
Cherry peppers are a vibrant and flavorful addition to any pantry, and canning them at home lets us enjoy their spicy-sweet punch all year round. This Cherry Pepper Canning Recipe is perfect for preserving those fresh garden peppers while locking in their crisp texture and bright flavor. Whether we’re adding them to sandwiches, salads, or antipasto platters, these canned cherry peppers bring a delightful kick to every dish.
Canning cherry peppers is easier than you might think, and it’s a great way to reduce waste and savor the harvest longer. With just a few simple ingredients and some basic canning techniques, we can create jars of deliciousness that store safely on our shelves. Let’s dive into this recipe and learn how to make the most of cherry peppers with a method that’s both reliable and rewarding.
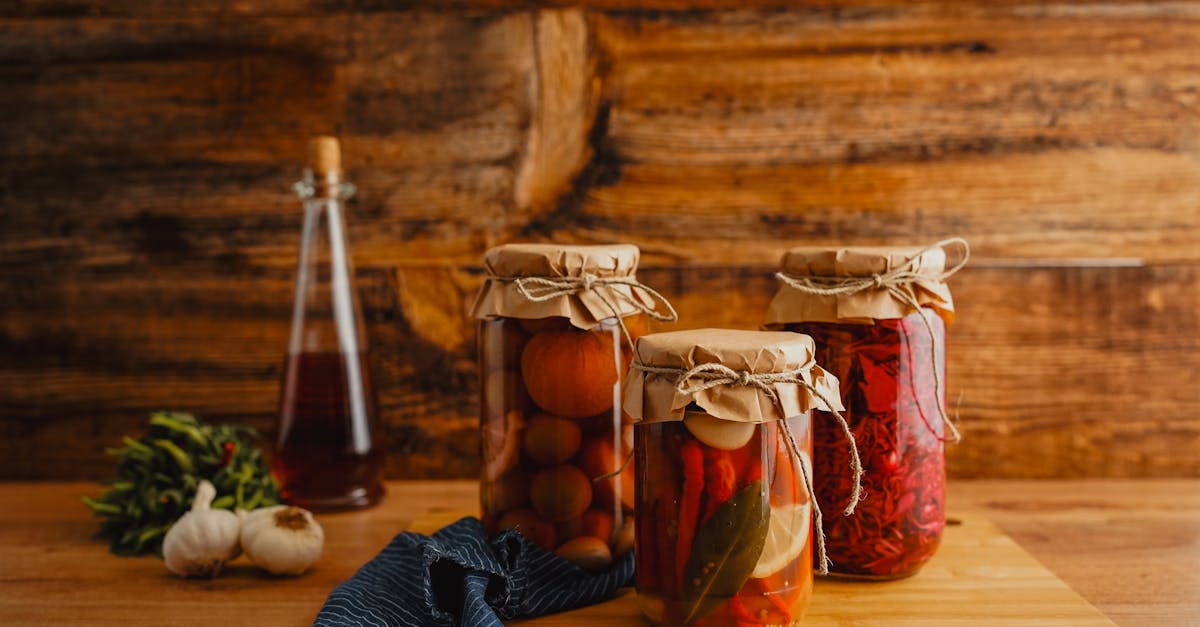
Cherry Pepper Canning Recipe
Preserving our vibrant cherry peppers through canning keeps their crisp texture and bright, spicy flavor intact. Follow these precise steps to ensure safe and delicious results for year-round enjoyment.
Ingredients for Cherry Pepper Canning
- 4 pounds fresh cherry peppers, washed and stems trimmed
- 3 cups white vinegar (5% acidity)
- 3 cups water
- 3 tablespoons kosher salt
- 3 cloves garlic, peeled and smashed (optional)
- 1 tablespoon sugar (optional, balances acidity)
Equipment Needed
| Item | Purpose |
|---|---|
| Large pot | For boiling brine and peppers |
| Canning jars | Sterilized, for storing peppers |
| Lids and bands | To seal jars securely |
| Canning funnel | Easy filling of jars |
| Jar lifter | Safe handling of hot jars |
| Water bath canner | Safe processing of jars |
Step-by-Step Instructions for Canning Cherry Peppers
- Prepare the Brine
Combine 3 cups vinegar, 3 cups water, 3 tablespoons kosher salt, and 1 tablespoon sugar in a large pot. Heat over medium high heat until the salt and sugar fully dissolve. Keep brine hot but not boiling.
- Sterilize Jars and Lids
Wash jars, lids, and bands in hot soapy water. Rinse well. Place jars in boiling water for 10 minutes. Keep warm until ready to fill.
- Fill Jars with Peppers and Garlic
Using a jar lifter, remove a jar from the hot water. Insert a canning funnel and pack fresh cherry peppers, leaving 1/2 inch headspace. Add 1 smashed garlic clove per jar if desired.
- Add Hot Brine
Pour hot brine over peppers, maintaining 1/2 inch headspace. Remove air bubbles with a nonmetallic spatula by gently sliding it along the inside of the jar.
- Seal Jars
Wipe rims with a clean cloth. Place sterilized lids on jars. Screw on bands fingertip-tight. Do not over tighten.
- Process in Water Bath
Place jars in a boiling water bath canner. Ensure they are covered by at least 1 inch of water. Process for 10 minutes (adjusting for altitude as needed).
- Cool and Store
Remove jars carefully with jar lifter. Set on a towel in a draft-free area. Let cool 12 to 24 hours. Check seals—lids should not flex when pressed. Store sealed jars in a cool dark place.
Processing Time Based on Altitude
| Altitude (Feet) | Processing Time (Minutes) |
|---|---|
| 0–1000 | 10 |
| 1001–6000 | 15 |
| Above 6000 | 20 |
“Properly canned cherry peppers retain their vibrant color and crunchy bite months after canning, ready to elevate any recipe or snack time.”
Maintaining acid levels and following these detailed safety steps ensures safe preservation, so we enjoy our fiery cherry peppers from garden to table anytime.
Ingredients
To make our Cherry Pepper Canning Recipe, we gather fresh, quality ingredients that preserve the peppers’ vibrant flavor and texture. Here is the precise list of what we need, measured and prepared for optimal results:
- Fresh cherry peppers – 4 pounds, washed and stemmed
- White vinegar (5% acidity) – 3 cups
- Water – 3 cups
- Kosher salt – 2 tablespoons (non-iodized)
- Granulated sugar (optional) – 1 tablespoon, to balance acidity if desired
- Garlic cloves – 4 large, peeled and halved
- Canning jars – 4 pint-sized jars, sterilized
- Lids and bands – new, for a secure seal
| Ingredient | Quantity | Preparation |
|---|---|---|
| Fresh cherry peppers | 4 pounds | Washed, stems removed |
| White vinegar | 3 cups | 5% acidity, do not substitute |
| Water | 3 cups | Fresh and clean |
| Kosher salt | 2 tablespoons | Non-iodized for best preservation |
| Granulated sugar | 1 tablespoon | Optional, balances tartness |
| Garlic cloves | 4 large | Peeled and halved |
| Canning jars | 4 pint jars | Sterilized before use |
| Lids and bands | 4 sets | New, to ensure airtight sealing |
This selection ensures our canned cherry peppers retain their crisp bite and vibrant color, ready to enhance any meal or snack.
Tip: Using white vinegar with 5% acidity is crucial for safe preservation. Substituting with a lower acidity vinegar may risk spoilage.
Equipment and Tools Needed
To successfully preserve our Cherry Pepper Canning Recipe and achieve the best results, having the right equipment and tools is essential. Here’s a detailed list and explanation of what we need for safe and efficient canning:
Essential Canning Equipment
- Canning jars: We use sterilized wide-mouth mason jars. These jars must be heat-resistant and free of cracks or chips.
- Lids and Bands: New two-piece canning lids (flat lids with sealing compound and screw bands) ensure airtight sealing.
- Water bath canner: A large, deep pot with a fitted rack that allows jars to sit submerged in boiling water during processing.
- Jar lifter: A tool with rubber grips helps us safely lift hot jars from boiling water.
- Funnel: A wide-mouth canning funnel prevents spills while transferring peppers and brine into jars.
- Bubble remover and headspace tool: To remove air bubbles and measure headspace, usually 1/2 inch, critical for safe sealing.
- Large pot or saucepot: For preparing the vinegar brine.
Optional but Recommended Tools
- Kitchen shears or small knife: For trimming pepper stems.
- Tongs: Handy for handling lids and garlic cloves.
- Clean towels or cloths: To wipe jar rims before sealing for a secure fit.
- Timer and thermometer: Monitor processing time and ensure correct temperatures.
Equipment Overview Table
| Equipment | Purpose | Notes |
|---|---|---|
| Mason jars | Storing cherry peppers safely | Use only jars designed for canning |
| Two-piece lids & bands | Sealing jars airtight | Use new lids for each canning session |
| Water bath canner | Processing jars in boiling water | Should have a rack |
| Jar lifter | Safely removing hot jars | Rubber grip for secure hold |
| Canning funnel | Filling jars without spilling | Wide-mouth size recommended |
| Bubble remover tool | Removing trapped air bubbles | Ensures proper headspace |
| Headspace tool | Measuring space between food and lid | Usually ½ inch for pickled peppers |
| Saucepot for brine | Cooking brine solution | Size depends on recipe quantity |
| Kitchen shears | Trimming pepper stems | Optional but convenient |
| Clean towels | Wiping jar rims | Maintains seal integrity |
Tip: We always inspect our equipment before use. Any damaged or doubtful items should be replaced to avoid contamination or sealing failure.
By carefully preparing and organizing our canning equipment and tools, we set the foundation for perfectly preserved cherry peppers with vibrant flavor and crisp texture every time.
Preparing the Cherry Peppers
To ensure the best flavor and texture in our Cherry Pepper Canning Recipe, proper preparation of the peppers is essential. Let’s walk through the crucial steps to get our peppers ready for canning.
Washing and Sorting
First, we thoroughly wash the fresh cherry peppers under cool running water. This removes dirt and pesticides that can affect the taste and safety of the final product. We always:
- Rinse peppers individually to avoid bruising
- Use a soft brush for stubborn dirt
- Drain well on a clean kitchen towel or paper towel
Next, we sort the peppers carefully. Sorting helps us discard any with:
- Wrinkles or soft spots
- Signs of mold or insect damage
- Any discoloration or bruising
Selecting only firm and vibrant peppers preserves the crisp texture and bright flavor that make canned cherry peppers so desirable.
Removing Stems and Seeds (Optional)
Depending on our heat preference, we can remove stems and seeds. Removing seeds reduces the heat level and allows for a milder canned pepper. Here’s how we proceed:
| Step | Description | Tip |
|---|---|---|
| Remove stems | Snap or cut off stems using kitchen shears or fingers. | Leaves jars easier to pack and stack. |
| Cut a slit or slice open | Slice peppers lengthwise to access seeds and membranes. | Careful not to split peppers apart completely. |
| Scoop out seeds | Use a small spoon or fingertip to gently remove seeds. | Seeds carry heat—remove more for less spice. |
| Leave whole if desired | Keep peppers intact for crunchy texture and extra heat. | Makes the jars visually appealing and more flavorful. |
By adjusting the seed removal, we control the spice intensity to suit our tastes, making the canned cherry peppers perfect for snacking or cooking.
By following these preparation steps, we set a strong foundation for perfectly canned cherry peppers that retain their vibrant color and satisfying crunch.
Making the Brine
To preserve the vibrant flavor and crisp texture of our cherry peppers, making a perfectly balanced brine is essential. The brine combines acidity, salt, and optional sweetness to enhance and safely preserve the peppers.
Ingredients for the Brine
We use simple yet precise ingredients to create a safe and flavorful brine for canning our cherry peppers. The key components include:
- 3 cups white vinegar (5% acidity)*
- 3 cups water
- 2 tablespoons kosher salt
- Optional: 1 tablespoon granulated sugar
- Optional: 2-3 garlic cloves, peeled
Tip:
Always use white vinegar with 5% acidity to ensure safe preservation. Substituting with vinegar of lower acidity can risk spoilage or unsafe canning results.
| Ingredient | Quantity | Purpose | Notes |
|---|---|---|---|
| White vinegar | 3 cups | Provides acidity for preservation | Must be 5% acidity for canning safety |
| Water | 3 cups | Dilutes vinegar for balanced taste | Tap or filtered water is acceptable |
| Kosher salt | 2 tablespoons | Enhances flavor and acts as preservative | Avoid iodized salt |
| Granulated sugar | 1 tablespoon (opt) | Balances acidity with subtle sweetness | Optional for personal taste preference |
| Garlic cloves | 2-3 cloves (opt) | Adds savory aroma and flavor | Optional, adds complexity to brine |
Preparing the Brine Mixture
We prepare the brine by combining our measured ingredients with care to achieve the right balance for cherry pepper canning:
- Combine vinegar, water, and kosher salt in a large stainless steel or enamel pot, ensuring no reaction occurs with the metal.
- Heat the mixture over medium-high heat, stirring occasionally to dissolve the salt completely.
- Bring the brine to a full rolling boil. This step is crucial as the heat sterilizes the brine and intensifies the flavors.
- Add sugar and garlic cloves if using, and stir until sugar dissolves fully.
- Reduce heat to keep the brine hot but not boiling while you prepare jars and peppers for filling.
“A hot brine ensures even flavor infusion and maintains food safety during the canning process.”
By carefully preparing this brine mixture, we set the foundation for perfectly preserved cherry peppers that stay vibrant and crunchy throughout the year.
Canning Jar Preparation
Proper canning jar preparation is essential to ensure the safety and quality of our cherry pepper preserves. Meticulous care in sterilizing jars and organizing tools sets the foundation for flawless sealing and long-lasting freshness.
Sterilizing Jars and Lids
Before we begin filling jars with our vibrant cherry peppers and brine, sterilizing them thoroughly eliminates any lingering bacteria, yeast, or molds that could spoil our preserves.
- Start by washing wide-mouth mason jars and lids in hot soapy water. Use a clean sponge to scrub away any residue.
- Rinse jars and lids thoroughly under running water.
- Place jars upright on a rack inside a large canner or stockpot. Fill with water, ensuring jars are completely submerged.
- Bring the water to a rolling boil and maintain boiling for at least 10 minutes to sterilize jars.
- Simultaneously, place lids in a small pot of simmering water (180°F/82°C) for 10 minutes. Avoid boiling lids to protect the sealing compound.
- Use a jar lifter to carefully remove sterilized jars from the hot water. Let jars air dry on a clean towel. Do not dry jars with a cloth to prevent contamination.
- Keep jars hot until ready to fill to avoid glass breakage when filling with hot brine.
| Step | Action | Temperature/Time | Notes |
|---|---|---|---|
| Washing | Wash jars and lids in hot soapy water | N/A | Removes dirt and initial residues |
| Sterilizing jars | Boil jars fully submerged | 212°F / 100°C for 10 min | Use jar lifter to remove |
| Sterilizing lids | Simmer lids, not boiling | 180°F / 82°C for 10 min | Protect rubber seal compound |
| Drying | Air dry jars on clean towel | N/A | Avoid cloth drying to prevent germs |
| Keeping jars hot | Keep jars in hot water or oven until use | 180°F / 82°C approx | Prevents thermal shock when filling hot brine |
Preparing Canning Tools
Organizing our canning tools prior to starting the process keeps everything within reach and minimizes handling, which helps maintain a sanitary workspace.
- Gather essential tools: jar lifter, funnel, bubble remover/headspace tool, and clean kitchen towels.
- Inspect each tool for cleanliness or damage. Replace any tools with rust, cracks, or worn edges.
- Lay tools out on a clean dry surface near your workspace.
- Use a funnel with a wide mouth to pour peppers and brine into jars without spills.
- The bubble remover tool helps release trapped air bubbles before sealing jars, ensuring a proper vacuum.
- Keep clean towels handy to wipe rims of jars before placing lids; any moisture or debris can prevent a tight seal.
- For convenience, keep tongs nearby for handling sterilized lids and jars.
| Tool | Purpose | Tips |
|---|---|---|
| Jar lifter | Safely remove hot jars from water bath | Secure grip on jar rim for safe lifting |
| Funnel | Fill jars neatly without spills | Use wide-mouth funnel for cherry peppers |
| Bubble remover tool | Remove trapped air bubbles in filled jars | Slide gently along jar sides and base |
| Clean towels | Wipe jar rims clean before sealing | Use lint-free towels |
| Tongs | Handle hot lids safely | Avoid touching sealing compound |
By meticulously preparing our jars and tools with these techniques, we ensure every jar of cherry peppers seals perfectly and remains safe for storage. This key step helps our preserves keep their bright color, crisp texture, and delicious flavor throughout the seasons.
Packing the Jars
Properly Packing the Jars is essential to preserve the vibrant flavor and crisp texture of our cherry peppers. Let’s carefully layer the peppers and add the brine to ensure a consistent and safe canning process.
Packing Cherry Peppers into Jars
We start by gently packing the prepared cherry peppers into the sterilized jars. Here are the key steps to follow:
- Use a wide-mouth funnel to keep the jar rims clean.
- Pack the peppers firmly but not tightly to avoid crushing them.
- Leave a 1/2-inch headspace at the top of each jar to allow for proper sealing and expansion during processing.
- Distribute any optional garlic cloves evenly among the jars as well.
- Avoid trapping air pockets by gently tapping the jars or running a non-metallic spatula around the inside edges.
Pro tip: If peppers create stubborn air pockets, use a bubble remover tool to carefully release trapped air without damaging the peppers.
Adding Brine and Air Removal
Once the peppers are packed, it’s time to add the hot brine, sterilized and heated from our previous steps. Follow these instructions:
- Pour the hot brine slowly over the peppers, covering them completely.
- Maintain the 1/2-inch headspace between the brine and the jar rim.
- Use the bubble remover or a thin non-metallic spatula to remove any remaining air bubbles.
- Wipe the jar rims with a clean, damp paper towel to remove any residue.
- Place the sterilized lids on the jars, followed by the screw bands. Tighten bands just until resistant—not overly tight to allow air to escape during processing.
| Step | Detail | Importance |
|---|---|---|
| Packing the peppers | Firm but gentle, 1/2-inch headspace | Prevents crushing and allows sealing |
| Adding hot brine | Brine covers peppers, maintain headspace | Ensures preservation and flavor |
| Removing air bubbles | Use bubble remover or spatula | Prevents spoilage due to air pockets |
| Wiping jar rims | Clean damp towel | Promotes airtight seal |
| Sealing jars | Screw bands finger-tight | Allows pressure release during processing |
By following these steps, we guarantee our cherry peppers remain crisp and flavorful in every jar, ready for safe long-term storage and future enjoyment.
Processing the Jars
Once our jars are packed with vibrant cherry peppers and hot brine, the crucial step is Processing the Jars to ensure safe preservation. This step sterilizes the contents and seals the jars airtight, locking in the crisp flavor and preventing spoilage.
Water Bath Canning Method
We use the classic Water Bath Canning Method to process our cherry pepper jars. Here’s how to do it effectively:
- Prepare the Canner: Fill the water bath canner with enough water to cover the jars by at least 1 inch.
- Heat the Water: Heat the water to a gentle simmer (around 180°F) while preparing jars.
- Place Jars in Canner: Using a jar lifter, carefully lower the sealed jars into the hot water ensuring they don’t touch the bottom directly.
- Cover and Boil: Cover the canner with its lid and bring the water to a full rolling boil.
- Boiling Process: Maintain a steady boil for the recommended processing time based on altitude and jar size.
- Remove Jars: After the processing time, lift the jars out with the jar lifter and place them on a dry towel. Leave them undisturbed for 12-24 hours to cool and seal.
The water bath ensures even heat penetration and kills bacteria, yeasts, and molds that could spoil the peppers.
Processing Time and Temperature
Processing time depends on the jar size and your altitude. Maintaining the correct time ensures the acids and heat fully preserve the cherry peppers without affecting texture or taste. Use this table as your guide:
| Jar Size | Altitude 0-1,000 ft | Altitude 1,001-6,000 ft | Altitude 6,001-8,000 ft | Altitude 8,001-10,000 ft |
|---|---|---|---|---|
| Pint (16 oz) | 10 minutes | 15 minutes | 20 minutes | 25 minutes |
| Quart (32 oz) | 15 minutes | 20 minutes | 25 minutes | 30 minutes |
Temperature: The water must reach and maintain a steady 212°F (100°C) boil for these times.
Important: Altitude affects boiling temperature so always adjust your processing time accordingly to guarantee safe preservation.
By strictly following the recommended processing times and temperature, we secure a perfect seal and preserve the peppers’ crisp texture and zesty flavor for months to come.
Cooling and Storing
Proper Cooling and Storing are essential to maintain the vibrant flavor and crisp texture of our Cherry Pepper Canning Recipe. These final steps ensure food safety and prolong the shelf life of our preserved peppers.
Cooling the Jars
Once we complete the water bath canning process, we carefully remove the jars using a jar lifter. We place them upright on a heat-resistant surface, such as a wooden board or clean towel, leaving enough space between each jar to allow air circulation. This helps the jars cool evenly and prevents cracking.
Cooling takes approximately 12 to 24 hours. During this time:
- Do not retighten the lids if they have loosened.
- Avoid moving or disturbing the jars to enable proper seal formation.
We listen for the classic “ping” sound indicating the lid has sealed vacuum-tight. If any lids have not sealed properly, we refrigerate those jars and consume the contents promptly.
Storing for Best Flavor and Safety
After the jars have cooled and sealed correctly, storage follows these guidelines to maximize flavor and safety:
| Storage Condition | Recommendations | Effects on Quality |
|---|---|---|
| Temperature | Cool, dark, and dry location | Preserves color and crispness |
| Humidity | Low to moderate | Prevents rust on lids and jar bands |
| Light Exposure | Avoid direct sunlight | Prevents color fading and flavor loss |
| Shelf Life | Up to 12 months | Best flavor within first 6 to 9 months |
We label each jar with the date of canning to keep track of freshness. When ready to enjoy, we inspect jars for signs of spoilage such as bulging lids, off-smells, or discoloration. If any indication of spoilage is present, we discard the contents immediately.
By following these cooling and storing best practices, we guarantee our Cherry Pepper Canning Recipe remains a delicious, safe, and versatile pantry staple all year long.
Tips for Success in Cherry Pepper Canning
Achieving perfect results in cherry pepper canning requires attention to detail and following proven techniques. Here are our top tips to help you preserve vibrant flavor and texture while ensuring food safety.
1. Select the Best Peppers
- Choose fresh, firm, and brightly colored cherry peppers without any blemishes or soft spots.
- Avoid overripe or damaged peppers as they may affect texture and increase spoilage risk.
- Wash peppers thoroughly under cold running water to remove dirt and pesticides.
2. Control Heat by Removing Seeds and Stems
- For a milder result, remove stems and scrape out seeds using a small knife or spoon.
- To retain full heat, leave seeds intact but be aware this intensifies spiciness.
3. Use the Correct Vinegar Acidity
- Always use white vinegar with 5% acidity for your brine.
- Using a lower acidity vinegar increases spoilage risk and unsafe preservation.
- Check vinegar labels carefully before purchasing.
4. Prepare Jars and Lids Properly
- Sterilize jars by boiling them in water for 10 minutes.
- Simmer lids in hot water (not boiling) to soften sealing compound.
- Keep jars and lids hot until filling to prevent temperature shock and breaking.
5. Maintain Appropriate Headspace
- Leave exactly 1/2 inch (12 mm) headspace between the top of peppers and jar rim.
- This allows for expansion during processing and ensures a proper vacuum seal.
6. Remove Air Bubbles Thoroughly
- After filling jars with peppers and brine, insert a non-metallic bubble remover or a thin plastic spatula to gently release trapped air pockets.
- Wipe rims clean to ensure lids seal properly.
7. Follow Processing Times and Altitudes Rigorously
| Jar Size | Altitude 0-1000 ft | Altitude 1001-6000 ft | Altitude Above 6000 ft |
|---|---|---|---|
| Pint (16 oz) | 10 minutes | 15 minutes | 20 minutes |
| Quart (32 oz) | 15 minutes | 20 minutes | 25 minutes |
- Adjust processing times based on your altitude to guarantee safety.
- Use a reliable water bath canner with steady boiling water maintained during the entire processing period.
8. Cool Jars Properly and Avoid Disturbance
- Let jars cool undisturbed for 12 to 24 hours at room temperature.
- Avoid placing hot jars on cold surfaces or in drafts to prevent cracking or seal failure.
- Check seals after cooling—lids should be concave and not move when pressed.
9. Store in Optimal Conditions
- Store sealed jars in a cool, dark, and dry place between 50°F and 70°F (10°C to 21°C).
- Label jars with the canning date for inventory rotation.
- Always inspect for signs of spoilage such as bulging lids, leaks, or off smells before use.
“Proper technique ensures that our canned cherry peppers stay crisp, zesty, and safe for months — turning every jar opening into a flavorful celebration!”
By implementing these essential tips, our cherry pepper canning will yield consistently successful and delicious preserved peppers every time.
Conclusion
Canning cherry peppers is a rewarding way to extend the harvest and enjoy their bold flavor all year. With the right ingredients, equipment, and attention to detail, we can create vibrant, crunchy jars that add a zesty kick to any meal.
Taking the time to follow safe canning practices ensures our preserves stay fresh and delicious for months. Once you’ve mastered this recipe, the possibilities for incorporating these peppers into your cooking are endless. Let’s keep preserving the garden’s bounty with confidence and flavor.
Frequently Asked Questions
What are the benefits of canning cherry peppers?
Canning cherry peppers preserves their vibrant flavor and crisp texture, allowing you to enjoy them year-round. It reduces food waste, extends the harvest period, and adds a zesty, crunchy element to many dishes.
What ingredients are needed for canning cherry peppers?
You’ll need fresh cherry peppers, white vinegar (5% acidity), water, kosher salt, and optional garlic and sugar for taste.
Why is vinegar acidity important in the canning process?
Using white vinegar with 5% acidity is crucial for safe preservation. Lower acidity vinegars may not prevent spoilage, risking food safety.
What equipment is necessary for canning cherry peppers?
Essential equipment includes sterilized wide-mouth mason jars, new lids and bands, a water bath canner, jar lifter, funnel, and a bubble remover tool.
How should cherry peppers be prepared before canning?
Wash and sort the peppers, removing any dirt or soft spots. Optionally, remove stems and seeds to control heat level.
What is the purpose of the brine in the recipe?
The brine, made from vinegar, water, salt, and optional sugar/garlic, preserves the peppers, adds flavor, and maintains their crunch.
How do I sterilize jars and lids properly?
Wash jars thoroughly, boil them for 10 minutes, and air-dry. Simmer lids in hot water to keep sealing compounds intact.
How do you pack jars for canning cherry peppers?
Layer peppers carefully, leave a 1/2-inch headspace, add hot brine, remove air bubbles, and seal tightly with lids.
What is the Water Bath Canning Method?
It involves processing filled jars in boiling water for a specific time based on altitude and jar size, ensuring a safe seal and preserving the peppers.
How long should cherry peppers be processed in a water bath?
Processing times vary by jar size and altitude. Typical times range from 10 to 15 minutes but check specific guidelines to ensure safety.
How should canned cherry peppers be stored after processing?
Cool jars at room temperature, check seals, label them, and store in a cool, dark, dry place for optimal preservation.
Can removing seeds affect the heat of canned cherry peppers?
Yes, removing seeds and stems reduces the heat level, making the peppers milder in flavor.
What can affect the crispness of canned cherry peppers?
Using fresh peppers, proper brine balance, correct processing times, and avoiding overcooking help maintain crispness.
How do I know if a jar seal is secure after canning?
A sealed jar will have a concave lid that doesn’t pop when pressed. If the lid moves or clicks, it’s not sealed properly.
What steps can prevent spoilage in canned cherry peppers?
Use proper acidity vinegar, sterilize jars, maintain correct headspace, remove air bubbles, follow processing times, and store jars correctly.