
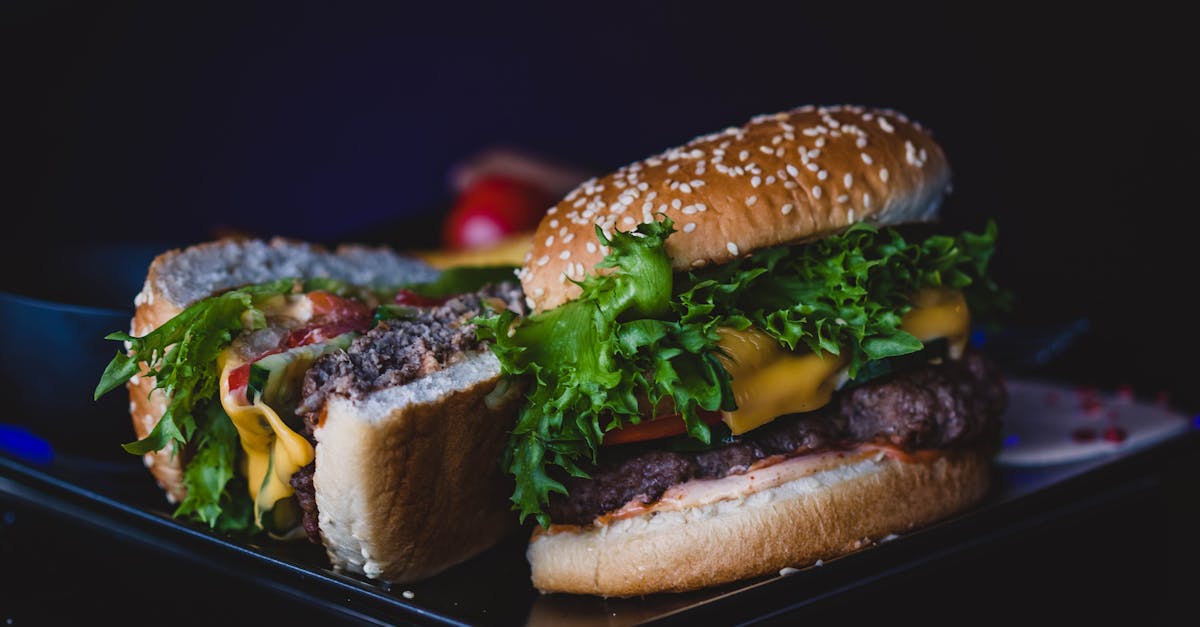
Cheeseburger subs bring all the juicy, cheesy goodness of a classic cheeseburger into a handheld sandwich that’s perfect for any meal. This recipe combines seasoned ground beef, melted cheese, and fresh toppings inside a soft sub roll for a satisfying bite every time. It’s a crowd-pleaser that’s easy to make and customizable to your favorite burger fixings.
Ingredients
To make the perfect cheeseburger subs, we rely on fresh and flavorful ingredients. Below, you’ll find everything you need organized into key components for easy preparation.
For the Cheeseburger Filling
- 1 pound ground beef (80/20 blend for optimal juiciness)
- 1 teaspoon garlic powder
- 1 teaspoon onion powder
- ½ teaspoon smoked paprika
- Salt and pepper to taste
- 4 slices American cheese or cheddar cheese, ready to melt
- 1 tablespoon vegetable oil (if needed for browning)
For the Subs
- 4 soft hoagie rolls or sub rolls, split lengthwise but not all the way through
- 2 tablespoons butter, softened (for toasting rolls)
Optional Toppings and Condiments
| Toppings | Condiments |
|---|---|
| Sliced dill pickles | Ketchup |
| Fresh lettuce leaves | Yellow mustard |
| Sliced tomatoes | Mayonnaise |
| Sliced red onions | Pickle relish |
| Jalapeño slices | Barbecue sauce |
Feel free to customize your cheeseburger subs with these options to suit your taste preferences perfectly.
Equipment Needed
To craft our delicious cheeseburger subs, having the right equipment is essential for a smooth process and perfect results. Here’s a detailed list of tools we recommend for optimal preparation and cooking:
- Large Skillet or Frying Pan
Use a heavy-bottomed skillet to brown the ground beef evenly. A nonstick or cast iron pan works best for retaining juices and cooking the meat thoroughly.
- Spatula or Wooden Spoon
For breaking up the ground beef and mixing in the spices evenly during cooking.
- Cutting Board and Sharp Knife
Essential for slicing the sub rolls and prep of optional fresh toppings like tomatoes, lettuce, and pickles.
- Measuring Spoons
To measure spices such as garlic powder, onion powder, and smoked paprika precisely.
- Basting Brush (Optional)
Useful for spreading butter on the sub rolls before toasting for an evenly crisp and golden exterior.
- Oven or Toaster Oven
To toast the sub rolls to a perfect crunch and melt the cheese over the beef filling.
- Mixing Bowl
To combine any additional ingredients or to hold toppings before assembling.
| Equipment | Purpose | Notes |
|---|---|---|
| Large Skillet | Cook ground beef evenly | Cast iron or nonstick works best |
| Spatula/Wooden Spoon | Breaks up meat and stirs spices | Durable and heat-resistant |
| Cutting Board | Prep bread and toppings | Use separate board for veggies if preferred |
| Sharp Knife | Slice rolls and toppings | Ensure sharpness for clean cuts |
| Measuring Spoons | Measure seasoning precisely | Consistent flavor dosing |
| Basting Brush | Spread butter on rolls before toasting | Optional but improves texture |
| Oven/Toaster Oven | Toast rolls and melt cheese | Preheat to 375°F (190°C) recommended |
| Mixing Bowl | Hold toppings or mix ingredients | Medium size preferred |
Prep Work
Getting our cheeseburger subs ready starts with proper preparation. By organizing the key steps beforehand, we ensure a smooth cooking process and the best results.
Preparing the Ground Beef
To achieve juicy and flavorful ground beef filling, we follow these crucial steps:
- Choose the right beef: Use 1 pound of 80/20 ground beef for an excellent balance of flavor and moisture.
- Season evenly: Mix in 1 teaspoon garlic powder, 1 teaspoon onion powder, and ½ teaspoon smoked paprika. These spices add depth and a subtle smoky aroma.
- Brown the beef properly:
- Heat 1 tablespoon vegetable oil in a large skillet over medium-high heat.
- Add the seasoned beef breaking it apart with a spatula.
- Cook for 6-8 minutes until the beef is fully browned and no longer pink.
- Drain excess fat to keep the subs from becoming greasy.
- Melt the cheese: Once browned, reduce heat to low and layer 4 slices of your preferred cheese over the beef. Cover the skillet for 2 minutes to melt.
By preparing the ground beef following these detailed steps, we create a savory and melty base for our cheeseburger subs.
Preparing the Bread Rolls
Perfectly toasted bread brings the whole cheeseburger sub experience together. Here’s how we prep the rolls:
- Select soft hoagie or sub rolls: Use 4 fresh rolls about 6-8 inches long.
- Butter the rolls: Spread 2 tablespoons softened butter evenly on the insides for rich flavor and crisp texture.
- Toast to perfection:
- Preheat the oven or toaster oven to 375°F (190°C).
- Place rolls butter-side up on a baking sheet.
- Toast for 5-7 minutes until golden brown and slightly crispy.
- Cool slightly: Let rolls rest for 2 minutes to set the buttery crust before assembling.
| Step | Details | Purpose |
|---|---|---|
| Choose rolls | Soft 6-8 inch hoagies | Soft yet sturdy base |
| Butter rolls | 2 tbsp softened butter | Adds flavor, crispiness |
| Toast | 375°F for 5-7 minutes | Creates crunchy texture |
By preparing the bread rolls correctly, we ensure a delicious, hearty vessel for our juicy beef and melted cheese filling.
Cooking Instructions
Let’s walk through the steps to create our mouthwatering Cheeseburger Subs. We’ll start with preparing the flavorful filling and then finish with perfectly melted cheese.
Cooking the Cheeseburger Filling
- Heat the skillet over medium-high heat and add 1 tablespoon of vegetable oil if using.
- Add 1 pound of 80/20 ground beef to the hot pan.
- Break the beef apart with a spatula or wooden spoon, spreading it evenly.
- Season the beef immediately with:
- 1 teaspoon garlic powder
- 1 teaspoon onion powder
- 1/2 teaspoon smoked paprika
- Cook the beef for 6 to 8 minutes, stirring occasionally, until it’s browned and cooked through.
- As it cooks, keep breaking the meat into small crumbles for even browning.
- Pour off excess grease carefully to avoid soggy subs.
- Reduce heat to low and keep the beef warm while you prepare the cheese.
| Step | Action | Duration | Notes |
|---|---|---|---|
| 1 | Heat skillet with oil | 1-2 minutes | Medium-high heat |
| 2-6 | Brown and season ground beef | 6-8 minutes | Break apart continuously |
| 7 | Drain excess grease | 1 minute | Avoid excess fat |
| 8 | Keep warm on low heat | Until cheese melts | Prevent overcooking |
Melting the Cheese
- Immediately after draining, sprinkle 4 to 6 slices of your favorite cheese (American, Cheddar, or Swiss) evenly over the hot meat.
- Cover the skillet with a lid or aluminum foil to trap the heat.
- Let the cheese melt for 2 to 3 minutes without stirring.
- Remove from heat once the cheese has fully melted and formed a gooey layer over the beef.
“Melting the cheese over the filling inside the skillet ensures that every bite of our cheeseburger subs is rich, creamy, and perfectly satisfying.”
Our filling is now ready to be spooned onto the toasted and buttered sub rolls for that unbeatable cheeseburger sub experience.
Assembling the Cheeseburger Subs
Now that our cheeseburger filling is perfectly cooked and the sub rolls are toasted, it’s time to assemble the subs. This step brings all the flavors together to create that classic cheeseburger sub experience you’re craving.
Layering the Ingredients
We start by layering the main components carefully to ensure every bite is balanced and flavorful. Follow these steps:
- Open each toasted sub roll horizontally, creating a warm and crispy base.
- Spoon a generous portion of the melted cheese and seasoned ground beef evenly onto the bottom half of each roll.
- Distribute the beef filling evenly to avoid sogginess and maintain texture.
- Optionally, add a layer of crisp fresh lettuce or shredded iceberg for crunch.
- Add sliced tomatoes if desired, placing them gently over the beef layer.
This method ensures the warm beef and melted cheese are the foundation, enveloping the fresh, crisp textures of your chosen toppings.
Adding Toppings and Condiments
To elevate the cheeseburger subs flavor profile, toppings and condiments are essential. Here’s our recommended order to build maximum taste and visual appeal:
| Step | Topping/Condiment | Notes |
|---|---|---|
| 1 | Sliced dill pickles | Adds tangy crunch, classic burger flavor |
| 2 | Thinly sliced onions | Raw or caramelized for sweetness |
| 3 | Ketchup | Use sparingly to balance flavors |
| 4 | Mustard | Adds sharpness and depth |
| 5 | Mayonnaise or aioli | Creaminess that smooths flavor |
After adding these, press the top half of the sub roll gently but firmly to hold everything in place without squashing the filling.
Pro tip: Serve your cheeseburger subs immediately for the best texture or wrap them tightly if prepping ahead. This helps keep flavors moist and the bread from drying out.
By layering the ingredients and toppings thoughtfully, we ensure each bite delivers the perfect harmony of melted cheese, juicy beef, fresh veggies, and savory condiments.
Serving Suggestions
To elevate our Cheeseburger Subs experience, let’s explore some delicious and complementary serving ideas that bring balance and flair to the meal.
Perfect Side Pairings
Pairing our subs with the right sides enhances the overall enjoyment. Here are some classic and delicious options:
- Crispy French Fries: Traditional shoestring or steak-cut fries create a perfect salty crunch contrast.
- Onion Rings: Their crispy, sweet flavor pairs beautifully with the savory cheeseburger filling.
- Coleslaw: A creamy or vinegar-based coleslaw provides refreshing crunch and tang.
- Pickle Spears: Add a zesty bite that cuts through the richness of the cheese and beef.
- Potato Chips: For a simple, crunchy snack that requires no preparation.
- Fresh Garden Salad: Lightens the meal with crisp greens and a tangy vinaigrette.
Suggested Beverage Pairings
Complement your Cheeseburger Subs with refreshing drinks that cleanse the palate:
| Beverage Type | Description | Serving Temperature |
|---|---|---|
| Classic Cola | Sweet, effervescent soda | Cold |
| Iced Tea | Unsweetened or lightly sweetened | Chilled |
| Beer (Lager or Ale) | Light malt flavors to balance cheesiness | Cold |
| Lemonade | Tart and sweet citrus refreshment | Cold |
| Sparkling Water | Effervescent and neutral to refresh | Icy cold |
Serving Temperature Tips
- Serve the Cheeseburger Subs immediately after assembly to enjoy the cheese melted and bread warm.
- If preparing ahead, wrap tightly in foil and reheat briefly in the oven to restore warmth without sogginess.
- Keep sides like coleslaw and pickles chilled for contrast.
Presentation Ideas
- Cut the subs diagonally for a visually appealing triangle shape.
- Serve on a wooden board or a rustic platter for a casual yet inviting feel.
- Garnish plates with fresh parsley or basil to add a pop of color.
Optional Garnishes and Add-ons
For an extra boost of flavor and texture:
- Jalapeño slices for a spicy kick
- Sautéed mushrooms for umami complexity
- Avocado slices for creamy richness
- Hot sauce for those who enjoy bold heat
By carefully selecting sides, beverages, and presentation, we create a fulfilling Cheeseburger Subs meal that shines both in taste and experience.
Make-Ahead and Storage Tips
To enjoy cheeseburger subs anytime, mastering make-ahead and storage techniques is essential. Here’s how we keep our subs fresh, flavorful, and ready to serve.
Preparing Ahead
- Cook the Filling in Advance: Brown the ground beef with seasonings as described in our recipe. Cool the cooked filling completely, then transfer it to an airtight container.
- Toast the Rolls: Lightly toast the buttered sub rolls beforehand and allow them to cool. Store them separately to keep the rolls from becoming soggy.
- Store Toppings Separately: Prepare fresh toppings like lettuce, tomatoes, and pickles fresh and refrigerate them in separate containers to maintain crispness.
Storage Guidelines
| Item | Storage Method | Refrigerator Duration | Freezer Duration |
|---|---|---|---|
| Cooked Ground Beef | Airtight container | Up to 3 days | Up to 3 months |
| Toasted Sub Rolls | Airtight bag or container | Up to 2 days | Up to 1 month |
| Fresh Toppings | Sealed containers | 1 to 2 days | Not recommended |
| Assembled Subs | Tightly wrapped (plastic wrap or foil) | Up to 1 day (best fresh) | Not recommended |
Reheating Tips
- For the Filling: Reheat the seasoned ground beef in a skillet over medium heat until warmed through. Cover with a lid to retain moisture. Avoid microwaving for best texture.
- For the Rolls: Warm toasted rolls in the oven at 350°F (175°C) for 5-7 minutes to regain crispness.
- Assembling After Reheating: Add fresh toppings after reheating for a bright crunch and superior flavor.
“Pro Tip: To prevent sogginess, always store components separately and assemble your cheeseburger subs right before serving.”
Make-Ahead Serving Suggestion
Consider prepping the beef filling a day ahead and storing it properly. On the day of serving, assemble subs by layering the warm filling on toasted rolls and adding fresh toppings and condiments. This method guarantees each bite delivers the perfect balance of juicy beef, melted cheese, and crisp veggies.
Conclusion
Cheeseburger subs bring together the best of a classic burger in a convenient and customizable sandwich. With simple ingredients and straightforward steps, they’re perfect for any occasion—whether a quick weeknight dinner or a crowd-pleasing party option.
By mastering the basics and adding your favorite toppings, you can create a delicious meal that’s both satisfying and versatile. We’re confident that once you try this recipe, cheeseburger subs will become a go-to in your kitchen for flavorful, hearty sandwiches everyone will enjoy.
Frequently Asked Questions
What are the key ingredients for making cheeseburger subs?
The key ingredients include 1 pound of 80/20 ground beef, garlic powder, onion powder, smoked paprika, cheese, soft hoagie or sub rolls, butter for toasting, and optional toppings like pickles, lettuce, tomatoes, and sauces.
How do you cook the cheeseburger filling?
Brown the seasoned ground beef in a skillet with some oil, drain excess fat, then sprinkle cheese on top and melt it under a lid until creamy and bubbly.
What type of bread is best for cheeseburger subs?
Soft hoagie or sub rolls are ideal because they hold the filling well and toast nicely to complement the juicy beef and melted cheese.
Can cheeseburger subs be customized?
Yes! You can add various fresh toppings and condiments such as sliced pickles, lettuce, tomatoes, onions, ketchup, mustard, and mayonnaise to match your taste.
How do I assemble the perfect cheeseburger sub?
Start by toasting and buttering the sub roll, then layer melted cheese and seasoned beef, followed by fresh toppings and your favorite condiments for balanced flavor.
What equipment do I need to make cheeseburger subs?
You’ll need a large skillet for cooking the beef, a spatula or wooden spoon, a cutting board and knife for prepping toppings, measuring spoons, and an oven or toaster oven for toasting rolls.
Can I prepare cheeseburger subs ahead of time?
Yes, cook the beef filling in advance and store separately from toasted rolls and fresh toppings. Assemble just before serving to keep everything fresh and avoid sogginess.
How should leftovers be stored and reheated?
Store cooked beef and toasted rolls separately in the refrigerator, with toppings stored in airtight containers. Reheat beef gently in a skillet or microwave, and warm rolls in the oven for best texture.
What makes cheeseburger subs a crowd-pleaser?
Their combination of juicy seasoned beef, melted cheese, fresh toppings, and customizable condiments offers familiar flavors in a convenient, handheld sandwich that appeals to many tastes.