
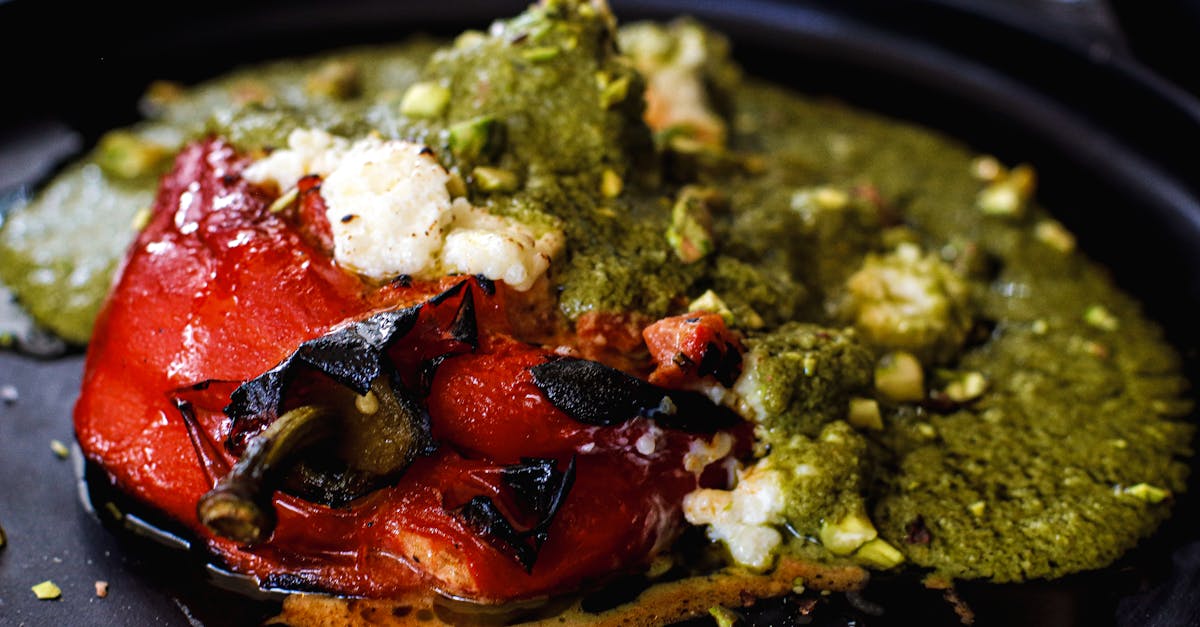
Cheese Penny is a delightful snack that combines crispy, golden edges with a rich cheesy flavor. Originating from traditional comfort food recipes, this treat has become a favorite for cheese lovers looking for something quick and satisfying. Its simplicity and bold taste make it perfect for any occasion, whether it’s a cozy night in or a casual gathering with friends.
Ingredients
To craft the perfect Cheese Penny, we use a few simple ingredients that come together to create that irresistible crispy texture and rich cheesy flavor. Below are the essentials separated into dough and filling components for clarity.
For the Dough
We prepare the dough with basic pantry staples to ensure a light crisp outer shell that holds the cheesy filling flawlessly.
- 1 ½ cups all-purpose flour, sifted for a smooth texture
- ¼ teaspoon salt to enhance flavor
- 2 tablespoons unsalted butter, cold and cubed to create flakiness
- ⅓ cup cold water added gradually to bind the dough
- ½ teaspoon baking powder to give a slight lift and crispiness
| Ingredient | Quantity | Preparation |
|---|---|---|
| All-purpose flour | 1 ½ cups | Sifted |
| Salt | ¼ teaspoon | Measured |
| Unsalted butter | 2 tablespoons | Cold, cubed |
| Cold water | ⅓ cup | Add gradually |
| Baking powder | ½ teaspoon | Measured |
For the Filling
Our filling combines the perfect blend of cheeses for a robust, gooey center that melts beautifully with every bite.
- 1 cup shredded sharp cheddar cheese for pronounced cheese flavor
- ½ cup mozzarella cheese, shredded for gooey meltiness
- ¼ cup cream cheese, softened to bind filling
- 1 tablespoon fresh parsley, finely chopped for a hint of freshness
- ½ teaspoon garlic powder for subtle savory notes
- Salt and pepper to taste, to balance the richness
| Ingredient | Quantity | Notes |
|---|---|---|
| Sharp cheddar cheese | 1 cup | Shredded |
| Mozzarella cheese | ½ cup | Shredded |
| Cream cheese | ¼ cup | Softened |
| Fresh parsley | 1 tablespoon | Finely chopped |
| Garlic powder | ½ teaspoon | Adds savory depth |
| Salt and pepper | To taste | Balances flavors |
With these carefully selected ingredients, our Cheese Penny Recipe guarantees a satisfying combination of crispy, cheesy, and flavorful perfection in every bite.
Tools and Equipment
To create the perfect Cheese Penny, having the right Tools and Equipment is essential. These ensure precision during preparation and help us achieve the ideal texture and flavor.
Essential Tools for Preparing Cheese Penny
- Mixing Bowls: Use medium and large bowls for combining the dough ingredients and the cheese filling separately. Glass or stainless steel bowls work best for easy cleaning and durability.
- Measuring Cups and Spoons: Accurate measurement of ingredients like flour, butter, and spices guarantees consistent results.
- Pastry Cutter or Food Processor: To cut cold butter into the flour for a flaky, crispy dough.
- Rolling Pin: We use this to roll out the dough evenly to the perfect thinness required for Cheese Penny.
- Sharp Knife or Pizza Cutter: For cutting the dough into uniform rounds or squares for folding and filling.
- Grater: To shred the cheddar and mozzarella cheeses finely, ensuring smooth melting and even distribution.
- Spoon or Small Ice Cream Scoop: For portioning the filling precisely.
- Baking Sheet: A sturdy, rimmed baking sheet lined with parchment paper or a silicone baking mat prevents sticking and promotes even cooking.
- Oven with Reliable Temperature Control: Consistent heat is crucial to achieving golden crispy edges and a perfectly melted cheese center.
- Cooling Rack: Allows the Cheese Penny to cool evenly without becoming soggy.
Optional but Helpful Equipment
- Stand Mixer with Dough Hook: Speeds up the dough mixing process, especially helpful if making large batches.
- Pastry Brush: For brushing melted butter or egg wash on Cheese Penny for extra browning and shine.
- Kitchen Scale: Provides even more precision than measuring cups for flour and butter.
| Tool | Purpose |
|---|---|
| Mixing Bowls | Combine dough and cheese filling |
| Measuring Cups & Spoons | Accurate ingredient measurement |
| Pastry Cutter/Food Processor | Cut butter into flour for crisp dough |
| Rolling Pin | Roll dough to desired thickness |
| Sharp Knife/Pizza Cutter | Cut dough into shapes |
| Grater | Shred cheeses finely |
| Spoon/Ice Cream Scoop | Portion cheese filling evenly |
| Baking Sheet | Bake Cheese Penny evenly and prevent sticking |
| Oven | Cook at consistent temperature for crispness |
| Cooling Rack | Cool treats evenly without moisture buildup |
By having these tools and equipment ready, we set ourselves up for success when making our delicious Cheese Penny snack. Each tool plays a key role to bring out the crispy textures and rich cheesy flavors we all crave.
Prep Work
Before diving into assembling our Cheese Penny, we must focus on meticulous preparation to ensure every bite offers the perfect balance of crispy texture and rich cheesy goodness. Proper prep work sets the foundation for a flawless end result.
Preparing the Dough
To make the light and crispy shell of our Cheese Penny, follow these steps precisely:
- Chill the Ingredients: Start by placing unsalted butter in the freezer for 10 minutes before use. Cold butter is essential for flaky dough.
- Combine Dry Ingredients: In a large mixing bowl, sift together all-purpose flour, baking powder, and salt for even distribution.
- Cut in Butter: Using a pastry cutter or food processor, cut the cold butter into the flour mixture until it resembles coarse crumbs. This step is crucial for that signature crispiness.
- Add Cold Water Slowly: Gradually pour cold water, a tablespoon at a time, mixing gently with a fork until the dough just comes together. Avoid overworking the dough to keep it tender.
- Form & Chill Dough: Shape the dough into a disk, wrap it in plastic wrap, and refrigerate for at least 30 minutes. Resting the dough allows gluten to relax and butter to firm up.
| Ingredient | Measurement | Preparation |
|---|---|---|
| All-purpose flour | 2 cups | Sifted |
| Baking powder | 1 tsp | Sifted |
| Salt | ½ tsp | Sifted |
| Unsalted butter | 6 tbsp | Frozen and cut into cubes |
| Cold water | ½ cup (approx.) | Ice-cold, added gradually |
“Cold ingredients are key for flaky, crispy dough that holds its shape perfectly while baking.“
Preparing the Cheese Filling
Our Cheese Penny filling delivers the mouthwatering cheesy flavor that makes this snack so addictive. Here’s how we prepare it expertly:
- Grate the Cheeses: Finely grate sharp cheddar and mozzarella to ensure they blend smoothly in the filling. Use a medium or fine grater for best results.
- Soften Cream Cheese: Bring cream cheese to room temperature for easy mixing and creamy consistency.
- Combine the Cheeses: In a mixing bowl, stir together cheddar, mozzarella, and cream cheese until smooth and uniform.
- Add Fresh Herbs and Spices: Fold in finely chopped fresh parsley and a sprinkle of garlic powder. These add a vibrant flavor layer that complements the cheese beautifully.
- Season to Taste: Add salt and pepper sparingly since cheddar is naturally salty.
| Ingredient | Measurement | Preparation |
|---|---|---|
| Sharp cheddar | 1 cup | Finely grated |
| Mozzarella | 1 cup | Finely grated |
| Cream cheese | 4 oz | Softened to room temp |
| Fresh parsley | 2 tbsp | Finely chopped |
| Garlic powder | ½ tsp | To taste |
| Salt & black pepper | To taste | Optional |
“*The perfect cheese blend is the heart of Cheese Penny’s rich and satisfying taste.*”
With these prep steps completed, we’re ready to assemble and bake our Cheese Penny for a crispy, cheesy delight.
Instructions
Let’s transform our prepared ingredients into the perfect Cheese Penny. Follow these detailed steps to ensure a crispy, cheesy delight with every bite.
Rolling Out the Dough
- Lightly flour your work surface to prevent sticking.
- Remove the dough from the refrigerator and let it sit for 5 minutes to soften slightly.
- Using a rolling pin, roll the dough into a 12-inch circle, approximately 1/8-inch thick for an even crispiness.
- Ensure the dough maintains a consistent thickness to allow uniform baking and texture.
Assembling the Cheese Penny
- Spoon the prepared cheese filling evenly onto one half of the rolled-out dough, leaving about a 1-inch border around the edge.
- Spread the filling gently but evenly to avoid lumps and ensure every bite delivers a rich cheesy flavor.
- Fold the other half of the dough over the filling, matching edges carefully.
| Step | Detail | Key Tips |
|---|---|---|
| Dough Size | 12-inch diameter circle | Keep thickness at 1/8 inch |
| Filling Placement | On one half leaving 1-inch border | Spread evenly |
| Fold | Fold over to enclose filling | Match edges carefully |
Sealing and Shaping
- Press the edges firmly together using your fingers to seal the dough and prevent filling leakage.
- Use a fork to crimp the edges all around the Cheese Penny, creating a decorative seal and ensuring tight closure.
- Slice the assembled dough into desired shapes—circles or squares—using a sharp knife or pizza cutter.
- Place the shaped Cheese Penny pieces on a parchment-lined baking sheet, spacing them 1 inch apart to allow even cooking.
- For a golden finish brush the tops lightly with melted butter before baking.
By following these steps meticulously, we guarantee a crispy, golden exterior perfectly balanced with a rich, gooey cheese filling.
Cooking Directions
Let’s move on to cooking our Cheese Penny to perfection. Whether you prefer the classic Frying Method for crispy edges or a healthier option with baking, follow these precise steps to achieve that irresistible golden hue and rich cheesy flavor.
Frying Method
- Preheat the oil in a deep skillet or frying pan to 350°F (175°C). Use a thermometer for accuracy to ensure even cooking and avoid greasiness.
- Carefully place the assembled Cheese Penny pieces into the hot oil. Avoid overcrowding to maintain the oil temperature and prevent sogginess.
- Fry each piece for 2 to 3 minutes on one side until the edges turn golden brown and crisp.
- Flip and fry the other side for an additional 2 minutes or until fully golden and the cheese inside starts to bubble slightly.
- Use a slotted spoon to remove the Cheese Penny from the oil. Drain excess oil by placing them on a plate lined with paper towels.
- Let them cool for 2 minutes to set and enhance the texture before serving.
“Frying at the correct temperature is key to achieving that perfect crispy exterior without absorbing too much oil.”
Baking Method (Optional)
For a lighter option that still delivers on flavor and texture, baking is an excellent method.
- Preheat your oven to 375°F (190°C). Line a baking sheet with parchment paper or a silicone mat.
- Arrange the assembled Cheese Penny pieces evenly on the sheet, leaving space between each piece.
- Lightly brush the tops with melted butter to promote browning and add richness.
- Bake for 15 to 20 minutes or until the edges are crisp and golden, and the cheese filling is bubbling.
- Remove from the oven and allow to cool for 3-5 minutes to let the cheese set.
| Cooking Method | Temperature | Time | Notes |
|---|---|---|---|
| Frying | 350°F (175°C) | 4 to 6 minutes | Turn once for even golden crispiness |
| Baking (Optional) | 375°F (190°C) | 15 to 20 minutes | Brush with butter for a golden finish |
Serving Suggestions
To maximize the enjoyment of our Cheese Penny recipe, we recommend pairing and serving it in ways that highlight its crispy texture and rich, cheesy flavor. Here are some versatile ideas:
1. Classic Dipping Sauces
Enhance each bite with dips that complement the cheese blend:
- Marinara sauce offers a tangy contrast that brightens the rich cheese.
- Garlic aioli introduces a creamy, savory layer.
- Spicy sriracha mayo adds a subtle heat perfect for those who enjoy a kick.
2. Accompany with Fresh Sides
Balance the richness by serving Cheese Pennies alongside fresh, crisp vegetables or light salads. Some excellent options:
- A simple arugula salad with lemon vinaigrette.
- Crisp cucumber sticks or carrot batons for refreshing crunch.
- Cherry tomatoes drizzled with balsamic glaze.
3. Pairing with Beverages
Choose drinks that complement the cheesy flavors and crispy texture for a complete snack experience:
| Beverage Type | Recommended Options | Notes |
|---|---|---|
| Soft Drinks | Sparkling water with lemon, ginger ale | Cuts through cheese richness |
| Alcoholic Beverages | Light lager, dry white wine (Sauvignon Blanc), pale ale | Enhances cheesy taste balance |
| Non-Alcoholic | Iced tea, fresh lemonade | Refreshing and palate-cleansing |
4. Presentation Tips
For parties or gatherings:
- Serve Cheese Pennies on a warm platter lined with parchment paper to retain crispness.
- Garnish with chopped fresh parsley or a light dusting of smoked paprika for extra color and aroma.
- Arrange with small bowls for dips around to create an inviting snack station.
By thoughtfully pairing Cheese Penny with these accompaniments, we elevate this simple comfort snack into a delightful, shareable experience perfect for any occasion.
Make-Ahead Tips and Storage
To keep our Cheese Penny fresh and delicious, following proper make-ahead and storage techniques is essential. Here’s how we can prepare in advance and maintain the best texture and flavor for our cheesy treats.
Make-Ahead Tips
- Prepare the Dough Ahead: We can make the dough up to 2 days before baking. After combining and chilling it once, wrap it tightly with plastic wrap and refrigerate. This resting period actually enhances the dough’s crispiness when cooked.
- Pre-Mix the Cheese Filling: The cheese blend with sharp cheddar, mozzarella, and cream cheese along with herbs and spices can be combined and stored in an airtight container in the fridge for up to 24 hours. This helps the flavors to meld beautifully.
- Assemble Before Cooking: For busy schedules, assemble the Cheese Penny pieces and place them on a parchment-lined tray. Cover loosely with plastic wrap and refrigerate for up to 6 hours before cooking. This prevents drying out and keeps the edges sealed perfectly.
Storage Guidelines
Proper storage preserves the Cheese Penny’s signature crispness and cheesiness whether we store leftovers or make them ahead.
| Storage Method | Duration | Storage Tips |
|---|---|---|
| Refrigerate Cooked Cheese Penny | Up to 3 days | Store in an airtight container at room temperature before refrigerating to retain crisp edges. Reheat in an oven for best texture. |
| Freeze Uncooked Dough | Up to 1 month | Wrap dough tightly in plastic and foil. Thaw overnight in the fridge before use. |
| Freeze Cooked Cheese Penny | Up to 2 months | Freeze in a single layer on a baking sheet before transferring into freezer bags to avoid sticking. |
Reheating Tips for Maximum Freshness
“The key to reviving Cheese Penny is reheating slowly so the cheese melts again without sogging the crust.”
- Oven Reheat: Preheat oven to 350°F (175°C). Place Cheese Penny pieces on a baking sheet and warm for 8-10 minutes until crispy and gooey.
- Skillet Reheat: Heat a non-stick skillet over medium heat. Warm each piece 2-3 minutes per side to restore crunch and melted cheese.
- Avoid Microwave: Microwaving causes sogginess and loss of crisp texture.
Observing these make-ahead and storage strategies guarantees we can enjoy Cheese Penny at peak quality anytime, whether freshly baked or reheated.
Conclusion
Cheese Penny is more than just a snack—it’s a delicious way to bring comfort and flavor to any table. With its perfect balance of crispy dough and rich, cheesy filling, it’s a treat that’s sure to impress both family and friends.
Whether you choose to fry or bake, the recipe offers flexibility to suit your kitchen style and taste preferences. By following the tips and techniques we’ve shared, you can confidently create this savory delight anytime.
We’re excited for you to try making Cheese Penny and enjoy its satisfying taste at your next gathering or cozy night in. It’s a simple recipe that delivers big flavor and endless enjoyment.
Frequently Asked Questions
What is Cheese Penny?
Cheese Penny is a crispy, golden-edged snack filled with a rich blend of cheeses. It’s a popular comfort food enjoyed for its satisfying cheesy flavor and crunchy texture.
What ingredients are needed to make Cheese Penny dough?
The dough includes all-purpose flour, salt, unsalted butter, cold water, and baking powder, ensuring a light, crispy outer shell.
What cheeses are used in the Cheese Penny filling?
The filling combines sharp cheddar, mozzarella, and cream cheese, flavored with fresh parsley and garlic powder.
What tools do I need to make Cheese Penny?
You’ll need mixing bowls, measuring cups, a pastry cutter or food processor, rolling pin, sharp knife or pizza cutter, grater, and a baking sheet.
How do I prepare the Cheese Penny dough?
Chill ingredients, mix dry ingredients, cut in butter, add cold water, then rest the dough to achieve the perfect texture.
How do I assemble Cheese Penny?
Roll dough into a 12-inch circle, add filling leaving a 1-inch border, seal edges well, crimp with a fork, cut into shapes, and brush tops with melted butter.
What are the cooking options for Cheese Penny?
You can fry Cheese Penny at 350°F for 4-6 minutes or bake at 375°F for 15-20 minutes until golden brown and crispy.
What dipping sauces pair well with Cheese Penny?
Marinara, garlic aioli, and spicy sriracha mayo are excellent dipping options to enhance its flavor.
How can I store Cheese Penny?
Refrigerate cooked Cheese Penny for up to 3 days, freeze uncooked dough for up to 1 month, and keep cheese filling refrigerated for up to 24 hours before use.
Can I prepare Cheese Penny in advance?
Yes, dough can be made up to 2 days ahead, cheese filling up to 24 hours, and assembled pieces can be prepped for later cooking.
How should I reheat Cheese Penny?
Reheat in an oven or skillet to maintain crispiness; avoid microwaving as it softens the texture.
What sides and drinks complement Cheese Penny?
Serve with fresh sides like arugula salad, cucumber sticks, cherry tomatoes, and beverages like sparkling water, light lagers, or iced tea.