
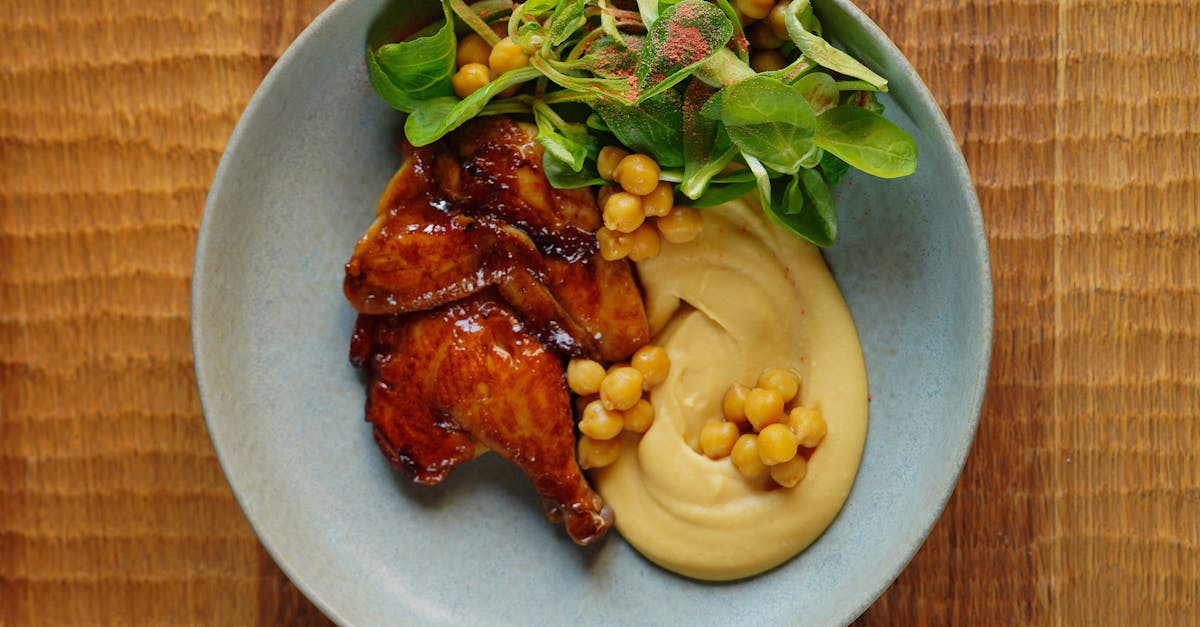
Cedars Chickpea Salad is a vibrant and flavorful dish that brings a taste of the Mediterranean right to our table. Known for its fresh ingredients and bold flavors, this salad combines tender chickpeas with crisp vegetables and a zesty dressing that makes it perfect for a quick lunch or a light dinner.
We love how easy it is to whip up this healthy salad, packed with protein and fiber, making it both satisfying and nutritious. Whether you’re meal prepping for the week or looking for a refreshing side dish, Cedars Chickpea Salad delivers on taste and simplicity.
Ingredients
To craft our vibrant Cedars Chickpea Salad, we’ll gather fresh, wholesome ingredients that highlight its Mediterranean roots. Organizing components by salad and dressing ensures a smooth preparation process.
Salad Ingredients
Our salad combines tender chickpeas and crisp vegetables for a satisfying texture and vibrant color. Here’s what we need:
- 2 cups cooked or canned chickpeas, drained and rinsed
- 1 medium cucumber, finely diced
- 1 cup ripe cherry tomatoes, halved
- ½ cup red onion, finely chopped
- ¼ cup fresh parsley, chopped
- ¼ cup fresh mint leaves, chopped
- 1 small green bell pepper, diced
- ½ cup crumbled feta cheese (optional for added creaminess)
- Salt, to taste
- Freshly ground black pepper, to taste
Dressing Ingredients
Our zesty dressing delivers the signature tang that elevates the salad’s flavors:
| Ingredient | Quantity | Description |
|---|---|---|
| Extra virgin olive oil | ¼ cup | Rich and fruity |
| Fresh lemon juice | 3 tablespoons | For bright acidity |
| Garlic | 1 clove | Minced for a pungent kick |
| Ground cumin | ½ teaspoon | Adds warm earthiness |
| Dried oregano | ½ teaspoon | Classic Mediterranean herb |
| Honey or maple syrup | 1 teaspoon | Balances tartness |
| Salt | ¼ teaspoon | Enhances all flavors |
| Black pepper | ¼ teaspoon | Freshly ground preferred |
With these ingredients ready, we can proceed confidently to assemble a Cedars Chickpea Salad bursting with fresh, zesty flavor and nutritional goodness.
Equipment Needed
To prepare our vibrant Cedars Chickpea Salad with ease and precision, we need some essential kitchen tools. Using the right equipment allows us to maintain the freshness and texture of each ingredient while blending the zesty dressing perfectly.
- Large Mixing Bowl
Ideal for combining the cooked chickpeas, fresh vegetables, and herbs. A roomy bowl ensures even mixing without spilling.
- Cutting Board
Use a clean, sturdy cutting board for chopping cucumbers, tomatoes, red onion, green bell pepper, and herbs. It helps keep our workspace organized and hygienic.
- Chef’s Knife
A sharp knife is crucial for precise dicing and slicing. It lets us control the size and shape of ingredients, enhancing the salad’s texture.
- Small Bowl or Jar with Lid
For mixing and shaking the dressing ingredients thoroughly. A jar with a lid makes emulsifying effortless and mess-free.
- Measuring Spoons
To accurately portion out olive oil, lemon juice, spices, and sweeteners. Precision in measurements guarantees the perfect balance of flavors.
- Colander or Strainer
Needed for rinsing canned chickpeas. Draining well prevents sogginess and keeps the salad crisp.
- Salad Servers or Tongs
Useful for tossing the salad gently, ensuring all ingredients and dressing combine evenly without mashing delicate components.
| Equipment | Purpose |
|---|---|
| Large Mixing Bowl | To mix salad ingredients |
| Cutting Board | To chop vegetables and herbs |
| Chef’s Knife | For precise dicing and slicing |
| Small Bowl/Jar | To prepare and emulsify the dressing |
| Measuring Spoons | To measure liquid and dry ingredients |
| Colander/Strainer | To rinse and drain chickpeas |
| Salad Servers/Tongs | To toss the salad evenly without crushing |
We find that having these tools ready before starting makes assembling the Cedars Chickpea Salad straightforward and enjoyable, letting us focus on the vibrant flavors and wholesome nutrients.
Prep Work
To craft the perfect Cedars Chickpea Salad, precise preparation is essential. Let’s break down the critical steps for prepping the chickpeas and vegetables to ensure each bite bursts with fresh flavor.
Preparing the Chickpeas
First, we drain the canned chickpeas in a colander to remove excess liquid. Then we rinse them thoroughly under cold running water to reduce sodium content and enhance their natural taste. After rinsing, it’s important to pat the chickpeas dry with a clean kitchen towel or paper towels to avoid watering down the salad.
If using dried chickpeas, soak them overnight in water then cook until tender but firm, about 45 minutes to 1 hour. Once cooked, drain and cool completely before adding to the salad.
Here is a quick reference for chickpea preparation:
| Type | Preparation Steps | Cooking Time |
|---|---|---|
| Canned Chickpeas | Drain, rinse, and pat dry | Ready to use |
| Dried Chickpeas | Soak overnight, cook until tender | 45 min to 1 hour |
Chopping the Vegetables
For the freshest taste and texture, we finely dice the cucumber, green bell pepper, and red onion into small, uniform pieces. This allows each flavor to shine evenly in every forkful.
We halve the cherry tomatoes to release their juicy sweetness throughout the salad. Then we chop the fresh parsley and mint leaves finely, releasing their vibrant aromas and peppery zest.
Pro Tip: Use a sharp chef’s knife and a sturdy cutting board to achieve clean cuts for better presentation and bite-size consistency. This helps balance the Cedars Chickpea Salad‘s crisp vegetables with its creamy chickpeas.
| Vegetable | Prep Style | Notes |
|---|---|---|
| Cucumber | Small dice | Peel if desired |
| Green Bell Pepper | Small dice | Remove seeds and membranes |
| Red Onion | Small dice | Use sweet or red onion for balance |
| Cherry Tomatoes | Halved | Choose ripe but firm tomatoes |
| Parsley & Mint | Finely chopped | Fresh herbs for zesty lift |
Making the Dressing
To create the zesty dressing that defines our Cedars Chickpea Salad, we focus on balancing fresh acidity with aromatic spices and a subtle touch of sweetness. Follow these precise steps to bring out the full Mediterranean flavor.
- Combine the Base Ingredients
In a small bowl or jar, pour 3 tablespoons of extra virgin olive oil. Add 2 tablespoons of freshly squeezed lemon juice for bright acidity. The quality of the olive oil and freshness of the lemon juice are key to a vibrant dressing.
- Add Aromatics and Spices
Add 1 clove of minced garlic for pungency and depth. Sprinkle in 1/2 teaspoon of ground cumin and 1/2 teaspoon of dried oregano. These spices impart a warm, earthy note that complements the chickpeas perfectly.
- Sweeten and Season
To balance acidity and spice, stir in 1 teaspoon of honey or maple syrup. Finish by seasoning generously with 1/4 teaspoon of salt and 1/4 teaspoon of freshly ground black pepper. These elevate all the flavors harmoniously.
- Emulsify the Dressing
Whisk vigorously or tighten the lid and shake the jar until the dressing emulsifies into a smooth cohesive sauce. The olive oil and lemon juice should fully blend with the spices and sweetener.
Dressing Ingredients and Measurements
| Ingredient | Measurement | Purpose |
|---|---|---|
| Extra Virgin Olive Oil | 3 tablespoons | Rich, fruity base |
| Fresh Lemon Juice | 2 tablespoons | Bright, zesty acidity |
| Garlic (minced) | 1 clove | Aromatic pungency |
| Ground Cumin | 1/2 teaspoon | Earthy warmth |
| Dried Oregano | 1/2 teaspoon | Herbal brightness |
| Honey or Maple Syrup | 1 teaspoon | Natural sweetness |
| Salt | 1/4 teaspoon | Flavor enhancer |
| Black Pepper (fresh) | 1/4 teaspoon | Mild heat and depth |
“The secret of a perfect Cedars Chickpea Salad dressing lies in balancing the tartness of lemon with the richness of olive oil and the aromatic warmth of cumin and oregano.“
Once the dressing is ready we pour it over the well-mixed chickpeas and vegetables. Toss everything gently until each bite of our Cedars Chickpea Salad is coated with this bright, flavorful dressing that ties all the ingredients together beautifully.
Assembling the Salad
To assemble our Cedars Chickpea Salad with maximum flavor and vibrant texture, we follow a systematic approach that ensures every ingredient shines and blends harmoniously.
Step 1: Combine the Base Ingredients
In a large mixing bowl, add the prepared chickpeas first. Then, gently fold in the diced cucumber, halved cherry tomatoes, finely chopped green bell pepper, red onion, and the fresh herbs—parsley and mint. This layering allows the solids to evenly distribute and prevents crushing delicate vegetables.
Step 2: Add the Zesty Dressing
Pour the freshly made dressing evenly over the mixed vegetables and chickpeas. Ensure the dressing fully coats the salad for balanced flavor in every bite.
Step 3: Gently Toss the Salad
With clean salad servers or tongs, toss the salad carefully but thoroughly. Tossing not only blends the flavors but preserves the crispness of the veggies—striking the perfect balance of texture we expect from this Mediterranean-inspired chickpea salad.
Step 4: Optional Addition of Feta
If using, crumble the feta cheese over the top after tossing the salad. This prevents the cheese from blending into the salad fully and keeps its creamy texture and sharp flavor distinct.
Step 5: Taste and Adjust
Taste the assembled salad. Adjust seasoning with additional salt, black pepper, or a splash of lemon juice if desired. This final step personalizes the salad to your preferences.
| Assembly Step | Key Details | Tools Needed |
|---|---|---|
| Combine base ingredients | Add chickpeas, vegetables, herbs gently | Large mixing bowl |
| Add dressing | Pour dressing evenly over salad | Measuring spoon/jar |
| Toss salad | Toss gently to combine without bruising | Salad servers/tongs |
| Add feta (optional) | Crumble feta on top after tossing | None |
| Taste and adjust | Season to taste with salt, pepper, lemon | Spoon or fork |
“Toss gently but thoroughly,” is the golden rule for assembling the salad—it preserves the texture while evenly distributing the zesty dressing, creating the signature balance of our Cedars Chickpea Salad.
Following these steps guarantees a vibrant, nutrient-rich salad ready to enjoy immediately or chilled for later meals.
Serving Suggestions
Our Cedars Chickpea Salad shines as a versatile dish perfect for various occasions. Here are some of the best ways to enjoy this vibrant, nutrient-rich salad:
As a Standalone Meal
Serve the salad chilled in a large bowl topped with a sprinkle of crumbled feta cheese for added creaminess. This makes a satisfying protein-packed lunch or light dinner ideal for a quick, wholesome meal.
Side Dish Pairings
Pair the salad with grilled meats or seafood to complement Mediterranean-inspired dinners. It pairs especially well with:
- Grilled chicken breasts
- Lamb kebabs
- Pan-seared salmon
This contrast of warm, savory mains and cool, zesty salad creates a well-balanced plate.
In Wraps or Pita Pockets
Spoon the salad into whole grain pita pockets or wraps for a fresh and portable meal. Add hummus or tzatziki for extra flavor layers.
For Meal Prepping
Portion the salad into airtight containers. It stores well in the fridge up to 3 days, making it perfect for easy grab-and-go lunches or side dishes during the week.
Flavor Enhancement Tips
- Drizzle with an extra splash of lemon juice or a pinch of sumac before serving to intensify the salad’s brightness.
- Garnish with extra fresh herbs like chopped parsley or mint for a vibrant aroma.
| Serving Idea | Description | Additional Suggestions |
|---|---|---|
| Standalone Meal | Salad served chilled with optional feta | Add warm pita bread or whole grain crackers |
| Side Dish with Grilled Mains | Complements grilled meats or seafood | Use alongside Mediterranean grilled chicken or salmon |
| Wrap or Pita Stuffing | Filled in pita or wraps for a fresh portable meal | Include hummus or tzatziki for extra flavor and creaminess |
| Meal Prep | Store in fridge up to 3 days for easy lunches | Keep dressing separate if preparing far in advance |
“Toss gently to preserve the freshness and bright flavors each time before serving.” This simple step ensures every bite bursts with the classic zesty and herbaceous profile of our Cedars Chickpea Salad.
Make-Ahead Tips
To get the best out of our Cedars Chickpea Salad, planning ahead helps maintain its vibrant flavors and crisp textures. Here are the essential steps to prepare this salad in advance while preserving its fresh Mediterranean essence.
Step 1: Prepare Ingredients Separately
- Chickpeas: Rinse and drain cooked or canned chickpeas thoroughly. If cooking dried chickpeas, ensure they are fully softened but not mushy.
- Vegetables & Herbs: Dice cucumber, green bell pepper, and red onion finely. Halve cherry tomatoes and chop parsley and mint leaves.
- Store each component separately in airtight containers to avoid moisture mixing which can cause sogginess.
Step 2: Make and Store the Dressing
- Combine all dressing ingredients as per the recipe, whisk thoroughly until emulsified.
- Store the dressing in a sealed jar in the refrigerator. This keeps the zesty dressing fresh and ready to coat the salad just before serving.
Step 3: Assemble Just Before Serving
- Important: Toss the salad with the dressing right before serving to keep the vegetables crisp and the chickpeas firm.
- Add optional feta cheese after tossing to prevent it from getting soggy.
Storage and Shelf Life
| Item | Storage Method | Maximum Storage Time | Notes |
|---|---|---|---|
| Prepared vegetables | Airtight container, cold | Up to 2 days | Keep dry to avoid sogginess |
| Cooked chickpeas | Airtight container, cold | Up to 3 days | Rinse well to reduce starch |
| Dressing | Sealed jar, refrigerated | Up to 5 days | Stir before using |
| Assembled Salad | Airtight container, cold | Up to 1 day | Toss gently before serving |
Pro Tips for Make-Ahead Success
“The secret to a delicious make-ahead Cedars Chickpea Salad is maintaining the integrity of each component until the last moment.”
- Keep dressing and salad ingredients separate to avoid premature wilting.
- Use fresh herbs when adding the salad for the brightest flavor.
- If prepping the salad for meal prep, slightly under-dress the salad and add extra lemon juice or olive oil before serving to refresh flavors.
By following these make-ahead tips, we ensure every bite of our Cedars Chickpea Salad bursts with the fresh boldness and texture that make this Mediterranean-inspired dish so irresistible.
Storage Instructions
To keep our Cedars Chickpea Salad fresh and vibrant, proper storage is essential. Follow these steps to maintain the salad’s texture and flavor:
- Use airtight containers: Store the salad in a sealed container to prevent odors from other foods from altering its taste.
- Keep the dressing separate if possible: To preserve the crispness of the vegetables, store the dressing in a small jar or container and add it just before serving.
- Refrigerate promptly: Place the salad in the refrigerator immediately after preparation or after serving to slow bacterial growth.
- Consume within 3 days: For optimal quality and safety, eat the salad within three days of preparation.
Refrigerator Storage Guidelines
| Storage Method | Container Type | Shelf Life | Notes |
|---|---|---|---|
| Salad with dressing | Airtight container | Up to 24 hours | Vegetables may soften due to dressing |
| Salad without dressing | Airtight container | Up to 3 days | Keeps the vegetables crisp and fresh |
| Dressing separately | Small jar/container | Up to 1 week | Shake well before adding to salad |
Pro Tip: When serving leftovers, stir the salad gently after adding the dressing to evenly distribute flavors without breaking down the chickpeas or vegetables.
By following these storage instructions, we ensure every bite of our Cedars Chickpea Salad stays as refreshing and delicious as the first.
Conclusion
Cedars Chickpea Salad is a vibrant and nutritious option that fits effortlessly into any meal plan. Its fresh ingredients and zesty dressing create a perfect balance of flavors and textures that keep us coming back for more.
Whether we’re enjoying it as a quick lunch, a side dish, or prepping it ahead for busy days, this salad delivers on taste and convenience. With simple steps and thoughtful preparation, it’s easy to keep this Mediterranean-inspired dish fresh and flavorful every time.
Let’s keep this recipe in our rotation for a wholesome, satisfying meal that’s as versatile as it is delicious.
Frequently Asked Questions
What are the main ingredients in Cedars Chickpea Salad?
Cedars Chickpea Salad includes chickpeas, cucumber, cherry tomatoes, red onion, parsley, mint, green bell pepper, and optional feta cheese. The dressing has olive oil, lemon juice, garlic, cumin, oregano, honey or maple syrup, salt, and pepper.
Is Cedars Chickpea Salad healthy?
Yes, it’s rich in protein and fiber from chickpeas and packed with fresh vegetables, making it a nutritious and balanced meal or side dish.
Can I use canned chickpeas for this salad?
Absolutely. Just rinse and drain canned chickpeas well before using to ensure freshness and reduce sodium.
How do I make the dressing for the salad?
Combine olive oil, fresh lemon juice, minced garlic, ground cumin, dried oregano, honey or maple syrup, salt, and pepper. Emulsify by whisking or shaking until well blended.
What kitchen tools do I need to prepare this salad?
You’ll need a large mixing bowl, cutting board, chef’s knife, small bowl or jar for the dressing, measuring spoons, colander, and salad servers or tongs.
How should I chop the vegetables for best results?
Dice the cucumber, green bell pepper, and red onion finely. Halve cherry tomatoes and finely chop parsley and mint to maintain freshness and texture.
Can I prepare Cedars Chickpea Salad in advance?
Yes, prep ingredients and dressing separately, store in airtight containers, and toss together just before serving to keep vegetables crisp.
How long does the salad keep in the fridge?
Without dressing, the salad lasts up to three days refrigerated. With dressing, consume within 24 hours for optimal freshness.
What are some serving suggestions?
Serve as a standalone meal with feta, as a side to grilled meats or seafood, or stuffed into pita pockets or wraps for a portable meal.
How do I store leftovers to keep the salad fresh?
Store salad and dressing separately in airtight containers in the fridge. Stir gently before serving leftovers to maintain texture and flavor.