
Castor oil soap has gained popularity for its gentle yet effective cleansing properties. Known for its rich lather and moisturizing benefits castor oil makes a fantastic base for homemade soap. Whether you’re new to soap making or looking to add a nourishing bar to your collection this recipe is a great place to start.
We love how castor oil helps create a creamy foam that feels luxurious on the skin while providing hydration. Plus making your own soap lets us control every ingredient ensuring a natural and skin-friendly product. Let’s dive into crafting a castor oil soap that’s perfect for daily use and leaves your skin feeling soft and refreshed.
Ingredients
To craft our Castor Oil Soap, we carefully select each ingredient to ensure a gentle yet effective cleansing bar. Below is a detailed list of what we need, including preparation notes to streamline the process.
| Ingredient | Quantity | Preparation Detail |
|---|---|---|
| Pure Castor Oil | 8 oz (227 g) | Use cold-pressed for best quality |
| Olive Oil | 16 oz (454 g) | Extra virgin for natural moisturizing |
| Coconut Oil | 8 oz (227 g) | Solid at room temperature, melted |
| Distilled Water | 10 oz (283 g) | Room temperature |
| Sodium Hydroxide (Lye) | 4.5 oz (128 g) | Handle with care, dissolve into water |
| Essential Oil (optional) | 1 – 2 tsp | For fragrance, like lavender or tea tree |
We prioritize using high-quality oils because they impact the soap’s moisturizing and lathering properties directly. The castor oil is the star ingredient and contributes to the soap’s rich, creamy bubbles and skin-softening effects.
Safety note: It’s essential to carefully measure the sodium hydroxide and dissolve it slowly into the distilled water, always adding lye to water — never the reverse — to avoid dangerous reactions.
This combination balances cleansing strength and gentle hydration, producing a luxurious homemade soap that’s kind to all skin types.
Equipment Needed
To make castor oil soap safely and effectively, we need precise and reliable equipment. Below is a detailed list of essential tools along with their functions to guide us in preparing this luxurious soap.
Essential Tools for Castor Oil Soap Making
- Digital Kitchen Scale
Accurate measurements are critical in soap making. A digital scale helps us weigh oils, lye, and water to the exact gram or ounce, ensuring proper chemical balance and quality.
- Heat-Resistant Mixing Bowls
We use stainless steel or heavy-duty heatproof glass bowls for combining lye and water since this solution gets very hot and can react with certain metals like aluminum.
- Thermometer
A digital or candy thermometer allows us to monitor the temperatures of the oils and lye solution. Maintaining specific temperature ranges (usually between 90°F – 110°F) is crucial for successful saponification.
- Stick Blender (Immersion Blender)
This accelerates the mixing process by blending oils and lye solution into a smooth, consistent trace much faster than manual stirring.
- Soap Mold
A flexible silicone mold or a rigid wooden/plastic mold with liners works well to shape our castor oil soap bars and allows easy unmolding once cured.
- Safety Gear
Protective gloves, safety goggles, and long sleeves are mandatory when handling sodium hydroxide (lye) to avoid any chemical burns or splashes. -
Spatula and Stirring Spoons
Use silicone spatulas for scraping out all soap mixture from bowls and spoons or a heat-resistant stirring spoon for initial hand mixing.
- Measuring Cups (Heat-Resistant)
We use these to measure water and oils where precision and temperature control are necessary.
Equipment Summary Table
| Equipment | Purpose | Notes |
|---|---|---|
| Digital Kitchen Scale | Accurate weighing of ingredients | Essential for chemical balance |
| Heat-Resistant Mixing Bowl | Mixing lye and oils safely | Avoid aluminum |
| Thermometer | Monitor temperature of lye and oils | Keep between 90°F -110°F |
| Stick Blender | Speed blending to trace | Saves time and improves texture |
| Soap Mold | Shape and cure the soap | Silicone preferred for ease of use |
| Safety Gear | Protect skin and eyes from lye burns | Gloves, goggles, long sleeves |
| Spatula and Stirring Spoon | Mix and scrape soap batter | Silicone is preferable |
| Measuring Cups | Measuring liquids precisely | Heat-resistant recommended |
Additional Tips
“Always prepare your workstation before mixing. Lay down protective coverings and have all equipment within reach to work efficiently and safely.”
We recommend having a dedicated soap-making area with good ventilation due to the fumes released when mixing sodium hydroxide with water.
By gathering the right equipment needed for castor oil soap, we set ourselves up for success, producing batches of soap with that signature creamy lather and skin-loving qualities.
Safety Precautions
When crafting castor oil soap at home, ensuring our safety is the top priority. The key ingredient sodium hydroxide (lye) is highly caustic, so we must handle it with care to prevent burns or injuries.
Essential Safety Gear
We always wear the following protective equipment to safeguard ourselves:
- Chemical-resistant gloves to protect our hands from lye burns
- Safety goggles to shield our eyes from splashes
- A long-sleeved shirt and closed-toe shoes to avoid skin exposure
Safe Handling of Sodium Hydroxide (Lye)
We follow these crucial steps to handle lye properly:
| Step | Action |
|---|---|
| 1. Prepare workspace | Work in a well-ventilated area, preferably near an open window or with a fan running to disperse fumes. |
| 2. Measure accurately | Use a digital scale for precise lye and water amounts to avoid dangerous reactions. |
| 3. Add lye to water | Always add lye to water, never the reverse. This prevents violent reactions and splashing. |
| 4. Stir carefully | Use a stainless steel or heat-resistant plastic spoon to stir until lye dissolves completely. |
| 5. Allow cooling | Let the lye solution cool to the recommended temperature (typically 100-110°F) before mixing with oils. |
Handling Hot Soap Mixture
Once oils and lye solution combine, the mixture heats due to the chemical reaction. We take these precautions:
- Use heat-resistant containers to prevent cracking or melting.
- Keep children and pets away to avoid accidents.
- Stir with long-handled tools to keep hands at a safe distance.
Cleanup and Storage
- Neutralize any lye spills immediately with a mild acidic solution like vinegar before wiping to prevent damage to surfaces.
- Store leftover lye and soap-making chemicals in clearly labeled, secure containers away from children and pets.
Important: Never leave the lye solution unattended during preparation. Always clean and dry your protective gear after use to maintain its effectiveness.
By observing these safety precautions attentively, we can enjoy making our nourishing castor oil soap safely while achieving the luxurious results we desire.
Preparing the Soap Base
Creating the soap base is a crucial step in our castor oil soap recipe. This stage involves precise measuring, melting oils, and careful mixing of the lye solution to ensure a smooth, safe, and effective soap-making process.
Measuring and Melting Oils
Accurate measurement of oils sets the foundation for quality soap. We use a digital kitchen scale to weigh each oil precisely according to the recipe. For our castor oil soap, the main oils include:
- Pure castor oil for its rich, moisturizing lather
- Olive oil for skin nourishment
- Coconut oil for cleansing and hardness
| Oil | Weight (oz) | Weight (g) |
|---|---|---|
| Castor Oil | 8 | 227 |
| Olive Oil | 12 | 340 |
| Coconut Oil | 10 | 283 |
After measuring, we melt the solid coconut oil gently using a double boiler or low heat. The liquid oils (castor and olive) are added afterward, blending them into a uniform warm mixture between 95°F and 105°F (35°C – 40°C). Maintaining this temperature range is pivotal to ensure the oils will combine well with the lye solution later on.
Mixing Lye Solution
Handling sodium hydroxide (lye) demands strict safety protocols. We wear chemical-resistant gloves, goggles, and work in a well-ventilated area.
Important: Always add lye to water, never water to lye to prevent dangerous splashing or reactions.
Steps to mix the lye solution:
- Measure distilled water according to the recipe:
- Approximately 12 oz (340 g) for our batch.
- Slowly sprinkle the measured lye into the water while stirring gently but continuously.
- The mixture will heat rapidly and release fumes—avoid inhaling directly and keep the workspace clear.
- Monitor the temperature; allow the lye solution to cool down to between 95°F and 105°F (35°C – 40°C) before combining with the oils.
| Ingredient | Weight (oz) | Weight (g) |
|---|---|---|
| Distilled Water | 12 | 340 |
| Sodium Hydroxide | 4.5 | 128 |
Maintaining the temperature of both the melted oils and the lye solution within this range enables us to blend them smoothly without causing premature thickening or separation. This precision ensures our castor oil soap will have a creamy texture and excellent lather, ready for the next phase of soap-making.
Combining Ingredients
To create our luxurious castor oil soap, precise combining of ingredients is essential. We carefully blend oils, lye, and optional additives to achieve a creamy, moisturizing soap with a rich lather.
Blending Oils and Lye
First, we start by melting the solid oils—coconut oil—in a heat-resistant bowl until fully liquid. Then, we add the measured olive oil and keep the temperature between 100°F and 110°F for optimal blending.
Simultaneously, we prepare the lye solution by slowly adding sodium hydroxide (lye) to the distilled water, never the reverse, to avoid dangerous reactions. This mixture heats rapidly, so we allow the lye solution to cool to the same range as the oils before combining.
| Ingredient | Weight (oz) | Temperature °F |
|---|---|---|
| Coconut Oil | 8 | 100-110 |
| Olive Oil | 12 | 100-110 |
| Lye Solution | 6.5 (water + lye) | 100-110 |
Once both the oils and lye solution are at the proper temperature, we slowly pour the lye solution into the oils while stirring steadily. Using a stick blender enhances emulsification, so we blend gently until a smooth, pudding-like consistency called trace is reached.
Adding Castor Oil
Next, we introduce the star of our recipe: castor oil. Castor oil contributes to the soap’s rich lather and deep moisturizing properties.
- We add exactly 4 ounces of pure castor oil after achieving trace.
- Stir thoroughly but gently to incorporate the castor oil evenly into the soap base, ensuring the final product maintains its creamy texture and enhanced skin nourishment.
Incorporating Optional Additives
At this stage, we can customize our soap with optional additives that boost its appeal and therapeutic effects.
- Essential oils: Add up to 1 ounce for fragrance (such as lavender, peppermint, or tea tree).
- Natural colorants: For subtle hues, include ingredients like turmeric powder, spirulina, or activated charcoal.
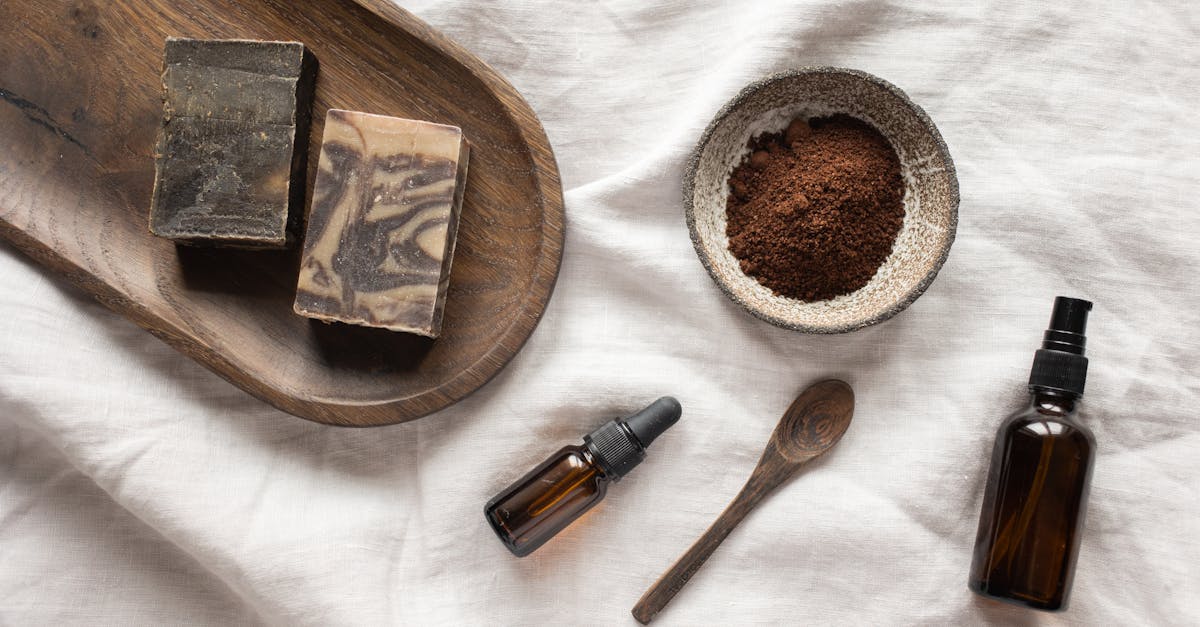
- Exfoliants: Choose fine oatmeal or ground coffee for gentle scrubbing properties.
We fold these additives carefully to avoid disturbing the soap’s consistency and ensure even distribution throughout.
Pouring and Setting the Soap
Once we reach the perfect trace with our castor oil soap mixture, the next critical phase is Pouring and Setting the Soap. This step ensures our soap solidifies properly while preserving its creamy texture and rich lather.
Pouring into Molds
Before pouring, double-check that our soap mixture has reached a medium to thick trace—the consistency should resemble pudding or thick custard. This guarantees the oils and lye are well emulsified for a smooth final bar.
We pour the soap mixture slowly and evenly into the prepared molds, ensuring minimal air bubbles. Using a spatula helps scrape every last drop from the mixing container.
- For silicone molds, gently tap the sides to release trapped air.
- For wooden or lined molds, smooth out the surface carefully to avoid lumps.
We should avoid overfilling molds to leave room for any possible expansion during the curing process.
| Step | Description | Tip |
|---|---|---|
| 1 | Check soap trace consistency | Medium to thick pudding-like texture |
| 2 | Pour soap slowly into molds | Pour evenly to prevent air bubbles |
| 3 | Tap or smooth soap in molds | Release trapped air and level surface |
| 4 | Leave slight space at top | Accommodate soap expansion during set |
Insulating and Curing
Once poured, insulating the soap mold is crucial for controlled heat retention, which helps the soap complete saponification slowly and uniformly.
We wrap the soap molds with towels or blankets to keep the heat in. This insulation encourages the gel phase where the soap solidifies smoothly, producing a denser lather and richer texture.
- Keep the soap in the mold for 24 to 48 hours.
- After unmolding, place the soap bars on a ventilated rack.
- Allow the soap to cure for at least 4 to 6 weeks in a cool, dry place to evaporate excess moisture and harden fully.
| Curing Phase | Duration | Purpose |
|---|---|---|
| In-mold insulating | 24 – 48 hours | Promote even saponification and gel phase |
| Out-of-mold curing | 4 – 6 weeks minimum | Evaporate moisture and harden the soap bars |
By following these key pouring and setting steps, we ensure the castor oil soap matures into bars that are luxurious to use and long-lasting.
Cutting and Storing the Soap
Once our castor oil soap has fully cured, the next crucial step is cutting and storing it properly to preserve its quality and enhance its shelf life.
Cutting Techniques
Cutting soap requires a steady hand and the right tools to ensure each bar is uniform and visually appealing. Here are the best practices we follow:
- Use a sharp soap cutter or a large, non-serrated knife for clean cuts.
- Allow the soap to harden for at least 24 hours before cutting to prevent crumbling.
- Cut the soap into bars approximately 1 inch thick for easy handling and optimal curing.
- For consistent sizing, we mark guidelines on the soap block before slicing.
“Clean, precise cuts promote even curing and a polished final product, enhancing the luxurious feel of our castor oil soap bars.”
| Step | Detail | Reason |
|---|---|---|
| Wait | 24 hours after unmolding | Soap hardens for smooth cut |
| Tool | Sharp cutter or large knife | Prevents soap crumbling |
| Thickness | About 1 inch per bar | Ideal for use and curing |
| Marking Guidelines | Use a ruler and a blunt tool | Ensures uniform bars |
Proper Storage Tips
Proper storage is essential to maintain the moisturizing properties and rich lather of our castor oil soap. Follow these tips to store your soap bars correctly:
- Store soap bars in a cool, dry place away from direct sunlight to prevent melting and discoloration.
- Use breathable containers like wooden boxes or breathable cotton bags to avoid trapping moisture.
- Allow each bar to air-dry between uses to keep the bars firm and extend their lifespan.
- Avoid airtight plastic bags that can cause softening or sweating.
- Stack soap bars loosely with enough space for airflow.
Pro Tip: Label your soap bars with the curing date to track their age and ensure best performance over time.
By following these cutting and storage techniques, we safeguard the luxurious texture and skin-friendly benefits of our homemade castor oil soap for an elevated bathing experience.
Troubleshooting Common Issues
When crafting our castor oil soap, certain challenges can arise. Addressing these issues promptly ensures our soap maintains its luxurious lather and skin-softening qualities.
Soap Mixture is Too Thin or Runny
A runny soap batter typically means the soap has not reached the right trace stage for pouring.
- Check Trace: We want a medium to thick trace where the mixture leaves visible trails when drizzled over itself.
- Solution: Continue gentle blending with a stick blender. Avoid over-blending which can lead to rapid thickening or soap dough.
- Temperature: Ensure oils and lye solution are close to 110°F (43°C) before combining, which promotes proper saponification.
Soap Mixture is Too Thick or Hard to Pour
If the soap thickens too quickly or becomes stiff before pouring:
- Cause: High temperatures or too much blending accelerate trace.
- Solution: Work faster to pour within the window of medium thickness. If needed, warm the mixture slightly in a double boiler to soften.
- Prevention: Maintain temperatures below 120°F (49°C) and blend moderately to avoid premature thickening.
Soap Does Not Lather Well
Lack of lather can reduce the luxurious feel of castor oil soap:
| Common Causes | Fixes |
|---|---|
| Insufficient Castor Oil | Ensure recipe contains at least 20-30% pure castor oil |
| Excess Water | Stick to recommended water-to-lye ratio to avoid diluted soap |
| Improper Curing | Cure soap 4-6 weeks to fully harden and develop lather |
| Incomplete Saponification | Verify lye solution and oils were properly mixed and heated |
Soap Has a Sticky or Tacky Surface
Sticky soap surfaces can be caused by excess moisture or too much castor oil.
- Drying Time: Extend the curing period by several weeks in a well-ventilated dry area.
- Recipe Adjustment: Reduce castor oil percentage slightly if soap remains tacky after curing.
- Storage: Store soap on a breathable surface to encourage moisture evaporation and harden bars.
Soap Develops White Film or Powdery Residue (Efflorescence)
A white film on cured soap bars is often caused by excess lye or residual moisture.
- Test pH: Use pH strips to ensure soap is neutral (pH 7-10); higher pH indicates excess lye.
- Wipe Off: Gently rub the surface with a damp cloth to remove residue.
- Prevention: Measure ingredients meticulously and maintain proper curing conditions.
Soap Fails to Harden Properly After Curing
Soft or crumbly soap can stem from incorrect ingredient ratios or inadequate curing.
| Possible Issues | Remedies |
|---|---|
| Too Much Castor Oil | Adjust recipe to no more than 30% castor oil |
| Excess Water in Recipe | Use recommended water to lye ratio |
| Insufficient Cure Time | Allow minimum of 6 weeks curing before use |
Lye Solution Reaction Problems
If the lye does not dissolve properly or reacts violently:
- Add Slowly: Always add lye to water slowly while stirring.
- Use Distilled Water: Avoid impurities in tap water which can cause erratic reactions.
- Wear Safety Gear: Gloves and goggles are essential during mixing to avoid splashes.
“Proper measuring, careful temperature control, and patience during curing are key to mastering castor oil soap production.“
By following these troubleshooting strategies, we can maintain the quality and luxurious experience of our homemade castor oil soap without setbacks.
Conclusion
Crafting castor oil soap at home offers us a rewarding way to create a gentle and nourishing product tailored to our skin’s needs. With attention to detail and safety, we can enjoy the satisfaction of making soap that not only cleanses but also pampers our skin with every use.
By mastering this process, we gain full control over the ingredients and the final quality, ensuring a natural and luxurious bathing experience. Let’s embrace the art of soap making and elevate our skincare routine with the rich benefits of castor oil soap.
Frequently Asked Questions
What makes castor oil soap beneficial for the skin?
Castor oil soap is gentle and moisturizing, providing a rich lather that cleanses without drying. It helps keep skin soft, refreshed, and nourished due to its natural emollient properties.
What ingredients are needed to make castor oil soap at home?
You need pure castor oil, olive oil, coconut oil, distilled water, sodium hydroxide (lye), and optional essential oils for fragrance.
Is it safe to handle sodium hydroxide in soap making?
Yes, but safety gear like gloves, goggles, and protective clothing is essential. Always work in a well-ventilated area and carefully mix lye with water as instructed.
What equipment is necessary for making castor oil soap?
Essential items include a digital kitchen scale, heat-resistant bowls, a thermometer, a stick blender, soap molds, and safety gear such as gloves and goggles.
How do I ensure my soap has a good lather and texture?
Use high-quality oils, particularly castor oil for creamy bubbles, maintain proper temperatures when mixing, and reach a medium to thick trace before pouring into molds.
How long should castor oil soap cure before use?
Cure your soap for at least 4 to 6 weeks to harden properly and allow excess moisture to evaporate, ensuring the best texture and lather.
How do I store homemade castor oil soap?
Store in a cool, dry place using breathable containers. Allow bars to air-dry between uses to maintain their quality and longevity.
What should I do if my soap mixture is too thick or too thin?
Adjust ingredient measurements carefully, monitor temperatures, and be patient during curing. For thick mixtures, you may add a small amount of oil or water; for thin mixtures, continue blending until trace forms.
Can I add fragrances or colorants to castor oil soap?
Yes, you can add essential oils for fragrance and natural colorants or exfoliants to enhance the soap’s appearance and benefits without compromising texture.
How do I cut soap bars properly?
Wait at least 24 hours after pouring, then use a sharp soap cutter or knife to cut uniform bars. This helps ensure even curing and lasting quality.