
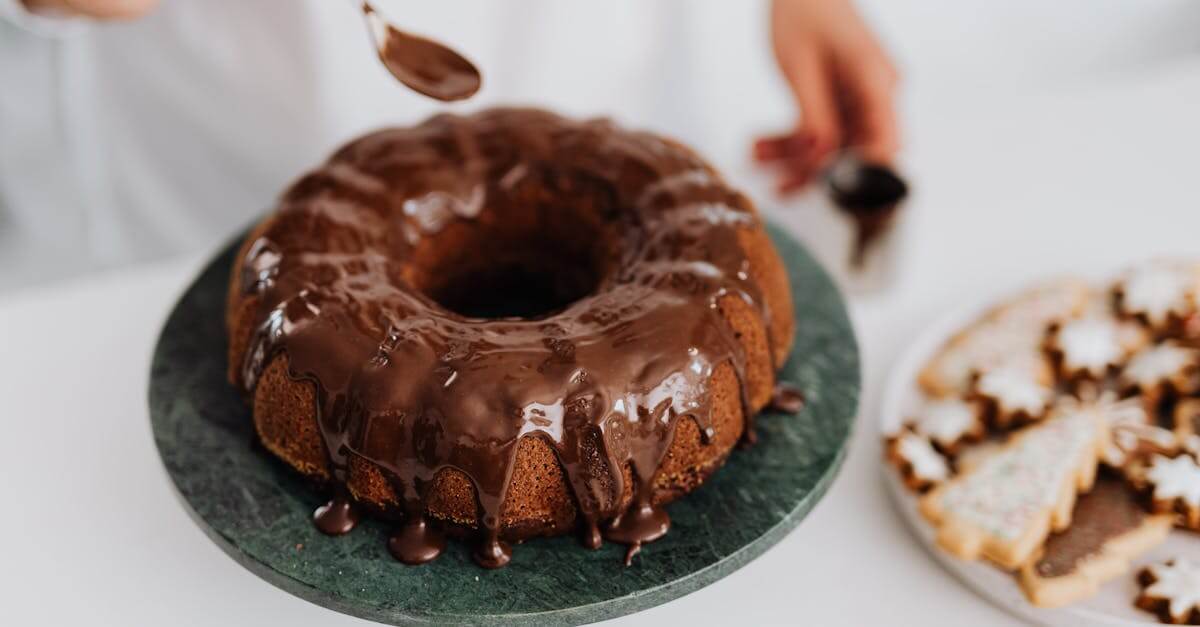
If you’re looking to elevate your dishes with bold and flavorful finishes, Captain Rodney’s glaze recipes are a game-changer. Known for their rich, tangy, and slightly sweet profiles, these glazes add a perfect touch to meats, seafood, and even vegetables. We love how versatile and easy they are to whip up, making them perfect for both weeknight dinners and special occasions.
Originating from a blend of traditional and innovative flavors, Captain Rodney’s glazes bring a unique twist that keeps us coming back for more. Whether you’re glazing a roast or adding a finishing shine to grilled fish, these recipes promise to enhance every bite with mouthwatering depth. Let’s dive into these delicious glazes and discover how they can transform your cooking.
Ingredients
To craft Captain Rodney’s Glaze Recipes, we rely on a combination of basic ingredients that create the signature bold and flavorful base. Alongside these essentials, we explore variations and optional ingredients that allow us to customize each glaze for different dishes and occasions.
Basic Ingredients for Captain Rodney’s Glaze
These core ingredients build the foundation of every glaze, providing balance and depth:
- Brown Sugar (dark or light) – for sweetness and caramelization
- Soy Sauce – delivers umami and saltiness
- Apple Cider Vinegar – adds tang and brightness
- Garlic (minced or powder) – for savory aroma and flavor complexity
- Fresh Ginger (grated) – introduces warm, spicy notes
- Honey – enhances sweetness with a smooth texture
- Dijon Mustard – for a subtle sharpness and emulsification
- Water – to adjust consistency
| Ingredient | Purpose | Typical Quantity |
|---|---|---|
| Brown Sugar | Sweetness, caramelization | ½ to ¾ cup |
| Soy Sauce | Umami, saltiness | ¼ cup |
| Apple Cider Vinegar | Tang, acidity | 2 tablespoons |
| Garlic (minced) | Aroma, savory flavor | 2 cloves |
| Fresh Ginger (grated) | Warmth, spice | 1 tablespoon |
| Honey | Natural sweetness | 2 tablespoons |
| Dijon Mustard | Sharpness, emulsification | 1 tablespoon |
| Water | Consistency adjustment | ¼ cup (optional) |
Variations and Optional Ingredients
To personalize Captain Rodney’s Glaze and amplify its flavor profile, we incorporate the following optional ingredients:
- Crushed Red Pepper Flakes – for a bold, spicy kick
- Orange Zest or Juice – to infuse a citrusy brightness
- Worcestershire Sauce – enhances savory complexity
- Smoked Paprika – adds a rich, smoky undertone
- Fresh Herbs (thyme, rosemary, or parsley) – for fresh herbal notes
- Maple Syrup – alternative natural sweetener with a distinct flavor
- Sesame Oil – for a nutty aroma and depth
These variations allow us to tailor the glaze’s boldness, sweetness, and complexity based on the dish or personal preference. We recommend starting with small amounts and adjusting gradually to achieve the perfect balance.
| Optional Ingredient | Flavor Contribution | Suggested Amount |
|---|---|---|
| Crushed Red Pepper | Heat, boldness | ¼ to ½ teaspoon |
| Orange Zest/Juice | Citrus brightness | 1 teaspoon zest / 1 tbsp juice |
| Worcestershire Sauce | Deep savoriness | 1 teaspoon |
| Smoked Paprika | Smoky richness | ½ teaspoon |
| Fresh Herbs | Herbal freshness | 1 to 2 teaspoons chopped |
| Maple Syrup | Earthy sweetness | 1 to 2 tablespoons |
| Sesame Oil | Nutty depth | ½ teaspoon |
By combining these basic and optional ingredients, we unlock the full potential of Captain Rodney’s glaze recipes, ensuring every dish receives its signature bold and vibrant flavor.
Equipment Needed
To master Captain Rodney’s Glaze Recipes and capture their bold, vibrant flavors, having the right tools is essential. Here’s what we recommend for a smooth and efficient cooking experience:
- Mixing Bowls: Use medium-sized stainless steel or glass bowls for combining ingredients thoroughly. Their non-reactive nature preserves the glaze’s flavor integrity.
- Measuring Cups and Spoons: Precise measurement of ingredients like brown sugar, soy sauce, and honey ensures balanced taste and consistency in every batch.
- Whisk: A sturdy whisk helps emulsify liquids and evenly distribute dry ingredients, creating a smooth glaze without lumps.
- Saucepan: Choose a medium saucepan with a heavy bottom to prevent burning while simmering the glaze over medium heat.
- Wooden Spoon or Silicone Spatula: Ideal for stirring the glaze gently without scratching your cookware.
- Fine Mesh Strainer (optional): We use this to remove any solids such as minced garlic or ginger bits for a velvety finish.
- Measuring Jug: Useful for adding water or other liquid components with accuracy.
| Equipment | Purpose |
|---|---|
| Mixing Bowls | Combining and mixing glaze ingredients |
| Measuring Cups/Spoons | Accurate ingredient measurement |
| Whisk | Emulsifying and blending ingredients |
| Saucepan | Cooking glaze without scorching |
| Wooden Spoon/Silicone Spatula | Stirring glaze evenly |
| Fine Mesh Strainer | Removing solids for a smooth glaze |
| Measuring Jug | Precise liquid additions |
Preparation Instructions
Here we present the step-by-step process to create Captain Rodney’s glaze. Following these instructions ensures a perfectly balanced glaze with bold and vibrant flavors every time.
Preparing the Base Components
- Measure the dry ingredients first for accuracy: gather brown sugar, garlic (minced), and fresh ginger (grated).
- Combine the wet ingredients separately: pour soy sauce, apple cider vinegar, honey, and water in a mixing bowl.
- Gently whisk the wet ingredients, ensuring the honey fully dissolves to form a smooth liquid.
- Prepare any flavor boosters or optional additives like Dijon mustard or crushed red pepper flakes before combining.
- Set aside your prepared base components to combine in the next step.
| Ingredient | Preparation |
|---|---|
| Brown Sugar | Measure precisely |
| Garlic | Mince finely |
| Fresh Ginger | Grate |
| Soy Sauce | Pour measured amount |
| Apple Cider Vinegar | Pour measured amount |
| Honey | Measure and prepare to dissolve |
| Water | Add to balance consistency |
| Dijon Mustard (optional) | Whisk for smoothness |
| Crushed Red Pepper Flakes (optional) | Measure for heat level |
Mixing the Glaze Ingredients
- Combine the dry base components and the whisked wet mixture in a medium saucepan.
- Using a wooden spoon or silicone spatula, stir thoroughly over medium heat.
- Allow the mixture to warm gradually, stirring constantly to prevent burning or sticking.
- Once the glaze reaches a light simmer, reduce heat and maintain a gentle cook for 5–7 minutes. This step thickens the glaze and intensifies flavors.
- Taste and adjust seasoning at this point. Add any optional ingredients such as orange zest or smoked paprika for extra layers of flavor.
- For an ultra-smooth finish, strain the glaze through a fine mesh strainer into a clean bowl.
- Let the glaze cool slightly before applying it to your dish.
| Step | Description | Key Tip |
|---|---|---|
| 1. Combine | Mix dry and wet ingredients in saucepan | Use medium heat |
| 2. Stir | Stir constantly with wooden spoon or spatula | Prevent burning or sticking |
| 3. Simmer | Bring to a light simmer | Reduce heat when simmering |
| 4. Cook | Maintain gentle simmer for 5–7 minutes | Develop flavor and consistency |
| 5. Adjust Flavor | Add optional flavor boosters as desired | Taste test before proceeding |
| 6. Strain (optional) | Pour through fine mesh strainer | Ensure smooth texture |
| 7. Cool | Let glaze cool before use | Handles better on food |
Cooking Directions
Mastering Captain Rodney’s glaze recipes begins with precise cooking techniques that unlock their bold and vibrant flavors. Follow these steps to ensure a perfectly balanced and richly textured glaze every time.
Heating and Combining the Glaze
- Preheat the Saucepan: Place your saucepan over medium heat. This moderate heat setting allows the glaze to thicken gradually without burning.
- Add Base Ingredients: Pour in the combined wet ingredients—soy sauce, apple cider vinegar, honey, and Dijon mustard—first. This ensures smooth blending of liquids before adding dry components.
- Incorporate Dry Ingredients: Whisk in the brown sugar, garlic, fresh ginger, and any optional seasonings like crushed red pepper flakes or smoked paprika. The whisk helps dissolve sugar crystals, preventing grainy texture.
- Simmer Gently: Bring the mixture to a low simmer. Maintain stirring with a wooden spoon or silicone spatula to avoid sticking or scorching on the pan’s bottom.
- Cook until Thickened: Let the glaze reduce for about 8 to 12 minutes. This step intensifies flavors and creates a luscious, syrupy texture with a bold flavor profile.
Adjusting Consistency and Flavor
- Check Thickness: Dip a spoon into the glaze. It should coat the back of the spoon evenly. If too runny, continue simmering and stirring for a few more minutes.
- Thin Out if Needed: If it becomes too thick, gradually whisk in warm water or a splash of apple cider vinegar to loosen the consistency while maintaining balance.
- Taste and Modify: Sample the glaze for flavor balance. Adjust sweetness with an extra teaspoon of honey or brown sugar, acidity with more vinegar, or heat by adding a pinch of crushed red pepper flakes.
- Strain for Smoothness: Use a fine mesh strainer to remove pieces of garlic, ginger, or herbs, ensuring a silky smooth finish.
- Cool Before Use: Allow the glaze to cool to room temperature. It thickens further as it cools, enhancing adherence to meats, seafood, or vegetables.
| Step | Key Actions | Purpose |
|---|---|---|
| Heating and Combining | Medium heat, whisk ingredients | Prevent burning, dissolve sugars, blend flavors |
| Simmering | 8-12 minutes stirring | Thicken glaze, intensify aroma and taste |
| Adjusting Consistency | Add water/vinegar if thick | Achieve ideal pourable texture |
| Flavor Adjustment | Add sweetener, acid, or spice | Customize glaze intensity and complexity |
| Straining & Cooling | Strain solids, cool to room temp | Smooth texture, ready consistency for application |
“Delicious is in the details.” With careful heating and meticulous adjustments, Captain Rodney’s glaze transforms dishes with signature boldness and unbeatable depth.
Application Tips
Applying Captain Rodney’s Glaze correctly is key to unlocking its full potential. Here’s how we can best use this bold and flavorful glaze to enhance various dishes with precision and flair.
Using Captain Rodney’s Glaze on Meats
To achieve that perfect balance of flavor and texture, apply Captain Rodney’s Glaze during the last few minutes of cooking. Follow these steps:
- Preheat your meat thoroughly — whether grilling, roasting, or pan-searing.
- Brush the glaze evenly across the surface 5 to 10 minutes before the meat is fully cooked. This timing allows the glaze to caramelize without burning.
- Turn the meat frequently to build layers of glaze and create a sticky, glossy finish.
- For thicker cuts like pork chops, chicken thighs, or steak, apply multiple thin layers rather than a single heavy coat.
- Use a heat level that’s medium to medium-high to avoid burning sugar components in the glaze.
- Rest the meat for 5 minutes after cooking to allow the glaze to set and flavors to meld.
| Meat Type | Application Time Before Done (minutes) | Recommended Heat Level | Notes |
|---|---|---|---|
| Chicken Breasts | 5 | Medium | Apply 2 layers, turn often |
| Pork Chops | 7 | Medium-High | Multiple thin coats |
| Steak | 5 | Medium-High | Glaze finish for seared crust |
| Fish Fillets | 3 | Medium | Use light glaze coat |
Quote to remember: “A well-timed glaze elevates a simple cut of meat from good to unforgettable.”
Glazing Vegetables and Other Dishes
Vegetables and alternative dishes respond wonderfully to Captain Rodney’s Glaze when applied thoughtfully:
- Roasted vegetables benefit from a glaze applied midway through roasting, allowing the sugars to caramelize and the acid to balance sweetness.
- For grilled vegetables, brush glaze in the final 2 to 3 minutes to avoid burning delicate surfaces.
- Use the glaze as a finishing drizzle on steamed or sautéed vegetables to add bold flavor and a shiny finish.
- Incorporate the glaze into grain bowls or salads by tossing vegetables lightly before serving, enhancing both taste and appearance.
- For seafood such as shrimp or scallops, apply glaze during the last minute of cooking and immediately remove from heat to maintain texture.
| Vegetable / Dish | Glaze Application Method | Timing | Cooking Tip |
|---|---|---|---|
| Roasted Carrots | Mid-roast brush | Halfway through roasting | Use 350°F roasting temp |
| Grilled Asparagus | Final glaze brush | Last 2-3 minutes | Medium grill heat |
| Steamed Broccoli | Drizzle after cooking | Just before serving | Toss gently to coat evenly |
| Quinoa Salad | Toss lightly before serving | Off heat | Use glaze as dressing base |
| Pan-Seared Scallops | Brush in last minute | Final step | Remove from heat immediately |
Applying Captain Rodney’s Glaze with these timing and method tips ensures that each bite bursts with vibrant, bold flavor while maintaining ideal texture.
Storage and Make-Ahead Instructions
To preserve the bold and vibrant flavor of Captain Rodney’s Glaze, proper storage and make-ahead techniques are essential. Follow these guidelines to ensure your glaze remains fresh, flavorful, and ready to elevate any dish at a moment’s notice.
Storing Captain Rodney’s Glaze
- Cool Completely: After cooking and straining, allow the glaze to cool to room temperature. This step prevents condensation and preserves texture during storage.
- Use Airtight Containers: Transfer the glaze to a clean, airtight container or jar. Glass containers with tight-sealing lids work best for maintaining freshness and preventing odors from contaminating the glaze.
- Refrigerate Promptly: Store the container in the refrigerator where the glaze will keep at its best quality.
- Shelf Life: Properly refrigerated, Captain Rodney’s Glaze remains fresh for up to 2 weeks.
| Storage Condition | Duration | Notes |
|---|---|---|
| Refrigerator (airtight) | Up to 2 weeks | Retains best flavor and texture |
| Freezer (optional) | Up to 3 months | Freeze in smaller portions; thaw gently |
Freezing for Longer Storage
- Freeze glaze in ice cube trays or small silicone molds. Once frozen, transfer cubes to freezer-safe bags for easy portioning.
- Thaw frozen glaze slowly in the refrigerator overnight.
- Reheat gently on low heat while stirring to restore smooth consistency without breaking the glaze.
Make-Ahead Tips for Convenience
- Prepare Captain Rodney’s Glaze up to one week ahead. The flavors intensify after resting, enhancing the depth of taste.
- Always give the glaze a good stir or gentle reheat before use to recombine any separated ingredients.
- Label your storage containers with the date of preparation to track freshness effortlessly.
Quick Reference: Best Practices for Storage and Make-Ahead
| Step | Action | Purpose |
|---|---|---|
| Cool | Bring glaze to room temperature | Prevent moisture damage |
| Store | Use airtight containers, refrigerate | Preserve flavor and texture |
| Freeze (optional) | Portion and freeze | Extend shelf life |
| Reheat & Stir | Warm gently before serving | Restore silkiness and blend flavors |
| Label | Mark date on container | Keep track of freshness |
“With the right storage, every spoonful of Captain Rodney’s Glaze delivers bold, vibrant flavor — just like freshly made.”
By mastering these Storage and Make-Ahead Instructions, we keep the glaze ready to transform our meals effortlessly while preserving its signature bold taste and smooth texture.
Conclusion
Captain Rodney’s glaze recipes open up a world of bold flavors that bring excitement to any dish. With simple ingredients and straightforward techniques, we can create versatile glazes that suit a range of meals from weeknight dinners to special gatherings.
By mastering the preparation, application, and storage tips, we ensure every batch delivers consistent, vibrant results. These glazes aren’t just sauces—they’re a way to transform our cooking with depth and character. Let’s keep experimenting and making every bite unforgettable with Captain Rodney’s signature touch.
Frequently Asked Questions
What ingredients are needed to make Captain Rodney’s glaze?
The basic ingredients include brown sugar, soy sauce, apple cider vinegar, garlic, fresh ginger, honey, Dijon mustard, and water. Optional add-ins like crushed red pepper flakes, orange zest, Worcestershire sauce, smoked paprika, fresh herbs, maple syrup, and sesame oil can customize flavors.
What equipment do I need to prepare the glaze?
You’ll need mixing bowls, measuring cups and spoons, a whisk, a saucepan, a wooden spoon or silicone spatula, and a fine mesh strainer for a smooth finish.
How do I prepare Captain Rodney’s glaze?
Mix dry and wet ingredients in a saucepan, simmer until thickened, adjust seasoning as needed, then strain for a smooth texture before cooling.
When should I apply the glaze during cooking?
Apply the glaze in the last few minutes of cooking. For meats, time application based on the type to balance flavor and texture; for vegetables, add near the end to enhance taste without wilting.
How do I store the glaze for later use?
Cool completely, then store in airtight containers in the refrigerator for up to two weeks. For longer storage, freeze in portions and thaw before reheating.
Can Captain Rodney’s glaze be made in advance?
Yes, it can be made up to a week ahead. Flavors improve as it sits, making your dishes even more flavorful.
What dishes pair well with Captain Rodney’s glaze?
The glaze works great on meats like chicken and pork, seafood, and a variety of vegetables, adding bold and vibrant flavor to each.
How can I customize the flavor of the glaze?
Adjust optional ingredients like red pepper flakes for heat, orange zest for brightness, maple syrup for sweetness, or herbs for freshness to tailor the glaze to your taste.