
There’s something truly satisfying about making our own Bloody Mary mix at home. Not only can we customize the flavors to suit our taste buds, but canning it also means we have a ready-to-go cocktail base anytime we want. This classic brunch favorite combines savory, spicy, and tangy notes that wake up our senses and add a kick to any gathering.
Canning our Bloody Mary mix lets us preserve the freshness of garden-picked tomatoes and bold spices, so we can enjoy that homemade flavor year-round. Plus, it’s a fun way to impress guests with a personalized cocktail experience. Whether we’re prepping for a party or just love having a quick cocktail fix, this recipe makes it easy to stock up and savor every sip.
Ingredients
Gathering the right ingredients is essential for a flavorful and balanced canning recipe for Bloody Mary mix. Each component plays a key role in building the signature savory, spicy, and tangy profile we want to preserve and enjoy year-round.
Fresh Produce
We rely on these fresh ingredients to provide a vibrant base and natural brightness:
- 4 cups fresh tomato juice (preferably homemade or no-salt added)
- 1 large lemon (juiced)
- 2 celery stalks (chopped finely)
- 1 large cucumber (peeled and diced)
- 2 cloves garlic (minced)
- 1 medium green bell pepper (seeded and chopped)
- 1 small bunch fresh parsley (chopped)
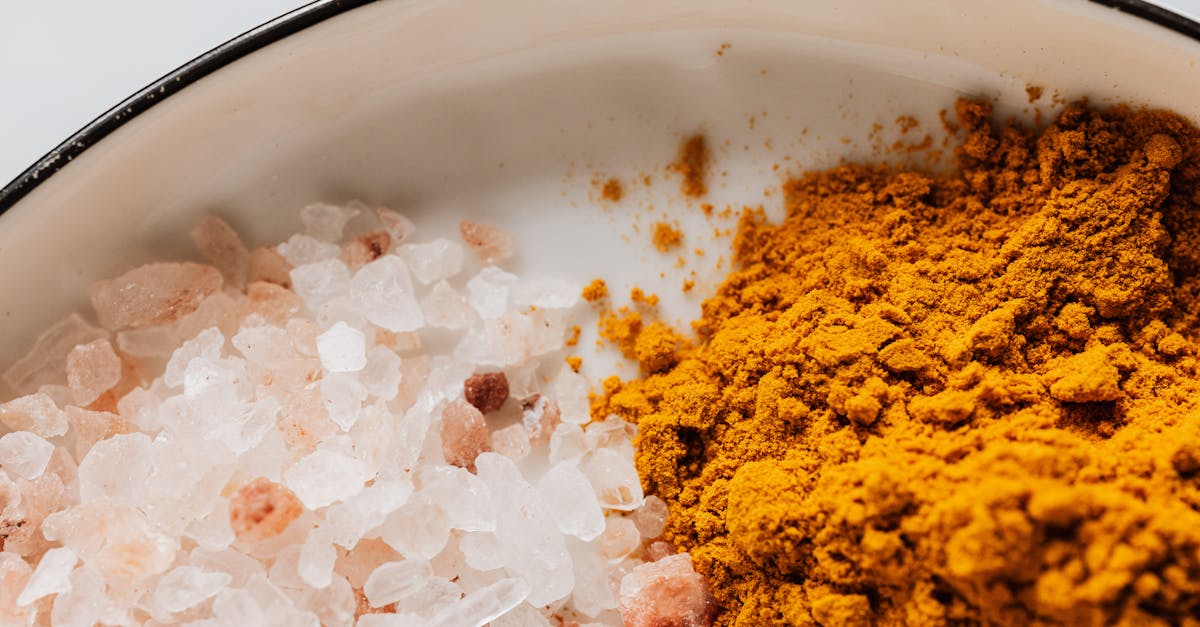
Spices and Seasonings
Spices are the soul of the mix, delivering the unmistakable Bloody Mary punch and complexity:
| Spice/Seasoning | Quantity | Notes |
|---|---|---|
| 1 tbsp celery salt | 1 tablespoon | enhances celery flavor |
| 1 tsp smoked paprika | 1 teaspoon | adds smoky depth |
| 1 tsp freshly ground black pepper | 1 teaspoon | sharpens the mix |
| 1/2 tsp cayenne pepper | 1/2 teaspoon | for controlled heat level |
| 1 tsp Worcestershire sauce | 1 teaspoon | rich umami boost |
| 1 tsp hot sauce | 1 teaspoon | adjust to taste for spice |
Liquids and Vinegars
Liquids help balance acidity and preserve freshness when canning:
- 1/4 cup distilled white vinegar (keeps mix shelf-stable)
- 1/4 cup pickle juice (adds briny complexity)
- 1/2 tsp kosher salt (enhances overall flavor)
Optional Add-Ins
Customize your canning recipe for Bloody Mary mix with these add-ons for extra depth or personal preference:
- Horseradish (1-2 teaspoons, grated for that classic bite)
- Olive brine (1 tablespoon for a subtle salty twist)
- Tobasco or another hot sauce (extra for heat)
- Smoked salt (replace kosher salt for smoky notes)
Tip: Balance spice and acidity perfectly before canning for the best shelf life and taste retention.
Equipment Needed
To successfully prepare and preserve our Bloody Mary Mix, having the right equipment is essential. This ensures safe canning, proper preservation, and the best flavor retention of our mix.
Canning Jars and Lids
We recommend using quart-sized or pint-sized mason jars made from tempered glass. Choose jars labeled specifically for canning to prevent breakage during processing. Each jar needs:
- A two-piece lid system: a flat metal lid with a sealing compound and a metal screw band
- New lids for each canning session to ensure a proper seal
| Item | Purpose | Notes |
|---|---|---|
| Mason jars | Store and preserve Bloody Mary Mix | Use sterilized jars |
| Flat lids | Create airtight seal | Must be replaced every time |
| Screw bands | Hold lids in place during canning | Reusable if undamaged |
“Only use lids once to ensure the best preservation and avoid spoilage.”
Canning Pot and Rack
A large water bath canner or deep stockpot with a fitted rack is a must-have. The canner should hold jars upright without touching each other or the pot sides.
- The rack elevates jars off the bottom preventing direct contact with heat
- The pot must be deep enough to cover jars with at least 1–2 inches of boiling water during processing
We recommend a pot at least 16 quarts in capacity for several quart jars at once.
Other Essential Tools
These additional tools streamline the canning process and help maintain hygiene:
- Jar lifter: Securely grip hot jars to move them safely in and out of the boiling water
- Magnetic lid lifter: Retrieve lids from hot water without contamination
- Funnel: Pour mix safely and avoid spills
- Clean cloth or paper towels: Wipe jar rims for a clean seal
- Bubble remover or plastic spatula: Release trapped air bubbles before sealing jars
- Timer: Accurately track processing time for safe preservation
Having all these essential tools on hand will lead to a successful canning experience and ensure our homemade Bloody Mary mix stays fresh and flavorful year-round.
Preparation
We start by carefully preparing the vegetables and ensuring our jars and lids are fully sterilized. Next, we combine our ingredients to create the perfect Bloody Mary mix base, ready for canning.
Preparing the Vegetables
To build flavor, fresh vegetables must be prepped precisely. Begin by:
- Washing all produce thoroughly under cold water.
- Chopping the celery, green bell pepper, cucumber, and parsley into small pieces for even blending.
- Mincing garlic finely to release its pungent aroma.
- Juicing fresh lemons to capture the tanginess essential to our mix.
This careful preparation ensures a vibrant and balanced Bloody Mary mix with fresh, crisp notes.
Sterilizing the Jars and Lids
Proper sterilization is critical for safe canning and long-term freshness. Follow these steps:
- Place quart or pint-sized mason jars in a large canning pot filled with water.
- Bring the water to a boil and let the jars boil for at least 10 minutes.
- Simultaneously, submerge the new lids and bands in simmering (not boiling) water to soften the sealing compound.
- Remove the jars using a jar lifter and place them on a clean towel to dry without touching the interior.
| Step | Duration | Purpose |
|---|---|---|
| Boil jars | 10 minutes | Sterilize and remove germs |
| Warm lids and bands | 5 minutes | Soften seals for airtight fit |
Remember, only use new lids for each canning session to guarantee a proper vacuum seal.
Mixing the Bloody Mary Base
After preparing vegetables and sterilizing jars:
- Combine tomato juice, lemon juice, and pickle juice in a large mixing bowl.
- Add finely chopped vegetables and minced garlic.
- Stir in celery salt, smoked paprika, black pepper, cayenne pepper, Worcestershire sauce, and hot sauce.
- Mix well until all ingredients blend smoothly creating a rich, tangy, and spicy cocktail base.
- Taste and adjust seasoning for balance, ensuring the acidity and spice harmonize for flavor retention and preservation.
This step unlocks the signature punch and freshness that makes our canned Bloody Mary mix stand out.
Canning Instructions
Proper canning techniques ensure our homemade Bloody Mary mix stays fresh, flavorful, and safe for long-term storage. Follow these steps carefully to preserve the vibrant taste and spicy kick of our mix.
Filling the Jars
- Preheat sterilized quart or pint mason jars in hot water to prevent cracking.
- Using a clean funnel, pour the hot Bloody Mary mix into each jar, leaving a 1/2-inch headspace at the top. This space is vital for proper sealing during processing.
- Inspect the jar rims for any residual mix or debris; wipe clean with a damp cloth to guarantee airtight seals.
| Step | Detail | Importance |
|---|---|---|
| Jar Preheating | Warm jars in hot water | Prevents glass breakage |
| Headspace | Leave 1/2 inch free space | Ensures proper vacuum seal |
| Rim Cleaning | Wipe rim clean before sealing | Prevents seal failure |
Removing Air Bubbles and Sealing
- Gently insert a non-metallic spatula or bubble remover around the inside edges of each jar to release trapped air bubbles.
- Recheck and adjust the headspace if needed after bubble removal.
- Place a new sterilized lid on each jar, then screw the metal band down until it is finger-tight — firm but not overly tight to allow air to escape during processing.
“Removing air bubbles is essential. Trapped air can cause spoilage or failed seals, compromising both safety and quality.”
Processing in a Water Bath Canner
- Fill the canner pot with enough water to cover the jars by at least 1-2 inches.
- Bring the water to a rolling boil before carefully placing jars on the rack inside the canner.
- Process jars for 15 minutes if using pint jars or 20 minutes for quart jars at a full boil.
- Start timing once the water comes back to a boil after adding jars.
- After processing, turn off the heat and allow jars to rest in hot water for 5 minutes to minimize jar breakage.
- Remove jars with a jar lifter and place them on a towel in a draft-free area to cool undisturbed for 12-24 hours.
| Jar Size | Processing Time | Water Coverage | Cooling Time |
|---|---|---|---|
| Pint | 15 minutes | 1-2 inches | 12-24 hours |
| Quart | 20 minutes | 1-2 inches | 12-24 hours |
Important: Do not retighten lids after processing. The vacuum created during cooling ensures a secure seal, preserving our Bloody Mary mix perfectly.
By following these canning instructions precisely, we guarantee our homemade mix remains a savory, spicy, and tangy delight ready for any occasion.
Storage and Shelf Life
Proper storage is key to maintaining the bold, complex flavors of our canned Bloody Mary mix. Understanding how to store it correctly and knowing its shelf life ensures every serving bursts with freshness and spice, ready for any occasion.
Proper Storage Conditions
To preserve the vibrant taste and safety of our Bloody Mary mix, store the sealed jars in a cool, dark, and dry place. A pantry or cupboard away from direct sunlight and heat sources works best. Ideal storage temperatures range between 50°F to 70°F (10°C to 21°C).
Once opened, refrigerate the mix promptly to avoid spoilage. Keep the jar tightly sealed and consume within a reasonable timeframe to enjoy the freshest flavors.
| Storage Condition | Details |
|---|---|
| Location | Cool, dark, and dry pantry or cupboard |
| Temperature Range | 50°F to 70°F (10°C to 21°C) |
| After Opening | Refrigerate immediately |
| Post-Opening Shelf Life | Use within 1 to 2 weeks |
How Long the Mix Will Last
Properly canned and sealed, our homemade Bloody Mary mix can last for up to 12 months on the shelf without losing its signature savory, spicy, and tangy flavor profile.
Once refrigerated after opening, the mix remains fresh and flavorful for about 1 to 2 weeks. Always check for signs of spoilage such as off-odors, cloudiness, or mold before use.
| Storage Phase | Shelf Life |
|---|---|
| Unopened (canned) | Up to 12 months |
| Opened (refrigerated) | 1 to 2 weeks |
Serving Suggestions
Our canned Bloody Mary mix offers incredible versatility, making it perfect for both classic cocktails and inventive twists. Let’s explore how to serve this flavorful base to impress every guest and elevate every occasion.
Classic Bloody Mary Recipe
To create a timeless Bloody Mary using our homemade canned mix, follow these steps for a perfectly balanced cocktail:
Ingredients:
- 4 oz chilled canned Bloody Mary mix
- 2 oz vodka
- 1/2 oz fresh lemon juice
- Ice cubes
- Celery stalk and lemon wedge for garnish
- Optional: celery salt or smoked paprika for rimming the glass
Instructions:
- If desired, rim the glass with celery salt or smoked paprika for an extra layer of flavor.
- Fill a tall glass halfway with ice cubes.
- Pour in 4 oz of chilled Bloody Mary mix and 2 oz vodka.
- Add 1/2 oz fresh lemon juice to brighten the cocktail.
- Stir gently to combine all flavors.
- Garnish with a crisp celery stalk and a wedge of lemon.
This classic recipe highlights the savory, tangy, and spicy notes of our canned Bloody Mary mix, ensuring each sip delivers that iconic cocktail experience.
Creative Variations
Our canned Bloody Mary mix invites creativity. Here are several exciting variations to personalize your drink:
| Variation Name | Additional Ingredients | Description |
|---|---|---|
| Spicy Horseradish Kick | 1 tsp prepared horseradish, dash of hot sauce | Adds a fiery punch with horseradish’s sharp heat. |
| Smoky Olive Twist | 1 oz olive brine, smoked salt rim | Brings a smoky, briny depth perfect for olive lovers. |
| Cucumber Cool | 1 oz cucumber juice, cucumber slice garnish | Refreshes the cocktail with a crisp cucumber chill. |
| Pickle Mary’s Charm | 1 oz pickle juice, dill sprig garnish | Introduces a tangy, dill-forward twist reminiscent of a pickleback. |
| Bloody Mary Margarita | Swap vodka with 2 oz tequila, add jalapeño slices | A fusion of spicy and tangy flavors blending two classics. |
We recommend experimenting with garnishes—bacon strips, shrimp, cherry tomatoes, or pickled vegetables—to elevate your serving style. These personalized touches highlight the complexity and depth locked inside every jar of our canned Bloody Mary mix.
Tips for Success
Mastering the art of canning Bloody Mary mix ensures a delicious and safe product every time. Here are our essential tips to help you avoid common pitfalls and elevate the flavor complexity.
Troubleshooting Common Issues
When canning Bloody Mary mix, a few challenges may arise. Understanding how to tackle them keeps the process smooth and your mix perfectly preserved.
| Issue | Cause | Solution |
|---|---|---|
| Jar seals fail | Improper jar or lid sterilization | Always sterilize jars and use new lids each batch |
| Inadequate headspace | Leave recommended ½ inch headspace before sealing | |
| Lid not tightened before processing | Tighten lids finger-tight before water bath | |
| Cloudy mix or sediment | Air bubbles or ingredient settling | Remove air bubbles with a non-metallic spatula before canning |
| Over-processing or under-processing | Follow exact processing times based on jar size | |
| Off flavors or spoilage | Contaminated ingredients or jars | Use fresh, high-quality produce and sterilized jars |
| Incorrect acidity levels | Ensure sufficient vinegar or acidic components are included |
“Proper preparation and attention to each step are crucial for a successful canning process.”
Enhancing Flavor
To make our Bloody Mary mix stand out, we focus on boosting the bold, savory, and spicy notes that define this classic cocktail base.
- Balance acidity and spice: Adjust vinegar and hot sauce carefully. Too much vinegar can overpower; too little risks spoilage. Aim for a harmonious tangy kick.
- Fresh herbs and aromatics: Adding fresh parsley, celery leaves, or a hint of cumin can intensify aroma and complexity without overwhelming the palate.
- Roast vegetables: Slightly roasting bell peppers, garlic, and tomatoes before blending deepens the smoky, savory undertones of the mix.
- Customize saltiness: Use celery salt and smoked salt to layer subtle flavors. Taste progressively to avoid over-salting.
- Rest the mix before canning: Let your mix sit refrigerated for at least 12 hours to marry flavors fully. This step enhances depth and integration of spices.
We recommend tasting your mix and making small seasoning tweaks before transferring it into jars. Remember that flavors will mellow slightly during the canning process.
Conclusion
Canning our own Bloody Mary mix opens up a world of flavor customization and convenience. With careful preparation and attention to detail, we can preserve that fresh, spicy kick all year long. It’s a rewarding way to elevate any gathering or simply enjoy a quick, delicious cocktail at home.
By mastering the canning process and balancing the ingredients just right, we ensure every jar delivers consistent quality and taste. Whether sticking to the classic recipe or experimenting with bold variations, having this mix on hand makes cocktail time effortless and impressive.
Frequently Asked Questions
What are the main benefits of making homemade Bloody Mary mix?
Homemade Bloody Mary mix allows you to customize flavors to your liking, use fresh ingredients, and enjoy a ready-to-use cocktail base. It’s perfect for gatherings and can be canned for year-round freshness.
Which ingredients are essential for a flavorful Bloody Mary mix?
Key ingredients include tomato juice, lemon, celery, cucumber, garlic, green bell pepper, parsley, celery salt, smoked paprika, black pepper, cayenne pepper, Worcestershire sauce, hot sauce, distilled white vinegar, and pickle juice.
What equipment do I need for canning Bloody Mary mix?
You’ll need mason jars (quart or pint), a canning pot with rack, jar lifter, magnetic lid lifter, funnel, timer, sterilized jars, and new lids for proper sealing.
How do I prepare vegetables for the Bloody Mary mix?
Wash all produce thoroughly, then chop or mince vegetables like celery, cucumber, garlic, and bell pepper to build a rich, balanced flavor in the mix.
What are the key steps in the canning process?
Sterilize jars and lids, fill jars with mix leaving proper headspace, remove air bubbles, wipe rims clean, seal with lids, process in a water bath canner for the recommended time, and avoid retightening lids after processing.
How should canned Bloody Mary mix be stored?
Store sealed jars in a cool, dark, dry place between 50°F and 70°F. Once opened, refrigerate and consume within 1 to 2 weeks for the best taste and safety.
How long does homemade canned Bloody Mary mix last?
When properly canned and sealed, the mix can last up to 12 months on the shelf without losing flavor. Always check for spoilage before using.
Can I customize the flavor of the Bloody Mary mix?
Yes! You can add horseradish, olive brine, smoked salt, or adjust spices and acidity to suit your taste preferences.
What are common canning problems and how can I avoid them?
Issues like seal failures and off flavors stem from improper jar sterilization, inadequate headspace, or wrong processing times. Follow detailed canning instructions and preparation tips carefully to avoid these problems.
How can I serve canned Bloody Mary mix?
Use it to create classic Bloody Mary cocktails or try variations like the Spicy Horseradish Kick or Bloody Mary Margarita. Garnish with bacon, shrimp, or pickled vegetables for an extra touch.