
Canned cherry peppers are a vibrant and flavorful addition to any pantry. These small, tangy peppers pack a punch with their perfect balance of heat and sweetness. Whether you’re looking to spice up sandwiches, salads, or antipasto platters, homemade canned cherry peppers bring a fresh, zesty twist that’s hard to beat.
Making your own canned cherry peppers lets us control the flavors and preserve their bright taste all year round. Plus, it’s a simple process that rewards us with a versatile ingredient ready to elevate countless dishes. Let’s dive into a recipe that captures the essence of these delightful peppers and adds a burst of flavor to our meals.
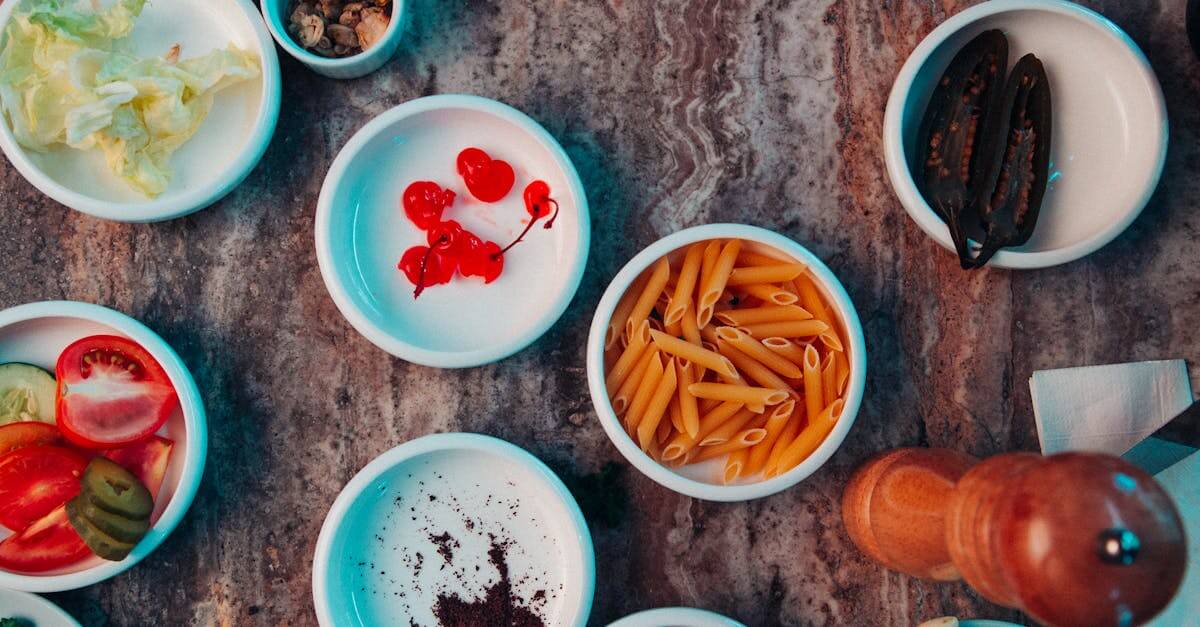
Ingredients
To craft the perfect Canned Cherry Peppers, we rely on fresh and quality ingredients that enhance their natural vibrancy and spicy-sweet flavor. Below is a detailed list of everything we need, including preparation specifics to ensure our peppers turn out irresistibly tangy and crisp every time.
| Ingredient | Quantity | Notes |
|---|---|---|
| Fresh cherry peppers | 2 pounds | Washed and stems trimmed |
| White vinegar | 2 cups | 5% acidity for proper canning |
| Water | 2 cups | Filtered for clarity |
| Kosher salt | 2 tablespoons | Enhances flavor and preservation |
| Granulated sugar | 1 tablespoon | Balances the heat and acidity |
| Garlic cloves | 4 cloves | Peeled and lightly crushed |
| Whole black peppercorns | 1 teaspoon | Adds subtle spice |
| Dried oregano | 1 teaspoon | Optional but recommended for extra aroma |
We recommend using fresh cherry peppers for the best flavor and texture. Removing the stems and washing thoroughly is essential to prepare them for pickling. Our brine, composed of white vinegar and water, balances acidity and clarity, crucial for both taste and safety during canning.
The addition of kosher salt and granulated sugar creates a harmonious base that heightens the peppers’ natural sweetness while taming their heat. To deepen the flavor profile, we incorporate garlic, black peppercorns, and a hint of dried oregano, all contributing layers of aroma that make our canned cherry peppers stand out.
“The right balance of acidity and seasoning transforms simple cherry peppers into a versatile condiment that elevates any dish.”
By following this ingredient list precisely, we ensure our Canned Cherry Peppers Recipe delivers consistent, flavorful results ideal for sandwiches, salads, and antipasto platters year-round.
Equipment Needed
To make our Canned Cherry Peppers Recipe successful, having the right equipment is essential. Each tool plays a vital role in ensuring the peppers are properly prepared, canned, and preserved for outstanding taste and safety.
Essential Tools for Canning Cherry Peppers
- Mason jars with lids and bands: We use these for safely storing our peppers. Choose pint or half-pint jars depending on your batch size.
- Large pot or canner: Ideal for sterilizing jars and processing peppers in boiling water.
- Jar lifter: This tool allows us to safely transfer hot jars without risk of burns.
- Funnel: A wide-mouth funnel helps pour liquids into jars cleanly and efficiently.
- Bubble remover or plastic spatula: Removing air bubbles helps ensure a proper seal.
- Measuring cups and spoons: For precise ingredient measurements to maintain the recipe’s perfect balance.
- Sharp knife: Used for coring and slicing fresh cherry peppers as needed.
- Cutting board: A sturdy surface for prepping our peppers.
- Large mixing bowl: To combine peppers with brine ingredients before canning.
- Tongs: Handy for handling peppers or garlic during preparation.
- Clean kitchen towels: For wiping jar rims to ensure tight seals.
Equipment Specifications and Uses
| Equipment | Purpose | Notes |
|---|---|---|
| Mason Jars (Pint/1/2 Pint) | Store canned cherry peppers safely | Use sterilized jars only |
| Large Pot/Canner | Process jars in boiling water for preservation | Ensure pot fits jars fully upright |
| Jar Lifter | Safely remove hot jars | Heat resistant handles preferred |
| Funnel (Wide-mouth) | Fill jars without spills | Food-grade material |
| Bubble Remover/Spatula | Remove trapped air bubbles in jars | Avoid metal utensils to prevent damage |
| Measuring Tools | Accurately measure ingredients | Standard measuring cups/spoons |
| Sharp Knife | Prep peppers (core, slice) | Keep blade sharp for clean cuts |
| Cutting Board | Prep surface | Sanitize before use |
| Mixing Bowl | Combine peppers and brine | Use non-reactive material |
| Tongs | Handle ingredients safely | Heat resistant optional |
| Clean Towels | Wipe jar rims for sealing | Lint-free cloths recommended |
Using these tools enables us to follow the Canned Cherry Peppers Recipe precisely, ensuring crisp texture, vibrant color, and balanced flavors in every jar we preserve. Having this equipment ready keeps the process smooth and efficient from start to finish.
Prep Work
Before we begin canning our vibrant canned cherry peppers, thorough preparation is key to achieving the best flavor and safety. Here’s how we get everything ready efficiently.
Preparing the Cherry Peppers
First, we start by selecting fresh, firm cherry peppers. Quality peppers are crucial because they impact the final taste and texture. Here are our essential steps:
- Wash the cherry peppers under cold running water to remove any dirt or residue.
- Remove the stems carefully using a sharp knife or scissors.
- Decide on your preferred style:
- Leave whole for a bold presentation and bite.
- Slice into rings for easier distribution in dishes.
- Optional: Remove seeds if you prefer less heat. We recommend keeping some seeds for authentic flavor and heat balance.
- Place the prepared peppers in a mixing bowl, ready for the next step.
Sterilizing Jars and Lids
Ensuring our mason jars and lids are properly sterilized prevents contamination and extends shelf life. Here’s our sterilization routine:
| Equipment | Method | Duration |
|---|---|---|
| Mason Jars | Boil in large pot or canner | 10 minutes |
| Lids & Bands | Simmer in hot water (not boiling) | 5 minutes |
- We fill our large pot with water and bring it to a boil.
- Submerge the jars completely and boil for 10 minutes.
- Meanwhile, we keep lids and bands in hot simmering water to soften sealing rings without damaging them.
- Using a jar lifter, we remove the jars carefully and set them on a clean kitchen towel to dry.
- This step is critical for food safety and preserving the integrity of our canned cherry peppers.
By following these prep steps meticulously, we ensure our canned cherry peppers deliver exceptional flavor and last perfectly on the shelf.
Directions
Let’s transform our fresh ingredients into vibrant canned cherry peppers with this step-by-step approach. Following these directions carefully ensures a safe preserve with the perfect balance of tang and spice.
Making the Brine
To achieve that classic zing, the brine must be prepared precisely:
- Combine in a saucepan:
- White vinegar
- Water
- Kosher salt
- Granulated sugar
- Bring the mixture to a rolling boil over medium-high heat.
- Stir continuously until the salt and sugar are fully dissolved.
- Add garlic cloves, black peppercorns, and if using, dried oregano to the brine.
- Let the brine simmer for an additional 2 minutes to infuse the flavors fully.
- Remove from heat and keep the brine hot until ready to pour.
| Ingredient | Measurement | Notes |
|---|---|---|
| White vinegar | 2 cups | 5% acidity |
| Water | 2 cups | Fresh cold water |
| Kosher salt | 1 tablespoon | Fine grain |
| Granulated sugar | 1 tablespoon | Adjust to taste |
| Garlic cloves | 2-3 cloves | Smashed |
| Black peppercorns | 1 teaspoon | Whole |
| Dried oregano (opt.) | 1 teaspoon | Optional flavor |
Packing the Jars
Packing the jars properly is crucial for even flavor distribution and safety:
- Using sterilized mason jars, place freshly prepared cherry peppers upright inside each jar.
- Gently pack the peppers to allow some space but avoid crushing them.
- Pour the hot brine over the peppers until they are completely submerged, leaving about 1/2 inch headspace at the top.
- Remove any air bubbles by sliding a clean bubble remover or non-metallic utensil along the jar sides.
- Wipe the rims of the jars with a clean, damp cloth to ensure a clean seal.
- Place the sterilized lids and screw bands on the jars, tightening them fingertip tight.
Sealing and Processing
To guarantee shelf stability and safety, processing under heat is essential:
- Submerge the sealed jars in a boiling water bath ensuring water covers jars by at least 1 inch.
- Process jars at a full boil for 15 minutes adjusting for altitude if necessary.
- Once processed, carefully remove jars using a jar lifter and place them on a towel or cooling rack.
- Leave the jars undisturbed for 12 to 24 hours to allow sealing.
- Check seals by pressing the center of each lid; a properly sealed lid will not flex up or down.
- Label each jar with the date and store in a cool, dark place.
Storage Instructions
Proper storage of canned cherry peppers ensures they maintain their vibrant flavor, crisp texture, and safety for long-term use. Follow these detailed steps to maximize shelf life and enjoy your peppers at their best.
Room Temperature Storage
- Store sealed jars of canned cherry peppers in a cool, dark place like a pantry or cupboard.
- Maintain an ideal temperature of 50°F to 70°F (10°C to 21°C) to prevent spoilage.
- Avoid exposing jars to direct sunlight, excessive heat, or fluctuating temperatures which can degrade quality and affect the seal.
| Storage Condition | Ideal Temperature Range | Best Location | Notes |
|---|---|---|---|
| Sealed jars | 50°F to 70°F (10-21°C) | Pantry or cupboard | Keep away from sunlight and heat |
| Unsealed, refrigerated | 35°F to 40°F (1.5-4.5°C) | Refrigerator | Use within 2-3 weeks |
After Opening
- Once opened, store the jar in the refrigerator immediately.
- Use a clean utensil to remove peppers to avoid contamination.
- Keep the peppers submerged in brine to preserve flavor and texture.
- Consume within 2 to 3 weeks for optimal taste and safety.
Checking Seals and Shelf Life
- Before storing, always check the jar lid for a proper vacuum seal — the lid should be concave and should not move when pressed.
- If a seal is compromised, refrigerate and consume promptly.
- Properly canned and sealed jars generally keep for up to 12 months.
“Proper storage is essential to preserve the distinctive tang and crunch of our homemade canned cherry peppers, ensuring they elevate your dishes all year long.“
Summary of Storage Guidelines
| Action | Before Opening | After Opening |
|---|---|---|
| Storage Location | Cool, dark pantry/cupboard | Refrigerator |
| Temperature | 50°F to 70°F (10-21°C) | 35°F to 40°F (1.5-4.5°C) |
| Shelf Life | Up to 12 months | Use within 2-3 weeks |
| Seal Check | Confirm lid suction seal | N/A |
| Handling | Avoid jar movement | Use clean utensils, keep brine |
By following these storage instructions, we ensure our canned cherry peppers stay fresh, safe, and flavorful, ready to enrich our favorite recipes whenever we crave a zesty kick.
Serving Suggestions
Our canned cherry peppers offer a vibrant punch of flavor that elevates a variety of dishes. Here are some of our favorite ways to enjoy them:
- Add to Sandwiches and Wraps
Slice the peppers thin and layer them in sandwiches or wraps. Their tangy heat complements meats like turkey, ham, or salami, and adds an exciting contrast to creamy cheeses such as provolone or mozzarella.
- Enhance Salads
Toss whole or sliced canned cherry peppers into green salads for a spicy, pickled burst. They pair exceptionally well with arugula, cherry tomatoes, cucumbers, and olives, bringing bright acidity to balance rich dressings.
- Create Antipasto Platters
Use our canned cherry peppers as a key element on antipasto platters. Arrange alongside cured meats, cheeses, marinated olives, and roasted vegetables to offer guests a wide flavor profile and beautiful presentation.
- Spice Up Pasta Dishes
Chop and mix them into pasta sauces or sprinkle on top of finished dishes. Their heat and acidity help cut through creamy sauces and add complexity to olive oil or tomato-based recipes.
- Top Pizzas and Flatbreads
Scatter sliced canned cherry peppers over pizza or flatbreads before baking or just after coming out of the oven. Their bold flavor pairs perfectly with melted cheeses and hearty toppings like sausage or mushrooms.
- Incorporate into Dips and Spreads
Blend some peppers into hummus, cream cheese spreads, or guacamole to give your dips an unexpected kick.
Flavor and Texture Overview Table
| Serving Idea | Flavor Impact | Texture Contribution | Pairing Tips |
|---|---|---|---|
| Sandwiches and Wraps | Spicy, tangy bite | Crunchy pickle texture | Meats, cheeses |
| Salads | Bright acidity | Crisp | Fresh greens, olives |
| Antipasto Platters | Bold, vibrant heat | Firm and juicy | Cured meats, cheeses |
| Pasta Dishes | Balances richness | Slight crunch | Creamy or tomato sauces |
| Pizzas and Flatbreads | Adds spicy pungency | Slightly soft after baking | Sausage, mushrooms, cheeses |
| Dips and Spreads | Kick of heat | Smooth when blended | Hummus, cream cheese, guacamole |
By incorporating our canned cherry peppers across these dishes, we maximize their versatility and enhance our meals with their signature tangy heat and bright flavor.
Tips and Variations
To get the most out of our Canned Cherry Peppers Recipe, here are essential tips and exciting variations to customize this vibrant ingredient to suit any palate or dish.
Tips for Perfect Canned Cherry Peppers
- Select Firm, Bright Cherry Peppers
Choose peppers with smooth skin and vibrant color to ensure crisp texture and full flavor after canning.
- Balance the Brine Acidity
Maintain the right vinegar-to-water ratio—typically 1 part white vinegar to 1 part water—to preserve safety and deliver that signature tang.
- Use Fresh Garlic and Spices
Fresh garlic cloves and whole black peppercorns enhance complexity. Optionally add dried oregano for a Mediterranean twist.
- Pack Jars Firmly but Gently
Fill jars snugly to maximize volume without bruising the peppers, preserving their shape and crunch.
- Process in Boiling Water Bath Correctly
Submerge jars fully and process for at least 10 minutes depending on altitude to ensure safe preservation.
Variations to Customize Your Canned Cherry Peppers
| Variation | Description | Flavor Impact | Usage Suggestions |
|---|---|---|---|
| Spicy Kick | Add crushed red pepper flakes or a few dried chilies to brine | Increases heat with lingering warmth | Excellent in sandwiches, pasta, and dips |
| Herbed Blend | Incorporate fresh thyme or rosemary with oregano | Adds earthy, piney undertones | Perfect for antipasto platters and salads |
| Sweet & Tangy | Increase granulated sugar by 1 tablespoon | Balances acidity with gentle sweetness | Ideal for pizza toppings and wraps |
| Smoky Flavor | Add a small amount of smoked paprika to the brine | Infuses smoky warmth | Great on grilled meats or flatbreads |
| Stuffed Peppers | Before canning, stuff peppers with cheese or cooked sausage | Creates hearty, savory bites | Serve as appetizers or snack platters |
Expert Tips for Storage & Serving
- Store Sealed Jars in a Cool, Dark Place
Maintain temperature between 50°F and 70°F (10°C to 21°C) to preserve peak flavor and texture.
- Check the Seal Before Storing
The lid should have a firm concave shape and no give when pressed.
- Refrigerate After Opening
Use within 2 to 3 weeks to enjoy vibrant tanginess and crispness.
- Enhance Dishes with Pickled Peppers
Add a spoonful to pasta sauces, salads, or even creamy dips to introduce bright acidity and mild heat.
“Proper technique and thoughtful customization turn simple canned cherry peppers into a versatile kitchen staple that elevates any dish.”
By incorporating these Tips and Variations we ensure that our canned cherry peppers are not only safe and delicious but also uniquely personalized to fit any culinary occasion.
Conclusion
Canning cherry peppers at home lets us enjoy their vibrant flavor all year long while tailoring the taste to our preferences. With the right ingredients, tools, and techniques, we can create a versatile pantry staple that adds a tangy kick to countless dishes.
By following careful preparation and storage guidelines, we ensure our canned peppers stay safe, crisp, and delicious. Whether we’re spicing up sandwiches, salads, or antipasto platters, homemade canned cherry peppers bring bold flavor and bright acidity that elevate any meal.
Embracing this simple yet rewarding process opens up endless culinary possibilities and keeps our kitchen stocked with a flavorful punch whenever we need it.
Frequently Asked Questions
What are the benefits of homemade canned cherry peppers?
Homemade canned cherry peppers allow you to control flavor, ensure freshness year-round, and enjoy vibrant, tangy heat in various dishes. They offer superior taste and quality compared to store-bought versions.
What ingredients are needed for canned cherry peppers?
You’ll need fresh cherry peppers, white vinegar, water, kosher salt, granulated sugar, garlic, black peppercorns, and optionally dried oregano for extra flavor.
What equipment is essential for canning cherry peppers?
Key tools include mason jars, a large pot or canner, jar lifter, funnel, bubble remover, measuring tools, a sharp knife, cutting board, mixing bowl, tongs, and clean kitchen towels.
How should I prepare cherry peppers before canning?
Select fresh, firm peppers, wash thoroughly, remove stems, and optionally remove seeds. Proper prep ensures good texture and flavor.
How do I sterilize jars and lids for canning?
Sterilize jars and lids by boiling them in water for about 10 minutes or using a dishwasher’s hot cycle to prevent contamination.
What is the brine recipe for canned cherry peppers?
The brine combines white vinegar, water, kosher salt, sugar, garlic, black peppercorns, and optional dried oregano, cooked until sugar and salt dissolve.
How should I pack jars with cherry peppers?
Pack peppers gently into sterilized jars, pour hot brine over them, leaving proper headspace, then seal and process using a boiling water bath.
How long can canned cherry peppers be stored?
Unopened jars last up to 12 months in a cool, dark place between 50°F and 70°F. Once opened, refrigerate and consume within 2 to 3 weeks.
What dishes pair well with canned cherry peppers?
They are great in sandwiches, salads, antipasto platters, pasta dishes, pizzas, flatbreads, dips, and spreads for added tangy heat and brightness.
Can I customize canned cherry peppers?
Yes, add crushed red pepper flakes for heat, herbs for flavor, or extra sugar for sweetness to tailor the peppers to your taste.