
When we hit the trail or set up camp, having versatile ingredients that simplify meal prep is a game changer. Camper’s All Purpose Baking Mix is one of those kitchen heroes that makes baking on the go easy and delicious. Whether we’re craving fluffy pancakes, hearty biscuits, or quick muffins, this mix has us covered without the need for multiple ingredients.
What makes Camper’s Baking Mix stand out is its convenience and adaptability. It’s designed to work in a variety of recipes, cutting down prep time and reducing the gear we carry. Plus, it’s perfect for both seasoned campers and beginners who want reliable, tasty results every time. Let’s explore some of our favorite recipes that turn this simple mix into camping classics that everyone will love.
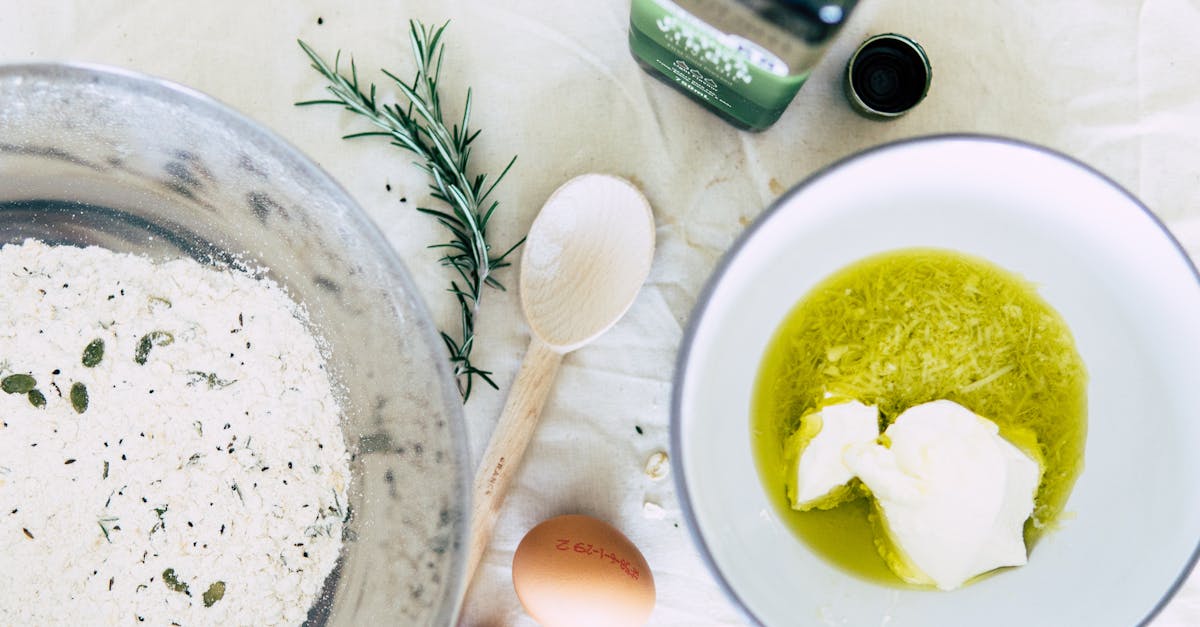
Ingredients
To make the most of Camper’s All Purpose Baking Mix, understanding its base components and the additional ingredients each recipe requires is essential. Below we break down the essential ingredients for crafting our versatile baking mix and the extras you’ll need for specific camping recipes.
Ingredients for Camper’s All Purpose Baking Mix
Our Camper’s All Purpose Baking Mix is designed to be a convenient foundation, combining classic baking essentials into one simple mix. Here’s what goes into crafting this reliable base:
- 4 cups all-purpose flour, sifted
- 3 tablespoons baking powder
- 1 teaspoon baking soda
- 1 teaspoon salt
- 3 tablespoons granulated sugar
- 3/4 cup nonfat dry milk powder or powdered whole milk
- 1/2 cup vegetable shortening or lard, chilled and cut into small pieces
Additional Ingredients for Each Recipe
Each recipe we showcase with Camper’s All Purpose Baking Mix calls for specific additional ingredients to bring out unique flavors and textures. Below is an overview of these essentials for common favorites:
| Recipe | Additional Ingredients |
|---|---|
| Pancakes | 1 1/2 cups water or milk, 1 large egg, 2 tablespoons melted butter |
| Biscuits | 2/3 cup milk or buttermilk |
| Muffins | 1 cup sugar, 1/4 cup oil, 2 large eggs, 1 teaspoon vanilla extract, 1/2 cup mashed fruit or berries |
| Quick Bread | 1 cup brown sugar, 1/2 cup oil, 2 eggs, 1/2 cup water or juice, nuts or dried fruit (optional) |
With these ingredients at hand, we can quickly prepare delicious baking favorites that enhance our camping experience with ease and confidence.
Equipment and Tools Needed
To make the most of Camper’s All Purpose Baking Mix, we need the right equipment to ensure smooth preparation and perfect results every time. Below, we outline the essential and optional tools for your camping baking adventures.
Essential Baking Tools
These are the must-have tools that form the foundation of any recipe using our Camper’s All Purpose Baking Mix:
- Mixing Bowl: Use a durable, lightweight bowl to combine ingredients easily.
- Measuring Cups and Spoons: Accurate measurements are key for consistency and flavor.
- Whisk or Fork: For mixing batter smoothly without lumps.
- Spatula or Wooden Spoon: Essential for folding ingredients and scraping bowls.
- Cast Iron Skillet or Portable Fry Pan: Perfect for pancakes and biscuits when camping.
- Camping Stove or Portable Burner: A reliable heat source is vital for cooking.
- Cooling Rack: Allows baked goods to cool evenly without sogginess.
- Knife: For slicing baked treats and prepping additional ingredients like fruit.
Optional Equipment for Specific Recipes
Some recipes made with Camper’s All Purpose Baking Mix benefit from these additional tools. They enhance convenience and expand the variety of dishes we can create:
| Equipment | Use Case |
|---|---|
| Muffin Tin or Silicone Cups | Ideal for muffins or cupcakes on the go |
| Pastry Brush | For glazing biscuits or brushing butter |
| Mixing Jar with Lid | Great for mixing and shaking pancake batter quickly |
| Griddle or Flat Cooking Surface | For evenly cooking pancakes or flatbreads |
| Cooling Basket or Paper Towels | Helps absorb excess oil in fried recipes |
By packing these essential and optional tools, we guarantee a seamless cooking experience with Camper’s All Purpose Baking Mix at the heart of our delicious camping meals.
Preparing Camper’s All Purpose Baking Mix
To start crafting delicious camping meals, mastering the preparation of Camper’s All Purpose Baking Mix is essential. Below, we break down how to make the base mix from scratch and share key storage tips to keep it fresh and ready for your next outdoor adventure.
How to Make the Base Mix
Creating the base mix is straightforward and requires just a few pantry staples. Follow these precise steps to achieve consistent results every time:
- Gather Ingredients
- 4 cups all-purpose flour
- 3 tablespoons baking powder
- 1 teaspoon baking soda
- 1 teaspoon salt
- 2 tablespoons sugar
- 1/4 cup dry milk powder
- 1/2 cup vegetable shortening
- Combine Dry Ingredients
In a large mixing bowl, whisk together the flour, baking powder, baking soda, salt, sugar, and dry milk powder until fully blended.
- Incorporate Shortening
Add the vegetable shortening to the dry mix. Use a pastry cutter or your fingertips to work the shortening into the dry ingredients until the mixture resembles coarse crumbs.
- Store or Use Immediately
Once combined, the base mix is ready for use in your favorite recipes or for storage (see next section).
Pro tip: Ensure the shortening is cold for easier blending and a better texture in your baked goods.
| Ingredient | Amount | Preparation Notes |
|---|---|---|
| All-purpose flour | 4 cups | Sifted for aeration |
| Baking powder | 3 tablespoons | – |
| Baking soda | 1 teaspoon | – |
| Salt | 1 teaspoon | – |
| Sugar | 2 tablespoons | Granulated preferred |
| Dry milk powder | 1/4 cup | Unsweetened |
| Vegetable shortening | 1/2 cup | Cold, cut into pieces |
“Perfecting the base mix is our first step toward savory pancakes, biscuits, and muffins—all crafted effortlessly with Camper’s All Purpose Baking Mix.”
Storage Tips for the Baking Mix
Storing your Camper’s All Purpose Baking Mix correctly ensures it remains fresh and ready for meal prep at camp.
- Use an airtight container to prevent moisture absorption and contamination.
- Keep in a cool, dry place away from heat and sunlight to preserve rising agents like baking powder and baking soda.
- If storing for more than a month, label the container with the preparation date for freshness tracking.
- For extended storage, we recommend refrigerating or freezing the mix. Allow it to return to room temperature before use.
| Storage Method | Recommended Duration | Notes |
|---|---|---|
| Airtight container, pantry | Up to 1 month | Keep away from humidity and heat |
| Airtight container, refrigerator | Up to 3 months | Protect from odors, bring to room temp to use |
| Airtight container, freezer | Up to 6 months | Defrost in refrigerator overnight |
Camper’s All Purpose Baking Mix Recipes
With Camper’s All Purpose Baking Mix as our base, we can quickly prepare delicious, versatile baked goods that elevate any camping meal. Below is a collection of our favorite easy-to-follow recipes that maximize flavor with minimal effort.
Quick Biscuits
Quick Biscuits are a staple for any outdoor adventure. Using Camper’s All Purpose Baking Mix, we create fluffy, golden biscuits ready in minutes, perfect for breakfast or as a side.
Ingredients:
- 2 cups Camper’s All Purpose Baking Mix
- 2/3 cup cold buttermilk (or substitute with milk + 1 tsp vinegar)
- 2 tbsp melted butter (optional, for brushing)
Instructions:
- Preheat your cast iron skillet or oven to 425°F.
- In a mixing bowl, combine the baking mix and buttermilk, stirring gently until just combined. Avoid overmixing to keep biscuits tender.
- Turn the dough onto a lightly floured surface. Pat it to about 1-inch thickness.
- Using a biscuit cutter or a round glass, cut out biscuits. Gather scraps, gently re-pat, and cut additional biscuits.
- Place biscuits on the skillet or baking sheet, leaving a small gap for expansion.
- Bake for 12-15 minutes until golden brown.
- Brush tops with melted butter immediately after baking for a rich finish.
Tips for Perfect Biscuits:
- Keep all ingredients cold before mixing.
- Use a light hand when mixing for fluffy texture.
- Serve warm with jam, honey, or butter.
| Ingredient | Measurement |
|---|---|
| Camper’s All Purpose Baking Mix | 2 cups |
| Cold Buttermilk | 2/3 cup |
| Melted Butter (optional) | 2 tbsp |
Fluffy Pancakes
Fluffy pancakes made with Camper’s All Purpose Baking Mix bring breakfast to life on any camping trip. These pancakes are simple to prepare, light in texture, and full of flavor, making them a perfect morning treat to fuel our outdoor adventures.
Ingredients for Pancakes
- 2 cups Camper’s All Purpose Baking Mix
- 1 1/2 cups milk (or water for a lighter option)
- 1 large egg
- 2 tablespoons vegetable oil or melted butter
- 1 tablespoon sugar (optional for extra sweetness)
- 1 teaspoon vanilla extract (optional for enhanced flavor)
- Butter or oil for cooking
| Ingredient | Quantity | Notes |
|---|---|---|
| Camper’s All Purpose Baking Mix | 2 cups | Base for pancakes |
| Milk (or water) | 1 1/2 cups | Adjust for desired batter consistency |
| Egg | 1 large | Binds ingredients |
| Vegetable oil or melted butter | 2 tablespoons | Adds moisture and richness |
| Sugar | 1 tablespoon (optional) | Enhances sweetness |
| Vanilla extract | 1 teaspoon (optional) | Adds depth of flavor |
| Butter or oil | As needed for cooking | Prevents sticking |
Instructions for Pancakes
- In a large mixing bowl, combine 2 cups of Camper’s All Purpose Baking Mix and 1 tablespoon sugar if using.
- In a separate bowl, whisk together 1 1/2 cups milk, 1 large egg, 2 tablespoons vegetable oil, and 1 teaspoon vanilla extract until well blended.
- Pour the wet ingredients into the dry mix. Stir gently with a whisk or wooden spoon until just combined. The batter should be slightly lumpy but without large pockets of dry mix. Avoid overmixing to keep pancakes fluffy.
- Preheat a cast iron skillet or griddle over medium heat, lightly grease with butter or oil.
- Pour 1/4 cup of batter onto the skillet for each pancake. Cook until bubbles form on the surface and edges look set, about 2-3 minutes.
- Flip carefully and cook the other side for an additional 1-2 minutes until golden brown and cooked through.
- Transfer pancakes to a plate, keep warm, and repeat with remaining batter.
Pro tip: For perfectly fluffy pancakes every time, keep the batter resting for 5 minutes before cooking. This allows the leavening agents in the baking mix to activate fully.
Serve with maple syrup, fresh fruit, or your favorite camping toppings for a satisfying breakfast that everyone will enjoy.
Easy Muffins
Discover how simple it is to bake delicious muffins using Camper’s All Purpose Baking Mix. These muffins are perfect for quick camping breakfasts or snacks, combining ease and flavor in every bite.
Ingredients for Muffins
- 2 cups Camper’s All Purpose Baking Mix
- 1/2 cup sugar (adjust to taste)
- 1 large egg
- 3/4 cup milk (or water for lighter muffins)
- 1/4 cup vegetable oil or melted butter
- 1 teaspoon vanilla extract (optional for extra flavor)
- 1 cup fresh or frozen berries, chopped nuts, or chocolate chips (optional)
Instructions for Muffins
- Preheat your oven or camp stove muffin tin to 375°F (190°C). If using a camping oven or portable burner, ensure even heat distribution.
- In a large mixing bowl, combine 2 cups of Camper’s All Purpose Baking Mix with 1/2 cup sugar. Stir in the optional berries or mix-ins now.
- In a separate bowl, beat 1 large egg, then add 3/4 cup milk, 1/4 cup vegetable oil, and 1 teaspoon vanilla extract if using.
- Pour the wet ingredients into the dry mix. Gently stir with a spatula or wooden spoon just until combined. Avoid overmixing to keep muffins light and tender.
- Spoon the batter evenly into greased or lined muffin cups, filling each about 2/3 full.
- Bake for 18 to 22 minutes, or until a toothpick inserted into the center comes out clean.
- Remove muffins from the oven and allow them to cool for 5 minutes before transferring to a cooling rack.
“These muffins rise beautifully using the all-purpose mix and provide a moist texture ideal for outdoor breakfasts.”
| Step | Action | Temperature/Time |
|---|---|---|
| 1 | Preheat oven/muffin tin | 375°F (190°C) |
| 2 | Mix dry ingredients | – |
| 3 | Mix wet ingredients | – |
| 4 | Combine wet and dry, avoid overmixing | – |
| 5 | Fill muffin cups | 2/3 full |
| 6 | Bake | 18-22 minutes |
| 7 | Cool before serving | 5 minutes |
Enjoy these easy muffins hot or pack them for a convenient snack on your camping adventure.
Simple Bread Loaf
Our Camper’s All Purpose Baking Mix transforms into a warm, fluffy bread loaf perfect for any camping meal. This straightforward recipe yields a satisfying homemade bread with minimal ingredients and effort.
Ingredients for Bread Loaf
- 3 cups Camper’s All Purpose Baking Mix
- 1 cup warm water (about 110°F)
- 1 packet (2 1/4 teaspoons) active dry yeast
- 1 tablespoon sugar
- 1 teaspoon salt
- 2 tablespoons olive oil or melted butter
| Ingredient | Measurement | Notes |
|---|---|---|
| Camper’s All Purpose Baking Mix | 3 cups | Provides the base flour blend |
| Warm water | 1 cup | Warm to activate yeast |
| Active dry yeast | 1 packet (2 1/4 tsp) | Ensures proper rise |
| Sugar | 1 tablespoon | Feeds yeast for fermentation |
| Salt | 1 teaspoon | Enhances flavor |
| Olive oil or melted butter | 2 tablespoons | Adds moisture and richness |
Instructions for Bread Loaf
- Activate the yeast: In a large bowl, combine the warm water, sugar, and active dry yeast. Stir gently and let sit for 5 to 10 minutes until the mixture becomes frothy.
- Mix dry ingredients: Add the Camper’s All Purpose Baking Mix and salt to the yeast mixture. Stir with a wooden spoon or spatula until the ingredients begin to combine.
- Add fat: Pour in the olive oil or melted butter. Mix thoroughly until the dough comes together and is slightly sticky but manageable.
- Knead the dough: Turn the dough onto a lightly floured surface (using a small amount of the baking mix). Knead for about 8 to 10 minutes, pressing, folding, and stretching until the dough is smooth and elastic.
- First rise: Place the dough in a greased bowl, cover with a clean towel or plastic wrap, and let it rise in a warm spot for 1 to 1 1/2 hours, or until it doubles in size.
- Shape the loaf: Punch down the risen dough to release air. Shape it into a loaf and place it in a greased 9×5-inch loaf pan or on a baking sheet.
- Second rise: Cover the shaped dough and allow it to rise again for 30 to 45 minutes until it puffs up noticeably.
- Bake: Preheat the oven to 375°F. Bake the loaf for 30 to 35 minutes, or until the crust is golden brown and the bread sounds hollow when tapped on the bottom.
- Cool: Remove the bread from the oven and let it cool in the pan for 10 minutes. Transfer to a wire rack to cool completely before slicing.
Enjoy this simple bread loaf fresh from the oven alongside your favorite camping meals. Its soft crumb and lightly crisp crust make it a versatile staple that pairs wonderfully with all your outdoor adventures.
Savory Flatbread
Savory flatbread made with Camper’s All Purpose Baking Mix is a quick versatile addition to any camping meal. It provides a crispy golden crust with a soft tender interior, perfect for dipping, topping, or enjoying plain.
Ingredients for Flatbread
- 2 cups Camper’s All Purpose Baking Mix
- ¾ cup warm water (about 110°F)
- 1 tablespoon olive oil (plus extra for cooking)
- 1 teaspoon dried herbs (such as rosemary, thyme, or oregano)
- ½ teaspoon garlic powder
- ¼ teaspoon salt
- Optional: coarse sea salt or sesame seeds for topping
| Ingredient | Measurement | Notes |
|---|---|---|
| Camper’s All Purpose Baking Mix | 2 cups | Foundation of the dough |
| Warm water | ¾ cup | Approximately 110°F |
| Olive oil | 1 tablespoon | Plus extra for cooking |
| Dried herbs | 1 teaspoon | Choice of rosemary, thyme, oregano |
| Garlic powder | ½ teaspoon | Adds savory depth |
| Salt | ¼ teaspoon | Enhances flavor |
| Coarse sea salt (optional) | To sprinkle | For topping |
| Sesame seeds (optional) | To sprinkle | For topping |
Instructions for Flatbread
- Combine dry ingredients: In a large bowl whisk together 2 cups Camper’s All Purpose Baking Mix, dried herbs, garlic powder, and salt.
- Add liquids: Slowly pour in ¾ cup warm water and 1 tablespoon olive oil while stirring with a spoon or spatula until a sticky dough forms.
- Knead the dough: Lightly flour a clean surface with some baking mix. Turn the dough out and knead gently for about 3-4 minutes until smooth and elastic.
- Divide and roll: Split the dough into 4 equal portions. Roll each portion into a thin flat circle, about ⅛ inch thick.
- Heat the pan: Warm a cast iron skillet or portable fry pan over medium heat. Brush lightly with olive oil.
- Cook flatbreads: Place one flatbread in the hot skillet. Cook 2-3 minutes on each side until golden brown spots appear and the bread puffs slightly.
- Optional toppings: Brush finished flatbreads lightly with olive oil and sprinkle with coarse sea salt or sesame seeds for added texture and flavor.
- Serve warm: Enjoy the savory flatbread fresh for dipping into sauces, topping with cheese or meats, or as a satisfying standalone snack.
Using Camper’s All Purpose Baking Mix in this recipe gives us a reliable dough that cooks quickly over a camping stove while holding excellent flavor from simple herbs and seasonings. This savory flatbread is a must-have to elevate outdoor meals effortlessly.
Make-Ahead and Storage Tips
Mastering make-ahead and storage techniques for Camper’s All Purpose Baking Mix ensures we always have a convenient and delicious base ready for our camping meals. Keeping the mix and prepared recipes fresh saves time and boosts flavor on outdoor adventures.
Preparing Mix in Advance
We recommend preparing larger batches of Camper’s All Purpose Baking Mix ahead of time for effortless baking on the go. Here’s how to handle it:
- Mix Thoroughly: Combine all dry ingredients evenly to ensure consistent texture and rising.
- Use Airtight Containers: Store the mix in airtight containers or heavy-duty resealable bags to prevent moisture and pests.
- Label Clearly: Mark each container with the preparation date and contents for easy tracking.
- Portion Control: Divide the mix into portions matching common recipe sizes for quick measure-and-go access.
| Preparation Step | Purpose | Tip |
|---|---|---|
| Mix Thoroughly | Even distribution of leavening agents | Use a whisk to blend dry ingredients |
| Airtight Containers | Preserve freshness, prevent contamination | Glass jars or BPA-free plastic work well |
| Label with Date | Track freshness | Use waterproof marker or labels |
| Portion Control | Simplifies recipe prep | Portion into standard cup measurements |
“Preparing the mix in advance lets us enjoy fresh baked goods anytime without the hassle of measuring and mixing at camp.”
Storing Prepared Recipes
For baked goods made with Camper’s All Purpose Baking Mix, proper storage maintains texture and flavor.
- Cool Completely: Before storing, let biscuits, muffins, bread, or flatbreads cool to room temperature to prevent sogginess.
- Use Sealed Containers: Store items in airtight containers ideally lined with parchment paper to retain moisture balance.
- Refrigerate or Freeze: For storage beyond 1-2 days, refrigerate or freeze baked goods and thaw gently when ready to eat.
- Reheat Properly: Warm items in a covered skillet, oven, or microwave to revive texture and aroma before serving.
| Recipe Type | Storage Method | Storage Duration | Reheating Tips |
|---|---|---|---|
| Biscuits & Muffins | Airtight container | 1-2 days at room temperature Up to 1 month frozen |
Oven 350°F for 10 minutes or microwave short intervals |
| Bread Loaf | Wrapped in foil or plastic | 2 days at room temperature Up to 3 months frozen |
Wrap in foil, heat at 350°F for 15 minutes |
| Flatbread | Airtight bag or container | 1-2 days at room temperature Up to 1 month frozen |
Reheat in cast iron skillet for crispness |
Tip: To avoid freezer burn, wrap baked goods tightly with plastic wrap before placing in airtight containers or freezer bags.
By adhering to these Make-Ahead and Storage Tips we maximize the convenience and enjoyment of Camper’s All Purpose Baking Mix recipes during every camping trip.
Troubleshooting and Tips
When working with Camper’s All Purpose Baking Mix, even the simplest recipes can occasionally present challenges. Here, we share practical solutions and expert tips to ensure your camping baking projects turn out flawless every time.
Common Baking Issues and Fixes
Baking outdoors requires adjustments and attention. Below is a handy guide addressing typical problems we may encounter when using Camper’s All Purpose Baking Mix:
| Issue | Cause | Fix |
|---|---|---|
| Dense or heavy baked goods | Overmixing batter or dough | Mix just until combined; avoid stirring vigorously |
| Dry or crumbly texture | Too much flour or too little liquid | Measure ingredients precisely; add a tablespoon of milk or water if needed |
| Baked goods not rising properly | Expired baking powder/soda or incorrect oven temp | Check ingredient freshness; preheat oven fully to correct temperature |
| Burnt edges or bottom | Oven temperature too high or uneven heat | Use oven thermometer; rotate pans midway through baking |
| Sticky dough or batter | Too much liquid or warm environment | Chill dough briefly; add a little extra dry mix if sticky |
| Flat pancakes or muffins | Batter is overmixed or baking powder inactive | Stir gently leaving lumps; verify freshness of leavening agents |
“Perfect baking comes from paying attention to your ingredients and environment.” By recognizing these common hiccups and applying these fixes, we ensure consistent, delicious results with our baking mix.
Tips for Perfect Results
Maximize the potential of Camper’s All Purpose Baking Mix with these essential tips we rely on during camping baking adventures:
- Use Cold Shortening
Cold vegetable shortening creates flaky biscuits and tender crumb structure. Avoid melting it before mixing.
- Preheat Your Cooking Surface
Whether using a cast iron skillet or oven, always preheat to the recommended temperature for even baking and browning.
- Measure Ingredients Carefully
Accurate measuring is vital. We use level cups and spoons for dry ingredients to maintain proper ratios.
- Combine Ingredients Gently
Mix wet and dry components with a light hand to avoid toughening the dough or batter by overdeveloping gluten.
- Allow Rest Time
For batters like pancakes or muffins, a brief rest after mixing lets the leavening agents activate fully, improving texture.
- Adapt Liquids Based on Altitude and Humidity
Dryer or higher altitude environments may require slightly more liquid; monitor dough consistency closely.
“A well-prepared mix and mindful technique turn simple baking into comfort food—no matter where the trail leads us.”
By applying these tried and true tips, we elevate every recipe made with Camper’s All Purpose Baking Mix, ensuring each bite is as delightful as the last.
Conclusion
Camper’s All Purpose Baking Mix truly transforms how we approach cooking outdoors. Its versatility and ease let us focus more on enjoying the adventure and less on complicated meal prep. Whether we’re whipping up fluffy pancakes or savory flatbread, this mix delivers consistent, delicious results every time.
By packing the right tools and following simple tips, we can confidently create a variety of baked goods that elevate our camping meals. With a bit of preparation and the right storage techniques, we ensure our mix and treats stay fresh for every trip. Embracing Camper’s mix means more time savoring great food and less time worrying about the details.
Frequently Asked Questions
What is Camper’s All Purpose Baking Mix used for?
Camper’s All Purpose Baking Mix is used to make a variety of camping meals like pancakes, biscuits, muffins, bread, and flatbread with ease, using one versatile baking base.
What ingredients are in Camper’s All Purpose Baking Mix?
The mix contains all-purpose flour, baking powder, baking soda, salt, sugar, dry milk powder, and vegetable shortening.
Do I need special equipment to bake with this mix while camping?
Basic tools like a mixing bowl, measuring cups, whisk, spatula, cast iron skillet, and a portable stove are essential. Optional items like a muffin tin or griddle can add convenience.
How do I prepare the baking mix from scratch?
Combine the dry ingredients and cold vegetable shortening thoroughly. Store the mix in an airtight container for best freshness.
Can I store the baking mix for a long time?
Yes, store it in an airtight container. For short-term use, keep it in a pantry; for longer storage, refrigerate or freeze.
What additional ingredients are needed for pancakes or biscuits?
For pancakes, add water or milk. For biscuits, use buttermilk. Muffins require fruit or berries along with wet ingredients.
How can I avoid dense or dry baked goods when camping?
Use cold shortening, measure ingredients accurately, preheat your cooking surface, and avoid overmixing the batter.
Is the mix suitable for novice bakers?
Yes, it simplifies baking and delivers reliable, delicious results for beginners and experienced campers alike.
What are some easy recipes using the baking mix?
Quick biscuits, fluffy pancakes, easy muffins, simple bread loaves, and savory flatbread are all excellent recipes with this mix.
How should I store baked goods made from the mix?
Cool them completely before placing in sealed containers. Refrigerate or freeze for longer storage and reheat gently for best texture.