
Dream Whip is a versatile ingredient that adds a light and fluffy texture to our favorite cakes without the hassle of heavy creams. Whether we’re whipping up a classic vanilla sponge or experimenting with fruity layers, Dream Whip helps us achieve that perfect, airy finish every time. Its convenience and ease of use make it a go-to for both beginners and seasoned bakers alike.
Incorporating Dream Whip into cake recipes opens up a world of creative possibilities. It blends seamlessly with various flavors and fillings, enhancing the overall taste while keeping our cakes moist and tender. Let’s explore some delicious cake recipes using Dream Whip that will impress family and friends with their delightful texture and flavor.
Ingredients for Cake Recipes Using Dream Whip
To create perfect cakes using Dream Whip, we need to gather a few essential ingredients. These components work together to deliver the delicate, fluffy texture and moistness that Dream Whip brings to every recipe.
Common Ingredients Needed
- Dream Whip mix (1 package) – The star ingredient providing lightness and stability
- Cold milk (1 cup) – For whipping the Dream Whip mix to softness
- All-purpose flour (2 cups) – Base for our cake batter
- Granulated sugar (1 to 1½ cups) – Sweetens the batter precisely
- Baking powder (1½ teaspoons) – Helps the cake rise perfectly
- Salt (½ teaspoon) – Balances sweetness and enhances flavor
- Unsalted butter (½ cup, softened) – Adds richness and moist texture
- Eggs (3 large) – Provide structure and tender crumb
- Vanilla extract (1 teaspoon) – Adds subtle depth and aroma
| Ingredient | Measurement | Purpose |
|---|---|---|
| Dream Whip mix | 1 package | Adds fluffy texture and stability |
| Cold milk | 1 cup | Whips with Dream Whip for creaminess |
| All-purpose flour | 2 cups | Forms cake structure |
| Granulated sugar | 1 – 1½ cups | Sweetens and tenderizes |
| Baking powder | 1½ teaspoons | Leavens cake for rise |
| Salt | ½ teaspoon | Enhances flavor balance |
| Unsalted butter | ½ cup, softened | Moisture and richness |
| Eggs | 3 large | Cake structure and moisture |
| Vanilla extract | 1 teaspoon | Fragrance and flavor depth |
Optional Flavor Variations
We can customize cakes using Dream Whip by adding some of these popular flavors to enhance and diversify taste profiles:
- Cocoa powder (¼ to ½ cup) – For a rich chocolate cake base
- Lemon zest (1 tablespoon) – Brightens with citrus notes
- Almond extract (½ teaspoon) – Adds a subtle nutty aroma
- Instant coffee granules (1 teaspoon) – Deepens flavor in chocolate or mocha cakes
- Cinnamon or nutmeg (¼ teaspoon each) – Warm spice undertones perfect for fall cakes
- Fresh fruit purees (½ cup) – Boosts moisture and fruity taste, ideal in layered or chiffon cakes
Using these optional flavor variations lets us tailor every Dream Whip cake recipe to suit any occasion or preference with ease.
Tools and Equipment
To achieve the perfect cake texture and harness the full potential of Dream Whip, having the right Tools and Equipment is crucial. Below, we list everything we rely on to make our Dream Whip cakes consistently fluffy and delicious.
Essential Baking Tools
When baking cakes using Dream Whip, these tools form the foundation for success:
- Mixing Bowls: We use large, sturdy bowls for thorough mixing of ingredients. Preferably glass or stainless steel to avoid retaining flavors.
- Electric Hand Mixer or Stand Mixer: Critical for whipping Dream Whip to its ideal light and fluffy consistency and for blending batter evenly.
- Measuring Cups and Spoons: Precision in measuring ingredients like flour, sugar, and Dream Whip mix ensures consistent results.
- Sifter or Fine Mesh Strainer: To evenly sift flour, baking powder, and any dry ingredients, preventing lumps for smoother batter.
- Rubber Spatula: Helps us fold the whipped Dream Whip gently into the batter, preserving airiness.
- Cake Pans: We typically use non-stick or well-greased round or square pans according to the recipe’s specifications.
- Cooling Rack: Essential for allowing cakes to cool evenly and maintain texture without becoming soggy.
Specialty Tools for Dream Whip Cakes
Certain tools uniquely enhance the preparation and presentation of cakes featuring Dream Whip:
| Tool | Purpose |
|---|---|
| Electric Whisk Attachment | Optimizes whipping speed and minimizes effort, creating perfect peaks in Dream Whip. |
| Offset Spatula | Allows for smooth and professional spreading of Dream Whip frosting or layers. |
| Springform Pan | Ideal for mousse-style or layered Dream Whip cakes, enabling easy release. |
| Piping Bags and Tips | Useful for decorative Dream Whip finishes, from simple borders to intricate designs. |
| Chilled Mixing Bowls | Maintain optimal temperature during whipping to achieve maximum volume and stability. |
By equipping ourselves with these essential and specialty tools, we ensure each step of our Dream Whip cake bake enhances the texture, flavor, and overall quality of our dessert masterpiece.
Preparing Dream Whip for Cake Recipes
To achieve the perfect light and fluffy texture in our cakes, mastering the preparation of Dream Whip is essential. Below, we detail how to whip Dream Whip properly and store it for best results.
How to Whip Dream Whip Properly
- Chill the Mixing Bowl and Whisk
For optimal volume, place the mixing bowl and whisk attachment in the freezer for at least 15 minutes before whipping. Cold equipment helps stabilize the whip.
- Combine Dry Mix and Cold Milk
In a large bowl, pour the Dream Whip mix powder. Gradually add the required amount of chilled milk while stirring gently with a rubber spatula.
- Whip at Medium-High Speed
Using an electric mixer, whip the mixture at medium-high speed. Watch closely as the cream begins to thicken.
- Whip Until Soft Peaks Form
The whipped mixture will change from liquid to airy cream. Stop whipping once soft peaks form — the peaks should hold but curl over slightly when the whisk is lifted.
- Avoid Overwhipping
Be careful not to whip too long; overwhipped Dream Whip can become grainy and lose its smooth texture.
| Step | Key Detail | Reason |
|---|---|---|
| Chill bowl & whisk | Minimum 15 minutes in freezer | Maintains cold temperature for stable whip |
| Combine mix & cold milk | Use exact cold milk measurements | Ensures proper consistency |
| Whip medium-high speed | 3 to 5 minutes | Incorporates air for fluffiness |
| Stop at soft peaks | Peaks curl slightly | Perfect texture for folding into cakes |
| Avoid overwhipping | Watch texture closely | Prevents grainy texture |
Pro Tip: Use whole milk or a 2% milk for creamier, richer whipped Dream Whip.
Storage Tips for Whipped Dream Whip
- Use Immediately for Best Texture
Whipped Dream Whip is at its peak freshness and fluffiness when used right after whipping.
- Short-Term Refrigeration
If you need to store whipped Dream Whip, place it in an airtight container and refrigerate. Use within 24 hours to maintain quality.
- Rewhipping After Storage
Before using stored whipped Dream Whip, gently whisk it for a few seconds to restore volume, but do not overwhip.
- Avoid Freezing
Freezing whipped Dream Whip leads to separation and texture loss. Use fresh or refrigerated only.
With these precise steps and storage tips, we ensure our cakes benefit from Dream Whip’s light texture and lasting moisture, resulting in irresistibly fluffy desserts every time.
Basic Cake Recipes Using Dream Whip
Here, we share foolproof recipes for basic cakes using Dream Whip that highlight its unique ability to create a light, fluffy texture. These recipes form the foundation for delicious cakes you can customize with our previously discussed flavor variations.
Classic Vanilla Dream Whip Cake
Ingredients
- 1 packet Dream Whip mix
- 1 cup cold milk
- 2 cups all-purpose flour, sifted
- 1 ½ cups granulated sugar
- 2 teaspoons baking powder
- ½ teaspoon salt
- ½ cup unsalted butter, softened
- 3 large eggs, room temperature
- 1 teaspoon pure vanilla extract
Instructions
- Preheat the oven to 350°F (175°C). Grease and flour two 9-inch round cake pans.
- In a large mixing bowl, combine the sifted flour, sugar, baking powder, and salt. Set aside.
- In a separate bowl, cream the softened butter until smooth and creamy.
- Add eggs one at a time to the butter, beating well after each addition.
- Stir in vanilla extract.
- Prepare Dream Whip by mixing the dry packet with cold milk. Whip at medium-high speed until soft peaks form.
- Gradually add the dry ingredients to the butter-egg mixture alternately with whipped Dream Whip, beginning and ending with dry ingredients. Mix gently to keep the batter airy.
- Distribute the batter evenly between the prepared pans.
- Bake for 25 to 30 minutes or until a toothpick inserted in the center comes out clean.
- Cool cakes in pans for 10 minutes, then remove to wire racks to cool completely before frosting.
Chocolate Dream Whip Cake
Ingredients
- 1 packet Dream Whip mix
- 1 cup cold milk
- 1 ¾ cups all-purpose flour, sifted
- 2 cups granulated sugar
- ¾ cup unsweetened cocoa powder, sifted
- 1 ½ teaspoons baking powder
- 1 ½ teaspoons baking soda
- ½ teaspoon salt
- ½ cup unsalted butter, softened
- 2 large eggs, room temperature
- 1 teaspoon vanilla extract
- 1 cup boiling water
Instructions
- Preheat oven to 350°F (175°C). Grease and flour two 9-inch round cake pans.
- In a large bowl, sift together flour, sugar, cocoa powder, baking powder, baking soda, and salt.
- Cream softened butter in another bowl until smooth.
- Add eggs one at a time to butter mixture, beating well after each.
- Stir in vanilla extract.
- Prepare Dream Whip by combining the dry packet with cold milk and whip until soft peaks appear.
- Alternately add the dry mixture and whipped Dream Whip into the butter-egg batter, mixing gently to preserve fluffiness.
- Stir in boiling water last; batter will be thin.
- Pour batter evenly into prepared pans.
- Bake for 30 to 35 minutes or until a toothpick inserted into the center comes out clean.
- Allow cakes to cool in pans for 15 minutes; then transfer to cooling racks to cool completely before frosting.
| Step | Classic Vanilla Cake | Chocolate Cake |
|---|---|---|
| Oven Temperature | 350°F (175°C) | 350°F (175°C) |
| Baking Time | 25–30 minutes | 30–35 minutes |
| Cake Pans | Two 9-inch round pans | Two 9-inch round pans |
| Key Flavoring | 1 tsp vanilla extract | ¾ cup unsweetened cocoa powder, 1 tsp vanilla |
| Dream Whip Usage | Whipped with 1 cup cold milk to soft peaks | Whipped with 1 cup cold milk to soft peaks |
Advanced Cake Recipes Using Dream Whip
For those looking to elevate their baking game, these advanced cake recipes using Dream Whip combine rich flavors with exceptional textures. Let’s explore how Dream Whip can transform traditional cakes into show-stopping desserts bursting with lightness and flavor.
Dream Whip Strawberry Shortcake
This Dream Whip Strawberry Shortcake features airy whipped topping combined with fresh strawberries and sponge cake layers. Its delicate balance of sweet and tart flavors creates a truly indulgent treat perfect for any celebration.
Ingredients:
- 1 package Dream Whip mix
- 1 cup cold milk (for whipping)
- 2 cups fresh strawberries, hulled and sliced
- 3 tablespoons granulated sugar (divided)
- 1 prepared sponge cake or angel food cake, cut into layers
- 1 teaspoon vanilla extract
Instructions:
- Prepare the Whipped Dream Whip: Chill a mixing bowl and whisk attachment for at least 15 minutes. Combine Dream Whip mix with cold milk and whip at medium-high speed until soft peaks form. Add vanilla extract during whipping to enhance flavor.
- Sweeten Strawberries: Toss sliced strawberries with 2 tablespoons of sugar. Let sit 15 minutes until they release natural juices.
- Assemble Cake: Place one cake layer on a serving plate. Spread a generous layer of whipped Dream Whip topping. Spoon half of the macerated strawberries over the whipped layer.
- Add the second cake layer and repeat the process with remaining whipped topping and strawberries.
- Finish by garnishing with fresh whole strawberries and a light dusting of powdered sugar if desired.
Pro Tip: For more intense strawberry flavor, fold a few diced strawberries gently into the whipped Dream Whip topping before assembly.
| Ingredient | Quantity | Preparation Details |
|---|---|---|
| Dream Whip mix | 1 package | Use cold milk for best results |
| Cold milk | 1 cup | Chilled to whip properly |
| Fresh strawberries | 2 cups | Hulled and sliced |
| Granulated sugar | 3 tablespoons | Divided for maceration and cake |
| Sponge or angel food cake | 1 prepared | Layered for assembly |
| Vanilla extract | 1 teaspoon | Added to whipped topping |
Dream Whip Lemon Mousse Cake
The Dream Whip Lemon Mousse Cake blends tangy lemon mousse with a soft cake base and airy Dream Whip topping. This refined dessert highlights the versatility of Dream Whip in creating smooth mousses with light yet substantial texture.
Ingredients:
- 1 package Dream Whip mix
- 1 cup cold milk (for whipping)
- 1 prepared lemon cake (9-inch round)
- 1 cup lemon curd
- 2 teaspoons grated lemon zest
- 1/2 cup powdered sugar
- 1 tablespoon lemon juice
- Fresh lemon slices and mint leaves for garnish
Instructions:
- Whip the Dream Whip: Chill mixing bowl and whisk. Whip Dream Whip with cold milk until soft peaks form.
- Make Lemon Mousse: In a separate bowl, fold lemon curd, lemon zest, powdered sugar, and lemon juice gently into the whipped Dream Whip until smooth and airy.
- Assemble Cake: Cut your lemon cake horizontally into two layers. Spread half of the lemon mousse evenly on the bottom layer.
- Place the top cake layer and coat the whole cake with remaining mousse, smoothing sides and top carefully.
- Chill the cake for at least 2 hours to set mousse layers.
- Garnish with fresh lemon slices and mint before serving.
Texture & Flavor Insight: The mousse’s lightness is enhanced by Dream Whip, creating a cool refreshing finish that balances the rich sweetness of lemon curd perfectly.
| Ingredient | Quantity | Notes |
|---|---|---|
| Dream Whip mix | 1 package | Whipped with cold milk |
| Cold milk | 1 cup | Fully chilled |
| Lemon cake | 1 (9-inch round) | Pre-baked |
| Lemon curd | 1 cup | Provides tart sweetness |
| Lemon zest | 2 teaspoons | Adds aromatic citrus notes |
| Powdered sugar | 1/2 cup | Sweetens mousse |
| Lemon juice | 1 tablespoon | Enhances tang |
We trust these advanced Dream Whip cake recipes will inspire us to create desserts with superior texture and remarkable flavors that our friends and family will adore.
Instructions for Making Dream Whip Cakes
Mastering the instructions for making Dream Whip cakes ensures we achieve that signature light and fluffy texture. Follow these detailed steps to create perfect cakes every time using Dream Whip.
Prep Steps
- Gather Ingredients
Assemble all ingredients: Dream Whip mix, cold milk, all-purpose flour, sugar, baking powder, salt, unsalted butter, eggs, and flavorings like vanilla or cocoa powder if desired.
2. Chill Equipment
Place the mixing bowl and whisk in the refrigerator for at least 15 minutes. Chilled equipment enhances whipping performance and creates a more stable, airy texture.
3. Preheat Oven
Set the oven temperature to 350°F (175°C) to prepare for consistent baking.
4. Prepare Cake Pans
Grease and flour two 9-inch cake pans for even baking and easy release. Alternatively, line pans with parchment paper.
5. Whip Dream Whip
Combine the dry Dream Whip mix with cold milk in the chilled bowl. Whip on medium-high speed using an electric mixer until soft peaks form. Be careful not to overwhip to prevent graininess.
Baking Directions
- Mix Dry Ingredients
In a separate bowl, sift together all-purpose flour, baking powder, and salt for a fine aerated base.
2. Blend Butter and Sugar
Using an electric mixer, cream the unsalted butter and granulated sugar until light and fluffy, approximately 3-4 minutes.
3. Add Eggs and Flavorings
Beat in eggs one at a time followed by vanilla extract or other desired flavorings until fully combined.
4. Combine Wet and Dry
Gradually fold the sifted dry ingredients into the butter mixture alternating with the whipped Dream Whip to maintain aeration. Mix gently until smooth but do not overmix.
5. Pour Batter into Pans
Evenly divide the batter between the prepared pans and smooth the tops with a spatula.
6. Bake
Place pans in the preheated oven. Bake for 25-30 minutes or until a toothpick inserted into the center comes out clean.
| Step | Temperature | Time | Equipment |
|---|---|---|---|
| Preheat Oven | 350°F | — | Oven |
| Baking Time | 350°F | 25-30 mins | Cake pans |
| Whip Dream Whip | — | 3-5 mins | Electric mixer |
| Cream Butter & Sugar | — | 3-4 mins | Electric mixer |
Cooling and Setting the Cake
- Initial Cooling
Remove cakes from the oven and place them on wire racks. Let the cakes cool in the pans for 10-15 minutes to set their structure.
2. Remove from Pans
Carefully invert each cake onto the wire racks. Peel off parchment paper if used.
3. Cool Completely
Allow cakes to cool completely before frosting or assembling to prevent melting or sliding of the whipped Dream Whip topping. This may take 1-2 hours at room temperature.
4. Optional Setting
For firmer texture, refrigerate the cooled cakes uncovered for 20-30 minutes before frosting. This step helps the cake maintain moisture while stabilizing Dream Whip’s fluffy texture.
“Patience is key when cooling; rushing this step can compromise the cake’s delicate crumb and luscious moisture brought by Dream Whip.”
By following these precise instructions for making Dream Whip cakes, we guarantee every cake turns out perfectly light, moist, and irresistible.
Decorating and Assembling Dream Whip Cakes
Decorating and assembling Dream Whip cakes brings out their full potential, combining light texture and exquisite flavor with beautiful presentation. Let’s explore how to frost and garnish these cakes for stunning results.
Frosting with Dream Whip
Using Dream Whip as frosting creates a light, airy, and smooth topping that enhances the cake’s delicate crumb. Follow these steps for perfect Dream Whip frosting every time:
- Chill your mixing bowl and whisk before whipping for optimal volume.
- Prepare the Dream Whip mix according to package instructions using cold milk.
- Whip at medium-high speed until soft peaks form, ensuring you stop before stiff peaks to maintain the ideal creamy texture.
- Add powdered sugar gradually if you want a sweeter frosting; 1 to 1.5 cups usually balances nicely without overpowering the cake.
- Include flavor extracts such as vanilla, almond, or lemon zest to complement the cake flavor.
- Apply the frosting immediately on a fully cooled cake to prevent melting or sliding.
| Component | Quantity | Purpose |
|---|---|---|
| Dream Whip mix | 1 package | Base for whipped frosting |
| Cold milk | 1 cup | Activates and cools the mix |
| Powdered sugar | 1 to 1.5 cups | Balances sweetness and stability |
| Flavor extracts | 1 tsp | Enhances flavor profile |
“Whipping Dream Whip frosting to soft peaks locks in fluffiness that pairs perfectly with our Dream Whip cakes.”
For smooth and even application, use an offset spatula and refrigerate the frosted cake for 20 minutes before adding additional decorations.
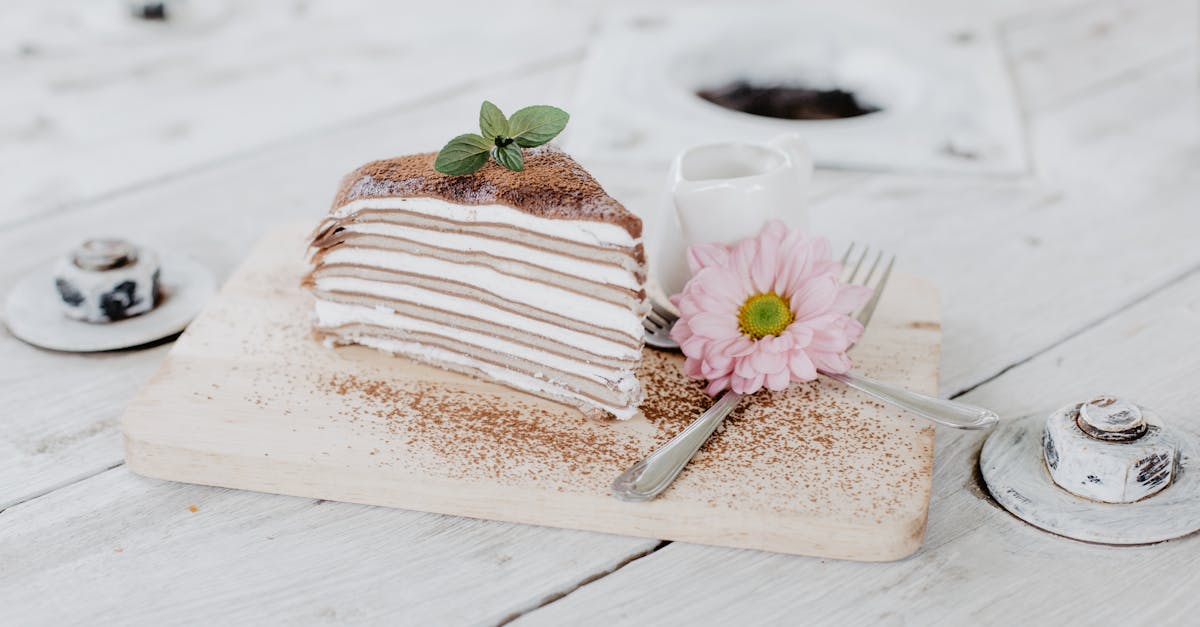
Adding Fresh Fruits and Toppings
Fresh fruits and toppings elevate Dream Whip cakes visually and add refreshing flavors that contrast the creamy frosting. Here’s how we suggest incorporating them:
- Select firm fresh fruits like strawberries, blueberries, raspberries, or sliced kiwi. Wash and pat dry to avoid extra moisture.
- Arrange fruits artistically on top of the frosting layer, layering or staggering for height and texture variation.
- Add chopped nuts or toasted coconut flakes for crunch if desired.
- Drizzle fruit coulis or a light glaze to add shine and extra flavor.
Pro tip: For the best presentation and lasting freshness, add fruits immediately before serving.
| Recommended Fruits | Best Uses | Preparation Tips |
|---|---|---|
| Strawberries | Sliced for topping | Remove stems, dry well |
| Blueberries | Whole, scattered | Rinse gently |
| Raspberries | Decorative clusters | Handle with care to avoid crushing |
| Kiwi slices | Layered or border | Peel and slice uniformly |
Combining Dream Whip frosting with fresh fruits not only enhances texture but also brightens the flavor profile—creating a cake that is as delightful to the eyes as it is to the palate.
Tips and Tricks for Perfect Dream Whip Cakes
Mastering Dream Whip cakes means paying attention to crucial details that ensure fluffy, moist, and flavorful results. Here are our top tips and tricks to help you avoid pitfalls and take your Dream Whip cake creations to the next level.
Avoiding Common Mistakes
To achieve flawless Dream Whip cakes every time, steer clear of these common errors:
- Overwhipping the Dream Whip: Whip Dream Whip only until soft peaks form. Overwhipping causes it to deflate or become grainy, losing its signature light texture.
- Using warm milk or equipment: Always use cold milk and chill your mixing bowl and whisk before whipping. Warm ingredients reduce whipping efficiency and volume.
- Skipping ingredient sifting: Sift dry ingredients such as flour, baking powder, and cocoa powder to avoid clumps that can affect cake crumb and rise.
- Adding Dream Whip too early: Incorporate whipped Dream Whip gently at the end when mixing batter to maintain its airy consistency and prevent cake density.
- Not preheating the oven properly: Start with a fully preheated oven at the specified temperature (usually 350°F) for even baking and proper cake rise.
- Cutting corners on cooling time: Let cakes cool completely on a wire rack before frosting to prevent melting or sogginess.
| Common Mistake | Effect on Cake | How to Avoid |
|---|---|---|
| Overwhipping Dream Whip | Grainy texture, loss of volume | Stop at soft peaks, no longer |
| Using warm milk/equipment | Poor whip volume, dense cake | Chill bowl, whisk; use cold milk |
| Skipping sift of dry ingredients | Lumpy batter, uneven baking | Always sift before mixing dry ingredients |
| Adding Dream Whip too early | Dense cake, lost fluffiness | Fold in gently at the end |
| Not preheating oven | Uneven baking, poor rise | Preheat oven fully before baking |
| Frosting warm cake | Melting frosting, soggy texture | Cool completely on a wire rack |
“Patience and precision are key to harnessing the full potential of Dream Whip in your cakes.”
Enhancing Flavor and Texture
Elevate your Dream Whip cakes with these flavor and texture enhancing techniques:
- Use complementary extracts and zests: Add fresh vanilla, almond extract, lemon zest, or orange peel to layer brightness and depth.
- Incorporate fresh fruit purees: Swirl in strawberry, raspberry, or mango purees gently for moisture and natural sweetness.
- Add a dash of spice or coffee: Cinnamon, nutmeg, or instant coffee granules intensify chocolate or vanilla bases, providing complexity.
- Fold in crushed nuts or chocolate chips: These add delightful texture contrasts without overwhelming the light crumb.
- Enhance whipped topping: For a richer finish, gently fold softened cream cheese or mascarpone into whipped Dream Whip.
- Chill cakes before serving: Let assembled cakes rest chilled for 2-4 hours to meld flavors and set the delicate crumb.
| Flavor Enhancer | Effect on Cake | Suggested Usage |
|---|---|---|
| Vanilla & almond extracts | Adds aromatic depth | 1 tsp per batch |
| Fresh citrus zest | Brightens and freshens flavor | 1-2 tsp finely grated |
| Fruit purees | Moistens cake, natural sweetness | ¼ to ½ cup, folded gently |
| Cinnamon, nutmeg, coffee | Adds warmth and complexity | ¼ tsp or as preferred |
| Nuts & chocolate chips | Adds textural contrast | ½ cup folded gently |
| Cream cheese/masked whipped topping | Adds richness and stability | 2 oz cream cheese mixed with whipped Dream Whip |
“Tip: Always fold gently using a spatula to preserve the light and airy texture unique to Dream Whip cakes.”
By avoiding common pitfalls and boosting flavors thoughtfully, our Dream Whip cakes will always impress with their perfect lightness, moisture, and rich taste.
Make-Ahead Instructions
Mastering cake recipes using Dream Whip means knowing how to prepare ahead for smooth baking and serving. Planning your steps in advance guarantees a flawless, moist, and fluffy cake every time.
Preparing Components in Advance
To save time and enhance the texture of our Dream Whip cakes, we recommend preparing key components ahead:
- Whip the Dream Whip mix: Prepare the whipped topping up to 4 hours before assembling. Store it in an airtight container in the fridge. This maintains its light, fluffy texture and ensures it is ready for immediate use.
- Bake the cake layers: Bake your cakes a day in advance. Cool completely on wire racks, then wrap them tightly with plastic wrap to lock in moisture.
- Chop or prep flavor add-ins: Whether it’s fresh fruit, nuts, or zest, prepare these components the day before. Store them separately in airtight containers.
| Component | Preparation Time Before Assembling | Storage Method | Notes |
|---|---|---|---|
| Dream Whip topping | Up to 4 hours | Airtight container, refrigerated | Gently rewhip if needed |
| Cake layers | Up to 24 hours | Wrapped in plastic wrap | Ensure complete cooling |
| Fruit/nuts/zest | Up to 24 hours | Airtight container | Keeps ingredients fresh |
By prepping these elements early we ensure minimum stress during assembly and maximum flavor preservation.
Storing Finished Cakes
Proper storage is vital for keeping our Dream Whip cakes fresh, moist, and ready to serve for up to several days:
- Refrigeration: Wrap the finished cake loosely with plastic wrap or use a cake dome. Store in the fridge to maintain the integrity of the Dream Whip topping and moist crumb.
- Serving timeline: Consume the cake within 3-4 days for optimal freshness and texture.
- Avoid freezing: Dream Whip’s airy texture can break down when frozen, resulting in a loss of lightness and moisture.
| Storage Method | Duration | Tips |
|---|---|---|
| Refrigeration | 3-4 days | Cover loosely; maintain cold temperature |
| Room Temperature | Up to 24 hours | Keep in a cool dry place, covered |
| Freezing | Not recommended | Alters Dream Whip texture |
“For best results with Dream Whip cakes, refrigeration with proper covering is key to preserving that signature fluffiness and moist crumb.“
By following these make-ahead instructions, we guarantee our cakes retain the light, fluffy texture and vibrant flavors Dream Whip is famous for.
Conclusion
Dream Whip opens up a world of possibilities for creating cakes that are light, fluffy, and full of flavor. Whether we’re baking a simple vanilla cake or an elegant lemon mousse dessert, this versatile ingredient helps us achieve perfect texture and moisture every time. With the right techniques, tools, and a bit of creativity, Dream Whip makes baking both enjoyable and rewarding. Let’s keep experimenting and delighting ourselves and others with these irresistibly airy cakes that stand out on any occasion.
Frequently Asked Questions
What is Dream Whip and why is it used in cake baking?
Dream Whip is a powdered whipped topping mix that, when combined with cold milk and whipped, creates a light and fluffy texture. It’s used in cake baking to add moisture, fluffiness, and enhance flavor, making cakes more enjoyable and easier to prepare.
What ingredients are essential for making cakes with Dream Whip?
Essential ingredients include Dream Whip mix, cold milk, all-purpose flour, granulated sugar, baking powder, salt, unsalted butter, eggs, and vanilla extract. These work together to achieve a moist, flavorful, and fluffy cake.
How do I properly whip Dream Whip for cake recipes?
Chill your mixing bowl and whisk, combine Dream Whip mix with cold milk, then whip at medium-high speed. Stop whipping at soft peaks to avoid overwhipping and maintain a perfect light texture.
Can I add flavors to Dream Whip cakes?
Yes! You can customize your cakes with cocoa powder, lemon zest, almond extract, instant coffee, spices, or fresh fruit purees to suit your taste or occasion.
What are the must-have tools for baking with Dream Whip?
Key tools include mixing bowls, electric mixers, measuring cups, sifters, rubber spatulas, cake pans, and cooling racks. Specialty tools like piping bags and offset spatulas help in decoration and presentation.
How should I store whipped Dream Whip if not used immediately?
Store whipped Dream Whip in an airtight container in the refrigerator and use within a short time. You can gently rewhip it before use but avoid freezing as it affects texture.
What are some basic Dream Whip cake recipes to start with?
Try the Classic Vanilla Dream Whip Cake for a traditional flavor or the Chocolate Dream Whip Cake with cocoa powder for a rich taste, both providing a fluffy, moist texture.
Are there advanced cake recipes using Dream Whip?
Yes, options like Dream Whip Strawberry Shortcake and Dream Whip Lemon Mousse Cake offer more complex flavors and textures, perfect for impressing guests with elegant desserts.
What are common mistakes to avoid when baking with Dream Whip?
Avoid overwhipping, using warm ingredients, and skipping oven preheating. Precision and patience during mixing and baking ensure the best cake texture.
How can I decorate Dream Whip cakes effectively?
Use Dream Whip as a light frosting, and garnish with fresh fruits or toppings for attractive and flavorful cakes that are visually pleasing and delicious.
Can Dream Whip cakes be made ahead of time?
Yes, whip Dream Whip up to 4 hours in advance, bake layers a day before serving, and prepare add-ins ahead. Store finished cakes in the fridge for 3-4 days without freezing to keep flavors and texture fresh.