
Cake lace adds an elegant and delicate touch to any dessert, transforming ordinary cakes into stunning masterpieces. This intricate edible decoration originated from traditional sugar art techniques and has become a favorite among bakers looking to impress with minimal effort.
We love how cake lace combines beauty and simplicity, allowing us to elevate our baking without complicated steps. Whether you’re preparing for a special occasion or just want to add a bit of flair to your everyday treats, mastering this technique is a game-changer.
Ingredients
To create stunning cake lace, we need a precise combination of ingredients that ensure flexibility, delicacy, and ease of application. Below are the essentials for the cake lace batter and some Optional Flavor Add-ins to customize your lace.
Cake Lace Batter Ingredients
For the perfect cake lace texture and structure, use the following ingredients measured exactly:
| Ingredient | Quantity | Preparation Notes |
|---|---|---|
| Unsalted Butter | 60 grams | Melted to room temperature |
| Powdered Sugar | 50 grams | Sifted |
| Cornstarch | 30 grams | Sifted |
| Gelatin | 5 grams | Bloomed in 25 ml cold water |
| Water | 25 ml | For blooming gelatin |
| Vanilla Extract | 1/2 teaspoon | Optional, for subtle aroma |
Optional Flavor Add-ins
To infuse your cake lace with unique flavors, consider these add-ins:
- Citrus Zest (lemon, orange): 1 teaspoon finely grated for a fresh zing
- Almond Extract: 1/4 teaspoon for a nutty twist
- Cocoa Powder: 1 tablespoon for a delicate chocolate lace
- Matcha Powder: 1 teaspoon for a vibrant green color and earthy note
Remember to mix these flavorings into the batter after fully combining your base ingredients for even distribution and the best flavor results.
Equipment Needed
To create stunning and delicate cake lace, having the right equipment is crucial. Below we outline both the Essential Tools and the Recommended Baking Equipment that will help us achieve perfect results every time.
Essential Tools
For mastering the art of cake lace, we need the following core tools:
- Silicone Lace Mat: This specialized mat features detailed patterns for piping the lace batter precisely. It ensures flexibility and easy removal of the delicate lace once baked.
- Offset Spatula: A small offset spatula helps us spread the batter evenly across the lace mat without disturbing the intricate designs.
- Mixing Bowls: Multiple sizes are ideal for whisking ingredients separately and combining them smoothly.
- Whisk or Electric Mixer: Consistent mixing is key to achieving a smooth, lump-free cake lace batter.
- Bench Scraper or Plastic Scraper: Essential for scraping the batter off the bowl sides and transferring it onto the mat cleanly.
- Parchment Paper or Silicone Baking Sheet (optional): To place under the lace mat if needed for additional stability.
- Cooling Rack: Allows the lace to set perfectly after baking by providing adequate airflow.
- Fine Mesh Sieve: For sifting powdered sugar and cornstarch to ensure there are no lumps in the batter.
Recommended Baking Equipment
To elevate our cake lace technique, consider these additional items:
| Equipment | Purpose |
|---|---|
| Precision Scale | Measures ingredients accurately for consistent results. |
| Gelatin Blooming Dish | Small bowl to properly bloom gelatin, ensuring smooth texture. |
| Small Saucepan | For gently warming gelatin and water mixture. |
| Silicone Spatula | Ideal for folding ingredients gently without deflating. |
| Cooling Oven or Dehydrator | To dry intricate lace designs slowly and thoroughly. |
“Having the right equipment ensures consistency, precision, and ease when crafting beautiful cake lace that can elevate any cake design.”
By preparing these tools before starting, we set ourselves up for smooth, efficient workflow and truly impressive decorative results.
Preparation
To create exquisite cake lace, precise preparation is essential. We must carefully prepare the batter and ensure the perfect consistency to achieve delicate, intricate decorations.
Preparing the Cake Lace Batter
Begin by blooming the gelatin: sprinkle the gelatin over cold water and let it sit for 5 minutes until fully absorbed and swollen. Meanwhile, sift powdered sugar and cornstarch together to prevent any lumps.
Next, in a heatproof bowl, melt the unsalted butter gently over a double boiler or low heat. Avoid overheating as this can alter the texture of the lace. Remove from heat and gradually whisk in the sifted powdered sugar and cornstarch mixture until smooth.
Add the bloomed gelatin into the warm batter and stir until fully dissolved. Incorporate any optional flavorings such as vanilla extract, citrus zest, or almond extract at this stage for a customized flavor profile.
Allow the batter to cool slightly but keep it fluid enough to pipe or spread effortlessly onto the silicone lace mat.
Tips for Achieving the Perfect Consistency
Achieving the perfect consistency determines the success of the cake lace design. The batter should be pourable but thick enough to hold intricate patterns without spreading excessively.
| Consistency Characteristic | Description | Troubleshooting Tip |
|---|---|---|
| Too Thin | Batter spreads and loses shape | Add a small amount more cornstarch, mix thoroughly |
| Too Thick | Difficult to pipe or spread | Warm gently and stir in a teaspoon of water |
| Ideal | Slightly thick, pipe-friendly | Flows easily off the spatula, holds detail |
We recommend testing a small amount of batter on the lace mat before piping the full design. This helps us check the flow and adjust consistency immediately for seamless application.
Remember to work quickly but carefully since the gelatin base begins to set as it cools. Keeping the batter at a consistent temperature ensures smooth piping and crisp lace patterns.
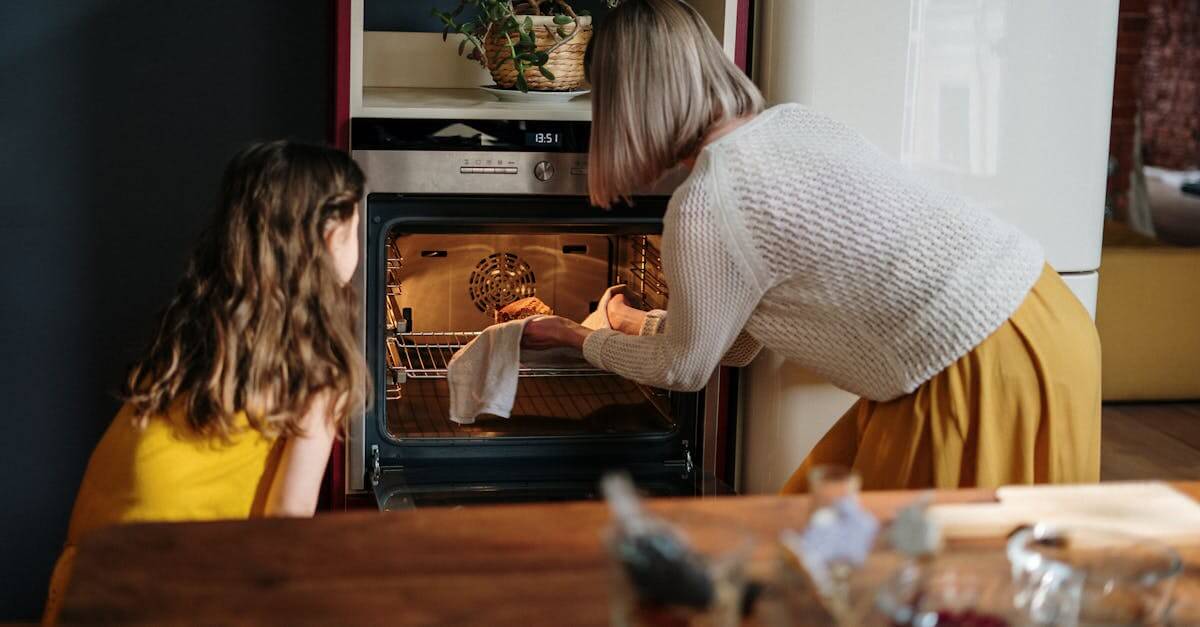
Baking Instructions
To achieve perfectly delicate and intricate cake lace, precise baking steps are crucial. Following these detailed instructions will help us create stunning lace decorations with the right texture and flexibility.
Preheating and Preparing Baking Surfaces
- Preheat the oven to 250°F (120°C).
This low temperature is essential to dry the lace gently without browning or cracking.
- Place the silicone lace mat on a flat oven-safe baking tray.
Ensure the mat lies completely flat to avoid uneven designs.
- Lightly dust the mat with a fine layer of cornstarch or powdered sugar if the recipe suggests.
This prevents sticking and makes removal easier once baked.
“Consistent oven temperature and a well-prepared baking surface are key factors in achieving flawless cake lace.”
| Step | Detail |
|---|---|
| Oven Temperature | 250°F (120°C) |
| Baking Surface | Silicone lace mat on tray |
| Preparation | Light dusting (optional) |
Baking the Cake Lace
- Using a piping bag or spatula, pipe or spread the cake lace batter evenly over the silicone mat in your desired pattern.
- Place the tray with the mat on the middle rack of the oven to ensure even drying.
- Bake for 30 to 45 minutes, depending on lace thickness and oven performance.
Watch carefully for a translucent and slightly firm texture.
- Avoid opening the oven door during baking to maintain temperature consistency and prevent cracking.
“Our goal is to gently dry the batter into flexible lace, not bake it like a typical cake.”
| Time Range (Minutes) | Texture Indicator | Action |
|---|---|---|
| 30 – 45 | Translucent, slightly firm | Remove from oven gently |
Cooling and Handling Cake Lace
- Remove the tray from the oven and allow the cake lace to cool completely on the silicone mat before attempting removal.
- Cooling time generally takes 15 to 20 minutes, depending on room temperature and lace thickness.
- Once cooled, carefully peel the lace from the silicone mat starting at one edge.
Handle gently to avoid tearing or breaking the delicate pattern.
- If the lace is too flexible, allow more cooling time.
If too brittle, check oven temperature and baking time in the next batch.
| Cooling Time (Minutes) | Handling Tips |
|---|---|
| 15 – 20 | Peel gently from edge |
| Longer if flexible | Allow extra time to set |
| Adjust bake if brittle | Lower temperature or time |
Using Cake Lace
Cake lace adds a touch of elegance and sophistication to desserts. By mastering its delicate texture and intricate patterns, we can elevate our cakes and pastries to stunning new heights.
Decorating Cakes and Pastries
We use cake lace primarily as a decorative wrap or accent on cakes and pastries. Its delicate, translucent character makes it perfect for adding refined patterns without overpowering the dessert. Here’s how we apply it effectively:
- Wrap Around Layered Cakes: After cooling, gently peel the lace from the silicone mat and wrap it around the chilled cake layers. The lace adheres nicely to buttercream or ganache, creating a visually striking border.
- Top Accents: Cut shapes or strips of lace to place atop cakes, cupcakes, or tarts for an artistic flourish.
- Textural Contrast: Pair the smoothness of fondant or buttercream with the intricate texture of lace to create visual and tactile interest.
- Flavor Pairing: When flavorings like citrus zest or matcha powder are added to lace batter, it complements the overall dessert profile enhancing the sensory experience.
“The key to flawless decoration with cake lace is to work quickly yet carefully to preserve its delicate structure.”
Creative Presentation Ideas
Elevate your cake lace use beyond traditional decorations by exploring unique presentation techniques:
| Presentation Technique | Description | Best For |
|---|---|---|
| Lace Collars | Form a circle of lace to place around dessert plates adding elegance without cake contact. | Individual plated desserts |
| Lace Bow or Ribbon | Shape lace into bows or ribbons to adorn the sides or tops of cakes for a delicate effect. | Wedding and celebration cakes |
| Lace Lacework | Layer multiple lace pieces with different flavors or colors for a multi-dimensional look. | High-end patisserie |
| Transparent Lace Sheets | Use large flat sheets of lace as edible placemats for pastries or chocolates. | Dessert buffets |
To handle lace in creative shapes, work when the lace is flexible but cooled slightly. Store unused lace in an airtight container at room temperature to maintain crispness.
By combining cake lace artistry with innovative presentation, we unlock endless decorative possibilities that impress both the eye and palate.
Storage Tips
Proper storage of cake lace is essential to maintain its delicate texture and intricate design. We recommend following these guidelines to keep your cake lace fresh and ready for use.
How to Store Cake Lace Properly
To preserve the delicacy and flexibility of cake lace, store it in a cool, dry place away from humidity and direct sunlight. Here are the best practices:
- Once completely cooled, gently remove the cake lace from the silicone mat.
- Place the lace flat on a sheet of parchment paper or wax paper.
- Stack multiple layers with parchment paper in between to avoid sticking or damage.
- Store the lace in an airtight container or resealable plastic bag.
- Keep the container in a dry, room temperature environment; avoid refrigeration as moisture causes the lace to soften or become sticky.
- For longer storage, we can wrap the entire container in aluminum foil to protect from light exposure.
“Humidity is the enemy of cake lace, causing loss of crispness and detail deterioration.”
Shelf Life of Cake Lace
The shelf life of cake lace depends on storage conditions and ingredients used. Below is an estimated guide for how long you can expect your cake lace to keep its ideal texture and appearance:
| Storage Condition | Estimated Shelf Life | Notes |
|---|---|---|
| Room temperature, airtight | 7 to 10 days | Optimal freshness and flexibility |
| Room temperature, exposed | 3 to 5 days | Risk of softening and sticky spots |
| Refrigerated, airtight | Not recommended | Moisture degrades texture |
| Frozen, airtight | Up to 1 month (not ideal) | May lose crispness after thawing |
To ensure the best decorative impact, use your cake lace within the optimal 7 to 10-day window after baking.
By carefully following these storage tips, we maintain the elegance and structural integrity of our cake lace, allowing it to transform any dessert into a stunning masterpiece.
Troubleshooting Common Issues
Mastering the art of cake lace can come with challenges. Here we address the most common issues to ensure your delicate decorations turn out perfect every time.
Preventing Burning or Over-Browning
The delicate nature of cake lace demands careful control of baking temperature and time. To avoid burning or over-browning, keep these tips in mind:
- Always preheat the oven to 250°F (120°C)—this low temperature dries the lace gently without causing browning or cracks.
- Use a silicone lace mat on a flat baking tray for even heat distribution.
- Avoid opening the oven door during baking to maintain a consistent temperature.
- Bake for 30 to 45 minutes and check for a translucent appearance coupled with slight firmness.
- If browning starts to appear, reduce the temperature by 10°F (5°C) or shorten the baking time by 5 to 10 minutes.
| Issue | Possible Cause | Remedy |
|---|---|---|
| Lace is browning | Oven too hot | Lower oven temperature |
| Lace is cracking | Temperature fluctuates | Avoid opening oven door |
| Lace burns quickly | Baking too long | Reduce baking time |
“Controlling heat precisely is key to achieving the translucent, fragile beauty that defines perfect cake lace.”
Fixing Batter Consistency Problems
The consistency of the cake lace batter is critical for creating elegant and intricate designs. If your batter is not flowing or setting correctly, consider the following:
- Too Thin: Batter will spread uncontrollably and fail to hold lace patterns.
Solution: Add a small amount of powdered sugar or cornstarch to thicken the batter gradually. - Too Thick: Batter will not pipe smoothly and can create clumps or break during spreading.
Solution: Incorporate a teaspoon of warm water or melted butter slowly and mix until reaching the ideal spreadable consistency. - The ideal batter flows easily but holds detail when piped or spread on the silicone mat.
| Batter Condition | Characteristics | Adjustment Tip |
|---|---|---|
| Too Thin | Spreads too much, lacks detail | Add powdered sugar or cornstarch |
| Ideal | Smooth flow, holds intricate lace patterns | Maintain current mix |
| Too Thick | Difficult to pipe, clumps form | Add warm water or melted butter |
“A quick test on your silicone mat before piping the entire design saves time and guarantees the perfect flow.“
Working swiftly is also essential as the gelatin base begins to set as it cools, which will affect batter consistency.
By following these troubleshooting tips for cake lace, we ensure our delicate designs maintain their beauty and structural integrity.
Conclusion
Cake lace offers a unique way to elevate our dessert presentations with elegance and charm. With the right ingredients, tools, and techniques, we can create delicate designs that add sophistication to any cake or pastry.
By practicing and experimenting with flavors and shapes, we not only enhance our baking skills but also bring a personal touch to every creation. Embracing cake lace decoration opens up endless possibilities for stunning and memorable desserts that impress both visually and taste-wise.
Frequently Asked Questions
What is cake lace and why is it used in baking?
Cake lace is an elegant, delicate decoration made from a sugar-based batter. It transforms ordinary cakes into stunning creations by adding intricate, lacy designs. Bakers use it to enhance the visual appeal of desserts for special occasions and everyday treats.
What ingredients are needed to make cake lace?
The key ingredients are unsalted butter, powdered sugar, cornstarch, gelatin, water, and optional vanilla extract. Flavorings like citrus zest, almond extract, cocoa, or matcha powder can be added for variety.
What tools do I need to create cake lace?
Essential tools include a silicone lace mat, offset spatula, mixing bowls, whisk or mixer, cooling rack, and a precision scale. A dehydrator or cooling oven is recommended for drying the lace without damage.
How do I prepare the cake lace batter?
Bloom gelatin in water, sift powdered sugar and cornstarch, and melt unsalted butter. Combine these carefully to achieve a smooth batter. Test a small amount on the lace mat to check consistency before piping the full design.
What is the ideal baking temperature and time for cake lace?
Preheat the oven to 250°F (120°C) and bake the lace for 30 to 45 minutes until it becomes translucent and slightly firm. Avoid opening the oven door during baking to maintain temperature consistency.
How should I cool and handle cake lace after baking?
Let the lace cool completely on the silicone mat for 15 to 20 minutes. Peel gently from the edges to avoid tearing. Adjust baking times if the lace seems too brittle or too flexible.
How can cake lace be used to decorate cakes and pastries?
Cake lace can be wrapped around layered cakes, used as top accents, or combined with fondant and buttercream for textural contrast. Creative ideas include lace collars, bows, and transparent sheets to elevate dessert appearance.
What is the best way to store cake lace?
Store cake lace in an airtight container at room temperature in a cool, dry place away from humidity and sunlight. Use parchment paper to separate layers. It stays fresh for 7 to 10 days when stored properly.
How can I prevent cake lace from burning or over-browning?
Maintain a consistent low oven temperature of 250°F (120°C) and avoid opening the oven door during baking. Keep an eye on baking times to prevent over-baking.
What should I do if the cake lace batter is too thin or too thick?
If too thin, add a little more powdered sugar and cornstarch; if too thick, add a small amount of water or melted butter. Test the adjusted batter on the lace mat until the ideal flow and consistency are reached.