
There’s something truly nostalgic about buttermilk cut out cookies. These classic treats bring back memories of holiday baking sessions and family gatherings. Their tender texture and subtle tang from the buttermilk make them stand out from your typical sugar cookie.
We love how versatile these cookies are—they’re perfect for decorating with icing or enjoying plain with a cup of tea. Plus, the recipe is straightforward, using simple ingredients you probably already have in your pantry. Whether you’re a seasoned baker or just starting out, these cookies are sure to become a favorite in your collection.
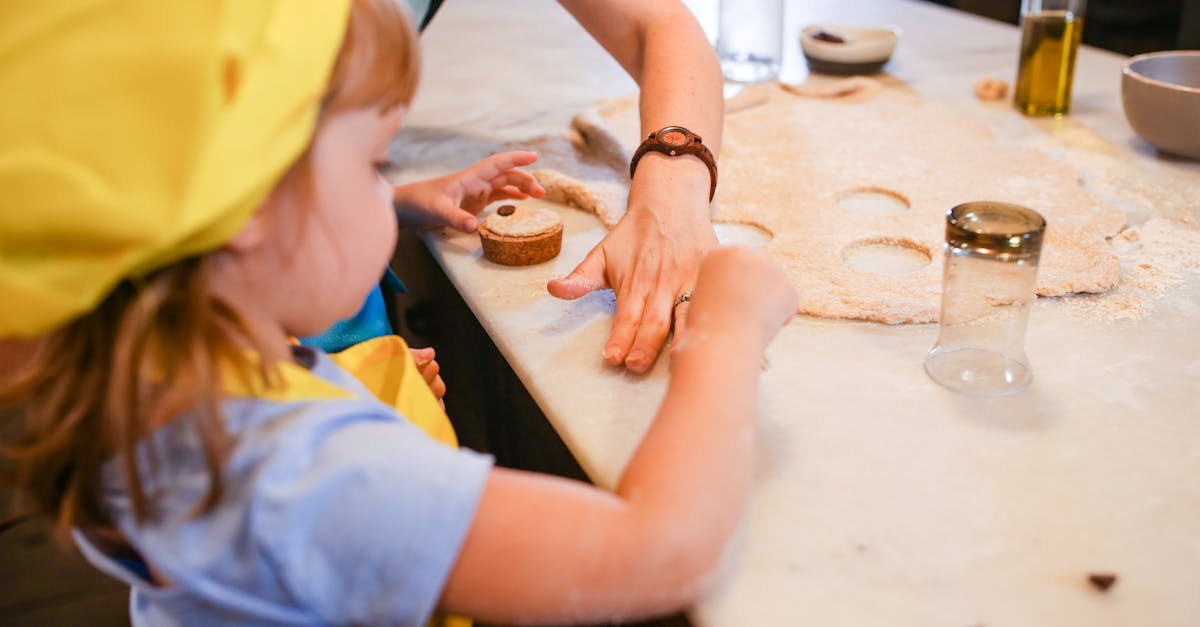
Let’s dive into making these delightful buttermilk cut out cookies that are as delicious as they are charming. You’ll appreciate how easy it is to create beautiful shapes that taste amazing every time.
Ingredients
To bake perfectly tender and flavorful buttermilk cut out cookies, we need to gather precise ingredients. These elements work together to create the classic texture and taste that set our cookies apart. Below, we break down the necessary components into dry ingredients, wet ingredients, and optional decorations to keep things organized and straightforward.
Dry Ingredients
The dry ingredients form the cookie’s structure and deliver the delightful crumb. Precision here is key for that classic cut out cookie consistency.
- 2 ¾ cups (345g) all-purpose flour, sifted for smooth texture
- 1 teaspoon baking powder to help with gentle rising
- ½ teaspoon baking soda adds slight lift and softness
- ¼ teaspoon salt to balance the sweetness and enhance flavors
- 1 tablespoon cornstarch ensures extra tenderness
| Dry Ingredient | Measurement | Purpose |
|---|---|---|
| All-purpose flour | 2 ¾ cups (345g) | Base structure |
| Baking powder | 1 teaspoon | Gentle leavening |
| Baking soda | ½ teaspoon | Softness and lift |
| Salt | ¼ teaspoon | Flavor balance |
| Cornstarch | 1 tablespoon | Tender crumb |
Wet Ingredients
Wet ingredients add richness, moisture, and that subtle tang unique to buttermilk cookies. Precise measurements ensure a dough that holds its shape perfectly when cut.
- 1 cup (226g) unsalted butter, softened to room temperature
- 1 cup (200g) granulated sugar for balanced sweetness
- 1 large egg, at room temperature for proper emulsification
- 2 teaspoons pure vanilla extract for warm, rich aroma
- ½ cup (120ml) buttermilk, the star ingredient that adds tenderness and depth
| Wet Ingredient | Measurement | Role in Dough |
|---|---|---|
| Unsalted butter | 1 cup (226g) | Adds richness and moisture |
| Granulated sugar | 1 cup (200g) | Sweetness |
| Egg | 1 large | Binds ingredients |
| Vanilla extract | 2 teaspoons | Flavor depth and aroma |
| Buttermilk | ½ cup (120ml) | Tender crumb and unique flavor |
Optional Decorations
Decoration options enhance the visual appeal and allow us to customize these classic buttermilk cut out cookies for any occasion. Here are our favorite choices to elevate them beautifully:
- Colored sanding sugar for a sparkling finish
- Royal icing to add detailed designs and vibrant patterns
- Sprinkles in assorted colors and shapes to add fun textures
- Edible glitter for a subtle shimmer on top
“Decorate your cookies after they cool completely to ensure icing and toppings set perfectly.”
By organizing these ingredients carefully, we set the stage for baking delicate, flavorful, and beautifully decorated buttermilk cut out cookies every time.
Equipment Needed
To achieve perfect buttermilk cut out cookies every time, having the right equipment is essential. Below is a detailed list and description of the tools we use to streamline the baking process and ensure consistent results.
Essential Tools for Mixing and Preparing Dough
- Mixing Bowls: Use medium and large bowls. We prefer glass or stainless steel for easy cleanup.
- Electric Mixer: A stand mixer or hand mixer with paddle attachment effortlessly creams the butter and sugar, giving us a smooth, fluffy texture.
- Measuring Cups and Spoons: Precise measurements are vital. Use dry measuring cups for flour and sugar, and liquid measuring cups for buttermilk and vanilla extract.
- Rubber Spatula: For scraping down bowl sides and folding ingredients gently.
Tools for Rolling and Shaping the Cookies
- Rolling Pin: Opt for a smooth, heavy rolling pin for even dough thickness.
- Parchment Paper or Silicone Baking Mat: These prevent sticking and help transfer cookies easily.
- Cookie Cutters: Choose various shapes and sizes depending on the occasion. Classic holiday shapes work great with our buttermilk cookie dough.
- Bench Scraper or Knife: To divide and lift dough sections cleanly without deforming the dough.
Baking and Decorating Tools
- Baking Sheets: Heavy-duty, rimmed baking sheets distribute heat evenly.
- Cooling Rack: Air circulation around the cookies prevents sogginess after baking.
- Decorating Supplies: For finishing touches, use piping bags, small offset spatulas, and brushes for applying royal icing and edible glitter.
| Equipment | Purpose | Notes |
|---|---|---|
| Mixing Bowls | Combine ingredients | Prefer glass or stainless steel |
| Electric Mixer | Cream butter and sugar | Stand or hand mixer with paddle attachment |
| Measuring Cups & Spoons | Measure dry and wet ingredients | Use appropriate cups for accuracy |
| Rubber Spatula | Scrape bowls and fold gently | Flexible and heat-resistant |
| Rolling Pin | Roll dough evenly | Smooth, heavy preferred |
| Parchment Paper/Silicone Mat | Prevent sticking and easy transfer | Reusable silicone mats eco-friendly |
| Cookie Cutters | Shape cookies | Multiple shapes enhance presentation |
| Bench Scraper/Knife | Divide and lift dough | Helps maintain dough shape |
| Baking Sheets | Bake cookies evenly | Heavy-duty, rimmed |
| Cooling Rack | Cool cookies without sogginess | Wire racks promote air circulation |
| Decorating Tools | Pipe, spread, and apply toppings | Piping bags, offset spatulas, brushes |
“Having the correct equipment not only facilitates a smooth baking experience but also elevates the quality of our buttermilk cut out cookies from good to exceptional.”
By gathering these tools before we start, we ensure our baking session is efficient and enjoyable, setting a strong foundation for creating tender and flavorful buttermilk cut out cookies worthy of any celebration.
Prep Work
Before diving into shaping and baking, preparing the dough properly and allowing it to chill are crucial steps for achieving the perfect texture and flavor in our buttermilk cut out cookies. Let’s walk through these essential stages.
Preparing the Dough
We start by creaming together the unsalted butter and granulated sugar until the mixture is light and fluffy. This process ensures our cookies will have that tender crumb and subtle sweetness. Next, we beat in the egg, vanilla extract, and buttermilk, blending until the ingredients are fully combined and smooth.
In a separate bowl, we whisk together the all-purpose flour, baking powder, baking soda, salt, and cornstarch. These dry ingredients provide the structure and delicate crumb that define our buttermilk cut out cookies.
Gradually, we add the dry ingredients to the wet mixture. We fold the flour mixture in gently using a rubber spatula or on low mixer speed, just until the dough forms. Overmixing can toughen the dough, so we handle this step with care.
Key Dough Preparation Steps
| Step | Description | Purpose |
|---|---|---|
| Cream butter & sugar | Beat until light & fluffy | Creates tender, airy texture |
| Add egg, vanilla, buttermilk | Mix until combined | Adds moisture, flavor, and tang |
| Whisk dry ingredients | Combine flour, leaveners, cornstarch, salt | Ensures even distribution |
| Fold dry into wet mixture | Mix gently until dough forms | Prevents overworking gluten |
Chilling the Dough
Chilling the dough is a non-negotiable step for buttermilk cut out cookies. We wrap the dough tightly in plastic wrap and refrigerate it for at least 2 hours or up to overnight. This process helps the dough firm up, making it easier to roll out and cut shapes without sticking or tearing.
Cold dough also controls spread during baking, preserving crisp edges and the clean lines that make cut-out cookies visually appealing and perfect for decorating.
“Chilling our dough is the secret to perfectly shaped and tender buttermilk cut out cookies every time.”
When ready, we remove the dough from the fridge and let it sit at room temperature for 5 to 10 minutes. This short rest makes rolling smooth and manageable without the dough becoming too soft.
By carefully preparing and chilling the dough, we lay the foundation for baking cut out cookies that hold their shape beautifully and deliver that classic tangy, tender bite that sets our buttermilk cut out cookies recipe apart.
Directions
Follow these detailed steps to transform our Buttermilk Cut Out Cookies dough into tender, perfectly shaped cookies that showcase the classic tangy flavor and crisp edges we love.
Rolling Out the Dough
- Lightly flour a clean work surface to prevent sticking.
- Remove the chilled dough from the refrigerator and let it sit at room temperature for about 5 minutes to soften slightly for easier handling.
- Place the dough on the floured surface and dust the rolling pin with flour as well.
- Roll the dough evenly into a ¼-inch thickness, working from the center outward to maintain consistent thickness.
- Rotate the dough occasionally to avoid sticking and to keep the shape even.
- If the dough becomes too soft or sticky, return it briefly to the refrigerator for 10 minutes before continuing.
Cutting Out the Cookies
- Dip your cookie cutters into flour before each use to prevent sticking and ensure clean edges.
- Press the cutters firmly into the dough to cut out shapes, taking care not to twist the cutter, which can distort the cookie edges.
- Transfer each cutout gently onto a prepared baking sheet lined with parchment paper or a silicone baking mat.
- Use a bench scraper or thin spatula to lift cookies carefully from the surface.
- Gather the remaining dough scraps, re-roll, and repeat until all dough is used. Avoid overworking the dough to keep cookies tender.
Baking the Cookies
- Preheat the oven to 350°F (175°C).
- Place the baking sheet with cookies in the center rack for even heat distribution.
- Bake for 8 to 10 minutes until edges are set and just beginning to turn a light golden brown.
- Avoid overbaking to maintain a tender texture and prevent dryness.
- For best results, bake cookies in batches to avoid overcrowding the oven, which can alter baking times and texture.
| Oven Temperature | Baking Time | Expected Result |
|---|---|---|
| 350°F (175°C) | 8–10 minutes | Set edges, light golden bottom, tender crumb |
Cooling the Cookies
- Remove baked cookies from the oven and let them cool on the baking sheet for 3 to 5 minutes to firm up.
- Transfer cookies to a cooling rack using a spatula to prevent sogginess on the bottom.
- Allow cookies to cool completely before decorating or storing to preserve shape and texture.
- Store cooled cookies in an airtight container at room temperature for up to 5 days, or freeze for longer storage.
By following these precise directions for rolling, cutting, baking, and cooling, we ensure our Buttermilk Cut Out Cookies deliver that perfect nostalgic bite every time.
Decorating the Cookies
Decorating our buttermilk cut out cookies is where we bring these tender treats to life. Whether we prefer a quick finish or intricate designs, choosing the right decorating technique enhances both appearance and flavor.
Simple Icing Glaze
For a straightforward, glossy finish, a Simple Icing Glaze works beautifully. Here’s how we make it:
- Mix 1 cup powdered sugar with 1 to 2 tablespoons of milk or lemon juice.
- Stir until the glaze is smooth and pourable but not too runny.
- Add a few drops of food coloring if desired.
- Use a spoon or small offset spatula to gently spread the glaze over cooled cookies.
- Let the glaze set at room temperature for 20 to 30 minutes.
This glaze adds sweetness without overpowering the tangy flavor of buttermilk in the cookies. It dries shiny with a subtle crunch that contrasts the soft cookie base perfectly.
Royal Icing for Detailed Decoration
When we want to add intricate designs or vibrant colors, royal icing is our go-to option. It’s perfect for piping outlines, flooding cookie surfaces, or adding fine details like dots and lines.
Here’s a reliable royal icing recipe to get crisp, stable decorations every time:
| Ingredient | Quantity | Notes |
|---|---|---|
| Powdered sugar | 4 cups (480 g) | Sifted |
| Meringue powder | 3 tablespoons | For structure and stability |
| Water | 5-6 tablespoons | Adjust for desired consistency |
| Lemon juice | 1 teaspoon | Adds brightness to flavor |
Steps to prepare:
- Combine powdered sugar and meringue powder in a bowl.
- Add water gradually while mixing on low speed.
- Increase speed and beat until stiff peaks form (about 5-7 minutes).
- Adjust consistency with water for piping (thicker) or flooding (thinner) by adding small amounts at a time.
- Divide and tint with gel or paste food coloring as desired.
With royal icing, we can:
- Pipe sharp outlines to define cookie shapes.
- Flood areas with thin icing for a smooth canvas.
- Add decorative details like swirls, flowers, or words once the flood layer is dry.
Tip: Work quickly and cover icing bowls with damp cloths to prevent drying out. Let each decorated layer dry fully for at least 2-4 hours before adding more to avoid bleeding colors.
By mastering both simple icing glaze and royal icing, we ensure our buttermilk cut out cookies look stunning and taste delicious every time.
Storing and Serving
Proper storage of our Buttermilk Cut Out Cookies ensures they remain fresh, tender, and flavorful for days. After cooling completely on a wire rack, place the cookies in an airtight container. For best results, separate layers with parchment paper to prevent sticking and preserve the delicate icing decorations.
| Storage Method | Duration | Notes |
|---|---|---|
| Airtight container | Up to 5 days | Keep at room temperature, away from heat and sunlight |
| Refrigeration | Up to 1 week | May slightly firm up the cookies; allow to return to room temperature before serving |
| Freezing (unfrosted) | Up to 3 months | Wrap tightly in plastic wrap then foil; thaw overnight in the fridge |
If we choose to freeze unfrosted cookies, it’s best to decorate after thawing to maintain icing quality. When serving, bring the cookies back to room temperature for their signature tender texture and the full tangy buttermilk flavor to shine through.
To enhance the serving experience, try pairing the cookies with a cold glass of milk, a cup of hot tea, or coffee. The slightly tangy notes in the cookies beautifully complement creamy or mildly bitter beverages, creating a balanced and satisfying treat.
When decorating, allow the royal icing or glaze to fully set before stacking or storing. This prevents smudging and preserves the crisp edges that make our Buttermilk Cut Out Cookies truly delightful.
Conclusion
Baking buttermilk cut out cookies brings a perfect blend of tradition and flavor to any kitchen. With the right ingredients, tools, and techniques, we can create tender cookies that hold their shape beautifully and offer that distinctive tang we love. Decorating adds a personal touch that makes each batch unique and festive.
Storing them properly ensures they stay fresh and delicious, ready to enjoy anytime. Whether for a special occasion or a simple treat, these cookies are sure to impress and satisfy. Let’s keep baking and sharing the joy of these timeless delights.
Frequently Asked Questions
What makes buttermilk cut out cookies different from regular sugar cookies?
Buttermilk cut out cookies have a tender texture and a unique tangy flavor from the buttermilk, setting them apart from standard sugar cookies. They offer a nostalgic appeal and remain versatile for decorating or enjoying plain.
What are the key ingredients needed for buttermilk cut out cookies?
You need dry ingredients like all-purpose flour, baking powder, baking soda, salt, and cornstarch. Wet ingredients include unsalted butter, granulated sugar, an egg, vanilla extract, and buttermilk. Optional decorations like sprinkles and icing enhance their appeal.
Which tools are essential for making buttermilk cut out cookies?
Essential tools include mixing bowls, an electric mixer, measuring cups and spoons, a rubber spatula, rolling pin, parchment paper or silicone mats, cookie cutters, baking sheets, a cooling rack, and decorating supplies.
Why is chilling the dough important?
Chilling the dough firms it up for easier rolling and cutting. It also controls spreading during baking, resulting in cookies with crisp edges and well-defined shapes.
At what temperature and for how long should these cookies be baked?
Bake the cookies at 350°F (175°C) for 8 to 10 minutes until the edges are set and lightly golden.
How can I decorate buttermilk cut out cookies?
Use a simple icing glaze made from powdered sugar and milk or lemon juice for a glossy finish. For detailed designs, royal icing can be piped and flooded onto cookies. Colored sugars and sprinkles add extra flair.
What is the best way to store buttermilk cut out cookies?
Store cooled cookies in an airtight container at room temperature. You can refrigerate or freeze them unfrosted; decorate after thawing. Let icing set fully before stacking or storing.
What drinks pair well with buttermilk cut out cookies?
Milk, tea, or coffee complement the cookies perfectly, enhancing their distinct tangy flavor and making for a delightful snack experience.