
Brining a goose is a game-changer when it comes to achieving juicy tender meat with a perfect balance of flavor. Unlike turkey or chicken brines, goose requires a slightly different approach due to its rich and dense texture. Our brine recipe is designed to enhance the natural flavors while keeping the meat moist throughout the cooking process.
We understand that cooking goose can be intimidating but with the right brine, it becomes much easier to master. This simple yet effective brine combines savory herbs spices and just the right amount of salt and sugar to penetrate deep into the meat. Whether you’re preparing a festive holiday meal or a special dinner, this brine will help you serve a succulent goose that everyone will love. Let’s dive into the secrets of perfect goose brining and elevate your cooking game.
Ingredients
To create the perfect brine recipe for goose, we need a balanced blend of essential components that deeply infuse flavor and retain moisture. Below are the key ingredients and some optional add-ins to elevate the taste even more.
Brine Ingredients
We start with the core ingredients that form the backbone of our brine. These elements work together to penetrate the rich texture of goose meat and keep it juicy throughout cooking.
- Water – 1 gallon (provides the base for dissolving other ingredients)
- Kosher Salt – 3/4 cup (crucial for seasoning and moisture retention)
- Brown Sugar – 1/2 cup (balances saltiness and adds subtle caramel notes)
- Black Peppercorns – 1 tablespoon (adds gentle heat and complexity)
- Bay Leaves – 3 whole leaves (bring an earthy herbal aroma)
- Garlic Cloves – 4, smashed (imparts savory depth)
- Whole Allspice Berries – 1 teaspoon (adds warm spice undertones)
| Ingredient | Quantity | Purpose |
|---|---|---|
| Water | 1 gallon | Solvent base for brine |
| Kosher Salt | 3/4 cup | Moisture retention and seasoning |
| Brown Sugar | 1/2 cup | Sweetness and flavor balance |
| Black Peppercorns | 1 tablespoon | Mild spiciness |
| Bay Leaves | 3 whole | Herbal fragrance |
| Garlic Cloves | 4, smashed | Savory aroma and taste |
| Whole Allspice Berries | 1 teaspoon | Warm spice flavor |
Optional Add-Ins for Flavor
To give the brine for goose a unique and aromatic character, we can add extra ingredients based on personal preference or the occasion.
- Fresh Rosemary Sprigs – 2 sprigs (adds pine-like, fragrant notes)
- Thyme Sprigs – 3 sprigs (fresh herbal brightness)
- Orange Zest – 1 tablespoon (introduces citrusy freshness)
- Juniper Berries – 1 teaspoon (brings subtle resinous hints reminiscent of game)
- Cinnamon Stick – 1 stick (warm sweet-spicy accent)
- Cloves – 4 whole cloves (intense aromatic spice)
- Star Anise – 1 whole (adds a delicate licorice nuance)
Using these optional additives, we customize the brine to complement the goose’s richness perfectly without overpowering its natural flavor.
Equipment Needed
To create the perfect brine for goose, having the right equipment ensures even brining and results in juicy, flavorful meat. Here are the essential tools we recommend:
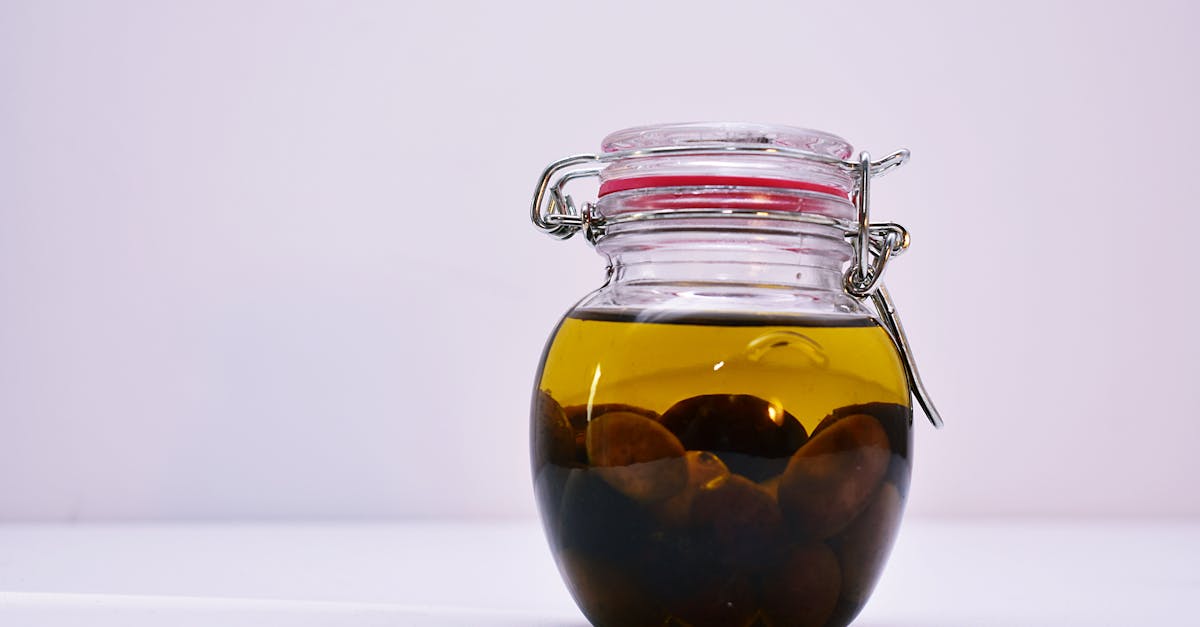
- Large Non-Reactive Container
Use a food-safe plastic, glass, or stainless steel container large enough to fully submerge the goose. This allows the brine to circulate evenly and penetrate the meat thoroughly.
- Measuring Cups and Spoons
Accurate measurement is crucial for balancing salt and sugar ratios in the brine. Using precise tools guarantees consistent flavor.
- Heavy-Duty Kitchen Scale
For weighing ingredients like kosher salt and brown sugar, a kitchen scale provides reliability and helps us maintain the ratio of salt to water needed.
- Stove or Electric Kettle
We need a heat source to dissolve salt and sugar into water when preparing the brine base.
- Mixing Spoon or Whisk
To combine ingredients thoroughly, use a wooden spoon or heat-resistant whisk.
- Refrigerator Space
A dedicated space in the fridge sized to accommodate the brining container keeps the goose at a safe temperature throughout the process.
- Food-Safe Plastic Wrap or Lid
Cover your container to prevent contamination and minimize odor mixing while brining.
- Cooling Rack and Roasting Pan (for after brining)
These are necessary tools when preparing the goose for roasting after the brine step.
| Equipment | Purpose | Notes |
|---|---|---|
| Large Non-Reactive Container | Submerge and brine the goose | Glass, stainless steel, or food-safe plastic |
| Measuring Cups and Spoons | Measure ingredients precisely | Salt, sugar, spices |
| Kitchen Scale | Weigh ingredients accurately | Ensures correct salt/sugar ratio |
| Stove/Electric Kettle | Heat water for dissolving brine ingredients | Quick sugar and salt dissolving |
| Mixing Spoon/Whisk | Combine brine ingredients evenly | Heat-resistant material preferred |
| Refrigerator Space | Keep brine and goose cold during process | Maintain food safety |
| Plastic Wrap or Lid | Prevent contamination and odor mixing | Airtight closure recommended |
| Cooling Rack & Roasting Pan | Prepare goose for cooking after brining | Ensures even roasting |
We recommend checking that your container fits your goose comfortably with enough room for the brine to circulate. This avoids uneven brining and allows the meat to soak up all the flavors thoroughly.
“We have found that using a large stainless steel or glass container keeps the brine flavor pure while being easy to clean and durable.”
By assembling all this equipment before starting, our brining process becomes smooth and efficient, setting us up for perfectly juicy and seasoned goose every time.
Preparing the Brine
To achieve a perfectly seasoned and juicy goose, preparing the brine with precise measurements and proper technique is crucial. Let’s break down the process of mixing the brine solution and adjusting it for the size of your goose.
Mixing the Brine Solution
We start by combining our essential ingredients to create a flavorful brine solution that penetrates deeply without overpowering the goose’s natural richness.
- Heat Water: Begin by heating 1 quart (4 cups) of water until warm (around 120°F). This helps dissolve the salt and sugar fully.
- Dissolve Salt and Sugar: Add ¾ cup of kosher salt and ½ cup of brown sugar to the warm water. Stir continuously until completely dissolved.
- Add Aromatics: Stir in 1 tablespoon of black peppercorns, 3 bay leaves, 4 crushed garlic cloves, and 1 teaspoon of whole allspice berries.
- Cool Down: Pour the brine into a large non-reactive container with 3 quarts (12 cups) of cold water. Stir well and chill the mixture until it reaches refrigerator temperature (below 40°F).
Pro tip: To speed up cooling, you can place the brine container in an ice bath. It’s important that the brine is fully chilled before submerging the goose to keep it safe and flavorful.
| Ingredient | Quantity | Purpose |
|---|---|---|
| Water | 4 cups warm + 12 cups cold | Solvent for salt & sugar |
| Kosher Salt | ¾ cup | Tenderizes and seasons meat |
| Brown Sugar | ½ cup | Balances saltiness, adds flavor |
| Black Peppercorns | 1 tablespoon | Adds subtle heat and aroma |
| Bay Leaves | 3 leaves | Earthy, herbal undertones |
| Garlic Cloves | 4, crushed | Adds depth and warmth |
| Allspice Berries | 1 teaspoon | Warm spice accent |
Adjusting for Goose Size
To ensure our brine recipe for goose works for any bird size, we adjust the water and seasoning quantities proportionally. The general rule is to maintain a 1:16 salt-to-water ratio by weight with balanced sugar and spices.
| Goose Weight (lbs) | Total Water (quarts) | Kosher Salt (cups) | Brown Sugar (cups) | Notes |
|---|---|---|---|---|
| 8 – 10 | 4 | ¾ | ½ | Ideal for average small goose |
| 11 – 14 | 5 | 1 | ⅔ | Larger goose, increase brine volume |
| 15 – 18 | 6 | 1¼ | ¾ | Extra-large goose, adjust spices slightly |
Steps for adjustment:
- Measure your goose’s weight accurately.
- Calculate brine amounts based on the table above.
- Keep aromatics proportional; increase bay leaves, garlic, and peppercorns slightly for bigger batches.
- Ensure enough brine fully covers the goose in your container for even seasoning.
“A well-adjusted brine preserves the juiciness and enhances the flavor uniformly throughout the bird.”
By carefully mixing the brine solution and adjusting for the goose size, we prepare the perfect foundation for a tender and flavorful holiday centerpiece.
Preparing the Goose for Brining
Before immersing the goose in our flavorful brine, we need to properly prepare the bird. These steps ensure the brine penetrates evenly, enhancing the texture and taste for a juicy, tender outcome.
Cleaning and Trimming
Cleaning and trimming the goose is essential to remove impurities and excess fat that can affect the brine’s effectiveness and final flavor.
- Remove the giblets and neck from the cavity, if included.
- Rinse the goose thoroughly under cold running water inside and out to wash away any residual blood or feathers.
- Pat dry with paper towels to help the brine adhere better to the skin.
- Trim excess fat from the neck and cavity opening but leave some for flavor and moisture.
- Inspect the skin for any remaining pin feathers and remove with tweezers if necessary.
This attention to detail will ensure a clean surface for the brine to work its magic.
Pricking the Skin for Better Brine Absorption
Goose skin is thicker and fattier than chicken or turkey, which can create a barrier to the brine solution. To maximize absorption, we gently prick the skin with a fork.
- Use a fork or skewer to prick the skin all over the goose, focusing on the breast and thighs.
- Avoid piercing too deeply; just enough to penetrate the skin and create small holes.
- This technique helps the brine penetrate beneath the skin, seasoning the meat while allowing the flavorful juices to stay locked in.
“Pricking the skin enhances flavor infusion and ensures every part of the goose becomes moist and succulent after roasting.”
| Preparation Step | Purpose | Tips |
|---|---|---|
| Remove giblets & neck | Clear cavity for brining | Save giblets for gravy or stock |
| Rinse thoroughly | Remove impurities and blood | Use cold water only |
| Pat dry with towels | Help brine adhere to skin | Remove excess moisture |
| Trim excess fat | Prevent greasy texture | Leave some fat for flavor |
| Prick skin with fork | Improve brine absorption | Avoid piercing meat deeply |
By following these preparation steps carefully, we set the stage for a perfectly brined goose with rich, flavorful meat and crispy skin.
Brining Process
Mastering the brining process is essential for achieving a juicy, flavorful goose. We will guide you step-by-step through the critical stages to ensure your bird soaks perfectly in the aromatic brine.
Submerging the Goose in Brine
To start, place the prepared goose fully submerged in the brine solution. Use a large non-reactive container, such as a food-grade plastic or stainless steel vessel, to avoid any metallic flavors. Ensure the brine covers the bird completely, including inside the cavity. If the goose tends to float, weigh it down with a clean plate or a sealed heavy object to keep it submerged.
Maintaining full immersion guarantees uniform salt and flavor penetration throughout the meat and skin. Remember:
“Partial submersion leads to uneven seasoning and texture.“
Recommended Brining Time
The length of time we submerge our goose is crucial for optimal results. The recommended brining duration depends on the bird’s weight. Below is a guideline based on the goose size:
| Goose Weight (lbs) | Brining Time (hours) |
|---|---|
| 8 – 12 | 12 – 16 |
| 12 – 16 | 16 – 20 |
| 16 – 20 | 20 – 24 |
We must avoid over-brining as it can cause the meat to become too salty and mushy. For most geese in the 12-16 lb range, 16 to 20 hours strikes the perfect balance between moisture retention and flavor enhancement.
Tips for Even Brining
To achieve even brining throughout the goose, consider these expert tips:
- Rotate the goose occasionally during the brining process to allow for consistent exposure to the brine.
- Refrigerate the brining container for food safety and to keep the solution cool. Cold brining helps tighten the meat fibers, resulting in a firmer texture.
- Keep the brine temperature below 40°F (4°C) at all times. Use an ice bath or add ice cubes if necessary.
- If using aromatic herbs and spices in the brine, ensure they are finely crushed or bruised to maximize flavor release.
- After brining, rinse the goose under cold water to remove excess salt from the surface. Pat it completely dry with paper towels before roasting to promote crisp skin.
By following these steps and maintaining precise control over each phase of the brining process, we create a goose that is tender, flavorful, and ready to impress any festive table.
After Brining
Once the brining process is complete, taking the right steps After Brining is crucial to maximize flavor and texture. Let’s walk through the essential post-brining care to ensure our goose is ready for a delicious roast.
Rinsing and Drying the Goose
To avoid excess saltiness, we thoroughly rinse the goose under cold running water. This removes any residual brine from the surface without washing away the flavors absorbed deep within the meat.
- Use cold water to rinse inside and out.
- Pay special attention to the cavity and skin folds.
- Be gentle to maintain the seasoning integrity.
Next we pat the goose dry with paper towels. This step is vital for achieving crispy skin during roasting, as moisture on the surface can cause steamy skin rather than a golden crust.
| Step | Purpose | Tips |
|---|---|---|
| Rinse with cold water | Remove excess salt brine | Rinse inside cavity thoroughly |
| Pat dry with towels | Prepare for crispy skin | Use clean, absorbent towels |
| Air dry (optional) | Further reduce surface moisture | Place on rack in fridge for 1 hour |
Pro tip: For even better skin crispness, allow the goose to air dry uncovered in the refrigerator for 1 hour after drying. This helps evaporate any remaining surface moisture.
Preparing for Cooking
After rinsing and drying our brined goose, preparation before cooking ensures even roasting and enhanced flavor.
- Let the goose rest at room temperature for 30 minutes to promote even cooking.
- Trim off any large chunks of loose skin or excess fat that could burn.
- Optionally, season lightly with fresh herbs, pepper, or a small brush of oil to enhance the skin’s browning.
- If stuffing the goose, do so loosely to allow heat circulation.
- Preheat the oven to the desired roasting temperature, typically between 325°F and 350°F depending on the recipe.
Following these steps carefully guarantees our goose will roast beautifully, combining the benefits of the brine with proper preparation to deliver a juicy, flavorful centerpiece worthy of any table.
Cooking Directions for Goose After Brining
After carefully brining our goose to enhance moisture and flavor, the next steps focus on cooking techniques that highlight the bird’s tender, juicy meat and crisp skin. Whether we choose roasting or explore a different method, precision in cooking temperature and timing is key to perfect results.
Roasting Instructions
- Preheat the oven to 325°F (163°C) for slow and even cooking.
- Prepare the goose by removing it from the refrigerator and letting it sit at room temperature for 30 minutes to ensure even cooking.
- Trim excess fat but leave a thin layer to keep the meat moist.
- Score the skin gently with a sharp knife, being careful not to cut into the meat to help render fat and crisp skin.
- Place the goose breast side up on a rack in a roasting pan to allow air circulation and fat drainage.
- Season the skin lightly with freshly ground black pepper and optional herbs if desired.
- Roast the goose for approximately 18-20 minutes per pound, adjusting for weight and oven specifics:
| Weight (lbs) | Roasting Time (minutes) | Internal Temp Target (°F) |
|---|---|---|
| 8 | 144-160 | 165 |
| 10 | 180-200 | 165 |
| 12 | 216-240 | 165 |
- Baste occasionally with rendered fat every 30 minutes to keep the skin glossy and flavors rich.
- Check internal temperature in the thickest part of the thigh with a meat thermometer — target a safe 165°F.
- Rest the goose for 20 minutes after removing it from the oven; this redistributes juices for more tender slices.
- Carve and serve, enjoying the crispy skin and juicy interior enhanced from our brine recipe for goose.
“Roasting at a moderate temperature and allowing the bird to rest are crucial steps for the ultimate juicy and flavorful goose.”
Alternative Cooking Methods
If roasting isn’t your preference, these alternative methods also showcase the benefits of our brine:
-
Slow Cooker Cooking
- Set the slow cooker on low.
- Place the rinsed and patted dry goose inside with aromatic herbs.
- Cook for 6-8 hours or until internal temperature reaches 165°F.
- Finish the skin under a broiler for 2-3 minutes to crisp.
-
Smoking
- Preheat smoker to 225°F.
- Place goose on rack, inserting a probe thermometer.
- Smoke for approximately 5-6 hours until internal temp is 165°F.
- This infuses a unique smoky flavor, enhancing the brine’s infused spices.
- Preheat grill for indirect cooking at 350°F.
- Place goose skin side up away from direct flames.
- Grill covered for 2-3 hours, turning occasionally.
- Monitor temperature closely for best results.
Each method benefits from letting the bird reach room temperature before cooking and resting post-cooking to maximize moistness and taste developed during brining.
Tips and Tricks for Best Results
To achieve the perfectly brined goose with juicy meat and flavorful depth, we must pay attention to several key factors during the brining process. Here are essential tips and expert tricks to get the best results:
1. Maintain Consistent Brine Temperature
Keeping the brine cold throughout the entire brining time is critical to food safety and optimal flavor absorption.
- Use a large container that fits easily in your refrigerator
- Add ice cubes or an ice bath to the brine if necessary
- Aim for a brine temperature between 36°F and 40°F during the entire soak
2. Submerge the Goose Fully
The goose must be completely submerged in the brine to ensure even seasoning.
- Use a non-reactive weight such as a clean plate or zip-top bag filled with water to keep the bird under the surface
- Rotate or flip the goose halfway through the brining time for uniform penetration
3. Brining Time Guidelines
Over-brining leads to an overly salty or mushy texture, so adhere carefully to time recommendations based on goose weight:
| Goose Weight (lbs) | Brining Time (hours) | Notes |
|---|---|---|
| 8 – 10 | 6 – 8 | Ideal for smaller birds |
| 11 – 14 | 10 – 12 | Most common size range |
| 15 – 18 | 12 – 16 | Larger geese require longer |
“Remember: It’s better to under-brine slightly than to risk overpowering saltiness.”
4. Prick Skin to Enhance Brine Absorption
Before placing the goose in the brine, lightly prick the skin using a fork or skewer. This creates tiny channels for the brine to better penetrate, especially through the thick skin and fat layers. Avoid puncturing the meat to prevent flavor loss.
5. Rinse and Dry Thoroughly After Brining
Once the brining time is complete, rinse the goose under cold running water to remove excess salt. Then:
- Pat dry with paper towels to remove moisture
- Let the goose air dry uncovered in the refrigerator for at least 1 hour to promote crisp skin during roasting
6. Adjust Aromatics to Personal Preference
Our base brine recipe includes classic spices like black peppercorns, bay leaves, and garlic cloves, but don’t hesitate to add or reduce the optional add-ins to suit your taste. For example:
- Add juniper berries for a piney aroma
- Use orange zest or cinnamon for a warm citrus note
7. Use a Food-Safe, Non-Reactive Container
Avoid metal containers that react with the brine’s salt content. Ideal containers include:
- Food-grade plastic bins
- Large glass or ceramic vessels
- Clean, heavy-duty plastic bags designed for brining
8. Balance Salt with Sugar
The 1:16 salt-to-water ratio is fundamental. Including brown sugar helps balance the savory notes and promotes a beautifully browned skin after roasting.
Summary of Best Practices
| Step | Key Action | Reason |
|---|---|---|
| Temperature Control | Keep brine 36°F – 40°F | Food safety and flavor absorption |
| Goose Submersion | Fully submerge, weigh down if needed | Even brining throughout the bird |
| Timing | Follow time by weight table | Avoid salty or mushy texture |
| Skin Preparation | Prick skin with fork or skewer | Enhances brine penetration |
| Post-Brining Rinse and Dry | Rinse, pat dry, air dry in fridge | Remove excess salt, crisp skin |
| Container Choice | Use food-safe non-reactive container | Prevent unwanted chemical reactions |
| Aromatics Adjustment | Customize flavor with optional herbs/spices | Personalize the flavor profile |
By following these tried-and-true tips and tricks, we ensure every step contributes to a succulent, flavorful goose that will impress at any festive meal or special occasion.
Conclusion
Brining a goose might seem daunting at first, but with the right approach and attention to detail, it becomes a straightforward process that elevates your dish. Our brine recipe and tips are designed to bring out the best in the meat’s natural richness while ensuring every bite is juicy and flavorful.
By preparing the bird properly and following precise brining techniques, we can confidently create a delicious centerpiece that impresses at any gathering. With a little practice, this method will become a reliable part of your holiday or special occasion cooking routine.
Frequently Asked Questions
Why should I brine a goose before cooking?
Brining a goose helps the meat stay juicy and tender by allowing it to absorb moisture and seasonings. It enhances flavor and prevents dryness, especially important because goose has rich, dense meat that requires a different approach than chicken or turkey.
What ingredients are essential in a goose brine?
A basic goose brine includes water, kosher salt, brown sugar, black peppercorns, bay leaves, garlic cloves, and whole allspice berries. These ingredients penetrate the meat to keep it moist and flavorful.
Can I customize the brine with other flavors?
Yes. Optional add-ins like fresh rosemary, thyme, orange zest, juniper berries, cinnamon, cloves, and star anise can elevate the flavor without overpowering the goose’s natural taste.
What equipment do I need for brining a goose?
You need a large non-reactive container, measuring cups and spoons, a kitchen scale, a stove or electric kettle, a mixing spoon or whisk, refrigerator space, and food-safe plastic wrap or a lid.
How do I prepare the brine solution?
Heat water, dissolve the salt and sugar, add aromatics, and then cool the mixture completely. Use an ice bath to speed up cooling if needed before submerging the goose.
How do I adjust the brine quantities for different goose sizes?
Maintain a 1:16 salt-to-water ratio and increase the other ingredients proportionally based on your goose’s weight to ensure proper flavor and moisture balance.
How should I prepare the goose before brining?
Clean and trim the goose, remove giblets, rinse thoroughly, pat dry, trim excess fat while keeping some, and prick the skin with a fork to improve brine absorption.
How long should I brine a goose?
Brining time depends on weight; typically, 12 to 24 hours. Avoid over-brining to prevent overly salty meat. Ensure the goose is completely submerged and keep the brine cold.
What post-brining steps improve the goose’s flavor and texture?
Rinse the goose under cold water to remove excess salt, then pat dry. Air-dry in the refrigerator for about an hour to help achieve crispy skin during cooking.
What are some recommended cooking methods for brined goose?
Roasting is traditional, but slow cooking, smoking, and grilling are great alternatives. Always let the goose reach room temperature before cooking and rest it afterward to retain moisture.
How can I ensure even brining?
Use a large non-reactive container, keep the goose fully submerged, rotate it occasionally, and maintain the brine temperature between 36°F and 40°F.
Why is it important to rinse and dry the goose after brining?
Rinsing removes excess salt to prevent overpowering flavor, and drying the skin helps it crisp up nicely during roasting or other cooking methods.