
Eczema can be a tough challenge for little ones, and as parents, we’re always looking for gentle, natural ways to soothe their sensitive skin. One surprising yet effective ingredient? Breast milk. Packed with antibodies and nutrients, it’s not just amazing for feeding—it can also work wonders for irritated skin.
This DIY breast milk eczema cream is a simple, chemical-free solution that uses the healing properties of breast milk combined with a few safe, natural ingredients. It’s easy to make and gives us peace of mind knowing exactly what’s going on our baby’s skin.
Whether you’re dealing with mild flare-ups or just want a natural moisturizer, this recipe is a great way to repurpose any extra breast milk. Let’s dive into this nurturing remedy that’s as gentle as it is effective.
Breast Milk Eczema Cream Recipe
Creating this gentle and nourishing eczema cream is simple and uses natural, baby-safe ingredients. Let us walk you through step-by-step instructions for preparing a DIY cream that can help soothe your little one’s skin.
Ingredients
- 1/2 cup breast milk (fresh or thawed, expressed milk)
- 1 tablespoon coconut oil, melted
- 1 teaspoon shea butter, softened
- 2 tablespoons beeswax pastilles
- 1/2 teaspoon vitamin E oil (optional, for added nourishment)
- A few drops of lavender essential oil (optional, for calming effects)
Equipment
- Double boiler or heat-safe bowl and saucepan
- Spoon or spatula
- Sterilized small glass jar with an airtight lid for storage
Step-by-Step Instructions
Step 1: Melt the Base Ingredients
- Place the coconut oil, shea butter, and beeswax pastilles into the top of a double boiler or a heat-safe bowl placed over a saucepan of simmering water.
- Stir the mixture gently until everything is completely melted and smooth. Make sure no solids remain.
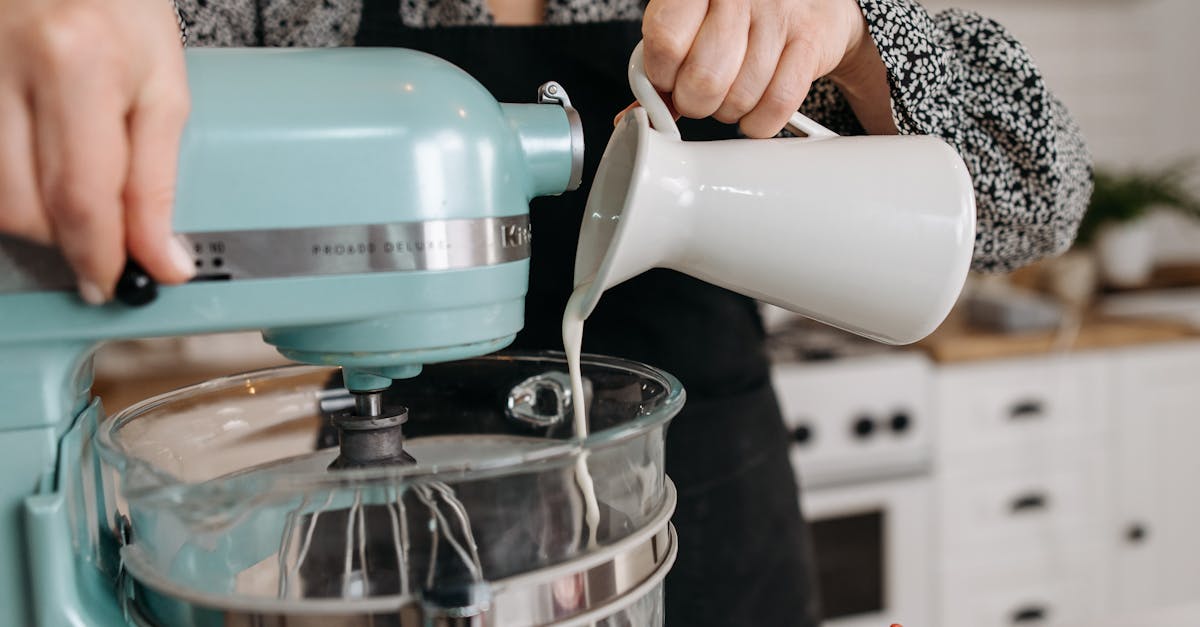
Step 2: Add Breast Milk
- Remove the bowl from the heat and allow it to cool slightly, around 5 minutes.
- Gradually whisk in the breast milk. Stir continuously to blend it into the oil-based mixture.
Step 3: Incorporate Additives
- If you’re including vitamin E oil and/or lavender essential oil, add them at this stage.
- Stir thoroughly to ensure equal distribution of these ingredients.
Step 4: Blend Until Creamy
- Use a spoon or small blender to whisk the mixture together thoroughly. The emulsification process ensures a creamy consistency.
- Continue blending until the cream thickens slightly as it cools.
Step 5: Store in a Sterilized Jar
- Transfer the finished mixture into a sterilized glass jar.
- Seal the jar with an airtight lid and store it in the refrigerator for up to one week for freshness.
| Ingredients | Measurement | Purpose |
|---|---|---|
| Breast milk | 1/2 cup | Base & provides healing properties |
| Coconut oil | 1 tablespoon | Moisturizes & nourishes skin |
| Shea butter | 1 teaspoon | Softens skin & locks in moisture |
| Beeswax pastilles | 2 tablespoons | Thickens cream texture |
| Vitamin E oil (optional) | 1/2 teaspoon | Adds antioxidants |
| Lavender essential oil | Few drops (optional) | Provides calming effect |
Ingredients
To make our gentle and natural breast milk eczema cream, we’ll need safe, nourishing ingredients that work together to soothe and moisturize sensitive skin. Here’s what you’ll need:
- 1/2 cup of fresh or thawed breast milk (acts as a natural hydrating and soothing agent).
- 2 tablespoons of beeswax pastilles (provides structure and acts as a natural preservative).
- 1 tablespoon of melted coconut oil (locks in moisture and helps fight dryness).
- 1 teaspoon of softened shea butter (calms irritation and nourishes the skin).
- Optional: 1-2 drops of lavender essential oil (offers a calming fragrance and mild skin benefit).
- Optional: 2-3 drops of vitamin E oil (boosts the cream’s shelf life and acts as an antioxidant for enhanced skin healing).
We recommend using organic ingredients for an even safer and eco-friendly preparation. Breast milk can vary in consistency, which may slightly alter the final texture. Ensure that all ingredients are fresh and high-quality before starting.
Tools And Equipment
To make our breast milk eczema cream, we need a selection of essential tools and equipment to ensure a smooth and sterile preparation. Below is a detailed breakdown of the required items. Proper use of these tools guarantees precision and hygiene, ensuring the cream is safe for sensitive skin.
Required Tools and Equipment
- Sterilized glass jar (for storage): A small, airtight jar is ideal to maintain freshness and prevent contamination.
- Double boiler: Necessary for gently melting the coconut oil, shea butter, and beeswax without burning.
- Measuring spoons and cups: Ensure accurate measurement of each ingredient for the perfect consistency.
- Wooden or silicone spatula: For stirring and combining the ingredients without scratching equipment.
- Glass bowl: Used for mixing melted ingredients with precision.
- Immersion blender or whisk: Helps achieve a creamy and uniform texture in the finished product.
- Dropper (optional): Useful for adding precise amounts of essential oils like lavender or vitamin E.
- Labels and marker: To label the jar with the preparation date for accurate tracking of freshness.
Suggested Additional Hygiene Steps
- Gloves: Wearing food-safe gloves can help maintain hygiene while preparing the cream.
- Sterilizing spray or wipes: Clean all tools and your workspace thoroughly before starting.
Tool Purpose at a Glance
| Tool/Equipment | Purpose |
|---|---|
| Sterilized glass jar | Safely stores the cream to maintain quality. |
| Double boiler | Gently melts ingredients like beeswax, coconut oil, and shea butter. |
| Measuring spoons/cups | Ensures accurate ingredient proportions. |
| Wooden/silicone spatula | Combines ingredients effectively and prevents scratches. |
| Glass bowl | Provides a clean surface for meticulous mixing. |
| Immersion blender/whisk | Creates a creamy, smooth final product. |
| Dropper (optional) | Adds precise amounts of oils, if optional ingredients are used. |
| Labels and marker | Marks preparation to track storage duration. |
By having these tools ready and organizing our workspace, we can confidently prepare the DIY breast milk eczema cream with minimal effort and excellent results.
Directions
Follow these simple step-by-step instructions to create a gentle and effective DIY breast milk eczema cream. Proper preparation and care will ensure the best results for soothing and nourishing sensitive skin.
Prep
- Sterilize all tools and equipment. Use a sterilizing spray or wipes to sanitize the glass jar, measuring spoons, cups, double boiler, and the area where you’ll be working.
- Measure all ingredients accurately. Prepare the following:
- 1/2 cup fresh or frozen (thawed) breast milk
- 1 tablespoon melted coconut oil
- 1 teaspoon softened shea butter
- 2 tablespoons beeswax pastilles
- Optional: a few drops of vitamin E oil for preservation and lavender essential oil for scent.
Combine Ingredients
- Place the beeswax pastilles, coconut oil, and shea butter into a double boiler.
- Heat over low to medium heat until everything is fully melted, stirring gently with a sanitized spoon or whisk.
- Remove from heat and let cool for about 1-2 minutes, ensuring the mixture is warm but not hot.
Expert Tip: Heating gently prevents the nutrients in the breast milk and optional oils from breaking down.
Mix To Desired Consistency
- Add the breast milk slowly into the warm base mixture, stirring continuously.
- Add a few drops of optional oils (vitamin E and lavender essential oil) for enhanced preservation and fragrance.
- Blend the mixture using an immersion blender or whisk. Blend on low speed until the cream achieves a smooth, creamy consistency.
| Ingredient | Role in Recipe |
|---|---|
| Breast Milk | Natural hydration and soothing agent |
| Beeswax | Adds texture and preservation |
| Coconut Oil | Locks in moisture |
| Shea Butter | Calms irritation |
| Vitamin E Oil (Optional) | Extends shelf life |
| Lavender Essential Oil (Optional) | Adds a soothing scent |
Storage Instructions
- Transfer the cream into a sterilized glass jar using a clean spatula.
- Seal the jar tightly and store it in the refrigerator. The cool environment helps preserve the cream and prevents spoilage.
- Use the cream within one week for optimal freshness, as the natural ingredients are delicate.
Reminder: Always use clean hands or a sanitized spoon to scoop out the product for application to avoid contamination.
Tips For Best Results
To ensure the breast milk eczema cream is as effective and safe as possible, we need to focus on hygiene, consistency, and optimal application practices. Follow these expert tips for the best results:
1. Use Fresh or Properly Stored Breast Milk
- Always use freshly expressed breast milk or milk that has been safely stored in the refrigerator or freezer.
- If using frozen breast milk, thaw it in the refrigerator overnight or place the sealed container in warm water. Avoid exposing it to high heat during the thawing process to preserve its nutrients.
2. Choose High-Quality, Organic Ingredients
- Ensure all additives, such as coconut oil, shea butter, and beeswax pastilles, are organic and pure to reduce the risk of irritants or allergens.
- If using essential oils like lavender, choose a therapeutic-grade oil to maintain safety, especially for sensitive skin.
3. Sterilize Your Equipment
- Always sterilize the storage jars, tools, and workspace to prevent bacteria from contaminating the cream.
- Use boiling water or sterilizing solutions for jars and utensils. Allow them to air-dry on a clean surface before use.
4. Monitor Temperature During Preparation
- When melting ingredients in your double boiler, keep the heat low to retain the nutrients in the breast milk and other ingredients. Overheating can reduce their effectiveness.
| Ingredient | Ideal Handling Tip |
|---|---|
| Breast Milk | Avoid heating above body temperature to preserve vital enzymes. |
| Coconut Oil | Melt gently for better mixing. |
| Beeswax Pastilles | Heat until just liquefied to maintain its structure. |
5. Customize Based on Skin Needs
- For persistent irritation, add vitamin E oil to enhance the cream’s soothing and healing effects.
- If the skin is extra sensitive, perform a patch test with a small amount of cream on unaffected skin before applying broadly.
6. Store Properly for Long-Lasting Freshness
- Refrigerate the cream in a sterilized, airtight glass jar to extend its shelf life and maintain its effectiveness.
- Label the jar with the preparation date. Ensure the cream is used within one week for optimal quality and safety. Discard unused portions beyond this timeframe.
7. Apply Gently and Hygienically
- Always use clean hands or a sanitized applicator when applying the cream to avoid introducing bacteria.
- Gently massage a thin layer onto affected areas twice daily or as needed. Ensure the skin is clean and dry before application for maximum absorption.
8. Avoid Overloading with Additives
- Stick to simple, safe ingredients to lower the chance of skin reactions. Essential oils, while beneficial, should only be used sparingly and if the child’s skin tolerates them.
9. Track Changes in Skin Condition
- Regularly assess how the skin responds to the cream. If irritation worsens, discontinue use and consult with a dermatologist or pediatrician.
By incorporating these tips, we’ll maximize the effectiveness of our breast milk eczema cream and provide a soothing, gentle solution for irritated skin.
Make-Ahead Instructions
Preparing the breast milk eczema cream in advance can simplify your routine and ensure that you always have this soothing remedy on hand for flare-ups. Follow these tips and steps to make and store the cream efficiently while preserving its effectiveness and safety.
1. Batch Preparation for Convenience
We recommend doubling the recipe quantities if you expect frequent use. Preparing a larger batch at once not only saves time but also ensures that you have enough cream readily available for emergencies. For instance:
| Ingredient | Single Batch | Double Batch |
|---|---|---|
| Breast Milk | 1/2 cup | 1 cup |
| Melted Coconut Oil | 1 tablespoon | 2 tablespoons |
| Softened Shea Butter | 1 teaspoon | 2 teaspoons |
| Beeswax Pastilles | 2 tablespoons | 4 tablespoons |
| Optional Vitamin E Oil | A few drops | A few drops |
| Optional Lavender Oil | A few drops | A few drops |
Doubling the recipe ensures you maximize your ingredients while maintaining the correct ratios for consistency and effectiveness.
2. Storage Tips for Longevity
To store your breast milk eczema cream, pour it into sterilized, airtight containers immediately after preparation. Sterilization prevents contamination and extends the shelf life. Keep these points in mind:
- Refrigerate Immediately: Store the cream in the refrigerator at 37°F–40°F for freshness.
- Use Ice Cube Trays for Portioning: Pour the cream into food-safe ice cube trays, freeze, and transfer to a sealed bag for easy portioning. This method helps you thaw only what you need, minimizing waste.
3. Labeling for Proper Use
Always label your containers with the preparation date. This will make it easier to monitor the cream’s freshness. Use the following guidelines to determine usability:
- Fresh Cream Shelf Life: Up to 1 week in the refrigerator.
- Frozen Cream Shelf Life: Up to 3 months in the freezer.
4. Easy Defrosting
When you’re ready to use the cream after freezing, thaw it in the refrigerator overnight. If you’re in a rush, place the frozen portion in a sealed bag and submerge it in warm (not hot) water for a few minutes to safely soften the cream without altering its texture or properties.
Pro Tip: Maintain Hygiene
Always use clean hands or sanitized utensils to handle the cream. This prevents contamination and ensures the cream remains safe for sensitive skin.
By following these make-ahead tips, we can efficiently prepare and store our DIY breast milk eczema cream, making it a hassle-free, effective remedy when we need it most.
Conclusion
Creating a DIY breast milk eczema cream is a simple, natural way to care for sensitive skin. By combining the nourishing properties of breast milk with gentle, organic ingredients, we can offer a safe and effective solution for soothing irritation. With proper preparation, storage, and hygiene, this homemade remedy becomes a reliable tool in managing flare-ups and keeping skin moisturized. It’s a thoughtful way to repurpose breast milk while providing comfort and relief for our little ones.
Frequently Asked Questions
1. What is breast milk eczema cream?
Breast milk eczema cream is a natural DIY remedy made from breast milk and safe ingredients like coconut oil, shea butter, and beeswax. It helps soothe and hydrate irritated skin, offering a chemical-free solution for eczema in children.
2. How does breast milk help with eczema?
Breast milk contains natural anti-inflammatory and antibacterial properties that promote healing, reduce irritation, and hydrate sensitive skin, making it an effective solution for managing eczema.
3. What ingredients are needed to make this cream?
The recipe includes 1/2 cup of breast milk, 1 tablespoon of melted coconut oil, 1 teaspoon of softened shea butter, 2 tablespoons of beeswax pastilles, and optional additives like vitamin E oil or lavender essential oil.
4. How do you store breast milk eczema cream?
Store the cream in a sterilized glass jar in the refrigerator. Use it within one week for optimal freshness and effectiveness.
5. Can I customize the cream?
Yes! You can add optional ingredients like vitamin E oil to extend shelf life or lavender essential oil for a soothing scent. Adjust ingredients based on your child’s skin needs.
6. Is this cream safe for sensitive skin?
Yes, the cream uses gentle, natural ingredients without harsh chemicals, making it suitable for sensitive or eczema-prone skin. However, consult your pediatrician before use.
7. How can I make the cream last longer?
You can freeze small portions of the cream in an ice cube tray, defrosting them as needed. This minimizes waste and ensures freshness.
8. Do I need to sterilize tools before starting?
Yes, sterilizing tools and equipment is essential to maintain hygiene and prevent contamination during the preparation process.
9. Can I use previously frozen breast milk for the cream?
Yes, as long as the milk has been properly stored and thawed according to guidelines, it can be used to make the cream.
10. How often can I apply the cream to my child’s skin?
You can apply the cream as needed, typically 2–3 times per day, or during flare-ups. Always use clean hands or a sanitized utensil for application.
11. What precautions should I take when making the cream?
Ensure all tools are sterilized, monitor temperatures carefully to preserve nutrients, and label the cream with the preparation date to track freshness.
12. What if my child has a skin reaction to the cream?
Discontinue use immediately and consult a pediatrician. Even with natural ingredients, every skin type is unique, so monitor for any adverse reactions.
13. Can adults use breast milk eczema cream?
Yes, adults with sensitive skin or eczema can also benefit from this natural and gentle cream.
14. How easy is it to make the cream?
The recipe is simple and beginner-friendly, requiring just a few steps: melting, mixing, and blending ingredients to achieve a creamy texture.
15. What is the shelf life of the cream?
The cream should be used within one week if refrigerated. Proper storage and hygiene during preparation ensure it remains effective.