
Breaking bread together has always been a symbol of connection and community. Our break bread recipe brings that tradition right into your kitchen with a simple yet satisfying loaf that’s perfect for any occasion. Whether you’re sharing a meal with family or enjoying a quiet moment with a cup of coffee this bread offers a comforting homemade touch.
This recipe uses basic ingredients but delivers a soft crumb and golden crust that’ll make you want to bake again and again. We’ve crafted it to be easy enough for beginners yet rewarding for seasoned bakers. Let’s dive into a baking experience that fills your home with warmth and the irresistible aroma of fresh bread.
Ingredients
To create our Break Bread Recipe, we rely on a straightforward set of ingredients that come together to form a loaf with a tender interior and a perfectly crisp crust. Each ingredient plays a crucial role in the bread’s texture and flavor, so precise measurements are key.
Below is a detailed list of what we need:
| Ingredient | Quantity | Preparation Notes |
|---|---|---|
| All-purpose flour | 3 ½ cups (420g) | Fresh and sifted for better texture |
| Warm water | 1 ½ cups (360ml) | Approximately 110°F or 45°C |
| Active dry yeast | 2 ¼ teaspoons | One standard packet |
| Granulated sugar | 1 tablespoon | To activate the yeast |
| Salt | 1 ½ teaspoons | For balanced flavor |
| Olive oil | 2 tablespoons | Adds moisture and a subtle richness |
Note: Using warm water is essential for activating the yeast properly, so test the temperature before mixing to avoid killing the yeast.
Each of these ingredients combines to create the structure and flavor profile that define our break bread. We recommend using fresh, high-quality flour and yeast to ensure the best rise and crumb texture.
Let’s gather these essentials to begin our journey to breaking fresh, warm bread that brings us closer together.
Equipment Needed
To create the perfect Break Bread Recipe, having the right equipment is essential. We recommend gathering these tools before starting, ensuring a smooth baking process and the best results.
Essential Equipment List:
- Mixing bowl: Choose a large bowl to accommodate ingredients comfortably and allow for dough expansion.
- Measuring cups and spoons: Accurate measurement is critical for consistent bread texture and flavor.
- Kitchen scale (optional but recommended): For precise flour and ingredient weighing.
- Wooden spoon or dough whisk: Ideal for mixing dough without overworking the gluten.
- Clean kitchen towel or plastic wrap: Necessary for covering dough during rising phases to retain moisture.
- Loaf pan or baking sheet: Depending on the desired bread shape, either a standard loaf pan or a flat baking sheet works well.
- Oven thermometer: Ensures the oven reaches and maintains the correct baking temperature.
- Cooling rack: Crucial for allowing the bread to cool evenly without becoming soggy.
| Equipment | Purpose |
|---|---|
| Mixing bowl | Combine and proof dough |
| Measuring cups/spoons | Accurate ingredient measurement |
| Kitchen scale | Precision weighing of flour and other ingredients |
| Wooden spoon/dough whisk | Dough mixing without overworking |
| Kitchen towel/plastic wrap | Cover dough for proper fermentation |
| Loaf pan/baking sheet | Shape the bread for baking |
| Oven thermometer | Maintain exact baking temperature |
| Cooling rack | Cool bread evenly after baking |
We advise using a digital kitchen scale if possible to measure flour since even slight variations affect the crumb texture noticeably. Covering the dough with a clean kitchen towel or plastic wrap during rising helps maintain an ideal environment for yeast activation.
“A well-equipped kitchen leads to well-baked bread,” so let’s ensure we have each item ready before mixing our ingredients. This preparation step is key to achieving that soft crumb and golden crust our Break Bread Recipe promises.
Preparation
Let’s dive into the crucial steps of preparing our Break Bread dough. Attention to detail here sets the foundation for a soft crumb and golden crust.
Preparing the Dough
To start, combine the all-purpose flour and salt in a large mixing bowl. Slowly add the warmed water mixed with the yeast (more on that next) and olive oil. Using a wooden spoon or dough whisk, stir the mixture until it forms a shaggy dough.
Next, transfer the dough onto a lightly floured surface. Knead it with firm pressure for about 8 to 10 minutes. We want the dough to be smooth and elastic—this develops the gluten network giving bread its structure. If the dough is sticky, sprinkle a little more flour as needed but avoid over-flouring to keep the bread tender.
Once kneaded, form the dough into a tight ball. Lightly oil the mixing bowl and place the dough back inside. Cover it with a clean kitchen towel or plastic wrap and let it rest in a warm spot for 1 to 1.5 hours until it doubles in size.
Activating the Yeast
Activating the yeast properly is critical for our Break Bread recipe to rise perfectly. Begin by measuring warm water between 105°F and 110°F; this temperature range wakes the yeast without killing it.
Add the active dry yeast and a pinch of granulated sugar to the warm water. Stir gently and wait for about 5 to 10 minutes. You will notice a foamy layer forming on the surface—this “bloom” signals the yeast is alive and ready.
| Step | Details |
|---|---|
| Water Temperature | 105°F to 110°F |
| Yeast Type | Active dry yeast |
| Sugar Quantity | Pinch (approximately 1/4 tsp) |
| Activation Time | 5 to 10 minutes |
| Expected Result | Foamy yeast mixture |
If foam does not appear, the yeast might be expired or the water temperature was incorrect—start over to ensure your bread rises well.
Pro Tip: Always use fresh, high-quality yeast for the best results and never add yeast directly to hot water as it will kill the organisms.
Following these preparation steps carefully will set us up for a delicious Break Bread with a soft interior and a beautifully crisp crust.
Instructions
Follow these step-by-step instructions to create a perfect Break Bread loaf that boasts a soft crumb and a golden, crispy crust.
Mixing the Ingredients
- In a large mixing bowl, sift together 3 ½ cups of all-purpose flour and 1 ½ teaspoons of salt.
- In a separate small bowl, combine 1 ¼ cups of warm water (105°F to 110°F) with 2 ¼ teaspoons of active dry yeast and 1 tablespoon of granulated sugar.
- Stir gently and wait about 5 minutes until the yeast mixture develops a foamy layer indicating activation.
- Once foamy, add the yeast mixture along with 2 tablespoons of olive oil to the flour mixture.
- Mix using a wooden spoon or dough whisk until the dough starts forming and pulls away from the sides of the bowl.
Kneading the Dough
- Transfer the dough onto a lightly floured surface.
- Knead the dough for about 8 to 10 minutes using the ball of your hand to stretch and fold the dough.
- Aim for a smooth and elastic texture that springs back when pressed.
- If the dough is too sticky, sprinkle with a little more flour but avoid adding too much to keep the bread tender.
First Rise
- Lightly oil a clean bowl and place the dough inside, turning it once to coat with oil.
- Cover the bowl with a damp kitchen towel or plastic wrap.
- Set the bowl in a warm, draft-free area.
- Let the dough rise until it doubles in size, approximately 1 to 1 ½ hours.
Shaping the Dough
- Gently punch down the dough to release the trapped air.
- Turn the dough out on a lightly floured surface.
- Shape it into a loaf by folding the edges under and creating tension on the surface.
- Place the shaped dough into a greased loaf pan or on a baking sheet if you prefer a free-form loaf.
Second Rise
- Cover the shaped dough loosely with the kitchen towel or plastic wrap.
- Allow it to rise again until nearly doubled, about 45 minutes to 1 hour.
- Preheat your oven to 375°F (190°C) during the last 15 minutes of this rise.
Baking the Bread
- Place the risen dough in the preheated oven.
- Bake for 30 to 35 minutes until the crust is a deep golden brown and the bread sounds hollow when tapped.
- Use an oven thermometer to ensure stable oven temperature throughout the process.
- Remove the bread from the oven and place it on a cooling rack.
- Let the bread cool completely before slicing to retain moisture and texture.
| Step | Time Required | Temperature | Notes |
|---|---|---|---|
| Yeast Activation | 5 minutes | 105°F–110°F (40°C) | Water must be warm, not hot |
| Kneading | 8–10 minutes | Room temperature | Dough becomes smooth and elastic |
| First Rise | 1–1 ½ hours | Room temperature | Dough should double in size |
| Second Rise | 45 minutes–1 hour | Room temperature | Rise until nearly doubled |
| Baking | 30–35 minutes | 375°F (190°C) | Golden crust with hollow sound when tapped |
Pro tip: Using fresh, high-quality ingredients and maintaining steady temperatures elevates the flavor and texture of our Break Bread.
Tips for Perfect Break Bread
To master the art of breaking bread that is soft inside with a golden crust, we need to focus on several key tips that ensure our loaf turns out perfect every time.
1. Use the Right Water Temperature for Yeast Activation
Warm water between 105°F and 115°F is optimal for activating active dry yeast. Water that is too hot will kill the yeast, and water that is too cold will not activate it properly.
“Yeast is a living organism – treat it gently with the correct warmth to make your bread rise beautifully.“
| Water Temperature | Effect on Yeast |
|---|---|
| Below 100°F | Slow/no activation |
| 105°F – 115°F | Optimal activation |
| Above 130°F | Yeast killed |
2. Knead the Dough Thoroughly
Kneading develops gluten, which gives the dough its structure and elasticity. We aim for a smooth and slightly sticky dough that springs back slowly when pressed.
- Knead for at least 8 to 10 minutes manually or 5-7 minutes using a stand mixer with a dough hook.
- Avoid over-kneading which can cause a dense loaf.
3. Give the Dough Enough Time to Rise
Patience is key. We let the dough rest in a warm draft-free place until it doubles in size. This typically takes 1 to 2 hours depending on room temperature.
“Fast rising means active yeast and better flavor development.”
4. Control Your Oven Temperature Precisely
Preheat your oven fully to the recommended baking temperature before placing the bread inside. Switching from cold to hot impacts crust texture and crumb structure.
- Use an oven thermometer to confirm the heat is steady at 375°F.
- Adjust the rack to middle position for even heat distribution.
5. Use Quality Ingredients
Fresh active dry yeast, high-quality all-purpose flour, and pure olive oil make a noticeable difference in flavor and texture. Check expiration dates especially for yeast.
“The flavor of your bread starts with the quality of the ingredients.”
6. Shape the Dough Gently but Firmly
When shaping the dough for the final rise, handle it with care to preserve the gas bubbles formed during fermentation but also shape a firm loaf to support even baking.
Summary Table: Key Factors for Perfect Break Bread
| Factor | Recommendation | Reason |
|---|---|---|
| Water Temperature | 105°F – 115°F | Proper yeast activation |
| Kneading Time | 8-10 minutes manual | Develop gluten structure |
| Rising Time | 1-2 hours until doubled | Flavor and texture development |
| Baking Temperature | 375°F | Golden crust and fully baked crumb |
| Ingredient Quality | Fresh yeast, high-grade flour/oil | Better taste and texture |
| Dough Handling | Gentle but firm shaping | Maintain gas bubbles for airy crumb |
By following these proven tips we ensure our Break Bread is consistently light, flavorful, and inviting — a true centerpiece for connection and community.
Serving Suggestions
Enjoying our Break Bread Recipe is more than just about tasting fresh bread. Serving it in ways that highlight its soft crumb and golden crust enhances every bite and enriches the shared experience. Here are some thoughtful and delicious serving ideas to turn our bread into a centerpiece of any gathering.
Warm and Simple
- Slice the loaf while it is still slightly warm to expose the tender interior.
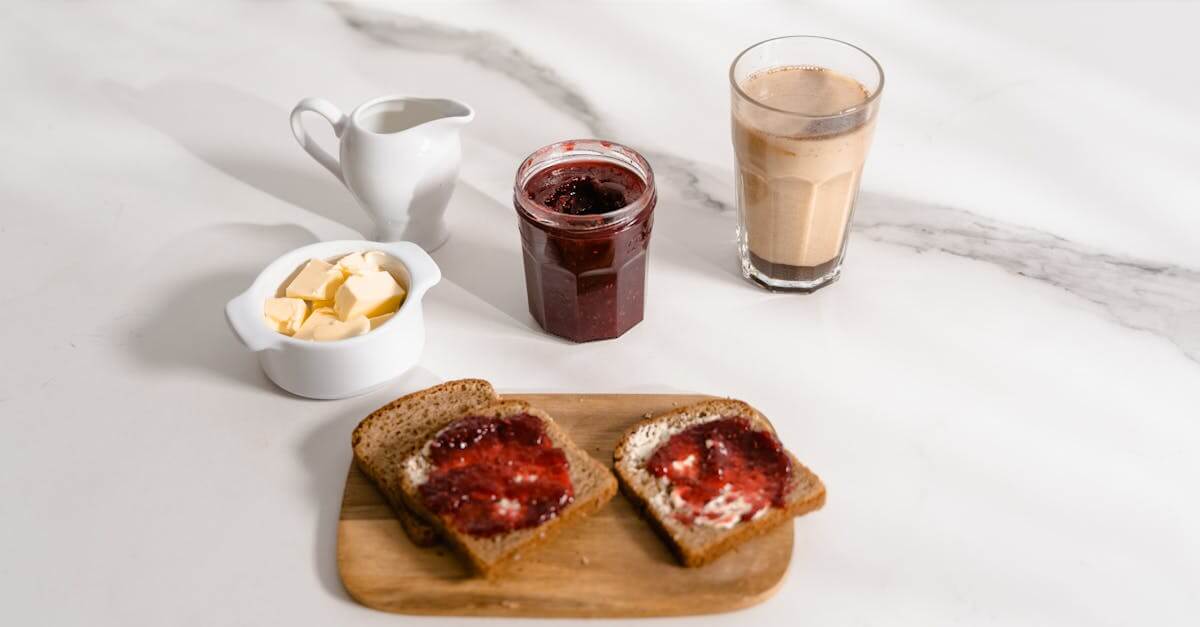
- Serve plain or with a light smear of unsalted butter to appreciate the bread’s natural flavor.
- Pair with a cup of hot herbal tea or freshly brewed coffee for a comforting start or end to the day.
Savory Accompaniments
- Offer alongside bowls of olive oil and balsamic vinegar for dipping.
- Use the bread to scoop up vibrant tomato bruschetta or rich hummus.
- Assemble open-faced sandwiches with layers of avocado, smoked salmon, and a sprinkle of fennel seeds for a gourmet touch.
Hearty Comfort
- Toast slices lightly and top with melted cheese and fresh herbs to create rustic cheese toasts.
- Serve next to warm soups like creamy butternut squash or hearty minestrone; the bread’s crust provides satisfying texture against smooth broth.
- Transform the bread into stuffing by cubing and combining with aromatics, vegetables, and broth, then baking for holiday meals.
Sweet Pairings
- Drizzle slices with local honey or spread homemade fruit preserves for a sweet contrast.
- Pair with a creamy ricotta cheese and fresh berries for a light dessert or brunch option.
- Create French toast by soaking sliced bread in an egg-cinnamon mixture before pan-frying until golden.
Serving Temperature and Storage Tips
To maximize the enjoyment of our Break Bread, serve freshly baked or gently warmed. Store leftovers tightly wrapped at room temperature for up to 3 days or freeze wrapped slices to preserve freshness longer.
| Serving Tip | Reason | Suggestion |
|---|---|---|
| Serve warm | Enhances flavor and texture | Wrap in clean towel before serving |
| Use accompaniments | Adds complementary flavors | Olive oil, herb butter, preserves |
| Toast or reheat gently | Restores crust crunchiness | Use oven or toaster |
| Proper storage | Maintains freshness | Airtight bag or freezer storage |
Storage and Shelf Life
Proper storage is essential to preserve the freshness, texture, and flavor of our Break Bread. Here are the best practices to ensure your loaf stays delightful for as long as possible.
Room Temperature Storage
- Once the bread has completely cooled on a cooling rack, wrap it tightly in plastic wrap or place it in an airtight container.
- Store at room temperature, ideally between 65°F and 75°F, away from direct sunlight and moisture.
- Under these conditions, Break Bread will remain fresh for up to 3 days.
Refrigeration
- We recommend avoiding refrigeration because it can cause the bread to dry out and lose its soft crumb.
- If refrigeration is necessary due to a humid environment, wrap the bread tightly in plastic wrap and then in aluminum foil.
- Refrigerated bread can last up to 1 week but expect minor texture loss.
Freezing for Extended Shelf Life
- To maintain freshness beyond a few days, freezing is the best option.
- Slice the bread before freezing for convenience. Wrap each portion or the entire loaf tightly in plastic wrap then place it in a resealable freezer bag.
- Label with the date and freeze immediately.
- Frozen Break Bread maintains optimal quality for up to 3 months.
| Storage Method | Wrapping Material | Ideal Temperature | Shelf Life | Notes |
|---|---|---|---|---|
| Room Temperature | Plastic wrap or airtight bag | 65°F – 75°F | Up to 3 days | Keep away from heat and moisture |
| Refrigeration | Plastic wrap + aluminum foil | 37°F | Up to 1 week | May dry out the bread |
| Freezing | Plastic wrap + freezer bag | 0°F (-18°C) | Up to 3 months | Best sliced; thaw at room temperature |
Thawing and Refreshing
- To thaw, remove the bread from the freezer and let it sit wrapped at room temperature for 1 to 2 hours.
- For a freshly baked texture, warm slices in a toaster or oven at 350°F (175°C) for 5 to 7 minutes.
- This refreshes the crust’s crispness and revives the soft crumb inside.
“Proper storage not only extends the shelf life but preserves the delicious aroma and inviting texture of our Break Bread, ensuring every bite feels freshly baked.”
By following these steps, we can enjoy our homemade loaf long after baking, sharing its warmth and flavor whenever we please.
Conclusion
Baking our own bread brings more than just delicious flavors into our homes—it creates moments that connect us. With simple ingredients and a bit of patience, we can craft a loaf that fills the air with warmth and invites everyone to gather around.
By mastering the techniques and tips shared, we ensure every loaf is soft inside with a golden crust outside. Whether enjoyed fresh or saved for later, our homemade break bread becomes a symbol of comfort and togetherness.
Let’s keep baking, sharing, and breaking bread as a way to nourish both body and soul.
Frequently Asked Questions
What ingredients are needed for the Break Bread recipe?
The recipe requires all-purpose flour, warm water (105°F to 115°F), active dry yeast, granulated sugar, salt, and olive oil. Using fresh, high-quality ingredients ensures the best flavor and texture.
Why is warm water important in this bread recipe?
Warm water activates the yeast properly, helping it foam and rise. The ideal temperature is between 105°F and 115°F to avoid killing the yeast or slowing fermentation.
What equipment do I need to bake this bread?
You’ll need a mixing bowl, measuring cups and spoons, a kitchen scale, a wooden spoon or dough whisk, a clean towel or plastic wrap, a loaf pan or baking sheet, an oven thermometer, and a cooling rack.
How long should I knead the dough?
Knead the dough until it becomes smooth and elastic, which usually takes about 8 to 10 minutes by hand. Proper kneading develops gluten for a good texture.
How long does the dough need to rise?
Let the dough rise until it doubles in size, typically 1 to 2 hours depending on room temperature. This allows the yeast to ferment, creating a soft crumb.
What is the ideal baking temperature and time?
Bake the bread at 375°F to 400°F for about 25 to 30 minutes until the crust is golden and crisp.
How should I store leftover bread?
Wrap cooled bread tightly in plastic wrap or place it in an airtight container at room temperature for up to 3 days. For longer storage, freeze it and thaw before use.
Can I refrigerate the bread to keep it fresh?
Refrigeration is not recommended as it dries out the bread faster. Freezing is the best option to maintain freshness over time.
What are some simple serving ideas for this bread?
Serve the bread warm with unsalted butter, olive oil, or balsamic vinegar. It also pairs well with cheeses and makes great open-faced sandwiches or rustic toasts.
What is a key tip for activating yeast successfully?
Use water at the right temperature (105°F–115°F) and wait until a foamy layer forms on top before mixing with other ingredients. This confirms the yeast is active.