
Baking bread without yeast might sound challenging but with our bread machine yeast free recipes, it’s easier than you think. Whether you’re avoiding yeast due to allergies or simply out of stock, these recipes deliver delicious, fluffy bread every time.
We’ve crafted recipes that work perfectly in your bread machine, so you can enjoy fresh homemade bread without the wait for yeast to rise. From quick breads to savory loaves, these yeast free options are great for anyone looking to expand their baking repertoire.
Let’s dive into simple, reliable recipes that bring variety and flavor to your kitchen while keeping things yeast free. You’ll love how easy it is to make bread that satisfies every craving without compromising on taste or texture.
Ingredients for Bread Machine Yeast Free Recipes
When baking bread without yeast in a bread machine, selecting the right ingredients is essential to achieve the perfect texture and flavor. Below, we break down the core components that make bread machine yeast free recipes both delicious and satisfying.
Common Ingredients Overview
To create a successful loaf without yeast, we start with fundamental baking staples. These ingredients provide structure, moisture, and taste to our yeast-free bread. Here’s what we typically use:
- Flour: All-purpose, whole wheat, or specialty gluten-free flours work well depending on the recipe.
- Liquid: Water, milk, or dairy alternatives provide hydration.
- Fats: Butter, oil, or margarine contribute to a tender crumb.
- Sweeteners: Sugar, honey, or maple syrup add a touch of sweetness and enhance browning.
- Salt: Vital for flavor balance.
Alternative Leavening Agents
Since we are baking without yeast, leavening relies on chemical agents that produce carbon dioxide to help the bread rise. These alternatives are key to fluffy yeast-free bread:
| Leavening Agent | Function | Usage Tip |
|---|---|---|
| Baking Powder | Releases gas on moisture and heat | Use fresh for best rise |
| Baking Soda | Reacts with acidic ingredients | Pair with buttermilk or yogurt |
| Self-Rising Flour | Contains baking powder and salt | Simplifies recipe measurement |
“Leavening agents like baking powder and baking soda are crucial to replicating that airy consistency usually provided by yeast.”
Optional Add-ins and Flavorings
To elevate our yeast-free bread, we include various optional ingredients that add texture, flavor, and nutritional value:
- Herbs and Spices: Rosemary, thyme, cinnamon, or nutmeg enhance the aroma and taste.
- Nuts and Seeds: Walnuts, sunflower seeds, flaxseeds add crunch and richness.
- Dried Fruits: Raisins, cranberries, or apricots bring bursts of sweetness.
- Cheese or Garlic: For savory breads, these intensify flavor profiles.
Using these carefully selected ingredients helps us craft flavorful, moist, and perfectly risen bread right from our bread machine, without relying on yeast.
Equipment Needed for Yeast Free Bread Machine Recipes
To achieve perfect yeast free bread using our bread machine, having the right equipment is essential. The proper tools ensure precision and a consistent texture in every loaf we bake.
Bread Machine Settings
Using the correct Bread Machine Settings is critical for successful yeast free bread machine recipes. Unlike traditional yeast breads, yeast free recipes often require different baking cycles to accommodate alternative leavening agents and batter-like doughs.
- Quick Bread or Cake Setting
This setting usually works best as it uses shorter mixing and baking times appropriate for baking powder or baking soda leavened doughs.
- Basic or White Bread Setting (Shortened Cycle)
When available, choose a cycle with minimal rising time or one designed for dense dough to prevent over-processing.
- Custom Setting
Some machines allow manual adjustments of kneading, rising, and baking times. We recommend customizing these based on the recipe’s instructions.
| Bread Machine Setting | Purpose | Recommended For |
|---|---|---|
| Quick Bread or Cake | Short mixing and baking cycle | Most yeast free bread recipes |
| Basic/White Bread (Short Cycle) | Reduced rising time | Dense or heavier doughs |
| Custom | Tailored kneading, rising, and baking durations | Expert users adjusting recipes |
Measuring Tools
Precision in measuring ensures consistent yeast free bread results from our bread machine. Since these recipes rely heavily on chemical leaveners, even slight measurement variances can impact texture and rise.
- Digital Kitchen Scale
Measuring ingredients by weight provides accuracy far beyond volume measurements. This is crucial when working with flours and liquids that affect dough consistency.
- Measuring Cups and Spoons
Use sturdy, standard-sized measuring cups and spoons for ingredients like baking powder, baking soda, salt, and sweeteners. Level off dry ingredients carefully to maintain correct ratios.
- Liquid Measuring Cup
A clear cup with measurement markings is necessary for precise liquid ingredients, including water, milk, or oils, all vital for the moisture content in yeast free bread machine recipes.
“We’ve found that investing in a reliable digital scale and quality measuring tools elevates our bread-making from good to consistently great.”
Combining the correct bread machine settings with accurate measuring tools allows us to master the art of baking delicious, fluffy, and perfectly risen yeast free bread effortlessly every time.
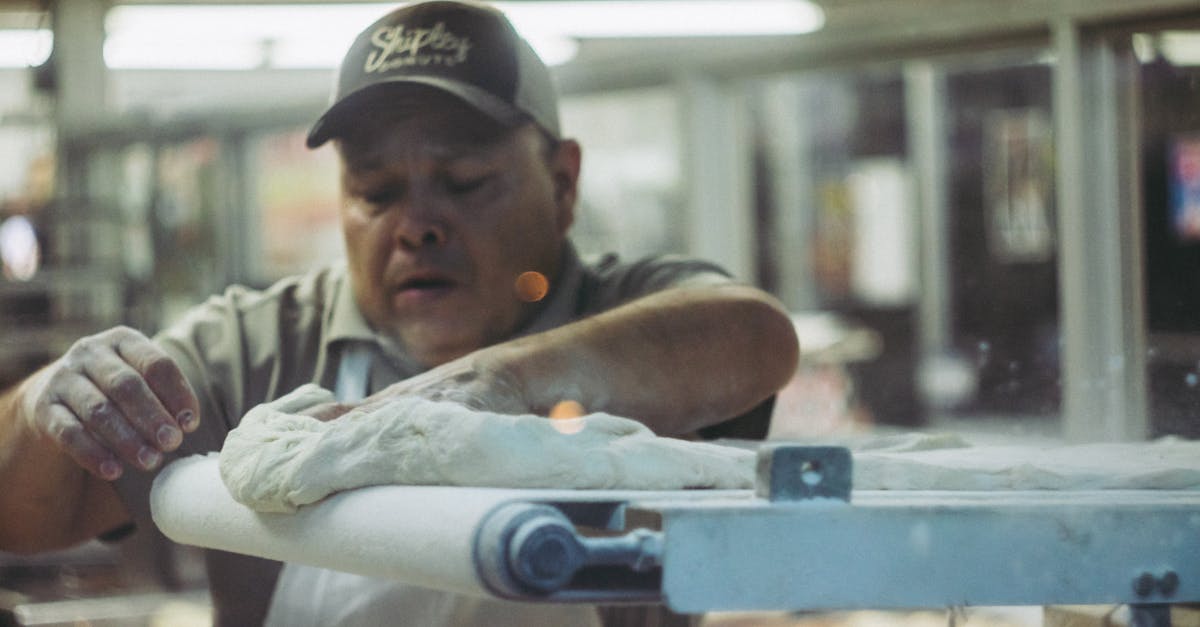
Preparing the Dough
Mastering the art of preparing the dough is essential for successful yeast-free bread machine baking. Let’s break down the process to ensure our dough comes out perfectly every time.
Mixing Ingredients
We start by adding ingredients to the bread machine in the order specified by its manufacturer, typically placing liquids first, followed by dry ingredients. This layering prevents premature activation of the leavening agents.
- Liquids first: water, milk, or other liquid bases
- Fats: melted butter, oil, or margarine
- Sweeteners: honey, sugar, or molasses (if using)
- Dry ingredients: flour, salt, and baking powder or baking soda
- Optional add-ins: herbs, nuts, dried fruits, or cheese added after initial mixing
We measure all ingredients precisely to avoid dense or flat bread. Using a digital kitchen scale for flour and other dry components guarantees accuracy.
During mixing, the bread machine should produce a slightly sticky but cohesive dough. If the dough feels too dry or wet, we adjust with small amounts of water or flour, respectively.
Using Alternative Leavening Agents Correctly
Yeast-free recipes rely on baking powder and baking soda to achieve rise and fluffiness. Getting the quantities right is critical to avoid bitter flavors or insufficient leavening.
| Leavening Agent | Typical Amount per 3 Cups Flour | Notes |
|---|---|---|
| Baking Powder | 1 to 1 ½ teaspoons | Use single-acting or double-acting |
| Baking Soda | ½ to 1 teaspoon | Requires acid (buttermilk, yogurt) |
When using baking soda, we always pair it with an acidic ingredient like buttermilk or yogurt to activate the rising process. Baking powder already contains acid, so it can be used with neutral liquids.
Important: Add leavening agents directly into the dry ingredients and avoid early mixing to prevent losing their rising power.
“The key to successful yeast-free bread is timely activation of leavening agents during baking.”
We also adjust dough mixing and baking times to avoid overworking the dough, which can reduce its ability to rise.
By carefully mixing ingredients in the right order and precisely using alternative leavening agents, we ensure our bread machine yeast-free recipes deliver soft, airy textures without yeast.
Bread Machine Baking Process
Mastering the bread machine baking process for yeast-free recipes ensures consistent, fluffy, and flavorful bread. Careful attention to each step—from ingredient loading to cycle selection—makes all the difference.
Loading Ingredients Into the Machine
Properly layering ingredients is essential for successful yeast-free bread in a bread machine. We recommend the following order for optimal mixing and rising:
- Liquids first: Water, milk, or non-dairy alternatives measured precisely to create the right dough consistency.
- Fats: Butter, oil, or margarine added next to enrich texture and moisture.
- Sweeteners: Honey, maple syrup, or sugar incorporated to enhance flavor and assist leavening.
- Dry ingredients: Flour blends, salt, and alternative leavening agents like baking powder or baking soda placed on top to prevent premature activation.
- Optional add-ins: Herbs, nuts, dried fruits, or cheese added last to avoid interference with rising.
“Layering ingredients correctly ensures that leavening agents activate at the optimal time, giving us the perfect rise and texture.”
Selecting the Right Cycle and Settings
Choosing the correct cycle tailored for yeast-free bread machine recipes is crucial. Here’s a quick guide for us to optimize results:
| Cycle Type | Description | When to Use |
|---|---|---|
| Quick Bread | Short mixing and baking times | For batter-like or soda bread |
| Cake Cycle | Gentle mixing with soft crumb | For sweet or delicate yeast-free breads |
| Basic/White Bread | Longer kneading and baking times | For denser doughs requiring structure |
| Custom Cycle | User-defined settings | For experienced bakers tweaking hydration and bake time |
Always select Quick Bread or Cake settings for our yeast-free recipes as these prevent overmixing and ensure leavening agents activate correctly within the shorter baking timeframe.
Tips for Optimal Baking Results
To consistently bake delicious yeast-free bread in our bread machine, we follow these expert tips:
- Measure ingredients with precision using a digital kitchen scale or leveling off measuring cups to avoid dough that is too dry or wet.
- Do not open the machine lid during baking, as this can disrupt rising.
- Add acidic ingredients (like buttermilk or lemon juice) when using baking soda to activate leavening fully and achieve a soft crumb.
- Monitor dough consistency early in the kneading cycle. If too sticky, add flour one tablespoon at a time; if too dry, add liquids gradually.
- Allow bread to cool in the pan for 10 minutes before removing to retain shape and moisture.
Cooling and Serving the Bread
Proper cooling and thoughtful serving enhance the enjoyment of our bread machine yeast free recipes. Cooling sets the crumb structure and locks in flavor, while serving ideas maximize the deliciousness of each loaf.
Proper Cooling Techniques
After baking, remove the bread pan carefully to avoid burns. Gently invert the loaf onto a wire rack to cool completely. Cooling on a rack allows air circulation around the bread, preventing sogginess and helping form a perfect crust.
| Step | Action | Details |
|---|---|---|
| 1. Remove from pan | Use oven mitts | Avoid spilling or damaging the loaf |
| 2. Invert the loaf | Tap gently to release | Let the bread fall out onto the rack |
| 3. Cool at room temp | Leave uncovered for 1-2 hrs | Ensure full cooling before slicing |
Slice the bread only after it has cooled completely. Cutting while warm can cause a gummy texture and uneven slices. Patience here yields a better texture and a more enjoyable eating experience.
Serving Suggestions
Our yeast-free bread machine loaves pair wonderfully with a variety of toppings and accompaniments. Here are some ideas to elevate your serving:
- Savory options: Spread with softened butter, herb-infused olive oil, or cream cheese mixed with fresh herbs.
- Sweet additions: Top slices with fruit preserves, honey, or nut butters for a comforting treat.
- Sandwich base: Use thick slices for sandwiches filled with grilled vegetables, cheese, or roasted meats.
- Toasting: Toast slices lightly for added crunch and a warm aroma; perfect for breakfast or snacking.
“Serving is the final step where we can creatively enjoy the fruits of our yeast-free baking.”
By following these cooling and serving tips, our bread machine yeast free recipes reveal their full flavor and texture potential.
Storing Yeast Free Bread
Proper storage is essential to maintain the freshness, texture, and taste of our yeast free bread. By following the right techniques, we can preserve its softness and prevent it from drying out or becoming stale quickly.
Best Practices for Storage
To keep our yeast free bread at its best, we recommend these key storage practices:
- Cool Completely: After baking, allow the bread to cool fully on a wire rack. This prevents moisture buildup, which can cause sogginess.
- Wrap Tightly: Use plastic wrap, beeswax wraps, or airtight containers to shield the bread from air exposure. This helps retain moisture and prevents it from drying out.
- Room Temperature Storage: Store the bread at room temperature for up to 2 days. Avoid storing bread in the refrigerator, as the cooler environment accelerates staling and hardening.
- Avoid Direct Sunlight and Heat: Keep bread away from warm or sunny spots to maintain its texture and delay spoilage.
| Storage Method | Duration | Notes |
|---|---|---|
| Room Temperature | Up to 2 days | Use airtight wrap, avoid heat sources |
| Refrigeration | Not recommended | Causes faster staling |
| Freezing | Up to 3 months | See freezing tips below |
Freezing and Reheating Tips
Freezing yeast free bread is an excellent option for extending its shelf life without compromising flavor or texture. Here’s how we do it right:
- Slice Before Freezing: Slice the bread so we can thaw only what we need. This minimizes waste and speeds up reheating.
- Wrap Securely: Wrap slices or whole loaves tightly in plastic wrap, then place them in resealable freezer bags or airtight containers to prevent freezer burn.
- Label and Date: Always label packages with the freezing date to keep track of storage times.
- Reheating Method:
- Thaw at Room Temperature: Remove from the freezer and let bread thaw for 1–2 hours wrapped, to keep moisture locked in.
- Toast or Warm: For a fresh-from-the-oven texture, toast slices directly or warm whole loaves in a preheated oven at 350°F (175°C) for 10–15 minutes, wrapped in foil to prevent drying.
Tip: Avoid microwaving bread as it can make the texture rubbery or tough.
By following these Storing Yeast Free Bread guidelines, we ensure every bite stays delightful and fresh longer, perfect for our versatile and health-conscious bread machine recipes.
Troubleshooting Common Issues
If you encounter challenges with your bread machine yeast free recipes, don’t worry. We can fix common problems like dense texture or improper rise by fine-tuning ingredient ratios, settings, and techniques. Let’s troubleshoot together.
Dense or Heavy Bread Solutions
Dense or heavy bread often results from ingredient imbalances or mixing issues. Here are precise steps to lighten your bread:
- Check flour type and measurement: Use light, fluffy all-purpose or bread flour and measure by spooning into your cup or weighing with a digital scale. Too much flour causes heaviness.
- Adjust liquid ratio: Yeast-free breads need adequate moisture. If dough feels thick or dry during mixing, add 1–2 tablespoons of liquid (water, milk, or juice) gradually.
- Avoid overmixing: Set your bread machine to the Quick Bread or Cake cycle to prevent tough crumb from excessive kneading.
- Use fresh leavening agents: Baking powder or soda past their prime lose effectiveness, producing dense bread.
- Include acidic ingredient: When using baking soda, pair it with an acid like buttermilk, yogurt, or lemon juice to activate rise properly.
- Avoid excessive fats or sweeteners: Too much butter, oil, or sugar weighs down the dough.
| Common Cause | Solution | Effect |
|---|---|---|
| Overmeasured flour | Use scale, spoon flour lightly into cup | Lighter crumb, softer texture |
| Insufficient liquid | Add 1–2 tbsp liquid during mixing | Moist, tender dough |
| Overmixing | Use Quick Bread/Cake cycle | Prevents dense crumb |
| Old leavening agents | Replace baking powder/soda | Improved rise and fluffiness |
| No acidic ingredient | Add yogurt, buttermilk, or lemon juice | Proper activation of baking soda |
| Excess fats or sweeteners | Reduce butter/oil and sugar | Balanced, airy bread |
Texture and Rise Adjustments
Achieving the perfect texture and rise in yeast free bread machine recipes requires attention to detail. Consider these adjustments for optimal results:
- Leavening balance: Combine correct amounts of baking powder and baking soda. Too little results in flat bread; too much causes coarse crumb and bitter taste.
- Layer ingredients carefully: Add liquids first, then fats and sweeteners, followed by dry ingredients and leaveners on top. This order ensures timely activation.
- Timing is crucial: Start the bread machine soon after adding baking soda to avoid leavening agents losing power.
- Use proper settings: The Quick Bread or Cake cycle suits most yeast-free breads, providing shorter kneading and baking tailored for baking powders.
- Temperature control: Avoid cold liquids; room temperature is ideal for activating leavening agents.
- Monitor dough consistency: Dough should be slightly sticky but cohesive. Add flour or liquid in small increments to adjust during the first mix if possible.
| Factor | Recommended Adjustment | Result |
|---|---|---|
| Baking powder/soda | 1–1.5 tsp baking powder + ¼ tsp baking soda | Ideal rise and tender crumb |
| Ingredient layering | Liquids > fats > sweeteners > dry ingredients | Ensures optimal activation |
| Immediate baking | Start machine within 5 minutes of mixing | Full leavening effect |
| Bread machine cycle | Quick Bread or Cake cycle | Proper mixing, rising, and baking |
| Liquid temperature | Use room temperature liquids | Improves leavening reaction |
| Dough texture | Slightly sticky and cohesive | Balanced moisture and structure |
By applying these targeted adjustments, we can master bread machine yeast free recipes and enjoy consistently fluffy, light loaves perfectly suited for every meal.
Conclusion
Yeast-free bread machine recipes open up a world of delicious possibilities for anyone looking to avoid yeast without sacrificing flavor or texture. With the right ingredients, precise measurements, and proper machine settings, we can easily create soft, fluffy loaves that satisfy every craving.
By mastering these techniques and paying attention to details like cooling and storage, we ensure our bread stays fresh and enjoyable longer. Whether for quick snacks or hearty meals, yeast-free bread made in our bread machines is both convenient and versatile.
Let’s keep experimenting and perfecting these recipes to enjoy homemade bread that fits our needs and tastes every time.
Frequently Asked Questions
Can you bake bread in a bread machine without yeast?
Yes, you can bake bread without yeast in a bread machine using recipes that rely on alternative leavening agents like baking powder or baking soda. These recipes produce delicious, fluffy bread ideal for those with yeast allergies or who don’t have yeast available.
What ingredients are essential for yeast-free bread recipes?
Essential ingredients include various flours, liquids (water, milk), fats (butter, oil), sweeteners, salt, and alternative leavening agents such as baking powder and baking soda. Optional add-ins like herbs, nuts, or cheese enhance flavor and texture.
How do baking powder and baking soda help yeast-free bread rise?
Baking powder and baking soda create carbon dioxide when activated, causing the dough to rise. Baking soda needs an acidic ingredient to activate, while baking powder contains both an acid and base for leavening.
What is the recommended bread machine setting for yeast-free bread?
Use the Quick Bread or Cake setting for yeast-free bread as these settings have shorter mixing and baking times suited for quick leavening agents. Some recipes may also work with Basic or White Bread settings depending on dough density.
How should ingredients be layered in a bread machine for yeast-free recipes?
Layer ingredients starting with liquids, then fats, sweeteners, dry ingredients, followed by add-ins. Proper layering ensures optimal mixing and good bread texture without yeast.
How important is measuring ingredients precisely for yeast-free bread?
Precise measurements are crucial. Using a digital scale or accurate measuring tools helps maintain the correct balance of ingredients, preventing dense or flat bread and ensuring consistent, fluffy results.
Can I add flavor enhancers like herbs or cheese to yeast-free bread recipes?
Yes, adding herbs, nuts, dried fruits, or cheese is encouraged to boost flavor and texture. These add-ins make the bread more enjoyable and customizable.
How should yeast-free bread be cooled after baking to maintain quality?
Cool yeast-free bread on a wire rack to prevent sogginess and retain a crispy crust. Proper cooling improves texture and flavor before serving or storing.
What is the best way to store yeast-free bread to keep it fresh?
Store cooled bread wrapped tightly at room temperature for up to two days. For longer storage, slice, wrap well, and freeze. Avoid refrigeration as it can dry the bread out.
How can I troubleshoot dense or heavy yeast-free bread in a bread machine?
Check ingredient ratios, especially flour and liquid amounts, use fresh leavening agents, avoid overmixing, and include acidic ingredients if using baking soda. Adjusting these factors helps achieve a lighter, fluffier loaf.