
Brazil nut milk is a creamy and nutritious alternative to traditional dairy and plant-based milks. Packed with healthy fats, vitamins, and minerals, it offers a rich, slightly nutty flavor that enhances smoothies, coffee, and cereals. Plus, it’s incredibly easy to make at home with just a few simple ingredients.
Originating from the Amazon rainforest, Brazil nuts are prized for their unique taste and impressive health benefits. By turning these nuts into milk, we get a delicious, dairy-free option that’s perfect for anyone looking to boost their nutrient intake while enjoying a smooth, refreshing drink. Let’s dive into how to make this wholesome Brazil nut milk from scratch.
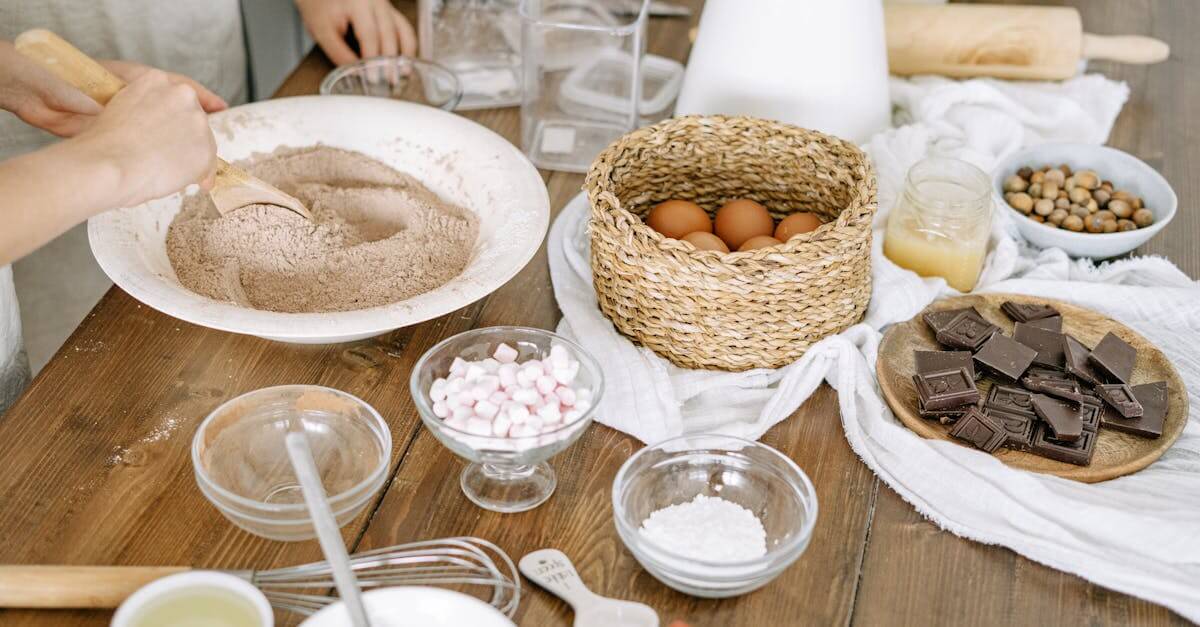
Ingredients
To craft our Brazil Nut Milk with rich flavor and creamy texture, we need a handful of simple, wholesome ingredients. Each component plays a crucial role in delivering the perfect balance of nutrition and taste.
- 1 cup raw Brazil nuts – soaked overnight to soften and activate nutrients
- 4 cups filtered water – for blending and achieving smooth consistency
- 1-2 tablespoons natural sweetener (optional) – such as maple syrup, honey, or agave to enhance flavor
- 1 teaspoon vanilla extract (optional) – adds aromatic warmth
- A pinch of fine sea salt – to balance and elevate sweetness naturally
Ingredient Breakdown Table
| Ingredient | Quantity | Purpose |
|---|---|---|
| Raw Brazil nuts | 1 cup | Base nut for creamy, nutrient-dense milk |
| Filtered water | 4 cups | Blending medium for smooth texture |
| Natural sweetener (optional) | 1-2 tbsp | Adds subtle sweetness |
| Vanilla extract (optional) | 1 tsp | Enhances aroma and flavor |
| Fine sea salt | Pinch | Balances and brightens flavor |
By soaking the raw Brazil nuts, we unlock their full potential, softening them for an ultra-smooth milk. We use filtered water to ensure purity and clarity, making the milk taste fresh and clean. Optional additions like vanilla and a natural sweetener customize the milk to our preferred taste profile, while salt enhances the subtle nutty flavor.
Let’s gather our ingredients carefully to prepare a fresh Brazil Nut Milk that’s both wholesome and delicious.
Equipment Needed
To make rich and creamy Brazil nut milk at home, we need the right equipment for smooth blending and strain-free milk. Here is a detailed list of essentials:
- High-speed blender
A powerful blender is crucial to break down the soaked Brazil nuts completely, ensuring a smooth and velvety texture. Medium or low-speed blenders might leave gritty bits.
- Large bowl
Used for soaking the raw Brazil nuts. We soak them to soften the nuts, unlock nutrients, and improve blending efficiency.
- Fine mesh nut milk bag or cheesecloth
This helps to strain the blended mixture, separating the milk from the nut pulp. The finer the cloth, the smoother the milk.
- Measuring cups
Accurate measurements maintain the right nut-to-water ratio, essential for balanced flavor and consistency.
- Glass jar or bottle for storage
To store the prepared Brazil nut milk. Glass is best for preserving freshness and avoiding odors or chemicals.
- Spoon or spatula
Useful for stirring in optional ingredients like natural sweeteners or vanilla extract and scraping pulp from the nut milk bag.
Equipment Summary Table
| Equipment | Purpose | Notes |
|---|---|---|
| High-speed blender | Blending nuts and water to smooth milk | Essential for creamy texture |
| Large bowl | Soaking Brazil nuts before blending | Use enough water to cover nuts |
| Fine mesh nut milk bag or cheesecloth | Straining milk for smooth texture | Choose fine mesh for best result |
| Measuring cups | Accurate ingredient measurement | 1 cup nuts, 4 cups water ratios |
| Glass jar or bottle | Storing finished Brazil nut milk | Keeps milk fresh longer |
| Spoon or spatula | Stirring and scraping pulp | Helps incorporate flavors |
Using this equipment ensures our Brazil nut milk turns out smooth, flavorful, and fresh, ready to enjoy in smoothies, cereals, or coffee.
Prep Work
Before we start blending our Brazil nut milk, preparing the nuts and equipment properly ensures a smooth, creamy, and flavorful result. Let’s walk through the essential steps to get everything ready.
Soaking the Brazil Nuts
Soaking is a crucial step for making Brazil nut milk because it softens the nuts, enhances nutrient absorption, and reduces natural bitterness. Here’s how we do it:
- Place 1 cup of raw Brazil nuts into a large bowl.
- Cover the nuts completely with filtered water (about 3-4 cups), allowing room for expansion.
- Let the nuts soak for 8 to 12 hours or overnight, at room temperature.
- After soaking, drain and rinse the nuts thoroughly under cold water.
“Soaking unlocks the creamy texture and releases the unique flavor of Brazil nuts, making our milk irresistibly smooth.”
| Step | Details |
|---|---|
| Nuts | 1 cup raw Brazil nuts |
| Water for soaking | 3-4 cups filtered water |
| Soaking time | 8-12 hours (overnight ideal) |
| Temperature | Room temperature |
Preparing the Blender and Strainer
To extract the smoothest milk from our soaked nuts, we need the right tools prepared properly:
- High-speed blender: Ensure the blender is clean and ready for use to achieve that velvety texture. We will blend soaked nuts with 4 cups of filtered water until silky smooth.
- Fine mesh nut milk bag or cheesecloth: Have this ready for straining the blended mixture to remove fibrous pulp, yielding pure milk.
- Large bowl: Place the nut milk bag or cheesecloth over the bowl to catch every drop effortlessly.
Pro tip: Rinsing the nut milk bag or cheesecloth before use prevents unwanted fibers from mixing into the milk.
Setting up these essentials before blending makes the process quick and smooth, helping us create a fresh batch of Brazil nut milk that’s ready to pour or store.
Directions
Follow these precise steps to make rich and creamy Brazil nut milk that perfectly balances flavor and nutrition in every glass.
Blending the Nuts and Water
- Drain and rinse the soaked raw Brazil nuts thoroughly under cold water. This removes any residual bitterness and activates their creamy texture.
- Place the nuts in a high-speed blender. Add 4 cups of filtered water for a smooth consistency.
- Blend on high speed for 1 to 2 minutes until the mixture is velvety smooth and free of visible nut pieces.
- Pause to scrape down the sides with a spatula if needed for even blending.
- Blend again briefly to ensure full integration of the nuts and water.
Straining the Milk
- Position a fine mesh nut milk bag or a doubled cheesecloth over a large bowl or pitcher.
- Pour the blended mixture slowly into the cloth, allowing the liquid to collect in the container below.
- Gather the cloth’s edges and squeeze firmly to extract every drop of milky liquid.
- This step separates the rich nut milk from the fibrous pulp, yielding a silky smooth texture without sediment.
- Set the pulp aside; it can be saved for baking or smoothies.
Adding Flavorings (Optional)
- Return the strained milk to the blender.
- Add sweeteners such as 1–2 tablespoons of maple syrup or honey to taste.
- For a warm aromatic touch, include ½ teaspoon of pure vanilla extract.
- Add a pinch of fine sea salt to perfectly balance the flavors.
- Blend briefly once more until well combined.
- Taste and adjust sweetness or vanilla if desired.
| Ingredient | Quantity | Purpose |
|---|---|---|
| Soaked Brazil nuts | 1 cup | Base for creamy milk |
| Filtered water | 4 cups | Dilutes and blends nuts |
| Maple syrup or honey | 1–2 tablespoons | Optional natural sweetener |
| Vanilla extract | ½ teaspoon | Adds aroma and depth |
| Fine sea salt | Pinch | Enhances overall flavor |
We recommend storing the freshly made Brazil nut milk in a sealed glass jar or bottle in the refrigerator for up to 3–4 days. Shake well before each use to maintain its creamy consistency.
Storage and Shelf Life
To maintain the freshness and nutritional quality of Brazil nut milk, proper storage is essential. Once prepared, transfer the milk into a clean, airtight glass jar or bottle to prevent exposure to air and contaminants. Always store the milk in the refrigerator at or below 40°F (4°C).
Recommended Storage Guidelines
| Aspect | Details |
|---|---|
| Container type | Airtight glass jar or bottle |
| Storage temperature | Refrigerate at ≤ 40°F (4°C) |
| Maximum shelf life | 3 to 4 days |
| Shake before use | Yes, to recombine natural separation |
Our experience shows that homemade Brazil nut milk stays fresh and maintains a creamy texture for up to 4 days in the fridge. After this period, the milk may begin to sour or separate excessively.
Tips to Extend Freshness
- Store away from strong odors since Brazil nut milk easily absorbs smells from other foods in the fridge.
- Keep the jar tightly sealed to minimize oxidation and bacterial growth.
- For longer preservation, consider freezing the milk in ice cube trays. Use within 1 to 2 months for best flavor and texture. Thaw frozen milk in the refrigerator and shake well before use.
Signs of Spoilage
We recommend discarding the milk if you notice any of the following:
- Off or sour smell
- Unusual texture or curdling beyond normal separation
- Mold presence or discoloration
Following these storage practices ensures your Brazil nut milk remains fresh, flavorful, and safe for daily use in smoothies, cereals, or as a creamy dairy alternative.
Tips for the Best Brazil Nut Milk
To achieve the creamiest and most flavorful Brazil nut milk, we recommend following these essential tips:
1. Soak Nuts Thoroughly
Always soak your raw Brazil nuts for 8 to 12 hours or overnight. Soaking softens the nuts, boosts nutrient absorption, and reduces any bitter compounds that may affect the taste. Use plenty of water to allow expansion.
“Soaking is the key step to unlocking the rich, creamy texture that’s signature to Brazil nut milk.”
2. Use Filtered Water
For the purest taste, blend nuts with filtered or spring water. Tap water can contain minerals or chemicals that alter flavor or freshness. The nutty undertones of the Brazil nuts shine best with clean, neutral water.
3. Blend at High Speed
To create the smoothest milk, use a high-speed blender. Blend for at least 2 to 3 minutes until the mixture is velvety and no visible nut particles remain. This breakdown improves mouthfeel and helps extract maximum creaminess.
4. Strain with the Right Equipment
For a silky smooth texture, strain the milk using a fine mesh nut milk bag or multiple layers of cheesecloth. Avoid coarse strainers that allow pulp to pass through, causing grittiness. Squeeze well to extract every drop of creamy liquid.
5. Customize Flavor with Natural Additives
Enhance your milk naturally with:
- Maple syrup or honey for sweetness
- A splash of vanilla extract for aroma
- A pinch of fine sea salt to balance flavor
Make adjustments to taste but keep these subtle enhancements to highlight the nuts’ natural flavor profile.
6. Store Properly for Freshness
Store your fresh Brazil nut milk in an airtight glass container in the refrigerator. Follow the storage guidelines below to maximize freshness and safety:
| Storage Condition | Duration | Notes |
|---|---|---|
| Refrigerated at ≤ 40°F (4°C) | 3 to 4 days | Shake well before use |
| Frozen (in ice cube trays) | 1 to 2 months | Use within recommended timeframe |
Avoid prolonged exposure to light and heat which will degrade nutrients and cause spoilage.
7. Detecting Freshness Signs
To ensure your nut milk remains safe and tasty, watch for these spoilage indicators:
- Off or sour smell
- Unusual thick or slimy texture
- Discoloration or mold formation
If any of these occur, discard the milk immediately to avoid health risks.
By consistently applying these Tips for the Best Brazil Nut Milk, we unlock the full potential of this nutritious, creamy, and flavorful alternative to dairy and other plant milks.
Conclusion
Making Brazil nut milk at home is a rewarding way to enjoy a nutrient-packed, creamy beverage that fits perfectly into a healthy lifestyle. With just a handful of simple ingredients and the right tools, we can create a fresh alternative to store-bought milks that’s both delicious and customizable.
By following the steps and tips we’ve shared, you’ll ensure your Brazil nut milk is smooth, flavorful, and full of the natural goodness these nuts offer. It’s a versatile addition to your kitchen, whether you’re adding it to smoothies, coffee, or enjoying it on its own.
Let’s embrace this easy, wholesome recipe and make Brazil nut milk a staple in our daily routines.
Frequently Asked Questions
What are the health benefits of Brazil nut milk?
Brazil nut milk is rich in healthy fats, vitamins, and minerals, particularly selenium, which supports immune function and antioxidant protection. It’s a creamy, nutrient-dense alternative to dairy and other plant-based milks.
How do I make Brazil nut milk at home?
Soak raw Brazil nuts for 8–12 hours, blend with filtered water, then strain the mixture through a nut milk bag or cheesecloth. Optional natural sweeteners and vanilla extract can be added for flavor.
Why is soaking Brazil nuts important?
Soaking softens the nuts, enhances nutrient absorption, reduces bitterness, and helps create a smoother milk texture.
What equipment do I need to make Brazil nut milk?
You need a high-speed blender, a large bowl for soaking, a fine mesh nut milk bag or cheesecloth for straining, measuring cups, and a glass jar or bottle for storage.
How long does homemade Brazil nut milk last?
It can be stored in a sealed glass container in the refrigerator for up to 3–4 days. Always shake well before use.
Can I add flavors to Brazil nut milk?
Yes, adding natural sweeteners like maple syrup or vanilla extract enhances the flavor without overpowering the nutty taste.
What’s the best water to use for Brazil nut milk?
Filtered water is recommended for a pure, clean taste and to avoid any unwanted flavors in the milk.
How can I tell if Brazil nut milk has gone bad?
Signs include sour smell, off taste, or curdled texture. If any of these appear, discard the milk immediately.
Can I freeze Brazil nut milk?
Yes, freeze it in ice cube trays for longer storage, and thaw as needed without significant loss of flavor or texture.
How do I make Brazil nut milk less gritty?
Blend nuts thoroughly at high speed and strain the milk well with a fine mesh bag or cheesecloth to ensure a smooth, creamy texture.