
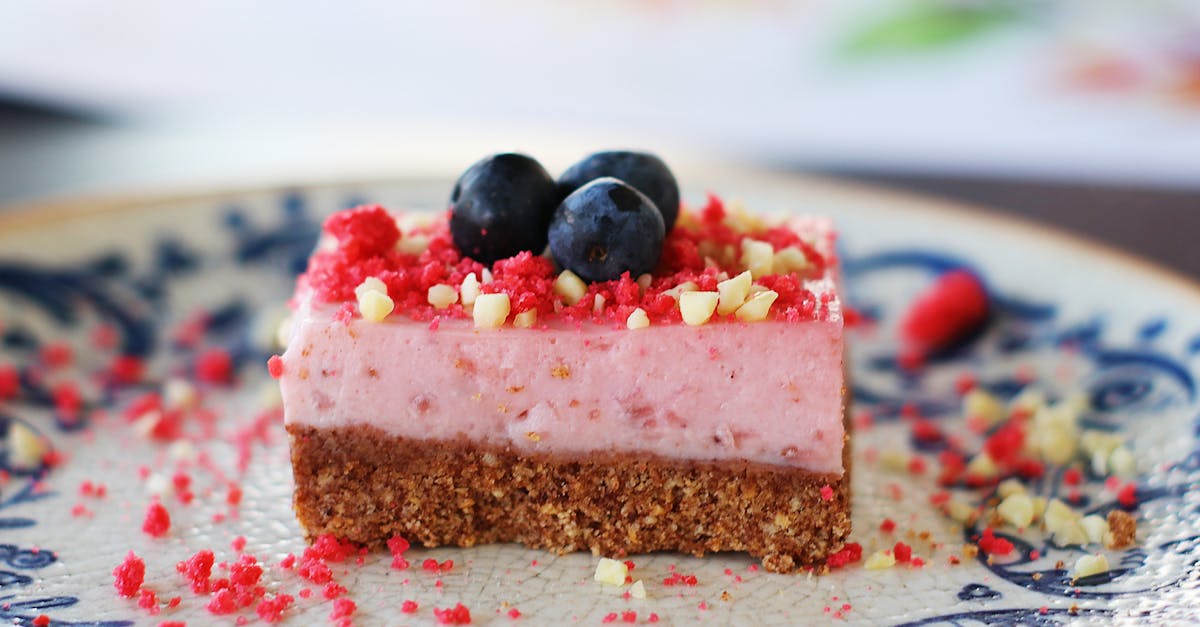
Brazil nut fruit cake is a delightful twist on the classic holiday treat that brings a rich, nutty flavor and a satisfying crunch to every bite. Originating from regions where Brazil nuts are abundant, this cake combines the natural sweetness of dried fruits with the earthy taste of these unique nuts, creating a perfect balance of textures and flavors.
We love how this recipe elevates a traditional fruit cake by adding Brazil nuts, which not only enhance the taste but also pack in nutrients like healthy fats and protein. Whether you’re baking for a festive occasion or simply craving a wholesome dessert, this Brazil nut fruit cake is sure to impress with its moist crumb and vibrant mix of ingredients. Let’s dive into making this delicious cake that’s both comforting and a bit exotic.
Ingredients
To craft our Brazil Nut Fruit Cake with the perfect balance of flavor and texture, we carefully select each ingredient. Below you will find all the essential components divided into dry, wet, and fruit & nut categories to make the process seamless and organized.
Dry Ingredients
We begin with the dry ingredients that form the cake’s sturdy yet tender base.
- 2 ½ cups all-purpose flour, sifted
- 1 teaspoon baking powder
- ½ teaspoon baking soda
- 1 teaspoon ground cinnamon
- ½ teaspoon ground nutmeg
- ¼ teaspoon salt
Wet Ingredients
The wet ingredients add moisture and richness, creating a lush crumb for our Brazil Nut Fruit Cake.
- ¾ cup unsalted butter, softened
- 1 cup brown sugar, packed
- 3 large eggs
- 1 teaspoon pure vanilla extract
- ½ cup molasses
- ½ cup whole milk or buttermilk
Fruits and Nuts
The star of our recipe appears here—Brazil nuts—paired with a medley of dried fruits to add sweetness and depth.
| Ingredient | Quantity | Preparation |
|---|---|---|
| Brazil nuts | 1 cup | Coarsely chopped |
| Dried cherries | ½ cup | Chopped roughly |
| Raisins | ½ cup | |
| Dried apricots | ½ cup | Chopped |
| Candied orange peel | ¼ cup | Finely chopped |
“The Brazil nuts give this fruit cake its signature nutty crunch, perfectly complementing the natural sweetness of the dried fruits.”
Using these ingredients in this exact order and measurement ensures the cake’s flavors meld beautifully while maintaining a moist and tender crumb.
Equipment Needed
To bake our Brazil Nut Fruit Cake perfectly, we rely on a set of essential tools that ensure precision and ease throughout the process. Having the right equipment ready helps us achieve that ideal texture and flavor every time.
Mixing Tools
- Large mixing bowl — for combining dry and wet ingredients thoroughly.
- Electric hand mixer or stand mixer — to cream butter and sugar smoothly and incorporate eggs well.
- Wooden spoon or rubber spatula — perfect for folding in the Brazil nuts and dried fruits without breaking them.
Measuring Equipment
- Measuring cups and spoons — exact measurements of all ingredients maintain the cake’s balance.
- Kitchen scale (optional but recommended) — for weighing nuts and fruits for consistency.
Baking Equipment
- Loaf pan or cake tin (9×5 inches) — we prefer this size for even baking and proper shape.
- Parchment paper — lines the pan for easy cake removal and clean edges.
- Cooling rack — essential to cool the cake evenly and prevent sogginess.
Additional Helpful Tools
- Fine sieve — sifts flour and spices, helping achieve a smooth batter.
- Chopping board and sharp knife — to roughly chop Brazil nuts and dried fruits for ideal texture.
- Oven thermometer — ensures our oven temperature is accurate, important for fruit cake baking.
| Equipment | Purpose | Notes |
|---|---|---|
| Large mixing bowl | Mixing dry and wet ingredients | Use a sturdy bowl for best results |
| Electric hand mixer | Creaming, mixing batter | Stand mixer can save effort |
| Measuring cups/spoons | Accurate ingredient measurement | Necessary for recipe precision |
| Loaf pan (9x5in) | Baking the cake | Line with parchment paper |
| Cooling rack | Cooling post-baking | Prevents condensation buildup |
| Fine sieve | Sifting dry ingredients | Helps avoid lumps |
| Chopping board/knife | Preparing nuts and fruit | Size affects cake texture |
| Oven thermometer | Monitoring baking temperature | Improves baking consistency |
Prep Work
Before we start mixing and baking, preparing the fruits and Brazil nuts properly is essential to achieve the perfect texture and flavor in our Brazil Nut Fruit Cake. This step lays the foundation for a moist, evenly textured cake with every bite bursting with nutty and fruity goodness.
Preparing the Fruits
We begin by preparing the medley of dried fruits. Use a mix of cherries, raisins, apricots, and candied orange peel for complexity and vibrant flavor. To soften the dried fruits and enhance their natural sweetness, soak them in warm liquid:
| Fruit Type | Quantity | Soaking Liquid | Soaking Time |
|---|---|---|---|
| Cherries | 1 cup (halved) | Warm water or rum | 30 minutes to 1 hour |
| Raisins | 1 cup | Warm water or rum | 30 minutes to 1 hour |
| Apricots (chopped) | 1/2 cup | Warm water | 30 minutes |
| Candied Orange Peel | 1/4 cup (chopped) | N/A | Use as is |
- Drain the fruits well after soaking to avoid excess moisture in the batter.
- For an extra flavor punch, soak fruits in spiced rum or brandy, quoting, “a soak in rum transforms dried fruit into tender bursts of joy.”
- Pat fruits dry with a paper towel but keep them slightly moist for a tender crumb.
Chopping Brazil Nuts
Our star ingredient, Brazil nuts, must be chopped carefully to maintain crunchy chunks without overpowering the cake.
- Use a sharp chef’s knife on a cutting board.
- Aim for small to medium chunks, about 1/4 inch pieces, to add texture without overwhelming each bite.
- Avoid over-chopping into powder; the texture contrast between nuts and soft fruit is key.
- For uniform pieces, hold the nut cluster firmly and rock the knife gently using a controlled motion.
- Set the chopped Brazil nuts aside in a bowl, ready to fold gently into the batter after combining all other ingredients.
Instructions
Follow these detailed steps to create the perfect Brazil Nut Fruit Cake with a moist crumb and rich, balanced flavors.
Mixing the Batter
- Preheat the oven to 325°F (160°C) and prepare your 9×5 inch loaf pan by lining it with parchment paper.
- In a large mixing bowl, cream together unsalted butter (1 cup) and brown sugar (1 cup). Use an electric hand mixer on medium speed until the mixture is light and fluffy, about 3 to 5 minutes.
- Add the eggs (3 large) one at a time, beating well after each addition to fully incorporate.
- Stir in vanilla extract (2 tsp) and molasses (2 tbsp), mixing thoroughly.
- In a separate bowl, whisk together the dry ingredients:
- 2 cups all-purpose flour
- 1 tsp baking powder
- 1/2 tsp baking soda
- 1 tsp ground cinnamon
- 1/2 tsp ground nutmeg
- 1/4 tsp salt
- Gradually add the dry mixture into the wet ingredients alternating with milk or buttermilk (1/2 cup), starting and ending with the dry mix. Fold gently with a wooden spoon or rubber spatula just until combined, avoiding overmixing to keep the batter tender.
Adding the Fruits and Nuts
- Drain the soaked dried fruit mixture thoroughly, reserving any soaking liquid for later use if desired.
- Fold the soaked fruits and chopped Brazil nuts (1 1/2 cups, chopped) carefully into the batter.
- Ensure even distribution of nuts and fruits to prevent sinking during baking.
- Optionally brush the top of the batter with the reserved soaking liquid to add moisture and enhance flavor during baking.
Baking the Cake
- Pour the batter evenly into the prepared loaf pan, smoothing the surface with a spatula.
- Bake in the preheated oven at 325°F (160°C) for 70 to 80 minutes or until a toothpick inserted into the center comes out clean.
- About halfway through baking, loosely cover the cake with aluminum foil if it browns too quickly.
- Once out of the oven, allow the cake to cool in the pan for 15 minutes before transferring to a wire cooling rack.
- Let the cake cool completely to room temperature before slicing to ensure the perfect texture.
| Step | Temperature | Time | Notes |
|---|---|---|---|
| Oven Preheat | 325°F (160°C) | – | Prepare pan by lining it |
| Baking | 325°F (160°C) | 70-80 minutes | Cover halfway if browning fast |
| Cooling in Pan | Room Temp | 15 minutes | Prevents sticking |
| Cooling on Rack | Room Temp | Until fully cool | Improves slicing quality |
Using these precise steps will guarantee a Brazil Nut Fruit Cake that delivers a wonderful balance of textures and a rich, nutty aroma perfectly complemented by sweet, softened fruits.
Baking Tips and Tricks
To master our Brazil Nut Fruit Cake recipe and achieve a moist flavorful result every time, we need to focus on key baking techniques. Here are essential tips that enhance texture, aroma, and appearance.
Oven Temperature and Baking Time
Maintaining the correct oven temperature is critical for even baking. We preheat the oven to 325°F (160°C) to allow slow cooking which prevents drying and burning. Use an oven thermometer for accuracy.
| Step | Temperature | Time | Notes |
|---|---|---|---|
| Baking | 325°F (160°C) | 70 to 80 minutes | Bake until a toothpick inserted comes out clean |
| Cooling | Room Temp | 30 to 60 minutes | Cool inside pan to retain moisture |
Mixing Techniques
- Creaming butter and sugar: Beat unsalted butter and brown sugar until light and fluffy to incorporate air—this gives the cake a tender crumb.
- Add eggs slowly: Add eggs one at a time while mixing to ensure they emulsify properly and bind ingredients well.
- Alternate dry and wet ingredients: Incorporate dry ingredients in batches alternating with milk or buttermilk to prevent overmixing which can toughen the cake.
- Fold in fruits and nuts gently: Use a spatula to fold soaked dried fruits and chopped Brazil nuts to distribute evenly without breaking fruit pieces.
Preparation of Fruits and Nuts
- Soaking dried fruits: We soak dried cherries, raisins, apricots, and candied orange peel in warm spiced rum or brandy for at least 2 hours or overnight. This step plumps the fruit, bringing succulent sweetness and moistness.
- Chopping Brazil nuts: Chop nuts into small to medium chunks to maintain a pleasing crunch without overpowering the fruit flavors or texture.
Pan and Cooling Tips
- Prepare the baking pan: We line the 9×5 inch loaf pan with parchment paper extending over edges for easy removal.
- Cooling on a rack: Once baked, unmold the cake and cool on a wire rack to prevent condensation under the cake that causes sogginess.
Pro Tips for Perfect Results
- “Patience is key”: Avoid opening the oven frequently during baking to maintain consistent heat.
- Test doneness by inserting a toothpick in the center; it should come out clean or with moist crumbs, never wet batter.
- Store the cake wrapped in parchment paper and then foil to help it mature and enhance flavors over 2 to 3 days before serving.
By focusing on these Baking Tips and Tricks we ensure our Brazil Nut Fruit Cake is perfectly textured with a rich nutty aroma complemented by sweet juicy fruits every time we bake.
Serving Suggestions
To fully enjoy our Brazil Nut Fruit Cake, we recommend serving it at room temperature to showcase its moist texture and rich flavors. Here are some serving ideas to elevate your experience:
- Pair with warm beverages: A cup of spiced chai tea, freshly brewed coffee, or a glass of mulled wine complements the nutty and fruity notes beautifully.
- Add a creamy element: Serve slices with a dollop of whipped cream, a spoonful of mascarpone, or a scoop of vanilla ice cream to balance the cake’s density.
- Top with a glaze or drizzle: A light drizzle of honey or a citrus glaze made from powdered sugar and fresh orange juice enhances the fruity brightness and adds a subtle sweetness.
- Accompany with fresh fruit: Seasonal fruits like sliced pears, apples, or figs provide freshness and contrast in texture.
- Make festive dessert plates: Pair slices with candied nuts, chocolate bits, or a sprinkle of cinnamon sugar for a holiday treat.
Serving Temperature and Storage
Serving the Brazil Nut Fruit Cake at the right temperature maximizes flavor release. Here is a quick guide:
| Serving Temperature | Description | Reason to Serve This Way |
|---|---|---|
| Room Temperature | 68-72°F (20-22°C) | Enhances the cake’s moisture and aroma |
| Slightly Warm | 95-105°F (35-40°C) | Softens the cake for a tender bite |
| Cold | 40-50°F (4-10°C) | Firmer texture, less aromatic |
“Allowing the cake to rest at room temp for 30 minutes before serving unlocks a burst of nutty and fruity aromas.”
Presentation Tips
- Slice the cake evenly using a serrated knife for clean edges.
- Arrange slices on a decorative platter or wooden board to highlight rustic charm.
- Garnish with a few whole Brazil nuts and dried fruit pieces for visual appeal.
- Add a sprig of fresh rosemary or mint to create a festive look.
By following these serving suggestions, we ensure each bite of our Brazil Nut Fruit Cake is a delightful harmony of texture, flavor, and aroma making it perfect for any celebration or cozy afternoon treat.
Storage and Shelf Life
Proper storage is essential to preserve the moisture and rich flavors of our Brazil Nut Fruit Cake. Follow these steps to keep your cake fresh and enjoyable for as long as possible.
Short-Term Storage (Up to 1 Week)
- Wrap the cake tightly in plastic wrap or aluminum foil immediately after it cools to prevent it from drying out.
- Place the wrapped cake in an airtight container or cake tin to protect it from air and odors.
- Store at room temperature in a cool, dry place, away from direct sunlight or heat sources.
This method maintains the cake’s moist crumb and nutty aroma for about 5 to 7 days.
Long-Term Storage (Up to 3 Months)
- For longer preservation, wrap the cake tightly in plastic wrap, then in a layer of aluminum foil to prevent freezer burn.
- Place the wrapped cake in a heavy-duty freezer bag or airtight container.
- Label the package with the date of freezing to keep track of its shelf life.
- Freeze at 0°F (-18°C) or lower for optimal quality.
When ready to enjoy, thaw the cake overnight in the refrigerator or at room temperature wrapped to retain moisture.
Key Storage Tips Table
| Storage Method | Wrapping Material | Storage Location | Shelf Life | Notes |
|---|---|---|---|---|
| Short-Term | Plastic wrap + airtight container | Room temperature | 5 to 7 days | Keep away from heat and sunlight |
| Long-Term (Freezing) | Plastic wrap + aluminum foil | Freezer (-18°C or below) | Up to 3 months | Thaw slowly to preserve texture |
| Refrigeration (Optional) | Plastic wrap + airtight container | Refrigerator (40°F or lower) | Up to 2 weeks | May dry out cake; best for warmer climates |
Important Considerations
“Keeping the Brazil Nut Fruit Cake wrapped tightly is the key to locking in both moisture and flavor.“
- Avoid frequent temperature fluctuations by storing the cake in a consistent environment.
- Do not slice the cake before storing; whole cakes retain moisture better.
- If using alcohol-soaked fruits, the alcohol acts as a natural preservative which can slightly extend shelf life.
By following these storage guidelines we ensure our Brazil Nut Fruit Cake stays delectably moist with its distinct nutty and fruity flavors intact from the first slice to the last.
Conclusion
Making a Brazil Nut Fruit Cake is a rewarding way to bring a unique twist to a classic favorite. With the right ingredients and careful preparation, we can create a cake that’s rich in flavor and texture, perfect for sharing with loved ones.
By paying attention to every step—from soaking the fruits to properly baking and storing—we ensure a moist and delicious result every time. This cake isn’t just a treat; it’s a celebration of bold flavors and wholesome ingredients that make any occasion special.
We encourage you to try this recipe and enjoy the comforting blend of nutty richness and fruity sweetness that only a Brazil Nut Fruit Cake can deliver.
Frequently Asked Questions
What makes Brazil nut fruit cake different from a traditional fruit cake?
Brazil nut fruit cake combines the rich, nutty flavor of Brazil nuts with a mix of dried fruits, offering a unique taste and texture compared to traditional fruit cakes. It includes healthy fats and protein from the nuts, adding nutritional benefits while retaining the classic moist, sweet profile.
What are the main ingredients needed for Brazil nut fruit cake?
The cake requires dry ingredients (flour, baking powder, spices), wet ingredients (butter, brown sugar, eggs, molasses, milk), and fruit & nut ingredients—primarily Brazil nuts and a mix of dried fruits like cherries, raisins, and candied orange peel.
How should I prepare the dried fruits and Brazil nuts?
Soak dried fruits in warm liquid, preferably spiced rum or brandy, to soften and enhance flavor. Chop Brazil nuts into small to medium chunks to balance texture without overpowering the cake.
What equipment is essential for baking this cake?
You need a large mixing bowl, electric mixer, measuring cups and spoons, a 9×5 inch loaf pan or cake tin, parchment paper, cooling rack, and optional tools like a sieve, chopping board, and oven thermometer.
What is the recommended baking temperature and time?
Bake the cake at 325°F (160°C) for 70 to 80 minutes for even cooking and a moist crumb.
How do I ensure the cake has a moist and tender texture?
Cream butter and brown sugar well, alternate adding dry and wet ingredients to avoid overmixing, soak fruits for moisture, chop nuts properly, maintain oven temperature, and cool the cake properly before slicing.
How should I store Brazil nut fruit cake?
For short-term, wrap it tightly in plastic or foil and keep in an airtight container at room temperature for up to 1 week. For long-term, freeze wrapped cake for up to 3 months; thaw before serving to keep moisture.
What are some good serving suggestions?
Serve at room temperature with warm drinks, add whipped cream, ice cream, or glaze, and garnish with fresh fruit for a festive presentation.
Can I substitute other nuts for Brazil nuts in this cake?
While you can substitute with other nuts like walnuts or pecans, Brazil nuts provide a unique rich, creamy flavor and texture that gives this cake its distinctive character.
Is Brazil nut fruit cake suitable for holiday celebrations?
Yes, it’s an excellent festive dessert option with its rich flavors and festive dried fruits, perfect for holiday occasions or as a special treat any time.