
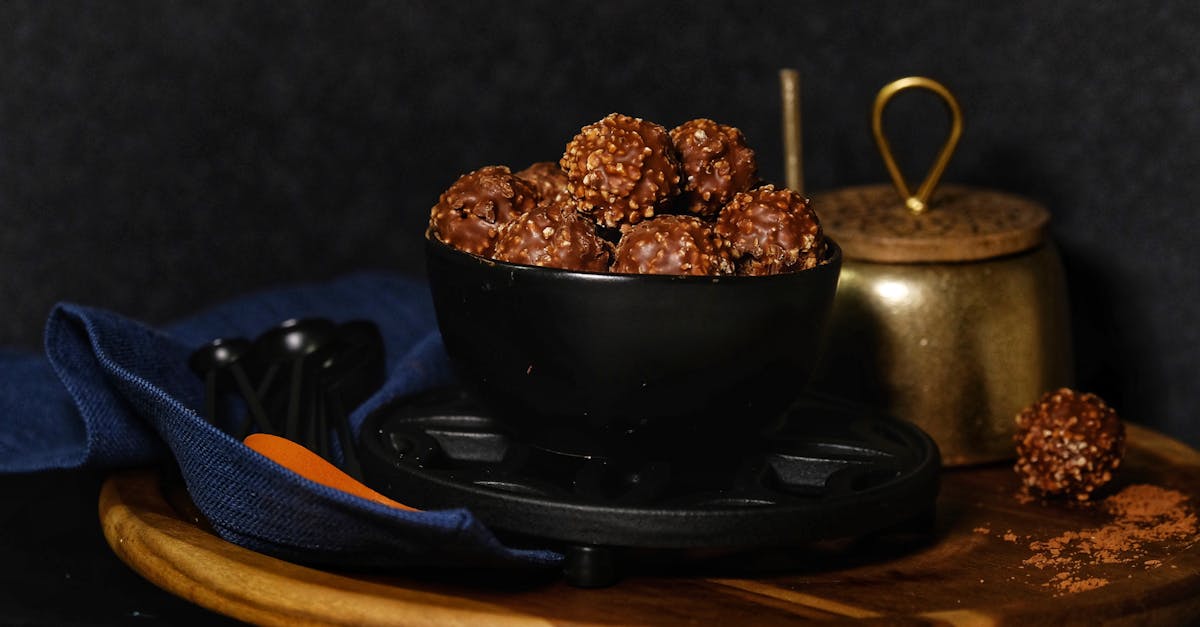
Let’s talk about a sweet treat that melts in your mouth and takes us straight to nostalgic bliss—Boston Cream Candy. This old-fashioned confection, also known as “potato candy” in some circles, has been delighting taste buds for generations. Its creamy texture and rich flavor make it a classic favorite, perfect for satisfying any sweet tooth.
What makes Boston Cream Candy so special is its simplicity. With just a few pantry staples, we can whip up this decadent dessert in no time. It’s a recipe that feels like a warm hug from the past, reminding us of family gatherings and homemade delights. Whether you’re new to candy-making or a seasoned pro, this recipe is a must-try for anyone who loves a little sweetness in their day.
Boston Cream Candy Recipe
Let’s dive into the step-by-step guide to make the perfect Boston Cream Candy, a classic dessert brimming with nostalgic charm. This recipe is straightforward, requiring simple ingredients and a bit of patience. Follow these instructions to recreate this timeless treat.
Ingredients
- 1 medium potato, peeled and boiled until soft
- 4-6 cups powdered sugar, sifted
- 1 teaspoon vanilla extract
- 1/2 teaspoon salt
- 1-1/2 cups semisweet chocolate chips, melted
- 1 tablespoon coconut oil (optional, for smoother chocolate finish)
Instructions
- Prepare the potato base:
- Mash the boiled potato until it’s completely smooth. You can blend it if needed to remove any lumps.
- Stir in the salt and vanilla extract.
- Incorporate powdered sugar:
- Gradually mix in the powdered sugar, one cup at a time.
- Continue until a soft dough forms. It should no longer be sticky to the touch but pliable. You might need between 4-6 cups depending on the potato size and humidity.
- Roll and shape the candy:
- Dust a clean work surface with powdered sugar to prevent sticking.
- Roll the candy dough into a rectangle approximately 1/4 inch thick.
- Melt the chocolate coating:
- In a double boiler or microwave-safe bowl, melt the semisweet chocolate chips. Stir in the coconut oil for a glossy and smooth finish.
- Cut and coat:
- Slice the candy dough into small squares or shapes of your choice.
- Dip each piece into the melted chocolate, ensuring they’re fully coated.
- Place the coated candy on a parchment-lined baking sheet.
- Chill and set:
- Refrigerate the coated candy for at least 30 minutes or until the chocolate hardens.
- Serve and enjoy:
- Once set, transfer the candies to an airtight container. These treats keep well in the refrigerator for up to 2 weeks.
Quick Tips for Success
- Consistency Check: If the dough feels too sticky, add more powdered sugar, a tablespoon at a time.
- Chocolate Coating: Use a fork or skewer for dipping to keep your process neat.
- Storage Solution: To prevent sticking, layer candies between sheets of parchment or wax paper in storage.
Ingredient Proportions Table
| Ingredient | Measurement | Notes |
|---|---|---|
| Potato | 1 medium | Peeled and boiled |
| Powdered sugar | 4-6 cups | Sifted; adjust based on dough texture |
| Vanilla extract | 1 teaspoon | For enhanced flavor |
| Salt | 1/2 teaspoon | Balances sweetness |
| Semisweet chocolate chips | 1-1/2 cups | Melted for candy coating |
| Coconut oil (optional) | 1 tablespoon | Adds smoothness to the chocolate |
Ingredients
Here’s what we’ll need to make our Boston Cream Candy. This straightforward recipe uses just a few simple ingredients, but each one plays a key role in creating the candy’s creamy texture and rich, nostalgic sweetness. Be sure to measure everything precisely for the best results!
Key Ingredients
- 1 small potato, peeled and boiled (approximately ½ cup once mashed)
- 4–5 cups powdered sugar, sifted
- 1 teaspoon vanilla extract (for flavor)
- 1 pinch salt (balances sweetness)
- 1 cup semisweet chocolate chips, melted (for coating)
Ingredient Note
- The potato acts as the binding agent and provides the base texture. Once mashed and cooled, it seamlessly blends with the powdered sugar.
- Adjust the powdered sugar amount according to the dough’s consistency — it should be firm yet pliable, like cookie dough.
- Using semisweet chocolate chips ensures the coating isn’t overwhelmingly sweet, complementing the candy’s creamy center perfectly.
Optional Add-Ins
If you’re feeling adventurous, try adding:
- 1 teaspoon almond extract (for a nutty twist)
- ¼ cup shredded coconut (for texture)
- ½ teaspoon ground cinnamon (to add warmth)
Quick Reference Table: Measurements and Benefits
| Ingredient | Quantity | Purpose |
|---|---|---|
| Peeled and boiled potato | 1 small (½ cup mashed) | Acts as a binding agent, soft and creamy base |
| Powdered sugar | 4–5 cups | Sweetens and firms candy dough |
| Vanilla extract | 1 teaspoon | Adds depth of flavor |
| Salt | 1 pinch | Balances overall sweetness |
| Semisweet chocolate chips | 1 cup melted | Provides a smooth and rich coating |
With these ingredients lined up, we’re ready to dive into crafting this time-honored treat! Make sure to prepare your kitchen space with all ingredients pre-measured for a seamless candy-making experience.
Tools And Equipment
Creating Boston Cream Candy requires a few essential tools to ensure smooth preparation and the best results. These tools not only simplify the process but also help us achieve the candy’s creamy texture and decadent finish. Here’s what we’ll need:
Essential Tools
- Mixing Bowls (2 medium-sized): For mashing the potato and mixing the ingredients without spills.
- Potato Masher or Fork: To create a smooth potato base free of lumps.
- Measuring Cups and Spoons: Accurate measurements ensure the perfect candy consistency.
- Wooden Spoon or Silicone Spatula: Ideal for mixing stiff dough without breakage.
- Rolling Pin: Helps smooth and shape the candy mixture for an even layer.
- Parchment Paper or Wax Paper: Prevents sticking and makes handling the dough easier.
- Sharp Knife or Pizza Cutter: For cleanly cutting the candy into squares or desired shapes.
- Double Boiler or Microwave-Safe Bowl**: To gently melt the chocolate coating without burning.
- Baking Sheet or Flat Tray**: Provides a sturdy surface for setting the candies.
Optional Tools for Enhancements
- Fine Mesh Sifter: To remove lumps from powdered sugar, allowing a silky-smooth dough.
- Decorative Molds or Cookie Cutters: For adding unique shapes to the candies.
- Offset Spatula: Useful for spreading melted chocolate evenly over the candies.
- Candy Thermometer: Ensures precise temperature control if experimenting with add-ons like caramel.
Quick Reference Table
Here’s a summarized tool checklist for convenience:
| Tool Name | Purpose |
|---|---|
| Mixing Bowls | For combining and mixing ingredients |
| Potato Masher/Fork | For mashing the potato smoothly |
| Measuring Cups/Spoons | Helps measure ingredients accurately |
| Wooden Spoon/Spatula | For mixing stiff dough |
| Rolling Pin | Smooths candy mixture as an even layer |
| Parchment Paper | Prevents sticking during rolling and setting |
| Sharp Knife | Cuts candy into clean, uniform shapes |
| Double Boiler/Bowl | Melts chocolate coating safely |
| Baking Sheet | Provides a stable setting platform for candies |
Directions
Let’s dive into the step-by-step process of crafting the perfect Boston Cream Candy. Follow these clear guidelines to achieve that creamy and indulgent treat every time.
Prep
- Prepare the potato: Start by boiling a small potato (about 4-6 ounces) until tender. Once boiled, peel the potato and mash it in a medium bowl until smooth and lump-free. Use a fork or a potato masher for best results.
Tip: Ensure the potato is completely cooled before adding other ingredients to avoid texture issues. - Prepare your workspace: Dust a clean surface or a sheet of parchment paper lightly with powdered sugar. This prevents sticking during the rolling and shaping process.
- Gather ingredients: Measure out 2 cups of powdered sugar, ½ teaspoon of vanilla extract, and a pinch of salt. Ensure your semisweet chocolate chips (1 cup) are ready for melting.
Cook
- Make the dough: Gradually mix the powdered sugar into the mashed potato. Continue adding the powdered sugar ½ cup at a time. Stir consistently until a smooth and slightly firm dough forms.
Note: The dough texture should be pliable but not sticky. If it feels too wet, add more powdered sugar in small increments. - Melt the chocolate: Using a double boiler or microwave, melt 1 cup of semisweet chocolate chips. If using a microwave, heat the chocolate in 20-second intervals, stirring each time, until fully melted and smooth.
Assemble
- Roll and shape the candy: Roll out the potato-based dough on the prepared surface to about ¼-inch thickness. Use a rolling pin for evenness. Cut the dough into small squares, rectangles, or any desired shape using a knife or cookie cutter.
- Coat with chocolate: Dip each piece of candy into the melted chocolate using a fork. Let the excess chocolate drip off before placing the pieces onto a parchment-lined tray.
Pro Tip: Work quickly when coating the candies to prevent the dough from softening at room temperature. - Chill and set: Transfer the tray to the refrigerator and chill for at least 1 hour, or until the chocolate shell hardens completely.
| Step | Action | Tool Needed |
|---|---|---|
| Prepare the potato | Boil, peel, and mash | Medium bowl, potato masher, fork |
| Mix dough | Combine potato and powdered sugar | Mixing bowl, spoon |
| Melt chocolate | Heat chocolate until smooth | Double boiler or microwave |
| Roll and shape candy | Flatten dough and cut into pieces | Rolling pin, knife or cookie cutter |
| Coat candy | Dip pieces into melted chocolate | Parchment paper, fork |
| Chill and set | Refrigerate until chocolate hardens | Tray, refrigerator |
Make-Ahead Instructions
When making Boston Cream Candy, planning ahead can save time and make the process smoother. This classic treat not only stores well but also tastes even better when allowed to rest as the flavors meld together. Here are our detailed make-ahead instructions:
Preparing in Advance
- Make the Candy Dough: The candy dough can be prepared up to 24 hours ahead of shaping and coating. After mixing the dough to the right consistency, wrap it tightly in plastic wrap and place it in an airtight container. Store it in the refrigerator to keep it fresh.
- Melting the Chocolate in Advance: If you’d like to get the chocolate ready ahead of time, you can melt it using a double boiler or microwave. Once melted, let it cool slightly before transferring it to an airtight container. Reheat the chocolate gently before dipping the candies when you are ready.
- Optional Add-Ins: Prepare optional toppings like shredded coconut or chopped nuts beforehand. Keep them stored in sealed containers to maintain freshness.
Storage
- Candy Storage: Once the candies are made and coated in chocolate, store them in the refrigerator in a single layer in an airtight container. If stacking is necessary, place parchment paper between layers to prevent sticking.
- How Long Do They Last? Boston Cream Candy can last up to 1 week in the refrigerator without losing texture or flavor. For longer storage, consider freezing the candies.
Freezing Instructions
Freezing is a great way to make this candy even further in advance without compromising its quality. Simply follow these steps:
- Place the fully made and cooled candies on a parchment-lined baking sheet in a single layer.
- Freeze for about 1–2 hours, or until each piece is firm to the touch.
- Transfer the candies to a freezer-safe airtight container or zip-top bag with parchment paper between layers.
- Store in the freezer for up to 3 months.
- Thaw in the refrigerator for a few hours before serving.
Quick Reference Table for Make-Ahead Tips
| Step | Action | Timeframe |
|---|---|---|
| Prepare Dough | Mix, wrap tightly, refrigerate | Up to 24 hours in advance |
| Melt Chocolate | Melt, store, reheat gently | Same day or day before |
| Candy Storage | Place in airtight container | Up to 1 week |
| Freezing Candies | Freeze solid, then store in freezer | Up to 3 months |
By following these Make-Ahead Instructions, we can ensure that our candy is fresh, flavorful, and stress-free for any occasion! Remember, planning ahead not only saves time but also enhances the experience of making homemade treats like this timeless Boston Cream Candy.
Tips For Success
Mastering Boston Cream Candy requires attention to detail and a few strategic adjustments during the process. Here are our top tips to ensure your candy turns out perfectly every time:
1. Consistency is Key
The dough consistency plays a crucial role in the success of this recipe. Aim for a dough that is smooth, pliable, and easy to roll without sticking. If the mixture seems too sticky, gradually add more powdered sugar, one tablespoon at a time. On the other hand, if the dough is overly dry or crumbly, mix in a few drops of water or milk to bring it together.
2. Mind the Temperature
Temperature sensitivity is critical during preparation. We recommend letting the mashed potato cool to room temperature before adding powdered sugar. Adding sugar to a hot potato can cause the mixture to become excessively runny, making it harder to achieve the right texture.
When handling melted chocolate, monitor its temperature carefully. Overheating can scorch the chocolate, while letting it cool too long could make it difficult to coat the candies smoothly. A microwave or double boiler works well—just melt in short intervals and stir frequently.
3. Work With a Lightly Floured Surface
When rolling out the dough, sprinkle your work surface lightly with powdered sugar to prevent sticking. Be cautious with the amount; too much sugar can alter the candy’s flavor and texture.
4. Use Tools for Precision
Having the right tools ensures efficiency and better results. Here’s a quick reference table for essential tools and how they help:
| Tool | Purpose in Recipe |
|---|---|
| Mixing bowls | For combining the mashed potato and powdered sugar. |
| Potato masher (or fork) | Mashes the potato into a smooth, lump-free consistency. |
| Rolling pin | Helps roll the dough evenly for cutting. |
| Cookie cutters (optional) | Creates uniform, decorative shapes for candies. |
| Double boiler (or microwave-safe bowl) | Melts the chocolate coating evenly. |
5. Test Your Chocolate Dip
Before coating all the candies, test one piece to ensure the texture and thickness of the melted chocolate meet your expectations. If the chocolate is too thick, stir in a small amount of coconut oil or vegetable shortening to achieve a smoother consistency.
6. Store Properly for Fresh Results
Proper storage is essential for maintaining the candy’s freshness:
- Keep the candies in an airtight container and refrigerate if storing for more than 24 hours. This step helps maintain their creamy texture and prevents the chocolate coating from melting.
- For longer storage, freeze the candies. Place them in a freezer-safe container, separating layers with parchment paper, and they’ll stay fresh for up to three months. Always thaw in the refrigerator before serving to prevent condensation on the chocolate.
Conclusion
Boston Cream Candy is more than just a sweet treat; it’s a delightful blend of tradition, flavor, and simplicity. Whether you’re recreating cherished memories or starting a new family tradition, this recipe offers a rewarding experience for candy makers of all skill levels.
With just a handful of ingredients and a little creativity, we can craft a dessert that’s as enjoyable to make as it is to share. Let’s embrace the joy of this timeless classic and bring a touch of homemade sweetness to our kitchens.
Frequently Asked Questions
What is Boston Cream Candy?
Boston Cream Candy, also known as “potato candy,” is a nostalgic dessert made from simple ingredients like mashed potatoes, powdered sugar, vanilla, and chocolate. It has a creamy texture and a rich flavor, making it a timeless treat.
What ingredients are needed for Boston Cream Candy?
The key ingredients are a boiled potato, powdered sugar, vanilla extract, salt, and semisweet chocolate chips. Optional add-ins include almond extract, shredded coconut, or ground cinnamon for customization.
How do I store Boston Cream Candy?
Finished candies can be stored in an airtight container in the refrigerator for up to one week. For longer storage, freeze them for up to three months.
What tools are essential for making Boston Cream Candy?
You’ll need mixing bowls, a potato masher, measuring cups, and a rolling pin. Optional tools include a fine mesh sifter and decorative molds for enhanced presentation.
How do I make the candy dough smooth and pliable?
Gradually mix mashed potatoes with powdered sugar to achieve a smooth, pliable consistency. Ensure the potato is cool before adding sugar to prevent stickiness.
Can I make Boston Cream Candy ahead of time?
Yes, you can prepare the candy dough up to 24 hours in advance and melt the chocolate ahead of time for convenience. Store dough in the refrigerator until ready to use.
How do I melt the chocolate for dipping?
Melt semisweet chocolate chips using a double boiler or microwave. Stir frequently to prevent burning and maintain smoothness.
What are some tips for successful candy-making?
Focus on dough consistency, let potatoes cool before mixing, lightly flour your surface for rolling, and test the chocolate dip before coating all candies.
Can I customize Boston Cream Candy?
Yes! You can add flavors like almond extract, shredded coconut, or ground cinnamon to personalize your candy to your taste.
How long does it take to make Boston Cream Candy?
The process, including preparation, shaping, and chilling, typically takes about 1 to 2 hours, depending on your experience and efficiency.