
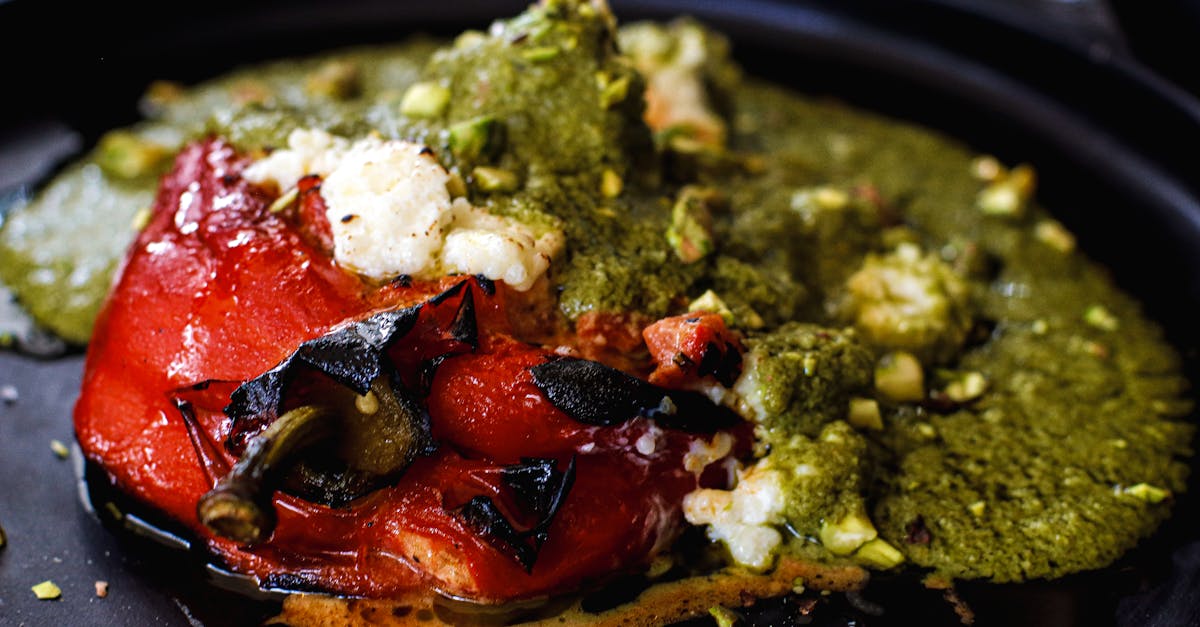
Boots and Sonny’s Chili Recipe is a classic that brings bold flavors and hearty comfort to the table. Known for its rich, smoky taste and perfectly balanced spices, this chili has earned a loyal following among chili lovers everywhere. Whether you’re cooking for a family dinner or a game day gathering, this recipe delivers satisfying warmth and depth in every bite.
We love how Boots and Sonny’s Chili combines simple ingredients with a few secret touches that make all the difference. It’s easy to prepare yet impressive enough to serve to guests. Perfectly thick and packed with tender meat and beans, this chili stands out as a go-to recipe for anyone craving a flavorful, stick-to-your-ribs meal. Let’s dive into making this iconic chili that’s sure to become a staple in our kitchens.
Boots And Sonny’s Chili Recipe Ingredients
To create the iconic Boots And Sonny’s Chili, we focus on a perfectly balanced blend of meat, vegetables, spices, and optional garnishes. Each ingredient plays a crucial role in delivering the dish’s rich, smoky, and hearty flavor that keeps fans coming back for more.
Meat and Protein
The foundation of this chili is its robust meat combination. We use:
- 2 pounds of ground beef (preferably 80/20 for the right fat content)
- 1 pound of ground pork for additional depth and richness
- Optional: 1/2 pound of beef chuck, diced for added texture and meaty bite
This combination ensures a thick, hearty chili base with layers of savory flavor.
Vegetables and Beans
Vegetables and beans provide balance, color, and texture. For the authentic Boots And Sonny’s Chili experience, include:
- 1 large yellow onion, finely chopped
- 3 cloves garlic, minced
- 1 green bell pepper, diced
- 2 cans (15 ounces each) of kidney beans, drained and rinsed
- 1 can (15 ounces) pinto beans, drained and rinsed
These ingredients add a hearty and satisfying bite while enhancing the overall flavor profile.
Spices and Seasonings
The secret to the chili’s smoky and perfectly seasoned taste lies in its spices. Use the following precise blends:
| Ingredient | Amount |
|---|---|
| Chili powder | 3 tablespoons |
| Ground cumin | 2 teaspoons |
| Smoked paprika | 1 teaspoon |
| Dried oregano | 1 teaspoon |
| Cayenne pepper | 1/2 teaspoon |
| Salt | 1 1/2 teaspoons |
| Black pepper | 1 teaspoon |
| Brown sugar | 1 tablespoon |
Note: These spices create the bold and balanced chili flavor synonymous with Boots And Sonny’s Chili. Adjust cayenne for your preferred heat level.
Optional Toppings and Garnishes
To elevate every bowl, we recommend these classic toppings that bring texture and freshness:
- Shredded sharp cheddar cheese
- Sour cream or Greek yogurt
- Chopped green onions
- Fresh cilantro leaves
- Sliced jalapeños for extra heat
- Crushed tortilla chips for crunch
“These toppings add a vibrant finish to our chili, turning each serving into a complete, satisfying experience.”
By carefully selecting and layering these ingredients, we replicate the authentic Boots And Sonny’s Chili that is thick, rich, and unforgettable.
Equipment Needed for Boots And Sonny’s Chili Recipe
To make the rich and smoky Boots And Sonny’s Chili Recipe perfectly, having the right equipment is essential. Each tool plays a key role in achieving the thick, hearty texture and deep flavor we crave. Let’s break down the must-have kitchen essentials:
Essential Cookware
- Large Heavy-Bottomed Pot or Dutch Oven
We need sturdy cookware to allow even heat distribution for browning meats and slow simmering. A Dutch oven works best here for retaining moisture and melding flavors.
- Skillet or Frying Pan
For browning ground beef, pork, and beef chuck separately before combining in the main pot. This step enhances the complex flavor profile.
- Wooden Spoon or Silicone Spatula
To stir the chili without scratching your cookware and to blend spices evenly throughout the dish.
Prep Tools
- Sharp Chef’s Knife
For chopping onions, garlic, and bell peppers finely. Precision prep shapes the chili’s texture and flavor impact.
- Cutting Board
Use a spacious, stable surface to handle all vegetable and meat prep safely and efficiently.
- Measuring Spoons and Cups
Exact spice measurements ensure the signature smoky balance is spot on.
Optional But Helpful Equipment
- Immersion Blender
If you prefer a slightly thicker chili with some texture blended out, this can be handy to puree a portion of the beans or sauce.
- Can Opener
For opening the kidney and pinto bean cans swiftly.
Equipment Summary Table
| Equipment | Purpose | Importance |
|---|---|---|
| Dutch Oven or Large Pot | Even cooking and simmering | Essential |
| Skillet/Frying Pan | Browning meats separately | Essential |
| Wooden Spoon/Silicone Spatula | Stirring without damage to cookware | Essential |
| Chef’s Knife | Precise chopping of vegetables | Essential |
| Cutting Board | Safe and efficient prep surface | Essential |
| Measuring Spoons/Cups | Accurate spice and ingredient measurements | Essential |
| Immersion Blender | Optional for preferred chili texture | Optional |
| Can Opener | Opens canned beans | Optional |
“Using the right equipment streamlines cooking and elevates the final taste of our Boots And Sonny’s Chili.”
With this arsenal ready, we’re all set to bring out the bold warmth and deep, smoky layers in every bowl of our chili.
Prep Steps for Boots And Sonny’s Chili Recipe
To ensure we get the perfect rich and smoky flavor in our chili, following precise prep steps is essential. Careful preparation of meat, vegetables, and spices lays the foundation for the iconic taste we love.
Preparing the Meat
We start by preparing our meat base, which includes ground beef, ground pork, and optional beef chuck. Here’s how we handle this step for maximum flavor and texture:
- Combine Meats: Measure and combine the ground beef and ground pork in a bowl. If using beef chuck, cut it into small cubes about ½ inch in size.
- Pat Dry: Lightly pat the meat dry with paper towels to reduce excess moisture. This helps in better browning.
- Season Lightly: Season the meats with a pinch of salt and black pepper before browning. This jumpstarts flavor development.
- Brown Properly: Heat a skillet over medium-high heat. Add the meat in batches if needed to avoid overcrowding. Brown the meat until no pink remains and it develops a rich caramelized crust, about 6-8 minutes.
- Drain Excess Fat: After browning, drain excess fat to keep the chili hearty but not greasy.
Chopping Vegetables
Next, chopping the vegetables precisely allows their flavors to blend seamlessly into the chili:
- Onion: Peel and dice one large yellow onion into uniform ¼-inch pieces for even cooking and sweetness release.
- Garlic: Mince 3-4 cloves finely. The garlic’s aroma is crucial for layering flavor inside the chili.
- Bell Pepper: Core and seed one medium red bell pepper. Dice into ¼-inch pieces to balance sweetness with the smoky spice.
- Optional Jalapeños: If using for heat, finely chop 1-2 jalapeños, removing seeds for milder heat or keeping seeds for extra spice.
Organize chopped vegetables in separate bowls to add at specific cooking stages.
Measuring Spices
Accurate spice measurement is key to achieving the balanced heat and smokiness of Boots And Sonny’s Chili:
| Spice | Amount | Notes |
|---|---|---|
| Chili Powder | 3 tbsp | Provides base heat and depth |
| Ground Cumin | 2 tsp | Adds earthy warmth |
| Smoked Paprika | 1 tbsp | Delivers signature smoky flavor |
| Garlic Powder | 1 tsp | Boosts garlic flavor subtly |
| Onion Powder | 1 tsp | Enhances overall savoriness |
| Cayenne Pepper | ½ tsp (optional) | Adjust based on preferred heat |
| Salt | 1 tbsp | Season to taste |
| Black Pepper | ½ tsp | Adds mild spice complexity |
We measure each spice meticulously using teaspoon and tablespoon measures for consistency. Mixing them in a small bowl before adding to the pot ensures even distribution.
By following these detailed prep steps for meat, vegetables, and spices, we set the stage perfectly for creating Boots And Sonny’s Chili that is thick, hearty, and bursting with layers of flavor.
Cooking Instructions for Boots And Sonny’s Chili Recipe
Follow these precise steps to create the hearty and smoky Boots And Sonny’s Chili that brings bold flavor to your table. Each stage builds layers of depth and richness essential for this iconic chili.
Browning the Meat
- Preheat a large heavy-bottomed pot or Dutch oven over medium-high heat.
- Add the combined ground beef, ground pork, and optional beef chuck to the pot.
- Break the meat apart using a wooden spoon, spreading it evenly in the pot.
- Let the meat cook undisturbed for 3-4 minutes to develop a deep caramelized crust.
- Stir occasionally and continue cooking until the meat is fully browned and no pink remains, about 6-8 minutes total.
- Drain excess fat carefully to prevent greasiness while retaining essential flavor.
Sautéing Vegetables
- Add 1 large diced onion, 3 minced garlic cloves, and 1 diced bell pepper directly into the browned meat.
- Stir continuously over medium heat until vegetables soften and become translucent, around 5 minutes.
- Watch for the garlic becoming fragrant to avoid burning and bitterness.
- This process releases the natural sweetness of the vegetables, enhancing the chili’s complexity.
Adding Beans and Liquids
- Stir in 1 can (15 oz) of kidney beans and 1 can (15 oz) of pinto beans, both drained and rinsed.
- Add 2 cups of beef broth to maintain the thick consistency we want.
- Pour in 1 cup of crushed tomatoes for acidity and body.
- Measure and add the spice mix carefully to deepen flavor:
| Spice | Amount |
|---|---|
| Chili Powder | 2 tablespoons |
| Ground Cumin | 1 tablespoon |
| Smoked Paprika | 1 teaspoon |
| Garlic Powder | 1 teaspoon |
| Onion Powder | 1 teaspoon |
| Cayenne Pepper | 1/4 teaspoon (adjust for heat) |
| Salt | 1 teaspoon |
| Black Pepper | 1/2 teaspoon |
- Mix thoroughly to blend ingredients evenly and coat every component with the spices.
Simmering the Chili
- Reduce heat to low and cover the pot with a tight-fitting lid.
- Let the chili simmer gently for at least 45 minutes, stirring occasionally to prevent sticking.
- Adjust thickness by adding more beef broth if it gets too thick or simmer longer to thicken.
- Taste and tweak seasonings near the end of cooking to balance smokiness and heat.
- Uncover for the last 10 minutes if you want a thicker chili with intensified flavors.
By following these steps, we ensure Boots And Sonny’s Chili reaches its signature rich smoky taste and satisfying texture.
Serving Suggestions for Boots And Sonny’s Chili Recipe
Boots And Sonny’s Chili Recipe shines as a hearty main dish but comes alive when paired with the right sides and toppings. Let’s explore how to elevate this smoky, flavorful chili into a complete meal experience.
Recommended Side Dishes
Pairing Boots And Sonny’s Chili with appropriate side dishes balances flavor and texture while complementing its robust profile. We recommend the following sides:
- Cornbread: The sweet crumbly texture offsets the chili’s smoky heat perfectly. Serve warm with butter.
- Rice: A simple bed of steamed white or brown rice helps soak up the rich chili sauce.
- Tortilla Chips: Crunchy and salty chips add a delightful contrast and function as a scoop for the chili.
- Pickled Jalapeños: Their sharp acidity cuts through the richness and adds a spicy tang.
- Coleslaw: A crisp tangy slaw refreshes the palate between bites.
| Side Dish | Flavor Profile | Serving Suggestion |
|---|---|---|
| Cornbread | Sweet, buttery | Warm with butter |
| Rice | Mild, neutral | Steamed, as a base |
| Tortilla Chips | Salty, crunchy | On the side or for scooping |
| Pickled Jalapeños | Tangy, spicy | As a spicy condiment |
| Coleslaw | Crisp, refreshing | Chilled alongside |
Suggested Toppings
Toppings bring Boots And Sonny’s Chili to life with bursts of color, texture, and contrasting flavors. Here are our favorite garnishes:
- Shredded Cheddar or Monterey Jack Cheese: Melts into the chili adding creamy richness.
- Sour Cream or Greek Yogurt: Offers a cool tang that balances the spice.
- Chopped Green Onions: Adds fresh sharpness and crunch.
- Fresh Cilantro: Lends herbaceous brightness enhancing the complex chili spices.
- Diced Avocado: Creamy texture and subtle flavor provide a luxurious mouthfeel.
- Sliced Jalapeños or Hot Sauce: For those who want to turn up the heat.
“The right combination of toppings turns Boots And Sonny’s chili from a satisfying dish to an unforgettable culinary experience.”
We encourage mixing and matching these toppings to suit your heat tolerance and flavor preferences, allowing everyone at the table to personalize their bowl.
Make-Ahead and Storage Tips for Boots And Sonny’s Chili Recipe
Proper planning elevates our experience with the Boots And Sonny’s Chili Recipe by saving time and intensifying flavors. Here are our expert tips for making this chili ahead and storing it safely while preserving its rich, smoky character.
Preparing Chili Ahead of Time
- Make 1-2 days before serving
Prepare the chili fully up to the simmering stage. Allow it to cool slightly before refrigerating. This resting period lets the spices meld deeply, enhancing the overall flavor.
- Reheat gently
When ready to serve, reheat on low to medium heat while stirring occasionally to prevent sticking. If the chili thickens too much, add a splash of beef broth or water for a perfect consistency.
Refrigeration Storage
| Storage Method | Duration | Tips |
|---|---|---|
| In a sealed container | 3-4 days | Cool chili completely before refrigeration. Use airtight containers to avoid absorbing odors from the fridge. |
| In the pot (lid on) | 2 days | Reheat thoroughly to 165°F (74°C) before serving. Stir well before serving. |
- Label containers with the date to track freshness.
- Avoid leaving the chili at room temperature longer than 2 hours to reduce the risk of bacterial growth.
Freezing Instructions
- Portion before freezing
Divide chili into meal-sized portions for easy thawing and reheating.
- Use freezer-safe containers or heavy-duty freezer bags
Remove as much air as possible to prevent freezer burn.
| Freezing Tips | Details |
|---|---|
| Shelf life in freezer | Up to 3 months |
| Thawing | Overnight in refrigerator or use defrost setting on microwave |
| Reheating from frozen | Heat slowly on stovetop, stirring frequently |
Additional Tips to Maintain Flavor and Texture
- Stir in garnish toppings like shredded cheese and sour cream only after reheating to keep their fresh texture.
- If beans absorb too much liquid after refrigeration or freezing, add a small amount of broth when reheating.
- For thicker chili after reheating, simmer uncovered for 5-10 minutes to reduce excess liquid.
“Allowing our chili to rest and making it ahead not only saves time but also unlocks the full depth of its smoky, hearty flavors.” Following these make-ahead and storage steps ensures every bowl delivers the satisfying warmth that defines Boots And Sonny’s Chili Recipe.
Conclusion
Boots and Sonny’s Chili Recipe offers a perfect blend of rich flavors and hearty ingredients that make every meal memorable. Its balance of smoky spices and tender meats creates a comforting dish that’s easy to prepare and customize.
Whether you’re cooking for family or friends, this chili stands out as a versatile and satisfying option. With simple steps and thoughtful tips, it’s a recipe that fits seamlessly into any kitchen routine.
We’re confident that once you try it, Boots and Sonny’s Chili will become a go-to favorite for cozy dinners and lively gatherings alike.
Frequently Asked Questions
What makes Boots and Sonny’s Chili Recipe unique?
Boots and Sonny’s Chili stands out due to its rich, smoky flavor and balanced spices. It uses a mix of ground beef, pork, and optional beef chuck, combined with kidney and pinto beans, vegetables, and a unique spice blend that includes smoked paprika and cumin, creating a hearty and flavorful chili.
What ingredients are essential for this chili?
Key ingredients are ground beef, ground pork, kidney beans, pinto beans, onions, garlic, bell peppers, beef broth, crushed tomatoes, chili powder, cumin, smoked paprika, and optional toppings like shredded cheese and sour cream.
What equipment do I need to cook this chili?
You need a large heavy-bottomed pot or Dutch oven for even cooking, a skillet for browning meat, a sharp chef’s knife, measuring cups, and optionally an immersion blender and can opener.
How do I achieve the perfect smoky flavor in this chili?
Brown the meat first to develop a caramelized crust, then sauté the vegetables before adding beans, broth, tomatoes, and spices. Simmer the chili to meld flavors, adjusting seasoning and thickness for balance.
What are the best sides and toppings for Boots and Sonny’s Chili?
Recommended sides include cornbread, rice, tortilla chips, pickled jalapeños, and coleslaw. Top your chili with shredded cheese, sour cream, green onions, cilantro, diced avocado, and sliced jalapeños or hot sauce for added flavor.
Can Boots and Sonny’s Chili be made ahead of time?
Yes, making it 1-2 days ahead allows flavors to deepen. Store in sealed containers in the refrigerator for 3-4 days or freeze portions for up to 3 months. Reheat gently to preserve taste and texture.
How do I adjust the heat level of the chili?
Control the spice by adjusting the amount of chili powder and jalapeños used. For milder chili, reduce these or omit spicy toppings; add hot sauce or extra chili powder for more heat.
Is this chili suitable for large gatherings?
Absolutely! Boots and Sonny’s Chili is hearty and easy to prepare in large batches, making it perfect for family dinners, potlucks, or parties. Simply multiply ingredients and serve with plenty of sides and toppings.