
Bolitas de Coco are delightful coconut treats that bring a burst of tropical flavor to any occasion. Originating from Latin American cuisine, these bite-sized sweets are loved for their chewy texture and rich coconut taste. They’re simple to make yet impressively delicious, perfect for sharing with friends and family.
Ingredients
To prepare our delicious Bolitas de Coco, we need simple yet flavorful ingredients that highlight the natural sweetness and chewy texture of coconut. Here is a detailed list organized by usage, ensuring accuracy and ease during preparation:
| Ingredient | Quantity | Preparation Notes |
|---|---|---|
| Unsweetened shredded coconut | 2 cups | Freshly shredded preferred for best texture |
| Sweetened condensed milk | 1 cup | Acts as the binding agent and sweetener |
| Powdered sugar | 1/2 cup | For extra sweetness and coating |
| Vanilla extract | 1 teaspoon | Enhances the flavor |
| Lime zest (optional) | 1 teaspoon | Adds a fresh citrus twist |
| Toasted coconut flakes | 1/2 cup | For coating the finished bolitas |
We use unsweetened shredded coconut as the core ingredient for that rich and authentic coconut flavor. The sweetened condensed milk works as our binding and sweetening agent, giving the bolitas their chewy consistency. Adding powdered sugar balances the texture and sweetness perfectly. A splash of vanilla extract lifts the aroma and flavor profile. For an added touch of freshness, we include optional lime zest which complements the coconut beautifully. Lastly, toasted coconut flakes provide a lovely crunchy coating for that extra sensory appeal.
Equipment Needed
To create perfect Bolitas de Coco, having the right equipment makes the process smooth and enjoyable. Here is the list of essential tools we rely on for consistent results:
- Mixing Bowl
Choose a medium-sized bowl to combine the shredded coconut, sweetened condensed milk, powdered sugar, and vanilla extract evenly.
- Measuring Cups and Spoons
Accurate measurements are key. Use standard measuring cups for the dry and wet ingredients, plus teaspoons for the vanilla and lime zest.
- Rubber or Silicone Spatula
Ideal for scraping the sides of the bowl and folding ingredients smoothly without losing moisture or coconut flakes.
- Baking Sheet or Plate
We recommend a flat surface lined with parchment paper or a silicone mat to place the shaped coconut balls before chilling.
- Small Cookie Scoop or Spoon
To ensure uniform size and shape, use a cookie scoop or small spoon to portion the mixture before rolling.
- Hands for Rolling
Clean and dry hands work best to gently roll the mixture into bite-sized balls.
- Optional: Microwave-Safe Bowl
If toasting coconut flakes at home, a microwave-safe bowl can speed up the toasting process.
| Equipment | Purpose | Notes |
|---|---|---|
| Mixing Bowl | Combine ingredients | Medium size preferred |
| Measuring Cups/Spoons | Measure ingredients accurately | Essential for consistency |
| Rubber/Silicone Spatula | Mix and fold ingredients smoothly | Prevents sticking |
| Baking Sheet/Plate | Hold formed balls before chilling | Line with parchment or mat |
| Small Cookie Scoop/Spoon | Portion dough uniformly | Creates even-sized Bolitas |
| Hands | Roll mixture into balls | Keep hands clean and dry |
| Microwave-Safe Bowl | Toast coconut flakes (optional) | Speeds toasting time |
Using these tools ensures we can prepare Bolitas de Coco efficiently while achieving the ideal texture and shape every time.
Prep Work
To start our Bolitas de Coco recipe, we focus on preparing the coconut mixture and the coating. Proper prep ensures these delicious coconut balls hold their shape and deliver the perfect chewy texture.
Preparing the Coconut Mixture
- In a medium-sized mixing bowl, combine the following key ingredients for the coconut mixture:
- 2 cups unsweetened shredded coconut
- 1 cup sweetened condensed milk
- 1/4 cup powdered sugar
- 1 teaspoon vanilla extract
- Optional: 1 teaspoon lime zest for a refreshing twist
- Using a rubber or silicone spatula, mix these ingredients thoroughly. The goal is to create a sticky, uniform dough where the shredded coconut is fully coated by the sweetened condensed milk and powdered sugar.
- Once mixed, cover the bowl with plastic wrap and place it in the refrigerator for 20–30 minutes. Chilling firms the mixture making it easier to handle during shaping.
Preparing the Coating
- While the coconut mixture chills, prepare the coating to enhance both texture and flavor.
- For a crunchy and aromatic finish, toast an additional 1 cup of shredded coconut flakes in a dry skillet over medium heat. Stir constantly until the coconut turns golden brown, approximately 3–5 minutes.
- Transfer the toasted coconut flakes to a plate lined with parchment paper. Let them cool completely to avoid melting or crushing when rolling the coconut balls.
- If preferred, you can also prepare a simple rolling station:
| Tool/Ingredient | Purpose |
|---|---|
| Baking sheet | Holds shaped balls for chilling |
| Parchment paper | Prevents sticking |
| Toasted coconut flakes | Adds crunchy coating and flavor |
We find that following these prep steps carefully creates the perfect base and coating for delicious Bolitas de Coco ready to be shaped and served.
Instructions
Follow these steps carefully to create the perfect Bolitas de Coco. We will guide you through mixing, shaping, and coating to ensure each bite delivers that authentic chewy texture and rich coconut flavor.
Mixing the Ingredients
- In a medium-sized mixing bowl, combine:
- 2 cups unsweetened shredded coconut
- 1 cup sweetened condensed milk
- 1/2 cup powdered sugar
- 1 teaspoon vanilla extract
- Optional: 1 teaspoon lime zest (for a refreshing twist)
- Use a rubber spatula to stir the ingredients vigorously until the mixture is sticky and uniform.
- Cover the bowl with plastic wrap and place it in the refrigerator for 20–30 minutes. This chilling step firms up the mixture, making it easier to shape.
| Ingredient | Quantity | Purpose |
|---|---|---|
| Unsweetened shredded coconut | 2 cups | Base, texture, natural sweetness |
| Sweetened condensed milk | 1 cup | Binding agent |
| Powdered sugar | 1/2 cup | Additional sweetness, texture |
| Vanilla extract | 1 teaspoon | Flavor enhancer |
| Lime zest (optional) | 1 teaspoon | Adds freshness and zing |
Shaping the Bolitas De Coco
- Prepare your rolling station with a baking sheet lined with parchment paper.
- Using a small cookie scoop or a spoon, portion out about 1 tablespoon of the chilled coconut mixture.
- Roll each portion between your clean palms to form smooth, firm balls approximately 1 inch in diameter.
- Place the shaped balls evenly spaced on the parchment-lined baking sheet.
“Rolling the mixture while cold helps maintain the firm texture essential to true Bolitas de Coco.”
Coating the Bolitas
- Toast about 1 cup of additional shredded coconut flakes in a dry skillet over medium heat, stirring constantly until they turn golden brown and emit a nutty aroma. Remove promptly to prevent burning.
- Spread the toasted coconut flakes on a wide plate.
- Roll each coconut ball gently but thoroughly in the toasted flakes until fully coated.
- Place the coated Bolitas de Coco back on the parchment-lined baking sheet.
- Refrigerate the coated balls for at least 15 minutes to set.
The toasted coconut coating delivers a crisp and aromatic contrast to the chewy interior, elevating the snack’s appeal.
Cooking or Setting
Bolitas de Coco require minimal cooking but precise setting to achieve their signature chewy texture and rich flavor. Proper refrigeration is key to firming up the coconut balls, ensuring they hold their shape and deliver the perfect bite.
Refrigeration or Baking (if applicable)
For this recipe, refrigeration is essential. Unlike baked goods, Bolitas de Coco are no-bake treats that rely on chilling to set properly. Here’s what we do:
- After shaping, place the coconut balls on a parchment-lined baking sheet.
- Refrigerate them for at least 1 hour. This step firms up the mixture, making the balls easier to handle and enhancing the chewy texture.
- Optional extended chilling: For an even firmer bite, refrigerate up to 3 hours or overnight.
- Do not bake, as heat can alter the coconut’s natural flavor and texture, resulting in a dry or crumbly snack.
| Step | Action | Duration | Purpose |
|---|---|---|---|
| Shaping | Roll mixture into balls | 5–10 minutes | Prepare for setting |
| Refrigeration | Chill on parchment-lined tray | Minimum 1 hour | Firm up texture and hold shape |
| Extended chill | Optional longer refrigeration | Up to overnight | Achieve a firmer, denser texture |
“Refrigeration is the secret to perfect Bolitas de Coco — it locks in moisture delivering that wonderful chewy consistency we love.”
After chilling, the coconut balls are ready to serve or store in an airtight container. This simple setting process lets the natural sweetness and toasted coconut coating shine through perfectly.
Serving Suggestions
To enjoy our Bolitas de Coco at their best, we recommend several delicious ways to serve these chewy coconut delights. Their naturally sweet and toasty flavor pairs wonderfully with a variety of accompaniments and occasions.
Pairing Ideas
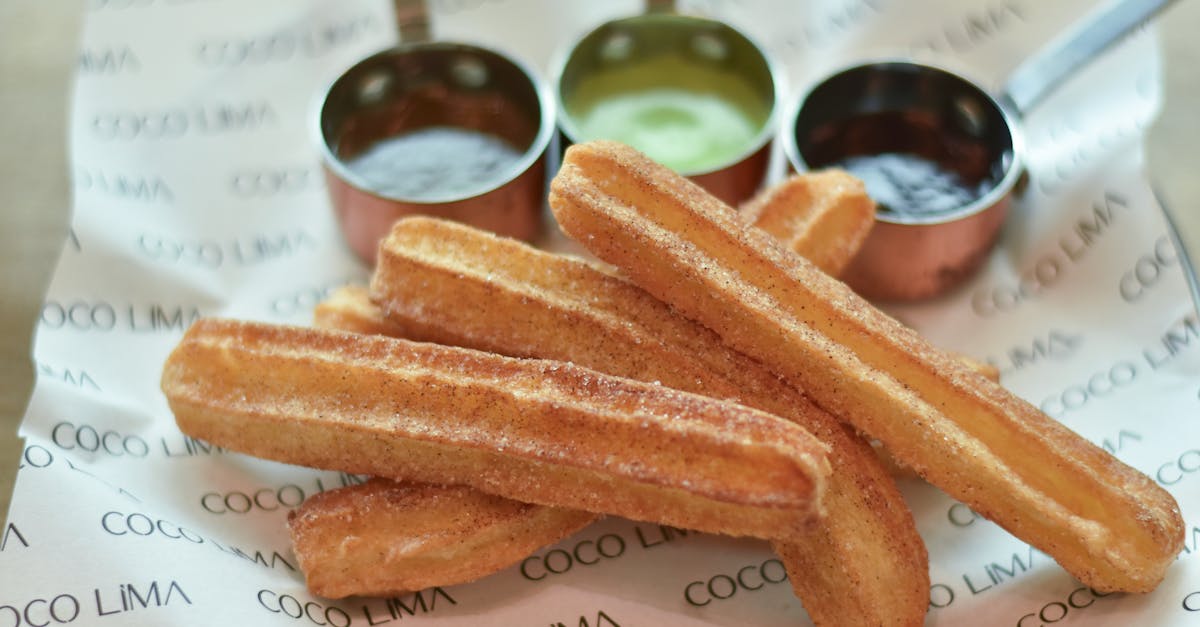
- Serve Bolitas de Coco alongside a cup of rich espresso or sweetened iced tea for a refreshing contrast between the creamy sweetness and bold drinks.
- Create a tropical dessert platter by adding slices of fresh mango, pineapple, and papaya to complement the coconut flavor.
- Present them with homemade dulce de leche or chocolate sauce for dipping, enhancing the snack with extra layers of sweetness.
Presentation Tips
- Arrange the Bolitas de Coco on a decorative serving plate or tiered dessert stand.
- Garnish the tray with toasted coconut flakes or a sprinkling of powdered sugar to add visual appeal and texture contrast.
- Insert small cocktail sticks or mini forks to make picking up the balls easy and elegant for guests.
Storage for Serving Later
| Storage Method | Duration | Notes |
|---|---|---|
| Airtight container | Up to 5 days | Keep refrigerated to maintain firmness |
| Freezer | Up to 1 month | Thaw in refrigerator before serving |
“Chilling key to perfect texture — If serving later, be sure to keep the Bolitas de Coco cold to preserve their chewy consistency.”
Serving Temperature
- Serve them chilled or at room temperature depending on preference.
- Chilled versions will have a firmer bite and refreshing feel.
- Room temperature allows the flavors to soften and intensify, offering a melt-in-your-mouth experience.
This approach helps us highlight the versatility of our Bolitas de Coco whether for casual snacking, festive gatherings, or as a festive homemade gift.
Storage Tips
To keep our Bolitas de Coco fresh and flavorful, proper storage is key. Follow these tips to preserve their chewy texture and rich coconut aroma.
- Use an Airtight Container: Always store the Bolitas de Coco in an airtight container. This prevents moisture from entering and keeps the coconut balls from drying out or absorbing other fridge odors.
- Refrigeration: Place the container in the refrigerator. The cool environment maintains the balls’ firmness and enhances their chewy texture. Refrigerate for up to 5 days for the best taste and consistency.
- Freezing for Longer Storage: If we want to store Bolitas de Coco for more than a few days, freezing is the best option. Wrap the balls individually in plastic wrap or parchment paper, then place them in a freezer-safe airtight container or a zip-top freezer bag.
| Storage Method | Duration | Notes |
|---|---|---|
| Refrigeration | Up to 5 days | Keeps texture perfect, serve chilled |
| Freezing | Up to 1 month | Thaw in fridge before serving |
Tip: When ready to enjoy frozen Bolitas de Coco, allow them to thaw in the refrigerator for 2–3 hours. Serving them slightly chilled enhances the flavor and texture.
- Serving Temperature: Although delicious chilled, some prefer to let the coconut balls sit at room temperature for 10–15 minutes before serving. This softens the texture slightly and intensifies the coconut flavor.
By following these Storage Tips, we ensure our Bolitas de Coco stay irresistibly chewy, aromatic, and ready to delight on every occasion.
Conclusion
Bolitas de Coco are a simple yet satisfying treat that brings a burst of tropical flavor to any moment. Their chewy texture and toasted coconut coating make them a crowd-pleaser whether you’re enjoying a casual snack or hosting a festive gathering.
With just a handful of ingredients and easy steps, we can create these delightful coconut balls that pair beautifully with coffee, tea, or fresh fruit. Storing them properly ensures they stay fresh and delicious, ready whenever a sweet craving hits.
Making Bolitas de Coco is a fun way to share a taste of Latin American tradition with those we care about. Let’s enjoy every bite and the smiles they bring.
Frequently Asked Questions
What are Bolitas de Coco?
Bolitas de Coco are a traditional Latin American coconut treat. They are chewy coconut balls made with shredded coconut, sweetened condensed milk, powdered sugar, and often coated with toasted coconut flakes, offering a sweet and rich flavor.
What ingredients do I need to make Bolitas de Coco?
You’ll need unsweetened shredded coconut, sweetened condensed milk, powdered sugar, vanilla extract, optional lime zest for freshness, and toasted coconut flakes for coating.
Is baking required to make Bolitas de Coco?
No, Bolitas de Coco are not baked. They rely on refrigeration to firm up and achieve their chewy texture, avoiding any heat that alters their flavor and texture.
How long should the coconut mixture be chilled?
The coconut mixture should be chilled for 20–30 minutes before shaping and the formed balls refrigerated for at least 1 hour to set properly.
What equipment is necessary for making Bolitas de Coco?
Essential tools include a mixing bowl, measuring cups and spoons, a spatula, a baking sheet or plate with parchment paper, and optionally a cookie scoop for consistent sizing.
How do I toast coconut flakes for the coating?
Toast shredded coconut flakes in a dry skillet over medium heat, stirring regularly until they turn golden brown and aromatic, then let them cool before using.
Can Bolitas de Coco be stored, and how?
Yes, store them in an airtight container in the refrigerator for up to 5 days or freeze for up to a month. Thaw frozen balls in the fridge for 2–3 hours before serving.
What are some serving suggestions for Bolitas de Coco?
Serve with rich espresso, sweetened iced tea, fresh tropical fruits, or drizzled with dulce de leche or chocolate sauce for extra flavor.
Can lime zest be omitted from the recipe?
Yes, lime zest is optional and adds a refreshing twist, but the recipe still works great without it.
How do I prevent Bolitas de Coco from sticking to my hands while rolling?
Chill the mixture well before rolling and consider lightly wetting or dusting your hands with powdered sugar to prevent sticking.