
There’s something truly special about homemade blueberry syrup. It captures the vibrant flavor of fresh blueberries in a sweet, versatile syrup that’s perfect for pancakes waffles or even cocktails. Making your own syrup not only lets us control the ingredients but also preserves the taste of summer all year round.
Canning blueberry syrup is a fantastic way to enjoy this delicious treat long after blueberry season ends. With the right recipe and simple steps we can create a shelf-stable syrup that’s ready whenever we want to add a burst of fruity sweetness to our favorite dishes. This recipe is straightforward yet yields a rich syrup that balances sweetness with the natural tartness of blueberries.
Whether you’re a seasoned canner or just starting out this blueberry syrup recipe is a must-have in our kitchen arsenal. Let’s dive into making this delightful syrup that’s sure to become a staple in our pantry.
Ingredients
To create our Blueberry Syrup Recipe for Canning, we need a precise balance of fresh ingredients to capture the vibrant, natural flavor of blueberries while ensuring perfect preservation. Here are the key ingredients we use for a rich syrup that stores beautifully and tastes delicious year-round:
- 4 cups fresh blueberries (preferably ripe and firm for the best flavor and color)
- 2 cups granulated sugar (this helps achieve the ideal sweetness and consistency for canning)
- 1 cup water (to dissolve the sugar and create the syrup base)
- 1 tablespoon freshly squeezed lemon juice (adds brightness and preserves color)
- 1/2 teaspoon lemon zest (optional, for an extra hint of citrus aroma)
| Ingredient | Quantity | Notes |
|---|---|---|
| Fresh blueberries | 4 cups | Ripe and firm |
| Granulated sugar | 2 cups | Balances tartness and sweetness |
| Water | 1 cup | Creates syrup base |
| Fresh lemon juice | 1 tablespoon | Enhances flavor and preservation |
| Lemon zest (optional) | 1/2 teaspoon | Adds citrus aroma |
Pro tip: Use fresh blueberries for the most vibrant taste. Frozen berries can work but may alter the syrup color slightly. The lemon juice is crucial to keep the syrup bright and safe for canning, so don’t skip it!
We recommend measuring each ingredient carefully to maintain the syrup’s ideal texture. This ingredient list creates a perfectly balanced syrup—richly sweet and bursting with blueberry flavor—ready for canning and enjoying any time of year.
Equipment Needed
To make our Blueberry Syrup Recipe For Canning successful and safe, having the right equipment on hand is essential. Here’s a detailed list of the tools we need to prepare, cook, and preserve the syrup efficiently:
- Large stainless steel pot
For cooking the blueberries, water, and sugar mixture evenly without affecting flavor.
- Canning jars with lids and bands
Mason jars work best and ensure a proper seal during the canning process.
- Jar lifter
To safely lift hot jars in and out of boiling water for sterilizing and processing.
- Wide-mouth funnel
Helps us pour the syrup into jars cleanly, avoiding spills and sticky messes.
- Ladle
For scooping and transferring the hot syrup into the jars with precision.
- Bubble remover or non-metallic spatula
To remove air bubbles from the jar before sealing to promote safe preservation.
- Large boiling water canner or stockpot with rack
Necessary for processing the filled jars through boiling water to create a vacuum seal.
- Clean kitchen towels
Used to wipe jar rims before sealing and to handle hot jars safely.
- Measuring cups and spoons
To measure exact quantities of sugar, water, lemon juice, and other ingredients.
| Equipment | Purpose |
|---|---|
| Large stainless steel pot | Cook syrup mixture |
| Canning jars with lids | Store and preserve syrup |
| Jar lifter | Safely handle hot jars |
| Wide-mouth funnel | Pour syrup into jars without spills |
| Ladle | Transfer syrup |
| Bubble remover/spatula | Remove air bubbles |
| Boiling water canner/rack | Process jars for sealing |
| Clean kitchen towels | Wipe rims and handle jars safely |
| Measuring cups and spoons | Accurate ingredient measurements |
Important Note: We always sterilize our jars and lids by boiling them before use. This step is critical for safe canning ensuring long shelf life and food safety.
Having this complete setup ready before starting enables us to move smoothly through each step of making and canning this vibrant blueberry syrup. It keeps our process organized, hygienic, and efficient.
Preparing Blueberries for Syrup
To create the perfect blueberry syrup for canning, preparing our blueberries carefully is essential. This step ensures the syrup achieves the vibrant flavor and rich color we desire.
Washing and Sorting Blueberries
We start by rinsing the blueberries under cold running water to remove dirt, debris, and any residual pesticides. It’s best to use a colander so that the berries can drain well afterward. As we wash, we take the time to sort through the berries, removing any that are:
- Overripe or mushy
- Moldy or shriveled
- Stems or leaves
This sorting ensures our syrup maintains a fresh, clean taste and prevents off-flavors. After rinsing and sorting, we pat the blueberries dry gently with a clean kitchen towel or let them air dry briefly to avoid excess water diluting the syrup.
Crushing or Mashing Blueberries
To release the juicy flavor and color, we need to crush or mash the blueberries before cooking. We can use one of the following methods depending on the texture we prefer:
| Method | Equipment | Resulting Texture |
|---|---|---|
| Manual Mashing | Potato masher or fork | Chunky with some whole berries |
| Food Processor | Pulse briefly | Smooth puree with no large chunks |
When mashing, we stop once most berries are broken and juices flow freely but still retain some natural berry texture. This balance helps the syrup keep its appealing body and vibrancy without being overly smooth or gritty.
“Crushing your blueberries just right unlocks their full burst of flavor ensuring our syrup is deliciously rich and beautifully colored.”
By carefully preparing our blueberries in these ways, we set the foundation for a syrup that is not only flavorful but also perfect for canning and long-term enjoyment.
Making the Blueberry Syrup
Let’s dive into the heart of our recipe—making the blueberry syrup. This step is where fresh blueberries, simple ingredients, and careful technique come together to create a vibrant syrup perfect for canning and year-round enjoyment.
Combining Ingredients
We start by assembling all key ingredients to ensure a smooth cooking process:
- 4 cups fresh blueberries, washed and crushed
- 2 cups granulated sugar
- 1 cup water
- 1 tablespoon freshly squeezed lemon juice
- Optional: 1 teaspoon lemon zest for added brightness
Tip: The lemon juice is crucial—it helps preserve the syrup’s natural color and enhances safety during canning.
Cooking Process
Next, follow these precise steps to cook the syrup perfectly:
- In a large stainless steel pot, combine the crushed blueberries, sugar, and water.
- Stir gently over medium heat until the sugar dissolves completely.
- Bring the mixture to a gentle boil. Reduce heat and let it simmer for 10–15 minutes, stirring occasionally.
- As the syrup simmers, the blueberries will release their juices, and the mixture will thicken.
- Stir in lemon juice and optional lemon zest, then simmer for an additional 2 minutes.
- Remove from heat and let the syrup cool slightly before straining it through a fine mesh sieve or cheesecloth to remove solids for a smooth finish (optional).
Adjusting Consistency and Sweetness
Fine-tuning the syrup’s consistency and sweetness is essential for the best results:
| Step | Action | Outcome |
|---|---|---|
| Check syrup thickness | Place a spoonful on a chilled plate, let cool | Should coat the back of the spoon |
| If too thin | Return to simmering and cook for 2–3 more minutes | Thicker syrup |
| If too thick | Stir in small amounts of water gradually | Desired pourable consistency |
| Taste test sweetness | Sample syrup after cooking | Adjust by adding sugar if desired |
| Balance tartness | Add more lemon juice carefully if syrup feels flat | Brightens flavor |
Remember: The syrup will thicken more as it cools. Aim for slightly thinner consistency when hot.
“Perfectly balancing sweetness and thickness ensures your blueberry syrup enhances every dish or drink it touches.”
Now that our syrup is ready and adjusted, we prepare to fill sterilized jars and begin the canning process to preserve this flavorful treat.
Canning Preparation
Proper canning preparation is essential to safely preserve our homemade blueberry syrup. Attention to sterilization and equipment setup will guarantee long-lasting freshness and flavor.
Sterilizing Jars and Lids
Before filling, we must thoroughly sterilize jars and lids to eliminate any bacteria or contaminants. Here’s our step-by-step method:
- Place clean canning jars and lids into a large pot or the boiling water canner.
- Fill with water until jars are fully submerged. Bring to a rolling boil.
- Boil for 10 minutes to sterilize jars and lids (adjust time if elevation is above 1,000 feet—add 1 minute per 1,000 feet).
- Keep jars hot until ready to fill to prevent cracking when adding hot syrup.
- Use a clean jar lifter to carefully remove the jars and place them inverted on a clean kitchen towel.
- Do not dry jars with a towel to avoid recontamination.
“Sterilizing is the cornerstone of safe canning. Skipping or rushing this step risks spoilage and unsafe syrup.”
Preparing Water Bath Canner
Setting up our water bath canner correctly ensures proper heat circulation during processing:
| Step | Details |
|---|---|
| Fill Caner | Fill the canner with enough water to cover filled jars by at least 1 inch (2.5 cm) |
| Heat Water | Heat water to a low boil and maintain during processing |
| Rack Placement | Place a canning rack inside to prevent jars from direct contact with the canner bottom |
| Monitor Water Level | Add boiling water as needed during canning to keep jars submerged |
| Ready Workspace | Arrange clean towels nearby to safely handle hot jars |
We always preheat the water bath before placing jars inside to avoid temperature shock. Maintaining a steady gentle boil is key throughout the timing process.
By meticulously preparing our jars and canner, we set the stage for successful and safe Blueberry Syrup canning that will delight us long after the blueberry season ends.
Canning the Blueberry Syrup
Canning our blueberry syrup properly preserves its vibrant flavor and ensures it stays safe for consumption long after the blueberry season. Below we detail the critical steps to confidently complete the canning process.
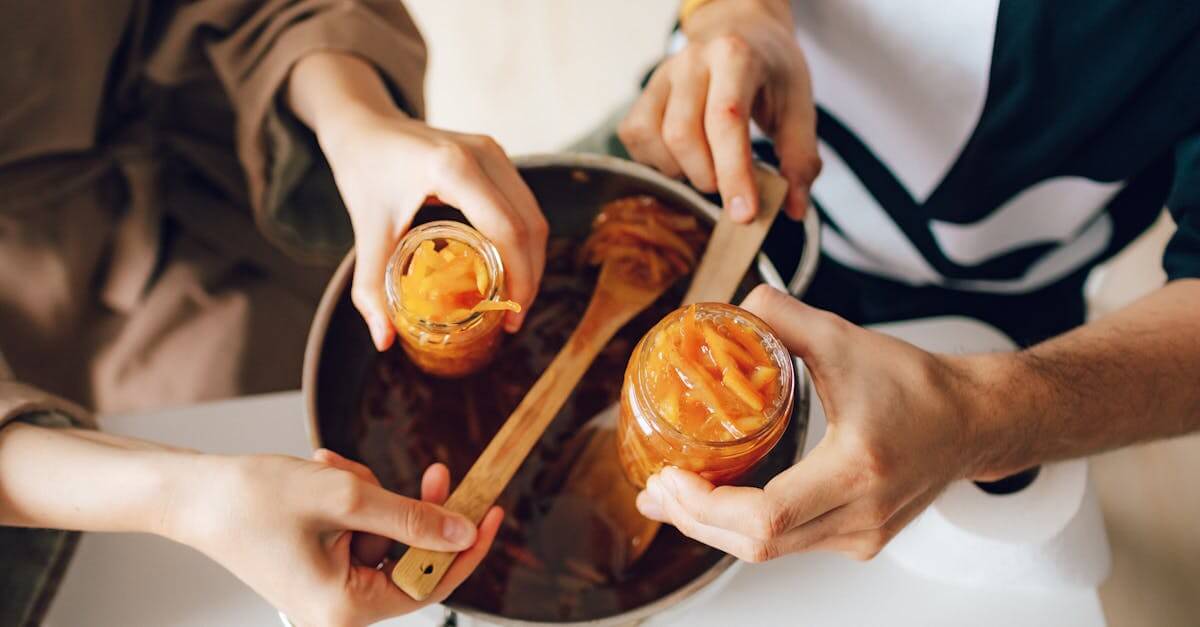
Filling Jars
Before filling, ensure your sterilized jars are warm to prevent cracking. Using a wide-mouth funnel and a ladle, pour the hot syrup into each jar, leaving a precise ¼ inch headspace at the top. This headspace allows for expansion during processing and prevents overflow.
| Step | Detail |
|---|---|
| Jar temperature | Warm to hot, not boiling |
| Syrup temperature | Hot (just off the boil) |
| Headspace | ¼ inch (6 mm) |
| Utensils | Wide-mouth funnel, ladle |
Carefully wipe the rims of the jars with a clean, damp cloth to remove any syrup residue. This step is crucial for creating a secure seal.
Sealing Jars
Place the sterilized lids on top of the jars and screw on the metal bands just until fingertip tight. Avoid over-tightening as air must escape during processing to form an airtight seal later.
- Use new lids to ensure a proper seal.
- Check lids for any dents or imperfections before use.
- Bands should be snug but not forcefully tight.
Processing in Water Bath Canner
Our syrup requires processing in a boiling water bath canner for safe preservation. Follow these steps carefully:
- Place filled and sealed jars on the rack inside the canner.
- Add enough hot water to cover jars by at least 1 inch (2.5 cm).
- Bring water to a rolling boil.
- Start timing once boiling occurs.
| Jar Size | Processing Time | Water Coverage |
|---|---|---|
| Pint (16 oz) | 10 minutes | ≥ 1 inch |
| Quart (32 oz) | 15 minutes | ≥ 1 inch |
Maintain a gentle boil for the entire processing time. Afterward, turn off the heat and allow jars to remain in the water for 5 minutes before removal.
Cooling and Storing
Remove jars using a jar lifter and place them on a clean towel or cooling rack, spaced apart to allow air circulation. Do not retighten lids.
- Let jars cool undisturbed for 12–24 hours.
- Check seals by pressing the center of each lid; it should not flex up or down.
- Label jars with date and contents.
- Store in a cool, dark, dry place away from direct sunlight.
Properly sealed jars of blueberry syrup can be stored for up to one year. Always inspect before use, looking for signs of spoilage such as bulging lids or off smells.
Tips for Perfect Blueberry Syrup
Creating the perfect blueberry syrup requires attention to detail at every stage. Here are our top tips to ensure your syrup is flavorful, safe for canning, and shelf-stable for year-round enjoyment.
1. Choose Ripe, Fresh Blueberries
Using fresh, ripe blueberries is essential. Their natural sweetness and vibrant color directly impact the syrup’s taste and appearance. Avoid overripe or moldy berries to prevent off-flavors or spoilage.
2. Measure Ingredients Accurately
Balance is key. Use our recommended measurements precisely:
- 4 cups fresh blueberries
- 2 cups granulated sugar
- 1 cup water
- 1 tablespoon freshly squeezed lemon juice
- Optional: lemon zest
| Ingredient | Quantity | Purpose |
|---|---|---|
| Fresh blueberries | 4 cups | Base flavor and color |
| Granulated sugar | 2 cups | Sweetness and preservation |
| Water | 1 cup | Dilution and consistency |
| Lemon juice | 1 tablespoon | Brightness and acidity for safety |
| Lemon zest (optional) | 1 teaspoon | Added aroma and fresh flavor |
3. Incorporate Fresh Lemon Juice
Lemon juice is not just for flavor—it acts as a natural preservative by maintaining acidity. This ensures your syrup’s safety during the canning process and preserves its bright blueberry flavor.
4. Crush Blueberries Thoroughly
To release rich juices and enhance color, crush or mash the berries well before cooking. Use a potato masher or pulse gently in a food processor. Avoid overprocessing which can make the syrup cloudy.
5. Monitor Cooking Temperature and Time
Simmer the mixture gently. Avoid boiling vigorously to prevent burning or caramelizing the sugar overly which alters taste. Stir regularly to prevent sticking. The syrup is ready when it thickens slightly and coats the back of a spoon.
6. Account for Thickening After Cooling
Remember blueberry syrup thickens as it cools. Aim for a slightly thinner consistency when hot. This prevents overly thick syrup that is hard to pour once cooled.
7. Maintain Cleanliness and Sterility
Sterilize jars and lids by boiling for at least 10 minutes. Handle jars with a jar lifter to avoid contamination. Filling jars with hot syrup preserves flavor and reduces risk of spoilage.
8. Leave Proper Headspace When Filling Jars
Leave a ¼ inch headspace between the syrup surface and the jar rim to allow for expansion during canning. This prevents jar breakage and ensures a good seal.
9. Use a Water Bath Canner Correctly
The water should cover jars by at least 1 inch during processing. Maintain a rolling boil for 15 minutes for pint jars and 20 minutes for quart jars to ensure proper sterilization and sealing.
“Perfect blueberry syrup starts with quality fruit and ends with precise canning technique. Every step matters.”
By following these tips, we guarantee you’ll produce a richly flavored, beautifully colored blueberry syrup that lasts and delights long after blueberry season fades.
Using and Serving Suggestions
Our Blueberry Syrup Recipe For Canning opens endless possibilities for enhancing your favorite meals and beverages. Here are practical and delicious ways to enjoy this vibrant syrup:
Breakfast Pairings
- Drizzle generously over pancakes or waffles for a burst of fresh blueberry flavor.
- Stir into plain yogurt or oatmeal as a naturally sweetened fruit topping.
- Blend into smoothies for added sweetness and color depth.
Beverage Enhancements
- Mix with sparkling water and ice for a refreshing blueberry soda alternative.
- Add a splash to cocktails like vodka lemonades or gin fizz for a fruity twist.
- Warm the syrup and blend with hot water and lemon for a soothing blueberry tea.
Dessert Ideas
- Pour over vanilla ice cream to create an easy homemade blueberry sauce.
- Layer in parfaits with whipped cream and granola for textured delight.
- Use as a glaze on cakes or cheesecakes to add shine and fruity notes.
Serving Tips
- Gently warm the syrup before serving to enhance aroma and pourability.
- Store opened jars in the refrigerator and use within 2–3 weeks for optimal freshness.
- Use clean utensils each time to maintain syrup quality and prevent contamination.
Quick Reference Table for Usage Suggestions
| Serving Occasion | Suggested Use | Preparation Tip |
|---|---|---|
| Breakfast | Pancakes, waffles, yogurt topping | Warm syrup slightly before drizzling |
| Drinks | Cocktails, soda, hot tea | Mix syrup with liquid and stir well |
| Desserts | Ice cream topping, cake glaze | Use directly or warm for easier pouring |
| Storage after opening | Refrigerate and consume within 2–3 weeks | Use clean spoon to avoid spoilage |
By integrating our blueberry syrup into daily meals and treats, we maximize its fresh, rich taste and vibrant color. Each serving transforms an ordinary dish into a gourmet experience reflecting the joy of homemade, canned goodness.
Conclusion
Making and canning blueberry syrup is a rewarding way to capture the fresh taste of summer all year long. With just a few simple ingredients and the right techniques, we can create a delicious syrup that elevates any dish or drink.
By following safe canning practices, our homemade syrup stays fresh and flavorful, ready whenever we want to add a burst of blueberry goodness. Whether we’re beginners or experienced canners, this recipe offers a reliable way to enjoy the vibrant taste of blueberries beyond their season.
Let’s keep experimenting with flavors and serving ideas to make the most of every jar we preserve.
Frequently Asked Questions
What ingredients do I need to make homemade blueberry syrup?
You need fresh blueberries, granulated sugar, water, freshly squeezed lemon juice, and optional lemon zest. Using ripe blueberries and lemon juice ensures vibrant flavor and helps with preservation.
Why is lemon juice important in blueberry syrup?
Lemon juice adds brightness to the flavor and acts as a natural preservative, helping keep the syrup safe for canning and extending its shelf life.
How do I prepare blueberries for syrup?
Wash and sort blueberries to remove debris and bad berries. Then crush or mash them manually or with a food processor to release juice and flavor.
What equipment is required for canning blueberry syrup?
Essential tools include a large pot, canning jars with lids, jar lifter, wide-mouth funnel, ladle, bubble remover, boiling water canner, clean towels, and measuring tools.
How do I properly sterilize jars and lids?
Boil jars and lids for 10 minutes to kill bacteria. Keep them hot until ready to fill with syrup to ensure food safety and increase shelf life.
What is the correct process for canning blueberry syrup?
Fill warm sterilized jars with hot syrup, leaving ¼ inch headspace. Seal jars with new lids fingertip-tight and process in a boiling water bath canner for the recommended time based on jar size.
How long can canned blueberry syrup be stored?
Properly sealed and stored jars can last up to one year. Always check for spoilage before consuming.
What are some popular ways to serve blueberry syrup?
Blueberry syrup is great drizzled on pancakes, waffles, ice cream, or mixed into cocktails and beverages for added flavor and color.
Can beginners safely make and can blueberry syrup at home?
Yes, the recipe and canning process are straightforward and suitable for beginners with proper equipment and careful attention to sterilization and processing steps.
How do I achieve the perfect balance of sweetness and tartness in blueberry syrup?
Use accurate measurements of sugar and lemon juice, simmer the mixture carefully, and adjust cooking time to get the desired consistency and flavor balance.