
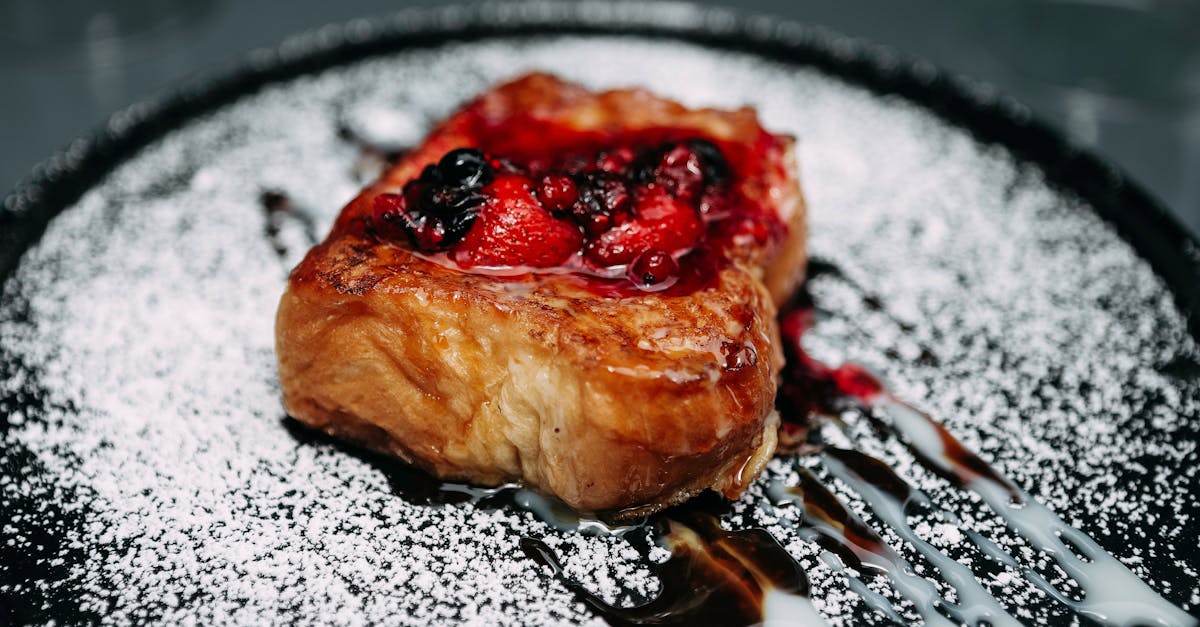
There’s something magical about homemade jam—it’s a simple way to capture the essence of fresh fruit in a jar. Our blueberry and strawberry jam combines the best of two beloved berries, creating a sweet and tangy spread that’s perfect for toast, pastries, or even a spoonful straight from the jar. It’s a burst of summer flavor that lasts all year.
We love how easy this recipe is, with no fancy equipment or tricky techniques required. Plus, making jam at home lets us control the sweetness and skip the preservatives found in store-bought versions. Whether you’re a seasoned jam-maker or trying it for the first time, this recipe is a delicious way to savor the natural goodness of blueberries and strawberries.
Blueberry And Strawberry Jam Recipe
Making blueberry and strawberry jam at home is straightforward and rewarding. This recipe highlights natural fruit flavors while keeping the process simple and achievable for everyone. Follow these steps to create a flavorful and preservative-free jam.
Ingredients
Here’s what we need to make this delicious jam:
- 2 cups of fresh blueberries, washed and drained
- 2 cups of fresh strawberries, hulled and halved
- 3 cups of granulated sugar
- 2 tablespoons of freshly squeezed lemon juice
- 1 teaspoon of vanilla extract (optional for added depth)
Equipment
- Large saucepan or pot
- Wooden spoon or heatproof spatula
- Potato masher
- Sterilized glass jars with lids
- Candy thermometer (optional but useful)
Instructions
1. Prepare the Fruit
- Place the blueberries and strawberries into a large saucepan.
- Use a potato masher to lightly crush the fruits. Aim for a balance between chunky and smooth texture, leaving some fruit bits intact for a homemade feel.
2. Add Sugar and Lemon
- Add the granulated sugar and lemon juice to the saucepan with the fruit.
- Stir well to combine all ingredients.
3. Cook on Medium Heat
- Place the saucepan over medium heat and let the mixture slowly come to a boil. Stir continuously to dissolve the sugar completely and prevent it from scorching.
- As the mixture boils, a sweet fruity aroma will fill the kitchen.
4. Skim Foam
- Once boiling, reduce to a simmer and skim off any foam that forms on the surface using a spoon. This ensures a glossy and smooth jam.
5. Check Thickness
- After 15-20 minutes of simmering, the mixture will begin to thicken. To test the jam’s consistency, use the “cold plate test”:
- Place a small plate in the freezer for 5 minutes.
- Drop a small amount of jam onto the cold plate. Push it with your finger – if it wrinkles slightly, the jam is ready.
- If it doesn’t, cook for a few more minutes and retest.
| Key Cooking Indicators | Timeframe/Action |
|---|---|
| Mixture reaches a boil | 5-7 minutes |
| Foam appears | Skim immediately |
| Consistency test using the cold plate method | At 15-20 minutes |
6. Add Vanilla (Optional)
- Stir in the vanilla extract after removing the saucepan from heat. It enhances the flavor without overwhelming the fruit.
7. Store the Jam
- Carefully ladle the hot jam into sterilized glass jars, leaving about ¼ inch of headspace at the top.
- Wipe the rims of the jars with a damp cloth to ensure a clean seal.
- Seal the jars with lids, and let them cool to room temperature. You’ll hear the satisfying “pop” of the lids sealing as the jam cools.
8. Refrigerate or Process for Longer Storage
- For short-term storage, refrigerate the jam, and it will stay fresh for up to 3 weeks.
- For long-term storage, process the jars in a boiling water bath for 10 minutes to seal them properly. This step ensures your jam remains shelf-stable for up to one year.
Ingredients
Here’s everything we’ll need to create our homemade Blueberry and Strawberry Jam. Using simple and fresh ingredients, this recipe yields a natural, sweet, and vibrant fruit spread:
- 2 cups fresh blueberries (rinsed and stems removed)
- 2 cups fresh strawberries (hulled and halved)
- 2 cups granulated sugar
- 2 tablespoons fresh lemon juice (to balance sweetness and aid preservation)
- Optional: 1 teaspoon vanilla extract (for a subtle depth of flavor)
Ingredient Notes:
- Use ripe blueberries and strawberries for the best flavor and texture.
- Do not skip the lemon juice. Its acidity is essential to maintain the jam’s shelf stability while enhancing the flavor profile.
- Vanilla extract is optional but can bring a warm, aromatic note that beautifully complements the berries.
Tools And Equipment
To make our blueberry and strawberry jam recipe as seamless as possible, it’s essential to have the right tools and equipment on hand. These items ensure efficient preparation, cooking, and storage of your homemade jam. Below is a detailed guide to the essentials:
Essential Tools and Their Functions
| Tool/Equipment | Use |
|---|---|
| Large heavy-bottom pot | Ensures even heat distribution to prevent burning or sticking while cooking the jam. |
| Wooden spoon or heat-resistant spatula | Ideal for continuous stirring and scraping the pot to avoid scorching. |
| Potato masher | Helps break down the fresh blueberries and strawberries to achieve the desired consistency. |
| Ladle | Useful for transferring the hot jam into jars without spills. |
| Small plates (for cold plate testing) | Used to test the jam’s consistency by chilling small samples in the freezer. |
| Candy thermometer (optional) | Monitors the jam’s temperature to reach the gel point (220°F). |
| Sterilized glass jars with lids | Safely stores the finished jam, keeping it fresh and free from contaminants. |
| Canning funnel | Helps pour the jam into jars neatly, reducing mess and waste. |
| Jar lifter (if canning) | Essential for safely handling hot jars during the boiling water bath for preservation. |
Additional Notes on Key Equipment:
- Heavy-bottom pot: This is one of the most critical components of successful jam-making. Avoid thin pans that can lead to uneven cooking and burning.
- Sterilized jars and lids: Proper sterilization is non-negotiable to prevent bacterial growth and ensure food safety.
- Cold plate for testing consistency: Chilling a small amount of jam on a plate from the freezer mimics its set texture at room temperature.
Tips for Preparing the Equipment:
- Wash all tools, including spoons, pots, and jars, with warm, soapy water. Rinse thoroughly.
- Sterilize the glass jars by boiling them in water for 10 minutes or as per the jar manufacturer’s instructions. Keep them warm until use.
- Place a few small plates in the freezer ahead of time for consistency testing during the cooking process.
With this comprehensive toolkit, we can create a luscious and perfectly set jam while maintaining the highest standards of safety and precision. Every tool plays a role in making sure the process is as smooth and enjoyable as the finished product.
Directions
Let’s dive into the step-by-step process of making this delicious Blueberry and Strawberry Jam. Follow these straightforward instructions to create a spread bursting with fresh fruit flavor.
Step 1: Prep The Berries
- Wash 2 cups of fresh blueberries and 2 cups of fresh strawberries thoroughly under cold water, removing any stems and debris.
- Hull the strawberries by cutting off the green tops, then chop them roughly into small pieces for easier cooking.
- Inspect the blueberries and discard any shriveled or overripe berries.
- Optional: If you prefer a smoother texture, you can lightly mash the fruit with a potato masher or fork.
Pro Tip: Aim for fruits that are ripe for optimal sweetness and vibrant color in the jam.
Step 2: Cook The Jam
- Place the prepped fruit into a large heavy-bottom pot, ensuring enough room for bubbling.
- Add 2 cups of granulated sugar and 2 tablespoons of fresh lemon juice, stirring to combine.
- Let the mixture sit for about 5 minutes to allow the sugar to draw out the natural fruit juices.
- Heat the pot over medium heat, bringing the fruit mixture to a gentle boil. Stir frequently with a wooden spoon to prevent sticking or burning.
- As the fruit cooks down, mash any larger fruit chunks for a smoother consistency. Continue boiling for 20-25 minutes, or until the mixture thickens.
- Optional: Stir in 1 teaspoon of vanilla extract during the last 5 minutes for a deeper flavor.
Important: Watch the pot carefully, as sugar can easily scorch at higher temperatures. Adjust the heat as necessary.
Step 3: Test For Consistency
- To check if the jam has reached the perfect set, use the cold plate method:
- Place a small plate in the freezer at the start of the cooking process.
- Once the jam looks thickened, take the plate out of the freezer, add a small spoonful of jam to it, and let it sit for 1 minute.
- Push the jam gently with your finger. If it wrinkles slightly and holds its shape, it is ready.
- If the jam is too runny, continue cooking and repeat the test every 3-5 minutes.
| Key Indicators | Description |
|---|---|
| Consistency | Wrinkles when pushed lightly |
| Texture | Slightly thick but spreadable |
| Color | Deep, vibrant red-blue hue |
Step 4: Jar The Jam
- While the jam is still hot, carefully ladle it into sterilized glass jars, leaving about 1/4 inch headspace at the top.
- Wipe the rims of the jars with a damp cloth to remove any spills, ensuring a proper seal.
- Screw the lids on tightly but not overly so. If preserving for long-term storage, process the jars in a hot water bath for 10 minutes.
- Allow the jars to cool completely at room temperature. You should hear a “pop” sound as the jars seal. Unsealed jars should be refrigerated and consumed within 2 weeks.
Storage Tip: Properly sealed jars can be stored in a cool, dark place for up to 1 year.
Make-Ahead Instructions
Planning to make this blueberry and strawberry jam ahead of time is simple and ensures a smoother cooking process and longer preservation. Here’s how to prepare in advance for the best results:
Prepping the Ingredients
- Wash and prep the fruit: Wash 2 cups of fresh blueberries and 2 cups of fresh strawberries thoroughly under cool running water. Remove the strawberry stems and hulls, and pat both fruits dry with a clean kitchen towel. Store the cleaned fruit in an airtight container in the refrigerator if not cooking immediately. This step can be done 1–2 days ahead.
- Measure out other ingredients: Pre-measure 2 cups of granulated sugar and 2 tablespoons of lemon juice. If using vanilla extract, measure 1 teaspoon, and store these ingredients in sealed containers.
- Chill a plate for testing: Place a small plate in the freezer to use later for the cold plate test to check the jam’s consistency during cooking.
Sterilizing Jars in Advance
Sterilized jars are critical for ensuring the jam stays fresh and safe for long-term use. Follow this timeline:
- Sterilize jars the day before cooking: Using a boiling water bath, immerse jars in boiling water for 10 minutes. Use tongs to remove them carefully, letting them air-dry on a clean towel. To maintain sterility, store the jars upside-down until use.
- Prepare matching lids and rings by washing them with hot, soapy water, rinsing them well, and leaving them to dry.
| Item to Prep | Time in Advance | Storage Notes |
|---|---|---|
| Fruits (washed & hulled) | 1–2 days before cooking | Store in the refrigerator in airtight containers. |
| Measured sugar & lemon juice | 1 day before cooking | Keep in sealed containers at room temperature. |
| Sterilized glass jars | 1 day before cooking | Store jars upside-down on a clean towel to stay sterile. |
| Pre-chilled plate | Up to 6 hours before cooking | Keep in the freezer—use for consistency testing. |
Enhancing Efficiency with Prep Tools
- Have tools like a potato masher for breaking down fruit, a wooden spoon or heat-resistant spatula for stirring, and a large heavy-bottom pot ready on your countertop. Lay everything out to streamline your process on the cooking day.
- Ensure you prepare several sterilized, airtight jars to avoid last-minute scrambles for storage.
When to Cook the Jam
Once all prep work is complete, the actual jam-making, including cooking and jarring, takes about 1–1.5 hours. You can initiate cooking on the day you’ve planned to serve or store the jam, with everything prepped ahead for a fuss-free experience.
Tips For Best Results
Achieving the perfect blueberry and strawberry jam requires attention to detail and a few insider tricks. Here are our top tips to ensure your jam turns out flavorful, vibrant, and perfectly set every time:
1. Choose Quality Ingredients
- Use ripe, fresh fruit for maximum flavor and natural sweetness. Avoid overripe or bruised berries, as they may affect the texture.
- Opt for freshly squeezed lemon juice instead of bottled for better taste and reliable acidity.
- If using the optional vanilla extract, go for high-quality pure vanilla, not imitation.
2. Balance Sugar and Acidity
- Stick to the sugar-to-fruit ratio provided in the recipe to ensure proper sweetness and setting. Altering this balance may prevent the jam from setting correctly.
- The lemon juice does more than enhance the flavor; it also helps the pectin in the fruit to activate for perfect consistency.
3. Prep Smarter for Efficiency
- Measure all ingredients and prepare tools before cooking begins. Having everything ready prevents unnecessary delays.
- Always sterilize jars ahead of time to guarantee safety and cleanliness. Place tools like potato mashers, spatulas, and spoons within easy reach.
4. Master the Cooking Process
- Use a large heavy-bottom pot to distribute heat evenly and prevent the jam from sticking or scorching.
- Bring the mixture to a gentle boil, ensuring you stir frequently. This prevents sugar from burning and ensures an even cook.
- Watch for cues like color deepening and thickened consistency to know when your jam is done.
5. Test for Perfect Consistency
- Before cooking, place a small plate in the freezer. During cooking, drop a spoonful of jam onto the cold plate and run your finger through it:
- If the jam wrinkles slightly and holds its shape, it’s ready.
- If it’s runny, cook for 2–3 more minutes and test again.
6. Jar and Store Properly
- Fill jars while the jam is hot, leaving about 1/4-inch headspace to allow sealing.
- Wipe jar rims with a damp cloth to remove any residue before sealing tightly.
- For long-term storage, consider processing jars in a boiling water bath for at least 10 minutes.
7. Customize with Flavor Enhancers
- Add a pinch of cinnamon or nutmeg while cooking for a subtle spice note.
- Incorporate a teaspoon of orange zest alongside the blueberries and strawberries for a bright citrus twist.
8. Track Shelf Life
- Once sealed, jam stored in a cool, dark place can last up to 1 year. After opening, refrigerate and use within 2–3 weeks.
| Key Action | Best Practice |
|---|---|
| Consistent stirring | Prevents burning during cooking. |
| Cold plate testing | Ensures jam sets to the right texture. |
| Jar sterilization | Maintains freshness and prevents spoilage. |
By following these expert tips, we can ensure every batch of our homemade blueberry and strawberry jam is a resounding success.
Variations And Add-Ins
One of the best parts about making our own blueberry and strawberry jam is its versatility. We can customize the flavors, textures, and even the sweetness to suit our preferences or dietary needs. Let’s explore some exciting variations and add-ins to elevate this classic jam recipe.
Sweetener Alternatives
We can replace regular granulated sugar with other sweeteners for a unique flavor or a healthier spin. Here are some popular options:
| Sweetener | Amount (per 1 cup sugar) | Notes |
|---|---|---|
| Honey | Use ¾ cup | Adds a floral, rich depth. Can thicken jam slightly. |
| Maple Syrup | Use ¾ cup | Offers a warm undertone. Reduce liquids slightly. |
| Coconut Sugar | Use 1 cup | Deep, caramel-like flavor. Darkens jam color. |
| Stevia (Powdered) | Use ¼ tsp or to taste | Zero calories. Use sparingly to avoid bitterness. |
When using alternative sweeteners, test the consistency, as they can alter the jam’s thickening process.
Spices And Flavor Boosters
Adding spices or extracts takes our homemade jam to the next level by enhancing depth and complexity. Here are some irresistible options to try:
- Cinnamon: Stir in 1 teaspoon of ground cinnamon for a warm, spiced touch.
- Nutmeg: Add ¼ teaspoon of nutmeg to complement the summer fruits.
- Ginger: Use 1 teaspoon of freshly grated ginger for a zingy twist.
- Vanilla Extract: A splash of vanilla extract (½ teaspoon) enriches the jam’s flavor.
- Almond Extract: Pairing ¼ teaspoon with strawberries offers a nutty aroma.
- Citrus Zests: Incorporate 1 tablespoon of lemon or orange zest to brighten the jam.
Chunky Vs. Smooth Textures
For texture preferences, we can adjust how we prepare the fruit:
- Chunky Jam: Mash the fruit lightly with a fork or potato masher, leaving small fruit bits for a rustic touch.
- Smooth Jam: Use an immersion blender to puree the fruit for a velvety texture before cooking.
This customization makes our jam perfect for spreading or pairing with other dishes.
Unique Fruit Combinations
Enhance the jam with complementary fruits to create new flavor profiles. Here are some pairing ideas:
| Added Fruit | Suggested Ratio (to total fruit) | Flavor Profile |
|---|---|---|
| Raspberries | Use 1 part raspberries to 3 parts | Adds tartness and a vibrant red hue. |
| Peaches | Use 1 part peaches to 2 parts | Sweet and mellow, balances blueberries. |
| Blackberries | Use 1 part blackberries to 3 parts | Intensifies the berry flavor with a hint of tartness. |
| Apples | Use 1–2 apples, diced finely | Adds natural pectin, thickens jam naturally. |
Herbaceous Twists
For unexpected yet delightful dimensions, we can incorporate fresh herbs:
- Thyme: Add a sprig while cooking for earthy undertones.
- Basil: Infuse with 4–5 fresh leaves to enhance the fruitiness.
- Mint: Toss in a couple of mint sprigs for a refreshing aroma.
Always remove large herb pieces after cooking for a smooth spread.
Lower Sugar Jam
For those watching sugar intake, we can reduce sugar to 1½ cups in the base recipe and add pectin to help the jam set. Follow the pectin package instructions for the best results.
Storage And Shelf Life
Proper storage of our blueberry and strawberry jam is essential to preserve its freshness, flavor, and longevity. Let’s break down the best methods to ensure your homemade jam stays delicious for as long as possible.
Short-Term Storage
For those planning to enjoy the jam within a few weeks, follow these guidelines:
- Allow the jam to cool completely after cooking.
- Transfer the jam into clean, sterilized glass jars. Leave about 1/4 inch of headspace at the top of each jar.
- Seal the jars with airtight lids and refrigerate immediately.
- Store in the refrigerator for up to 3 weeks.
Long-Term Storage (Canning Method)
For extended shelf life, properly process the jam using a water bath canning method. Here’s how:
- Pour the hot jam into sterilized jars, leaving 1/4 inch of headspace.
- Wipe the rims clean to ensure a proper seal. Place fresh lids and screw on the jar bands until just finger-tight.
- Submerge the jars in boiling water, making sure they’re covered by at least 1 inch of water.
- Process the jars for 10 minutes, adjusting for altitude if necessary.
- Carefully remove the jars and let them cool at room temperature for 12–24 hours. Ensure the lids have sealed properly by pressing in the center—if it doesn’t pop, it’s sealed.
- Label the jars with the date and store them in a cool, dark place for up to 1 year.
Tips for Maximizing Shelf Life
- Always use sterilized jars and lids to prevent contamination.
- Keep opened jars tightly sealed in the refrigerator and consume within 3 weeks.
- Avoid dipping utensils straight into the jar to prolong freshness—consider using a clean spoon each time.
How to Check for Spoilage
Homemade jam can spoil if improperly stored. Watch for these signs:
| Spoilage Indicator | Action to Take |
|---|---|
| Unusual odor | Discard immediately |
| Mold or discoloration | Do not consume; throw out the entire jar |
| Fizzing or bubbling | This could indicate fermentation; discard |
By following these guidelines, our homemade blueberry and strawberry jam can be enjoyed at its best, whether you’re savoring it within a few weeks or months later as a reminder of summer’s bounty.
Conclusion
Making blueberry and strawberry jam at home is a rewarding experience that combines creativity, flavor, and practicality. With just a few simple steps and quality ingredients, we can create a versatile spread that’s bursting with natural sweetness and free of unnecessary additives.
Whether we’re preserving summer’s bounty or experimenting with unique flavor combinations, this recipe allows us to enjoy a homemade touch in every jar. With proper storage and a little care, our jam will not only taste amazing but also last long enough to brighten breakfasts, desserts, and everything in between.
Let’s embrace the joy of homemade jam-making and share the delicious results with family and friends. There’s truly nothing better than savoring a spread crafted with care and love.
Frequently Asked Questions
What are the main ingredients for blueberry and strawberry jam?
The main ingredients are fresh blueberries, strawberries, sugar, lemon juice, and optionally, vanilla extract for added flavor.
Do I need special equipment to make this jam?
No, you don’t need special equipment. Basic kitchen tools like a large pot, spoon, sterilized jars, and a ladle are sufficient.
How can I test if the jam has the right consistency?
Use the cold plate method: place a small amount of jam on a chilled plate, let it cool briefly, and push it with your finger. If it wrinkles, it’s ready.
Can I use an alternative sweetener instead of sugar?
Yes, you can use alternatives like honey, maple syrup, or stevia. Adjust quantities based on sweetness preferences.
How long does homemade jam last?
In the refrigerator, it lasts up to three weeks. For long-term storage, use the water bath canning method, and it can last up to a year.
Why is lemon juice important in the recipe?
Lemon juice enhances the flavor, helps the jam set properly, and acts as a natural preservative for longer shelf life.
Can I make the jam ahead of time?
Yes, you can prep ingredients ahead and sterilize jars a day in advance, making the cooking process quicker and easier.
Are there ways to customize the jam flavor?
Absolutely! Add spices like cinnamon or nutmeg, citrus zest, or herbs like basil. You can also adjust fruit combinations for unique flavors.
What’s the best way to store the jam?
Store in sterilized jars. For short-term, refrigerate. For long-term, use a water bath canning method and keep in a cool, dark place.
How can I ensure my jam is shelf-stable?
Properly sterilize jars, use enough acidity (lemon juice), seal jars tightly, and process them in a boiling water bath for long-term storage.
How do I check for spoilage in homemade jam?
Check for off-smells, discoloration, or mold growth. If any of these are present, discard the jam immediately.
Can I make a lower-sugar version of the jam?
Yes, reduce the sugar and use natural sweeteners or a low-sugar pectin to ensure proper consistency without compromising flavor.