
Blue raspberry ice cream is a vibrant and refreshing treat that’s perfect for cooling down on a hot day. With its bright color and tangy-sweet flavor, it’s a fun twist on traditional ice cream flavors that everyone will love. We’re excited to share a simple recipe that brings this nostalgic favorite right into your kitchen.
Ingredients
To craft our Blue Raspberry Ice Cream, we focus on creating a vibrant syrup and a smooth creamy base. Let’s gather everything needed to bring this refreshing dessert to life.
Blue Raspberry Syrup
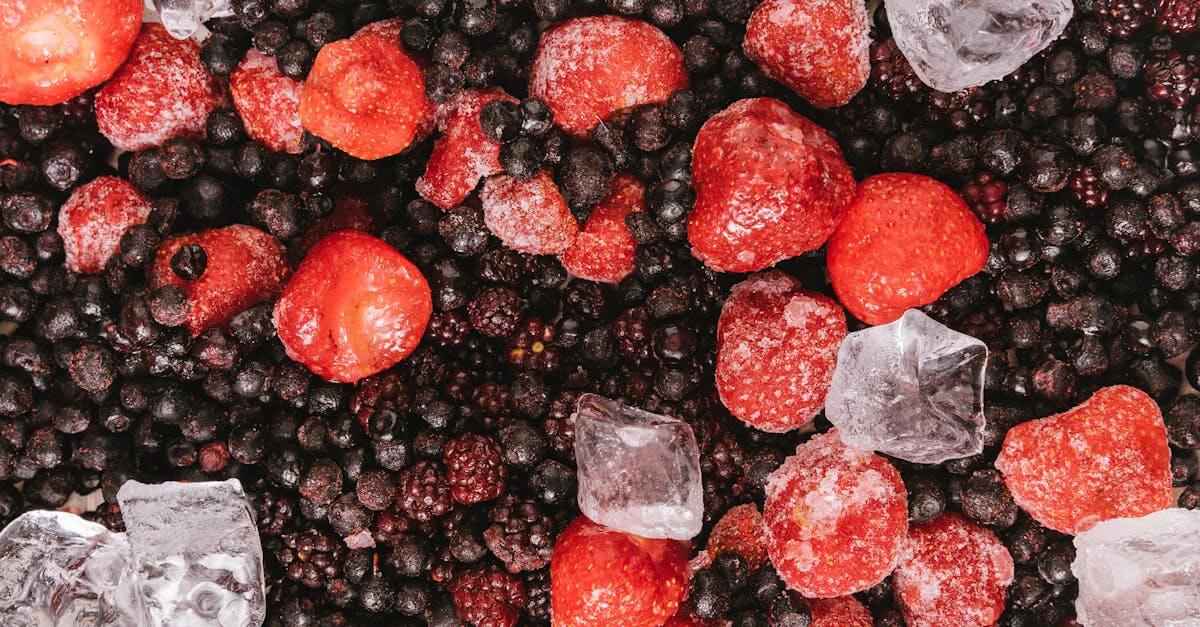
- 1 cup fresh or frozen raspberries (preferably blue raspberries if available)
- 3/4 cup granulated sugar
- 1/2 cup water
- 1 tablespoon lemon juice (freshly squeezed)
- A few drops of blue food coloring (to enhance that iconic blue raspberry hue)
Ice Cream Base
- 2 cups heavy cream
- 1 cup whole milk
- 3/4 cup granulated sugar
- 1 teaspoon pure vanilla extract
- Pinch of salt
Optional Mix-Ins and Toppings
- Blue raspberry candy pieces for extra crunch
- Whipped cream (for serving)
- Fresh blue raspberries (garnish)
- Sprinkles in blue or white
| Ingredient Category | Ingredients |
|---|---|
| Blue Raspberry Syrup | Fresh/frozen blue raspberries, sugar, water, lemon juice, blue food coloring |
| Ice Cream Base | Heavy cream, whole milk, sugar, vanilla extract, salt |
| Mix-Ins & Toppings | Blue raspberry candies, whipped cream, fresh raspberries, blue/white sprinkles |
Equipment Needed
To achieve the perfect blue raspberry ice cream texture and flavor, we need to gather specific equipment. Having these tools ready ensures a smooth, enjoyable making process and an outstanding final dessert.
- Ice Cream Maker: This is essential for churning the ice cream base evenly, creating that creamy, smooth consistency we desire. We recommend a machine with a freezing bowl or a built-in freezer unit for best results.
- Saucepan: Use a medium-sized saucepan to cook the blue raspberry syrup. A good-quality pan distributes heat evenly and prevents burning the delicate fruit sugars.
- Mixing Bowls: We’ll need at least two – one for mixing our syrup ingredients and another for combining the ice cream base ingredients thoroughly.
- Measuring Cups and Spoons: Precise measurements are key for balancing the sweet and tangy flavors, so measure ingredients accurately.
- Whisk: For blending the ice cream base ingredients, ensuring the sugar dissolves properly and the mixture is smooth.
- Fine Mesh Sieve: Strain the blue raspberry syrup to remove seeds and pulp, achieving a velvety smooth finish.
- Spatula: For scraping down the sides of bowls and folding the syrup into the ice cream base evenly.
- Freezer-Safe Container: Once churned, the ice cream will firm up further in this container.
- Optional: Candy thermometer can help monitor syrup temperature for consistency if preferred.
| Equipment | Purpose |
|---|---|
| Ice Cream Maker | Churns ice cream for creamy texture |
| Saucepan | Cooks the blue raspberry syrup |
| Mixing Bowls | Combines syrup and ice cream base ingredients |
| Measuring Cups/Spoons | Ensures precise ingredient amounts |
| Whisk | Blends and dissolves sugar in the base |
| Fine Mesh Sieve | Strains syrup for smoothness |
| Spatula | Mixes and scrapes ingredients |
| Freezer-Safe Container | Stores ice cream for final freezing |
| Candy Thermometer* | Monitors syrup temperature (optional) |
With our equipment ready, we’re set to craft our refreshing blue raspberry ice cream without a hitch.
Prep Work
Before diving into the fun part of churning our blue raspberry ice cream, we need to complete some essential Prep Work. This ensures the flavors meld perfectly and the texture turns out creamy and smooth.
Preparing the Blue Raspberry Syrup
The blue raspberry syrup is the heart of our ice cream’s vibrant taste and color. Here’s how we prepare it:
- Combine Fresh or Frozen Raspberries (1 cup), Granulated Sugar (¾ cup), and Water (½ cup) in a medium-sized saucepan.
- Heat over medium flame, stirring frequently until the sugar fully dissolves and the mixture begins to simmer.
- Allow it to simmer gently for about 10 minutes, crushing the raspberries with a spatula to release their juice.
- Remove from heat and stir in 1 tablespoon fresh lemon juice for brightness.
- Add 3-4 drops of blue food coloring to achieve that iconic blue raspberry hue.
- Strain the syrup through a fine mesh sieve into a bowl to remove seeds and pulp, pressing firmly to extract maximum flavor.
- Let the syrup cool to room temperature, then cover and refrigerate until cold.
| Ingredient | Quantity | Preparation |
|---|---|---|
| Fresh or Frozen Raspberries | 1 cup | Whole or thawed |
| Granulated Sugar | ¾ cup | Measured precisely |
| Water | ½ cup | Should be cold |
| Fresh Lemon Juice | 1 tbsp | Freshly squeezed |
| Blue Food Coloring | 3-4 drops | Added to taste |
Tip: Cooling the syrup completely ensures it does not melt the ice cream base during mixing.
Chilling the Ice Cream Base
A well-chilled base is crucial to a smooth and creamy blue raspberry ice cream:
- In a large mixing bowl, whisk together heavy cream (2 cups), whole milk (1 cup), granulated sugar (¾ cup), vanilla extract (1 tsp), and a pinch of salt (¼ tsp).
- Stir until the sugar completely dissolves, ensuring a silky texture.
- Cover the bowl tightly with plastic wrap and place it in the refrigerator for at least 4 hours or overnight. This chilling time helps the flavors meld and creates a denser, smoother ice cream once churned.
| Ingredient | Quantity | Notes |
|---|---|---|
| Heavy Cream | 2 cups | Cold from the fridge |
| Whole Milk | 1 cup | Cold |
| Granulated Sugar | ¾ cup | Pure white |
| Vanilla Extract | 1 tsp | Use good quality |
| Salt | ¼ tsp | Enhances sweetness |
Pro tip: The longer we chill the base, the better the ice cream’s final texture and flavor will be. We recommend starting prep a day ahead for best results.
Directions
Follow these precise steps to create our vibrant Blue Raspberry Ice Cream with a perfect balance of tang and creaminess. Each phase is designed to build flavor and texture for a refreshing dessert.
Making the Ice Cream Base
- In a large mixing bowl, whisk together the following ingredients until the sugar dissolves completely and the mixture is smooth:
- 2 cups heavy cream
- 1 cup whole milk
- ¾ cup granulated sugar
- 1 teaspoon vanilla extract
- ¼ teaspoon salt
- Cover the bowl tightly with plastic wrap and refrigerate for at least 4 hours or overnight. This chilling step is crucial as it allows the flavors to meld and the base to thicken for a silky smooth texture.
Combining the Blue Raspberry Syrup and Base
- Ensure the blue raspberry syrup is fully cooled to prevent melting the base during mixing.
- Gently fold 1 cup of syrup into the chilled ice cream base using a silicone spatula. Aim for an even distribution without overmixing to preserve the swirled appearance if desired.
- Taste the combined mixture; if you want a more intense raspberry flavor, fold in additional syrup carefully but avoid making the base too watery.
Churning the Ice Cream
- Pour the syrup-infused ice cream base into your pre-frozen ice cream maker.
- Churn according to the manufacturer’s instructions, generally about 20-25 minutes, until the ice cream thickens to a soft-serve consistency.
- Optional: In the last 5 minutes of churning, add any preferred mix-ins such as blue raspberry candy pieces or chopped fruit for added texture.
| Step | Action | Time | Result |
|---|---|---|---|
| Pour base | Into ice cream maker | Immediate | Ready to churn |
| Churn | Churn mixture | 20–25 minutes | Soft-serve ice cream texture |
| Add mix-ins | Optional | Last 5 minutes | Added texture and flavor |
Freezing and Setting
- Transfer the churned ice cream into a freezer-safe airtight container.
- Use a spatula to smooth the top and press a sheet of parchment or wax paper directly over the surface. This prevents ice crystals from forming.
- Freeze for at least 4 hours to allow the ice cream to firm up completely.
- Before serving, let the ice cream sit at room temperature for 5-10 minutes for easier scooping and the best flavor release.
Serving Suggestions
To fully enjoy our Blue Raspberry Ice Cream, consider these creative serving ideas that elevate its tangy sweetness and vibrant color.
Classic Presentation
- Scoop the ice cream into chilled bowls or cones for a refreshing treat.
- Add a dollop of whipped cream for a creamy contrast.
- Top with fresh raspberries or a few blue raspberry candy pieces to reinforce the flavor theme.
Layered Dessert
- Create a parfait by layering scoops of Blue Raspberry Ice Cream with crushed graham crackers, fresh berries, and a drizzle of blueberry syrup.
- Repeat layers for an appealing visual and textural contrast.
Frozen Treats
- Use the ice cream to make blue raspberry milkshakes by blending with milk and a splash of vanilla extract.
- Pour softened ice cream into popsicle molds and freeze for homemade blue raspberry ice pops.
Party Garnishes
- Sprinkle colorful rainbow sprinkles or edible glitter over the ice cream for eye-catching appeal.
- Serve alongside a slice of lemon pound cake or blueberry cheesecake to complement the fruity notes.
| Serving Idea | Key Components | Presentation Tip |
|---|---|---|
| Classic Scoop | Ice cream, whipped cream, fresh raspberries | Use chilled cones or bowls |
| Parfait | Ice cream, graham crackers, fresh berries, syrup | Layer in clear glasses |
| Milkshake | Ice cream, milk, vanilla extract | Serve with a colorful straw |
| Ice Pops | Ice cream, popsicle molds | Freeze 4-6 hours |
| Party Garnish | Sprinkles, edible glitter, cake slices | Add vibrant colors |
Storage Instructions
Proper storage is essential to maintain the vibrant flavor and creamy texture of our Blue Raspberry Ice Cream. Follow these steps to keep your ice cream fresh and scoopable:
Freezing and Container Tips
- Transfer the churned ice cream to a clean, airtight freezer-safe container.
- Smooth the top with a spatula to prevent ice crystals formation.
- Seal the container tightly to avoid freezer burn and absorption of other odors.
- Label with the date of preparation to monitor freshness.
Freezing Duration
Our Blue Raspberry Ice Cream tastes best when consumed within 2 to 3 weeks of freezing. Beyond this period, ice crystals may develop and the flavor may diminish.
| Storage Method | Duration | Notes |
|---|---|---|
| Airtight freezer-safe container | 2 to 3 weeks | Best flavor and texture |
| Unsealed or loosely covered | Less than 1 week | Risk of freezer burn and odor absorption |
| Room temperature | 5-10 minutes | Soften before serving |
Thawing and Serving
- Remove the ice cream from the freezer 5–10 minutes before serving.
- Allow it to soften slightly at room temperature for easier scooping and enhanced flavor release.
- Avoid microwaving as it can melt the ice cream unevenly.
“Proper storage preserves the balance of tangy blue raspberry and creamy sweetness in every scoop.“
By following these Storage Instructions, we ensure every serving of our homemade Blue Raspberry Ice Cream stays as refreshing and delightful as the first bite.
Conclusion
Blue raspberry ice cream is a fun and vibrant treat that brings a burst of tangy sweetness to any occasion. Making it at home lets us control the flavors and textures, ensuring every scoop is perfectly refreshing. With a little patience and the right steps, this nostalgic dessert becomes an easy favorite to share with family and friends.
Whether enjoyed on its own or dressed up with creative toppings, this recipe offers endless possibilities to satisfy our summer cravings. Keeping it stored properly means we can savor that bright, creamy flavor again and again. Let’s dive in and enjoy the cool, colorful delight of homemade blue raspberry ice cream whenever we want.
Frequently Asked Questions
What ingredients do I need to make blue raspberry ice cream at home?
You need fresh or frozen raspberries, sugar, water, lemon juice, blue food coloring, heavy cream, whole milk, vanilla extract, and salt. Optional toppings include whipped cream, fresh raspberries, and sprinkles.
How do I prepare the blue raspberry syrup for the ice cream?
Simmer raspberries, sugar, and water, then add lemon juice and blue food coloring. Strain the mixture to remove seeds and cool completely before combining with the ice cream base.
Why is chilling the ice cream base important?
Chilling the base for at least four hours enhances flavor and helps create a smooth, creamy texture in the final ice cream.
Can I add mix-ins to the blue raspberry ice cream?
Yes, you can add candy pieces, fresh raspberries, or other preferred mix-ins during the last few minutes of churning.
What equipment is required to make blue raspberry ice cream?
You’ll need an ice cream maker, saucepan, mixing bowls, measuring cups and spoons, a whisk, fine mesh sieve, spatula, and a freezer-safe container. A candy thermometer is optional.
How long should I freeze the ice cream after churning?
Freeze the churned ice cream for at least four hours to firm up before serving.
How should I store homemade blue raspberry ice cream?
Store it in a clean, airtight, freezer-safe container. Consume within 2 to 3 weeks for best flavor and texture.
What are some creative ways to serve blue raspberry ice cream?
Try scoops with whipped cream, layered parfaits with graham crackers, milkshakes, ice pops, or paired with desserts like lemon pound cake or blueberry cheesecake.
How do I make scooping easier?
Let the ice cream sit at room temperature for 5–10 minutes before scooping to soften and release flavors.
Can I skip the blue food coloring in the recipe?
Yes, but the ice cream won’t have its vibrant blue color; the flavor will remain the same.