
Bison rib roast offers a rich and flavorful alternative to traditional beef roasts. Known for its leaner profile and slightly sweeter taste bison meat has become a favorite among those seeking a healthier yet indulgent meal. This cut is perfect for special occasions or whenever we want to impress with a hearty and tender roast.
Roasting bison requires a bit of know-how since it cooks faster than beef due to its low fat content. With the right technique we can achieve a juicy and perfectly cooked rib roast that highlights the natural flavors of the meat. Our recipe guides you through simple steps to create a mouthwatering centerpiece that’s sure to delight family and friends.
Ingredients
To create the perfect Bison Rib Roast, we gather fresh and quality ingredients that complement the roast’s natural flavor while enhancing its tenderness. Here is everything we need for this delicious recipe.
Bison Rib Roast
- 1 (4 to 5 pounds) bone-in bison rib roast, trimmed of excess fat
- Ensure the roast is at room temperature before cooking for even roasting
Seasonings and Rub
We create a robust seasoning blend that brings out the rich, slightly sweet flavor of the bison while creating a flavorful crust.
| Ingredient | Quantity | Notes |
|---|---|---|
| Kosher salt | 2 tablespoons | Enhances natural meat flavor |
| Freshly ground black pepper | 1 tablespoon | Adds mild heat |
| Garlic powder | 1 tablespoon | Provides aromatic depth |
| Paprika | 1 teaspoon | Adds color and subtle smokiness |
| Dried rosemary | 1 teaspoon | Earthy herbal notes |
| Dried thyme | 1 teaspoon | Light floral undertones |
| Olive oil | 2 tablespoons | Helps seasonings adhere and promotes browning |
Additional Ingredients
These ingredients support the roast during cooking and bring balance when serving.
- 4 cloves garlic, smashed — infuses aroma during roasting
- 1 cup beef broth — maintains moisture and adds richness
- Fresh herbs (optional: rosemary, thyme sprigs) — enhance the roasting environment
- Vegetables for roasting (optional: carrots, onions, potatoes) — absorb drippings and complement the roast
Equipment Needed
To prepare a perfect Bison Rib Roast, having the right equipment is essential. Each tool plays a crucial role in ensuring the roast cooks evenly and retains its rich flavor and tenderness.
- Roasting Pan with Rack
Using a sturdy roasting pan paired with a rack allows heat to circulate evenly around the bison rib roast. The rack lifts the meat above the pan, preventing it from stewing in its juices and promoting a beautifully crusted exterior.
- Meat Thermometer
Precision is key when cooking bison rib roast because it cooks faster than traditional beef due to its low fat content. A digital instant-read meat thermometer helps us monitor the internal temperature with accuracy, avoiding overcooking.
- Sharp Chef’s Knife
A sharp chef’s knife is vital for trimming any excess fat or silver skin from the roast before seasoning. It also helps in carving the roast cleanly for serving.
- Cutting Board
Choose a large, sturdy cutting board to comfortably trim and rest the meat after cooking. A board with juice grooves can help contain flavorful drippings.
- Mixing Bowl
We use a medium-sized mixing bowl to blend the seasoning ingredients thoroughly, ensuring an even coating that enhances the natural taste of the bison.
- Aluminum Foil or Tent
Covering the roast loosely with aluminum foil during resting retains the juices and keeps the meat warm without steaming the crust.
| Equipment | Purpose | Notes |
|---|---|---|
| Roasting Pan with Rack | Even roasting and heat circulation | Prevents soggy bottom |
| Meat Thermometer | Monitor internal temperature precisely | Avoids overcooking |
| Sharp Chef’s Knife | Trimming and carving | Clean cuts enhance presentation |
| Cutting Board | Trimming and resting | Juice groove preferred |
| Mixing Bowl | Blending seasoning | Ensures even coating |
| Aluminum Foil | Retains heat and juices during resting | Prevents crust from softening |
Having this equipment ready before starting the recipe streamlines the cooking process and sets us up for success with our Bison Rib Roast.
Preparation
Preparing the Bison Rib Roast properly sets the foundation for a tender and flavorful meal. Let’s walk through the essential steps to ensure our roast cooks evenly and tastes incredible.
Thawing the Bison Rib Roast
To start, safely thaw the bison rib roast to maintain its texture and flavor.
- Place the frozen roast in the refrigerator for 24 to 36 hours depending on size (4-5 pounds).
- Keep it wrapped to prevent cross-contamination and moisture loss.
- For faster thawing, submerge the sealed roast in cold water, changing water every 30 minutes. This method takes about 2 to 3 hours but should be followed by immediate cooking.
“Never thaw the roast at room temperature to avoid bacterial growth and compromised meat quality.”
Prepping the Roast
Once thawed, we need to prep the meat for seasoning and roasting:
- Remove the roast from packaging and pat dry with paper towels to promote browning.
- Trim any excess silver skin or large fat deposits, leaving a thin layer for moisture retention and flavor.
- Tie the roast with kitchen twine every 1.5 to 2 inches to ensure even shape and consistent cooking.
We recommend using a sharp boning or chef’s knife for trimming and a clean cutting board designated for raw meat.
Preparing the Seasoning Rub
Creating the seasoning rub is crucial to enhancing the bison rib roast’s natural taste:
| Ingredient | Quantity | Notes |
|---|---|---|
| Kosher salt | 2 tablespoons | For even seasoning |
| Black pepper | 1 tablespoon | Freshly ground preferred |
| Garlic powder | 1 teaspoon | Adds depth of flavor |
| Paprika | 1 teaspoon | For subtle smokiness |
| Dried rosemary | 1 teaspoon | Crushed for fragrance |
| Dried thyme | 1 teaspoon | Complements the meat well |
- Combine all dry ingredients in a mixing bowl.
- Rub the seasoning evenly over the entire roast, pressing gently to adhere to the meat’s surface.
- Let the seasoned roast rest at room temperature for 30 to 45 minutes before roasting to enhance flavor absorption and even cooking.
Cooking Instructions
Follow these precise steps to cook our Bison Rib Roast to perfection. Each stage is designed to maximize flavor and ensure tenderness, highlighting the natural qualities of this lean, flavorful meat.
Preheating the Oven
Preheat your oven to 325°F (163°C). This moderate temperature allows the bison rib roast to cook evenly, preserving its juiciness and preventing overcooking.
| Step | Temperature | Duration |
|---|---|---|
| Oven Preheating | 325°F (163°C) | 15 minutes or until steady |
Ensure your oven rack is positioned in the center to promote even heat distribution around the roast.
Searing the Bison Rib Roast
Searing locks in flavor and creates a beautiful crust.
- Heat a large skillet over medium-high heat until shimmering.
- Add a tablespoon of high smoke point oil (such as avocado or grapeseed oil).
- Sear the roast on all sides for 2 to 3 minutes per side, including the ends.
- Look for a rich, golden-brown crust coating the entire roast.
Searing seals in natural juices and enhances the caramelization of the meat’s surface.
Roasting the Bison Rib Roast
Once seared, transfer the roast to the prepared roasting pan with a rack.
- Place the roast bone-side down to ensure even heat circulation.
- Add aromatics around the roast such as halved garlic cloves, quartered onions, fresh rosemary sprigs, and thyme for subtle flavor infusion.
- Optionally pour 1 cup beef broth into the pan to maintain moisture.
- Roast uncovered at 325°F (163°C).
Using a Meat Thermometer
Accurate temperature control is key due to bison meat’s lean nature and faster cooking time.
- Insert a digital meat thermometer probe into the thickest part of the roast, avoiding bones.
- Monitor internal temperature closely.
| Doneness Level | Internal Temperature (°F) | Description |
|---|---|---|
| Rare | 120–125°F | Bright red center |
| Medium Rare | 130–135°F | Warm red center, preferred for bison |
| Medium | 140–145°F | Warm pink center |
| Well Done | 150°F and above | Little pink, firmer texture |
Remove the roast from the oven when the thermometer reads 5°F below your desired doneness (carryover cooking will increase temperature). For the best flavor and tenderness, we recommend cooking to medium rare (130–135°F).
“Use a reliable digital meat thermometer to avoid guesswork and ensure perfect results every time.”
Let the roast rest loosely covered with foil for 15 to 20 minutes before carving. This allows juices to redistribute for maximum moistness and flavor.
Resting and Carving
Allowing the bison rib roast to rest after cooking and using proper carving techniques are essential steps to maximize tenderness and flavor. Let’s explore how to rest the roast perfectly and carve it like pros, ensuring every bite is juicy and delicious.
Resting the Roast
Resting the bison rib roast is crucial for redistributing juices throughout the meat. We recommend letting the roast rest for at least 20 to 30 minutes after removing it from the oven. Here’s why resting matters and how to do it right:
- Juice Retention: Resting allows the muscle fibers to relax and reabsorb the juices pushed to the center during cooking.
- Temperature Stabilization: The internal temperature evens out, preventing the roast from drying out when carved.
- Enhanced Flavor: The resting period lets the seasoning and natural flavors settle, creating a richer taste experience.
Resting Steps:
| Step | Action |
|---|---|
| 1 | Remove roast from oven when 5°F below desired doneness |
| 2 | Tent loosely with foil to retain warmth without trapping steam |
| 3 | Let rest on a cutting board or warm plate for 20–30 minutes |
| 4 | Use this time to prepare sides or sauces |
Pro Tip: Avoid slicing the roast immediately. Cutting too soon causes precious juices to escape, leading to a drier roast.
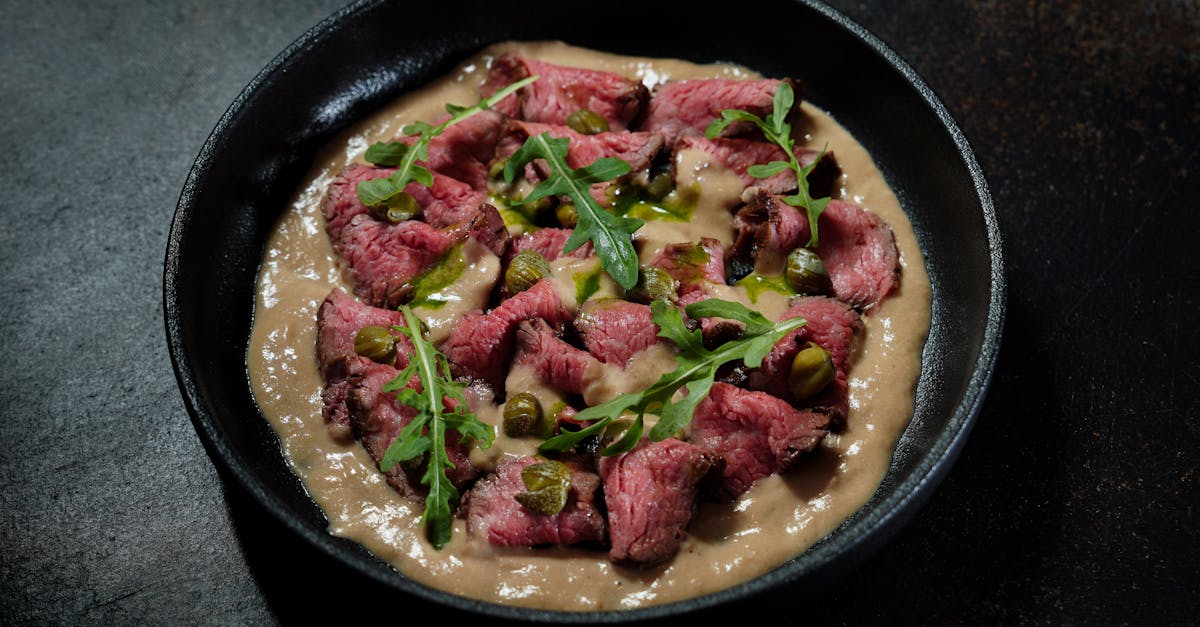
Carving Tips for Bison Rib Roast
Mastering the carving process ensures you get the most tender slices from your bison rib roast—showcasing its lean texture and rich flavor. Follow these carving tips for an impressive presentation:
- Use a Sharp Chef’s Knife: A sharp blade cuts cleanly through the meat without tearing the fibers.
- Cut Against the Grain: Slicing perpendicular to the muscle fibers shortens them, making each bite more tender.
- Slice Evenly: Aim for ½-inch thick slices for balanced texture and flavor distribution.
- Remove the Bones (Optional): For easier serving, carve along the bones and separate them before slicing the meat.
Carving Step-by-Step:
| Step | Action |
|---|---|
| 1 | Position the roast bones-side down on the cutting board |
| 2 | Locate the rib bones and cut along each bone to separate the ribs |
| 3 | Hold the separated roast steady and slice against the grain into even pieces |
| 4 | Arrange slices neatly on a serving platter, garnish as desired |
Remember: Because bison is lean, carving with care preserves moisture and highlights the roast’s natural, slightly sweet flavor.
Following these resting and carving strategies will help us serve a succulent and perfectly cooked bison rib roast that delights every guest at the table.
Serving Suggestions
To highlight the rich, slightly sweet flavor of our Bison Rib Roast, it is crucial to choose the right accompaniments. Below we share delicious pairings and complementary sauces to elevate your dining experience.
Side Dishes That Pair Well
The lean and tender texture of the bison rib roast calls for sides that enhance without overpowering. Here are our favorite selections:
- Roasted Root Vegetables: Carrots, parsnips, and sweet potatoes tossed with olive oil, rosemary, and sea salt, roasted until caramelized.
- Garlic Mashed Potatoes: Creamy and buttery with a subtle garlic kick to balance the roast’s robust flavor.
- Sautéed Green Beans with Almonds: Crisp green beans lightly sautéed in garlic butter, topped with toasted sliced almonds for crunch.
- Creamed Spinach: A rich and velvety side that adds a luxurious textural contrast.
- Wild Rice Pilaf: Nutty, fluffy wild rice cooked with savory herbs and diced mushrooms.
| Side Dish | Flavor Profile | Cooking Highlights |
|---|---|---|
| Roasted Root Vegetables | Sweet, earthy | Roasted until caramelized |
| Garlic Mashed Potatoes | Creamy, buttery | Infused with roasted garlic |
| Sautéed Green Beans | Crisp, nutty | Garlic butter and toasted almonds |
| Creamed Spinach | Rich, velvety | Slow cooked with cream and spices |
| Wild Rice Pilaf | Nutty, savory | Mixed with herbs and mushrooms |
Sauces and Condiments
Elevate the Bison Rib Roast with complementary sauces that enhance its natural flavor, adding layers of richness and zest:
- Red Wine Reduction: A classic pairing. Reduce red wine with shallots, garlic, and beef broth until silky and concentrated.
- Horseradish Cream Sauce: Sharp horseradish mixed with sour cream and lemon juice adds a refreshing bite.
- Mushroom Gravy: Earthy mushrooms sautéed with garlic and herbs, thickened into a savory gravy.
- Chimichurri Sauce: Bright and herbaceous with parsley, cilantro, garlic, olive oil, and red wine vinegar for a fresh contrast.
- Balsamic Glaze: Sweet and tangy, drizzled sparingly to add depth without overpowering.
Pro Tip: Serve sauces on the side to allow each guest to customize their plate and truly savor the bison rib roast experience.
Each of these accompaniments connects with the unique characteristics of bison meat — delicate yet richly flavored — creating a balanced, unforgettable meal.
Make-Ahead Instructions
To ensure our Bison Rib Roast is bursting with flavor and perfectly tender, proper make-ahead preparation is key. Follow these steps to streamline your cooking day and maximize the roast’s deliciousness.
1. Seasoning the Roast Ahead of Time
Apply the seasoning rub (kosher salt, black pepper, garlic powder, paprika, dried rosemary, and thyme) evenly over the roast at least 12 to 24 hours before cooking. This allows the flavors to deeply penetrate the meat, enhancing the savory profile and tenderness.
- Place the seasoned roast on a rimmed baking sheet or in a shallow pan.
- Cover tightly with plastic wrap and refrigerate.
2. Trussing and Storage
After seasoning, tie the roast with kitchen twine to ensure even cooking.
- Keep the tied roast refrigerated until 1 hour before cooking.
- Remove from fridge and allow it to reach room temperature before roasting for even heat distribution.
3. Preparing Aromatics and Broth in Advance
Chop garlic, fresh rosemary, thyme, and vegetables such as carrots and celery a day before cooking; store them in an airtight container in the fridge.
Additionally, measure out beef broth needed for moisture during roasting and keep it ready to add.
4. Thawing and Handling Safely
If purchasing a frozen roast, thaw it in the refrigerator 24 to 36 hours beforehand to preserve quality and safety.
| Thawing Method | Duration | Notes |
|---|---|---|
| Refrigerator thaw | 24 to 36 hours | Safe, preserves texture and flavor |
| Cold water thaw | 2 to 3 hours | Faster; roast must be in leak-proof wrap |
| Room temperature thaw | Not recommended | Risk of bacterial growth |
5. Day-Of Ready Checklist
On the day of cooking, gather all ingredients and equipment in advance: roasting pan, rack, digital thermometer, carving knife, and prepared aromatics. It’s helpful to have a timer and a meat thermometer already set to target temperature.
Pro Tip: Make-ahead seasoning not only saves time but guarantees a richer flavor profile as the herbs and spices meld deeply into the bison’s lean meat.
By following these make-ahead instructions, we give ourselves a stress-free cooking experience and a perfectly flavorful Bison Rib Roast that will impress every guest.
Storage and Leftovers
Proper storage of our Bison Rib Roast leftovers preserves flavor and ensures food safety. Follow these steps to store and reheat successfully:
Cooling and Refrigerating
- After serving, allow the roast to cool at room temperature for no more than two hours to prevent bacterial growth.
- Slice leftover roast into manageable portions to speed up cooling.
- Place portions in airtight containers or wrap tightly with aluminum foil or plastic wrap.
- Store in the refrigerator at or below 40°F (4°C) for up to 3 to 4 days.
Freezing Leftovers
- For longer storage, wrap leftover bison roast tightly in plastic wrap, then a layer of aluminum foil, or use vacuum-sealed bags.
- Label packages with the date before placing them in the freezer.
- Freeze at 0°F (-18°C) or below for up to 3 months to maintain optimal taste and texture.
| Storage Method | Temperature | Maximum Storage Time | Packaging Recommendations |
|---|---|---|---|
| Refrigeration | ≤ 40°F (4°C) | 3 to 4 days | Airtight containers or tightly wrapped foil |
| Freezing | 0°F (-18°C) or below | Up to 3 months | Vacuum-sealed bags or double-wrapped foil |
Reheating Leftovers
- Thaw frozen portions overnight in the refrigerator for even reheating.
- Preheat the oven to 300°F (149°C).
- Place roast slices in an oven-safe dish. Add a splash of beef broth or water to maintain moisture.
- Cover tightly with foil and heat for 20 to 30 minutes until warmed through.
- Alternatively, gently reheat on the stovetop over low heat with a bit of broth, stirring frequently to prevent drying.
“Reheating slowly at low temperatures keeps our bison tender and juicy—never overcook!“
Repurposing Leftovers
- Use sliced bison in sandwiches with horseradish mustard or garlic aioli.
- Add chopped roast to salads or grain bowls for a hearty protein boost.
- Incorporate into stews or soups for rich flavor depth.
- Chop leftovers finely for tacos or bison chili.
By following these storage and reheating best practices for our Bison Rib Roast, we enjoy every delicious bite safely and minimize food waste.
Conclusion
Choosing bison rib roast brings a unique flavor and a healthier option to your table. With the right preparation and cooking techniques, it’s easy to create a meal that’s both impressive and delicious.
By planning ahead and following proper storage tips, we can enjoy this flavorful roast long after the first serving. Whether it’s a special occasion or a cozy dinner, bison rib roast is a choice that delivers on taste and nutrition every time.
Frequently Asked Questions
What makes bison rib roast healthier than beef roast?
Bison rib roast is leaner than traditional beef, containing less fat and fewer calories. It also has a slightly sweeter taste, making it a flavorful yet healthier alternative for special occasions.
How should I thaw a frozen bison rib roast safely?
Thaw the roast in the refrigerator for 24 to 36 hours or submerge it in cold water for 2 to 3 hours, changing the water every 30 minutes to ensure it thaws evenly and safely.
What is the ideal oven temperature for cooking a bison rib roast?
Preheat your oven to 325°F (163°C) for roasting bison rib roast. This moderate temperature helps cook it evenly without drying out the lean meat.
How do I know when my bison rib roast is perfectly cooked?
Use a digital meat thermometer to check the internal temperature. Aim for 125°F (52°C) for rare, 135°F (57°C) for medium-rare, and 145°F (63°C) for medium.
Can I prepare the bison rib roast seasoning in advance?
Yes! Seasoning the roast 12 to 24 hours ahead enhances flavor absorption and improves tenderness, making your roast more flavorful and easier to cook on the day of serving.
How long should the roast rest after cooking?
Rest the bison rib roast for 20 to 30 minutes before carving. This allows the juices to redistribute, ensuring every slice is tender and juicy.
What are some good side dishes to serve with bison rib roast?
Roasted root vegetables, garlic mashed potatoes, and sauces like red wine reduction or chimichurri complement the rich and slightly sweet flavor of bison rib roast perfectly.
How should leftovers be stored and reheated?
Cool leftovers within 2 hours, then store in airtight containers in the fridge for 3 to 4 days or freeze for up to 3 months. Reheat slowly on low heat to keep the meat tender.
What are creative ways to use leftover bison rib roast?
Leftover bison roast can be used in sandwiches, salads, stews, or tacos, providing delicious new meals while minimizing waste and maximizing taste.