
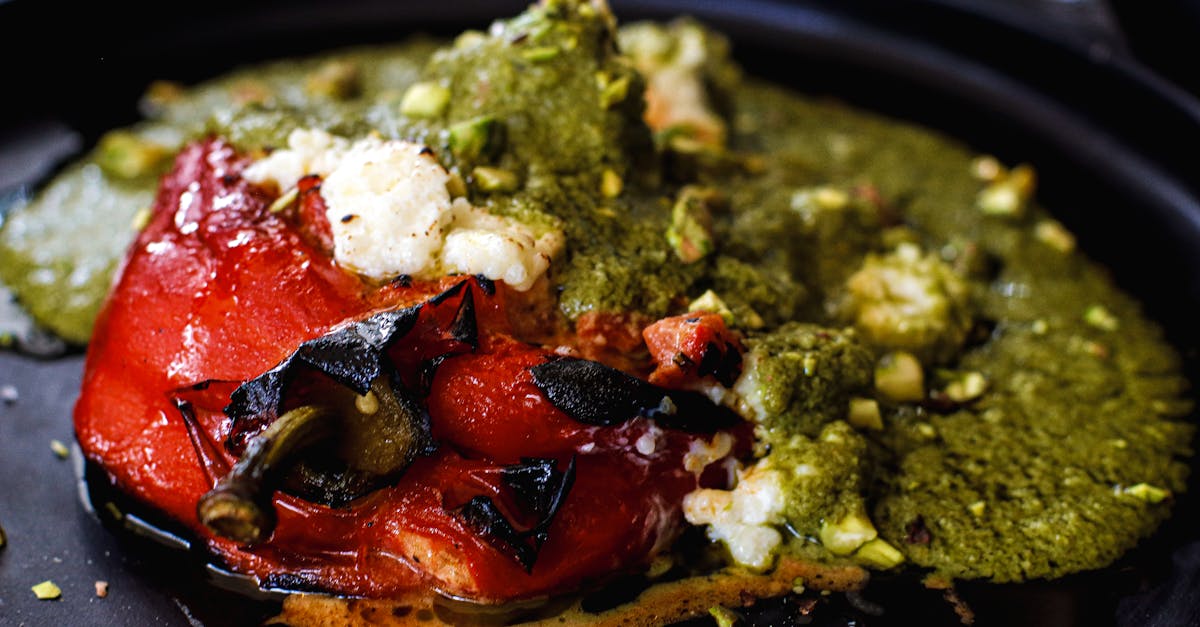
Bibingka Ube is a delightful twist on the classic Filipino rice cake that’s perfect for any occasion. Infused with the vibrant purple hue and subtle sweetness of ube, this version adds a modern flair to a beloved traditional treat. It’s soft, moist, and bursting with flavor that’ll keep you coming back for more.
We love how easy it is to make and how it brings a festive vibe to our table. Whether you’re new to Filipino cuisine or a longtime fan, this Bibingka Ube recipe is sure to impress. Let’s dive into creating this colorful and delicious dessert that’s as beautiful as it is tasty.
Ingredients
To create our vibrant and flavorful Bibingka Ube, we gather a combination of essential ingredients that deliver the perfect texture and sweet ube flavor. Below are the Main Ingredients for baking and the Optional Toppings that elevate this classic Filipino treat.
Main Ingredients
- 1 cup rice flour (ensures the characteristic chewy texture)
- 1/2 cup all-purpose flour (for structure and softness)
- 3/4 cup sugar (balances the natural earthiness of ube)
- 1 cup ube halaya (purple yam jam, the star ingredient giving bright color and flavor)
- 1 1/4 cups coconut milk (adds moisture and subtle richness)
- 2 large eggs (binds the batter and creates a tender crumb)
- 1/2 teaspoon baking powder (gives lightness to the cake)
- 1/4 teaspoon salt (enhances the sweetness and balances flavors)
- 1/2 teaspoon vanilla extract (boosts aroma and flavors)
Optional Toppings
Add these toppings for an authentic and festive presentation, enriching both the flavor and texture:
| Topping | Purpose |
|---|---|
| Grated coconut | Adds a chewy contrast and tropical aroma |
| Butter, melted | For brushing, gives a glossy, rich finish |
| Salted egg slices | Traditional savory touch balancing sweetness |
| Cheese | Offers a creamy salty flavor complement |
| Toasted rice krispies | Introduces a crunchy texture contrast |
We recommend brushing the bibingka with melted butter immediately after baking and adding your favorite toppings while still warm for the best results.
Equipment Needed
To make our Bibingka Ube perfectly every time, having the right equipment is essential. This ensures even cooking and helps us achieve the signature soft and moist texture with that vibrant purple hue.
Essential Tools for Bibingka Ube
- Mixing Bowls – We need at least two: one for wet ingredients and another for dry ingredients.
- Whisk or Electric Mixer – For blending the batter until smooth and lump-free.
- Measuring Cups and Spoons – Accurate measurements keep our Bibingka Ube consistent in flavor and texture.
- Bibingka Pan or Round Cake Pan – Traditionally, bibingka is baked in a shallow, round pan lined with banana leaves. If unavailable, a standard 8-inch round cake pan works well.
- Banana Leaves (optional) – To line the pan for authentic aroma and presentation.
- Oven or Stovetop with Heat Source – We bake our bibingka to golden perfection using these.
- Parchment Paper or Aluminum Foil – To cover the pan during baking and keep moisture inside.
- Basting Brush – For brushing melted butter over the bibingka immediately after baking.
- Cooling Rack – Allows the bibingka to cool evenly without becoming soggy.
Equipment Summary Table
| Equipment | Purpose | Notes |
|---|---|---|
| Mixing Bowls | Combine ingredients | Use separate bowls for wet & dry |
| Whisk/Electric Mixer | Mix batter thoroughly | Electric mixer speeds up mixing |
| Measuring Cups | Accurate ingredient measurement | Precision is key |
| Bibingka Pan/Cake Pan | Bake bibingka | 8-inch pan preferred |
| Banana Leaves | Line pan for aroma & presentation | Optional but highly recommended |
| Oven/Stovetop | Baking | Oven preferred for even heat |
| Parchment Paper/Foil | Cover pan during baking | Keeps moisture locked |
| Basting Brush | Apply melted butter after baking | For rich buttery finish |
| Cooling Rack | Cool baked bibingka | Prevents sogginess |
“Using the proper equipment elevates our Bibingka Ube from ordinary to extraordinary by ensuring consistent texture and flavor.”
Prep Work
Before diving into baking our Bibingka Ube, we must carefully prepare the key components—the ube and the batter. Proper prep ensures the vibrant color and distinct flavor that make this Filipino rice cake so special.
Preparing the Ube
- If using fresh ube (purple yam), peel and cut it into chunks. Steam for 20-25 minutes until soft. Let it cool slightly.
- For convenience, we can use store-bought ube halaya which is pre-cooked and sweetened. It simplifies the process and guarantees consistent flavor.
- Once steamed or if ready with halaya, mash the ube thoroughly or pulse in a food processor until smooth. This creates a velvety texture that blends evenly in the batter.
- Set the prepared ube aside. Its creamy consistency will infuse the Bibingka with that iconic purple hue and natural sweetness.
Preparing the Batter
We combine dry and wet ingredients step by step to achieve the perfect Bibingka Ube batter.
| Ingredient | Measurement | Preparation |
|---|---|---|
| Rice flour | 1 cup | Sifted |
| All-purpose flour | 1 cup | Sifted |
| Sugar | 3/4 cup | |
| Baking powder | 2 teaspoons | |
| Salt | 1/2 teaspoon | |
| Coconut milk | 1 1/4 cups | Use fresh or canned |
| Eggs | 3 large | Beaten |
| Ube halaya or mashed ube | 1 cup | Prepared as above |
| Vanilla extract | 1 teaspoon | Optional for enhanced aroma |
Steps to prepare the batter:
- In a large mixing bowl, whisk together the sifted rice flour, all-purpose flour, sugar, baking powder, and salt until evenly combined.
- In another bowl, beat the eggs thoroughly, then add coconut milk and vanilla extract. Whisk until smooth.
- Gradually pour the wet ingredients into the dry mixture. Stir gently using a spatula or wooden spoon to avoid overmixing.
- Fold in the prepared ube gently until the mixture becomes uniformly purple and smooth without lumps.
- Let the batter rest for about 10 minutes to allow the flours to hydrate fully, which leads to the soft and moist texture characteristic of bibingka.
“A well-prepared batter is the secret to our Bibingka Ube’s soft crumb and vibrant appearance.”
With the ube prepared and batter assembled, we are now ready for the next step: pouring the batter into pans and baking to perfection.
Instructions
Follow these detailed steps to create our vibrant and moist Bibingka Ube that delights with every bite.
Mixing the Batter
- In a large mixing bowl, combine 1 cup rice flour and 1 cup all-purpose flour for the perfect rice cake base.
- Add 3/4 cup granulated sugar, 2 teaspoons baking powder, and 1/2 teaspoon salt. Whisk these dry ingredients thoroughly to ensure even distribution.
- In a separate bowl, beat 4 large eggs until frothy to incorporate air for a soft texture.
- Slowly pour in 1 1/2 cups coconut milk and 1 cup ube halaya (purple yam jam) to the eggs. Add 1 teaspoon vanilla extract for enhanced aroma.
- Gradually add the wet mixture into the dry ingredients while whisking continuously until the batter is smooth and evenly colored a vivid purple.
- Let the batter rest for 10 minutes at room temperature to allow the flours to hydrate for a tender crumb.
| Ingredient | Measurement |
|---|---|
| Rice flour | 1 cup |
| All-purpose flour | 1 cup |
| Granulated sugar | 3/4 cup |
| Baking powder | 2 teaspoons |
| Salt | 1/2 teaspoon |
| Eggs | 4 large |
| Coconut milk | 1 1/2 cups |
| Ube halaya | 1 cup |
| Vanilla extract | 1 teaspoon |
Cooking the Bibingka
- Preheat the oven to 350°F (175°C). Line a 9-inch round cake pan with banana leaves or parchment paper for an authentic touch.
- Pour the prepared batter into the pan. Tap gently on the counter to remove air bubbles.
- Cover the pan with aluminum foil to trap steam which helps achieve the soft and moist texture.
- Bake for 30 to 35 minutes until the top is set and a toothpick inserted in the center comes out clean.
- Remove the foil in the last 5 minutes of baking to allow the surface to lightly brown.
- Transfer the cake onto a cooling rack for 10 minutes to prevent sogginess.
Adding Toppings
- While still warm, brush the top generously with 3 tablespoons melted butter using a pastry brush for a rich flavor.
- Arrange optional toppings such as:
- Sliced salted eggs for salty contrast
- Grated cheese for creamy notes
- Toasted rice krispies for crunch
- Freshly grated coconut for extra texture
- Serve immediately to enjoy the perfect balance of buttery, sweet, and savory flavors combined with the vibrant purple hue of Bibingka Ube.
Serving Suggestions
To fully enjoy our Bibingka Ube, serving it warm is essential. The soft, moist texture and vibrant purple hue come alive best when freshly baked. Here are some ways we recommend serving this delightful Filipino treat:
- Serve with a pat of melted butter brushed generously on top right after baking. This adds a rich, buttery aroma that perfectly complements the subtle sweetness of ube.
- Add traditional toppings for a multi-textural experience:
- Salted egg slices bring a salty contrast
- Grated cheese provides a savory balance
- Toasted grated coconut adds crunch with a nutty flavor
- Pair with hot Filipino coffee or tea. The warmth of the drink elevates the comforting qualities of the cake and balances the creamy sweetness.
- For festive occasions, present the Bibingka Ube on banana leaves to enhance authenticity and heighten the visual appeal.
Serving Temperature & Storage Tips
| Serving Tips | Details |
|---|---|
| Ideal Serving Temperature | Warm (around 110°F or 43°C) |
| Storage | Wrap in plastic wrap, refrigerate up to 3 days |
| Reheating | Microwave for 20-30 seconds or steam briefly |
Presentation Ideas
- Slice the Bibingka Ube into wedges and arrange on a large platter for sharing at gatherings.
- Garnish each slice with a small dab of ube halaya or a sprinkle of toasted rice krispies before serving.
- For a modern twist, serve alongside a scoop of coconut ice cream or crushed roasted peanuts to add contrast in flavor and texture.
“The key to making our Bibingka Ube shine is serving it warm with buttery and savory toppings that enhance its natural ube sweetness.”
These serving tips bring out the best in this traditional Filipino dessert reinvented with vibrant, creamy ube. We encourage you to experiment with flavors and textures to suit your occasion and palate.
Make-Ahead and Storage Tips
To ensure our Bibingka Ube stays fresh and delicious, proper make-ahead preparation and storage are essential. Here’s how we can keep this vibrant dessert at its best for longer enjoyment.
Make-Ahead Preparation
- Prepare the batter a day in advance and keep it covered in the refrigerator. This allows the flavors to meld and can improve the cake’s texture.
- For freshly steamed ube, cook and mash it ahead, then refrigerate to save time on baking day.
- Assemble all toppings like salted egg slices, grated cheese, and toasted coconut in separate airtight containers for easy access.
- When ready, whisk the chilled batter briefly to recombine before pouring it into the baking pan.
Storing Bibingka Ube
Proper storage prevents dryness and flavor loss:
- Wrap cooled bibingka tightly in plastic wrap or transfer to an airtight container.
- Store in the refrigerator for up to 3 days. Keep it cold to maintain moisture and freshness.
- For longer storage, freeze the bibingka using the following method:
- Wrap it tightly in plastic wrap then in aluminum foil.
- Label and freeze for up to 1 month.
| Storage Method | Duration | Tips |
|---|---|---|
| Refrigerator | Up to 3 days | Keep tightly wrapped to avoid drying |
| Freezer | Up to 1 month | Double wrap to prevent freezer burn |
Reheating Instructions
To enjoy warm and moist bibingka ube, reheat gently:
- Oven: Preheat to 300°F (150°C). Wrap the bibingka in foil and heat for 10–15 minutes until warmed through.
- Microwave: Place a slice on a microwave-safe plate. Cover with a damp paper towel and heat for 20–30 seconds. Avoid overheating to prevent dryness.
- Reapply a light brush of melted butter after reheating to restore the rich buttery flavor.
“Bibingka Ube is best enjoyed warm,” and following these make-ahead and storage tips helps us serve it at its soft, moist, and flavorful best.
Important Reminders
- Avoid freezing leftovers with fresh toppings like salted eggs or cheese as textures may change.
- Consume refrigerated bibingka within 3 days for optimal taste.
- Always allow bibingka to cool completely before wrapping to prevent condensation.
By mastering these make-ahead and storage techniques, we keep our Bibingka Ube ready for celebrations or everyday indulgence without compromising its signature texture and vibrant flavor.
Conclusion
Bibingka Ube brings a vibrant twist to a beloved Filipino classic, blending tradition with a pop of color and flavor. Its soft texture and subtle sweetness make it a crowd-pleaser for any gathering or simple indulgence.
With the right ingredients, equipment, and a little preparation, we can easily create this delightful dessert at home. Whether served warm with traditional toppings or enjoyed with a cup of coffee, Bibingka Ube promises a memorable treat that celebrates Filipino culinary heritage.
Frequently Asked Questions
What is Bibingka Ube?
Bibingka Ube is a modern Filipino rice cake made with ube (purple yam), giving it a vibrant purple color and a subtly sweet flavor. It has a soft, moist texture, perfect for any festive occasion.
What ingredients are needed to make Bibingka Ube?
Key ingredients include rice flour, all-purpose flour, sugar, ube halaya, coconut milk, eggs, baking powder, salt, and vanilla extract. Optional toppings can be grated coconut, butter, salted egg slices, cheese, and toasted rice krispies.
How do I prepare the ube for Bibingka Ube?
You can either peel, cut, and steam fresh ube or use store-bought ube halaya for convenience. Both methods work well for making a vibrant and flavorful batter.
What equipment do I need to bake Bibingka Ube?
Essential tools include mixing bowls, a whisk or electric mixer, measuring cups, a bibingka or round cake pan, parchment paper or foil, a basting brush, and a cooling rack. Banana leaves are optional for an authentic touch.
How should I bake Bibingka Ube for the best texture?
Preheat your oven and cover the pan with parchment or foil during baking to ensure even cooking. Bake until the cake is soft and moist, then brush with melted butter and add toppings while still warm.
What are the best toppings for Bibingka Ube?
Traditional toppings include salted egg slices, grated cheese, toasted coconut, melted butter, and toasted rice krispies. Adding these while the cake is warm enhances flavor and presentation.
How should I serve Bibingka Ube?
Serve Bibingka Ube warm at about 110°F (43°C) with a pat of melted butter and your choice of toppings. It’s best enjoyed with hot Filipino coffee or tea and presented on banana leaves for special occasions.
Can I prepare Bibingka Ube in advance?
Yes. You can prepare the batter or steam and mash fresh ube a day ahead and refrigerate. This helps save time and maintains freshness for baking when you’re ready.
How do I store leftover Bibingka Ube?
Wrap the cooled cake tightly in plastic wrap or place in an airtight container. Refrigerate for up to three days. You can also freeze it, but avoid freezing cakes with fresh toppings.
What is the best way to reheat Bibingka Ube?
Reheat gently in an oven at low temperature or in a microwave until warm and moist. Reheating helps restore its soft texture and enhances the flavor before serving.