
Shea butter has long been celebrated for its incredible moisturizing and healing properties. Originating from the nuts of the African shea tree, this natural ingredient is packed with vitamins and fatty acids that nourish both skin and hair. We’ve discovered that incorporating shea butter into our daily routine can make a noticeable difference in hydration and texture.
In this collection of better shea butter recipes, we’ll explore easy and effective ways to create your own skincare and haircare products at home. From rich body butters to soothing lip balms, these recipes harness the full potential of shea butter’s natural goodness. Whether you’re new to DIY beauty or looking to upgrade your current regimen, these recipes will help you achieve healthier, glowing skin and stronger hair with confidence.
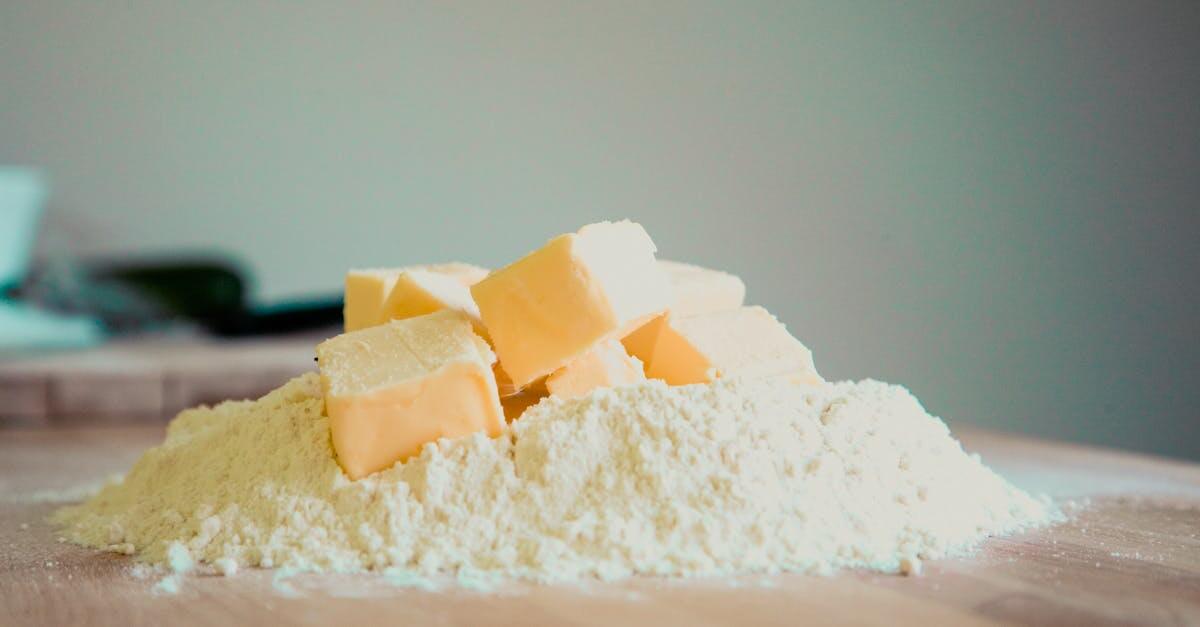
Ingredients
To craft our better shea butter recipes, we focus on high-quality ingredients that maximize the moisturizing and healing properties of shea butter. Below, we detail the essential shea butter ingredients and recommend optional add-ins for enhanced benefits to customize your skincare or haircare formulations.
Essential Shea Butter Ingredients
These ingredients form the base of every effective shea butter recipe. Choosing unrefined, raw shea butter ensures you retain the rich vitamins and fatty acids that nourish skin and hair deeply.
- Raw Shea Butter (100% pure, unrefined) – Provides intense hydration and skin barrier repair with vitamins A, E, and fatty acids.
- Carrier Oils – Light oils that improve texture and absorption
- Examples: Jojoba oil, Sweet almond oil, Coconut oil
- Natural Beeswax – Adds firmness and sealing properties, ideal for balms and creams.
- Vitamin E Oil – Natural antioxidant that extends shelf life and boosts skin repair.
| Ingredient | Purpose | Quantity Range for Recipe |
|---|---|---|
| Raw Shea Butter | Base, moisturizing, healing | ½ to 1 cup (120–240g) |
| Carrier Oils | Texture, absorption, extra nutrients | 2–4 tablespoons (30–60ml) |
| Natural Beeswax | Firmness, sealing moisture | 1–2 tablespoons (15–30g) |
| Vitamin E Oil | Preservation, skin nourishment | 10–20 drops |
Optional Add-Ins for Enhanced Benefits
We love personalizing our better shea butter recipes with these targeted ingredients. They elevate your formulation with added aroma, therapeutic qualities, or specific skin and hair benefits.
- Essential Oils (Lavender, Tea Tree, Peppermint) – For fragrance and skin soothing or antiseptic properties.
- Herbal Infusions (Chamomile, Calendula, Green tea) – Provides anti-inflammatory and antioxidant effects.
- Aloe Vera Gel – Boosts hydration and calms irritated or sunburned skin.
- Arrowroot Powder or Cornstarch – Adds a silky feel and reduces greasy residue.
- Beeswax Alternatives like Candelilla Wax – For vegan-friendly texture adjustment.
| Add-In | Benefit | Suggested Amount |
|---|---|---|
| Essential Oils | Fragrance, therapeutic support | 10–15 drops |
| Herbal Infusions | Antioxidant, anti-inflammatory | 1–2 tablespoons (infused oil) |
| Aloe Vera Gel | Hydration, soothing | Up to 2 tablespoons (30ml) |
| Arrowroot Powder | Smooth texture, oil absorption | 1 teaspoon |
| Candelilla Wax | Vegan thickener | Substitute equal for beeswax |
By combining these essential and optional ingredients mindfully, we create better shea butter recipes that elevate skin and hair health naturally with rich, nourishing formulations.
Tools and Equipment Needed
To craft better shea butter recipes with consistent quality and ease, we rely on a set of essential tools and equipment. Having the right gear helps us measure, melt, mix, and store our formulas precisely, enhancing the final product’s texture and effectiveness.
Measuring and Mixing Tools
Accurate measurements are critical when blending shea butter with carrier oils, beeswax, and additives. We recommend:
- Digital kitchen scale for weighing ingredients to the gram
- Measuring spoons for precise small quantities like vitamin E oil and essential oils
- Heat-resistant glass bowls or stainless steel bowls for melting ingredients safely
- Silicone spatulas for thorough mixing and scraping every bit of the blend
Heating and Melting Equipment
Since raw shea butter and beeswax need gentle melting for smooth incorporation:
- Use a double boiler or set a heat-safe bowl over a pot of simmering water to prevent direct heat contact
- A microwave-safe container can be an alternative for short bursts but requires close monitoring to avoid overheating
Storage and Packaging
Proper containers preserve the shelf life and usability of your homemade shea butter products:
- Glass jars with airtight lids for creams and body butters
- Tin containers or lip balm tubes for travel-friendly packaging
- Dark amber or cobalt blue bottles if creating liquid blends or serums to protect from light
Additional Helpful Tools
To enhance our workflow and safety:
- Funnel for easy pouring into small containers
- Disposable gloves to keep formulations hygienic
- Labels for ingredient notes and expiration dating
- Thermometer for checking melt temperatures; ideal range is 110°F to 130°F for shea butter blends
| Tool/Equipment | Purpose |
|---|---|
| Digital kitchen scale | Precise weight measuring of ingredients |
| Measuring spoons | Accurate small quantity dosing |
| Heat-resistant bowls | Safe melting and mixing |
| Silicone spatulas | Efficient blending and scraping |
| Double boiler | Controlled gentle melting |
| Microwave-safe containers | Quick melting with supervision |
| Glass jars | Airtight storage for creams |
| Tin containers/lip tubes | Portable product packaging |
| Funnel | Clean and easy transfer to containers |
| Disposable gloves | Maintain hygiene during preparation |
| Labels | Product identification and shelf life tracking |
| Thermometer | Ensuring proper melting temperature |
By assembling and using these tools and equipment, we optimize our better shea butter recipes process for smooth, nourishing formulations that deliver maximum benefits to skin and hair.
Preparation Steps
To create the most effective shea butter recipes, we follow precise steps to ensure the ingredients blend perfectly and retain their nourishing qualities. Mastering these preparation steps guarantees a smooth, creamy texture and maximum skin and hair benefits.
Shea Butter Melting and Softening
First, we begin by gently melting and softening the raw shea butter to preserve its nutrients. Avoid direct heat to prevent degradation:
- Use a double boiler setup or a microwave-safe bowl.
- Heat the shea butter on low or in short bursts in the microwave (15-20 seconds), stirring frequently.
- Melt until just softened, not fully liquid, to maintain a creamy consistency.
- Remove promptly once softened to prevent overheating.
“Gentle warming retains the rich vitamins and fatty acids that make shea butter so uniquely beneficial.”
Measuring and Mixing Ingredients
Accurate measurement and thorough mixing ensure the perfect balance in our better shea butter formulations.
| Ingredient | Measurement Tools | Key Points |
|---|---|---|
| Raw Shea Butter | Digital kitchen scale | Measure to the nearest gram for precision |
| Carrier Oils (e.g., jojoba, almond) | Measuring spoons | Use exact tablespoons as per recipe |
| Beeswax | Digital scale or measuring spoons | Melt and add while shea butter is warm |
| Vitamin E Oil | Dropper or measuring spoon | Add as antioxidant at end of mixing |
| Essential Oils (optional) | Dropper | Use 10-15 drops depending on batch size |
Steps to follow:
- Weigh and measure all ingredients before starting.
- Combine softened shea butter with carrier oils and melted beeswax in a clean bowl.
- Use a silicone spatula or electric mixer for uniform blending.
- Stir vigorously for 3-5 minutes until the mixture is creamy and smooth.
- Add vitamin E oil and essential oils last to preserve potency.
- Mix gently but thoroughly to distribute evenly.
“Precision and patience during mixing guarantee a luxurious texture that absorbs beautifully into skin and hair.”
By adhering to these preparation steps, we maximize the natural goodness of shea butter in every homemade recipe.
Shea Butter Recipe Variations
We can customize shea butter recipes to target specific skin and hair needs. Below are versatile formulations that use the nourishing properties of raw shea butter combined with complementary natural ingredients for enhanced benefits.
Nourishing Shea Butter Body Butter
This rich body butter deeply hydrates and rejuvenates skin, perfect for dry or rough patches.
Ingredients:
- 1/2 cup raw shea butter (softened)
- 1/4 cup coconut oil (melted)
- 1/4 cup sweet almond oil
- 1 teaspoon vitamin E oil
- 10 drops lavender essential oil (optional)
Instructions:
- Gently melt the raw shea butter and coconut oil in a double boiler until fully liquid.
- Remove from heat and blend in sweet almond oil and vitamin E oil.
- Allow mixture to cool slightly then whip with a hand mixer until fluffy.
- Add lavender essential oil and whip briefly to combine.
- Transfer to an airtight container and store in a cool place.
This body butter offers a luxuriously creamy texture that absorbs quickly leaving skin smooth and nourished.
Moisturizing Shea Butter Lip Balm
We can create a protective and hydrating balm for chapped lips using shea butter‘s healing fat content.
Ingredients:
- 2 tablespoons raw shea butter
- 1 tablespoon beeswax pellets
- 1 tablespoon jojoba oil
- 5-6 drops peppermint essential oil (optional)
| Ingredient | Quantity | Purpose |
|---|---|---|
| Raw shea butter | 2 tablespoons | Moisturizes and softens lips |
| Beeswax pellets | 1 tablespoon | Provides structure and sealant |
| Jojoba oil | 1 tablespoon | Adds hydration and shine |
| Peppermint EO (opt) | 5-6 drops | Adds refreshing scent |
Instructions:
- Melt shea butter and beeswax in a double boiler.
- Stir in jojoba oil and remove from heat.
- Add essential oil and mix well.
- Pour into lip balm containers and cool until solid.
This balm forms a light protective layer while deeply moisturizing and softening lips.
Soothing Shea Butter Hand Cream
Ideal for dry or cracked hands, this formula combines shea butter with calming aloe vera and oils.
Ingredients:
- 1/3 cup raw shea butter
- 2 tablespoons almond oil
- 2 tablespoons aloe vera gel
- 1 teaspoon vitamin E oil
- 8 drops chamomile essential oil (optional)
Instructions:
- Melt shea butter gently.
- Blend in almond oil and vitamin E oil.
- Stir in aloe vera gel and essential oil once mixture cools.
- Whip until creamy and smooth.
- Store in a pump or jar container.
The cool, soothing gel balances the richness of shea butter reducing irritation and improving skin texture.
Refreshing Shea Butter Foot Scrub
Exfoliate and hydrate tired feet with this uplifting scrub combining shea butter and natural exfoliants.
Ingredients:
- 1/4 cup raw shea butter
- 1/2 cup granulated sugar or sea salt
- 2 tablespoons coconut oil
- 10 drops eucalyptus essential oil (optional)
| Ingredient | Amount | Role |
|---|---|---|
| Raw shea butter | 1/4 cup | Moisturizes and nourishes |
| Granulated sugar/sea salt | 1/2 cup | Exfoliates dead skin cells |
| Coconut oil | 2 tablespoons | Adds softness |
| Eucalyptus EO (optional) | 10 drops | Refreshes and invigorates |
Instructions:
- Melt shea butter and coconut oil.
- Mix in sugar or sea salt.
- Add eucalyptus oil and stir well.
- Transfer to a jar for easy access.
This scrub removes rough patches while leaving feet soft, lightly scented, and refreshed.
Directions
Follow these step-by-step instructions to create luxurious shea butter recipes that deeply nourish your skin and hair. Each recipe combines precise measurements with gentle techniques to preserve the natural benefits of raw shea butter.
How to Make Shea Butter Body Butter
- Measure Ingredients
- 1 cup unrefined shea butter
- ½ cup carrier oil (e.g., jojoba, sweet almond)
- 1 tablespoon vitamin E oil
- 10-15 drops of essential oils (lavender or peppermint)
- Melt Shea Butter
Using a double boiler, gently melt the shea butter until soft but not completely liquid. Avoid direct heat to preserve nutrients.
- Combine Oils
Remove from heat and stir in the carrier oil and vitamin E oil until blended.
- Cool and Whip
Refrigerate the mixture for 30 minutes until edges start to harden. Use an electric mixer to whip the butter to a light, fluffy texture (about 5 minutes).
- Add Essential Oils
Slowly add essential oils while whipping to evenly distribute fragrance and benefits.
- Store Properly
Transfer to a clean glass jar with a tight lid. Store in a cool place to maintain consistency.
How to Make Shea Butter Lip Balm
- Gather Ingredients
- 2 tablespoons shea butter
- 2 tablespoons beeswax pellets
- 1 tablespoon coconut oil
- 5-8 drops peppermint essential oil (optional)
- Melt Ingredients
In a double boiler, melt the shea butter, beeswax, and coconut oil together, stirring until smooth.
- Pour into Containers
Carefully pour the liquid balm into lip balm tubes or small tins.
- Cool and Set
Let cool at room temperature until completely solid.
- Label and Use
Seal containers and label with ingredients and date. The balm provides rich moisture and protection.
How to Make Shea Butter Hand Cream
- Prepare Ingredients
- ½ cup shea butter
- ¼ cup aloe vera gel
- ¼ cup sweet almond oil
- 1 teaspoon vitamin E oil
- 10 drops lavender essential oil
- Melt and Mix
Gently melt shea butter using a double boiler. Combine with sweet almond oil and vitamin E oil.
- Add Aloe Vera
Remove from heat. Slowly fold in aloe vera gel, mixing thoroughly to blend into a creamy texture.
- Add Essential Oils
Incorporate lavender oil for calming, restorative properties.
- Transfer and Store
Pour the hand cream into sterilized pump bottles or jars. Use daily for smooth, hydrated hands.
How to Make Shea Butter Foot Scrub
- Ingredients to Measure
- ½ cup shea butter
- ½ cup sugar (white or brown)
- ¼ cup coconut oil
- 10 drops eucalyptus essential oil
- Combine Shea Butter and Oil
Melt the shea butter and coconut oil gently, then cool slightly.
- Add Sugar and Essential Oil
Stir in sugar until chunky but spreadable. Add eucalyptus oil for a refreshing scent and soothing effect.
- Package the Scrub
Transfer to a glass jar with a lid.
- Usage Tip
Scoop a small amount and massage onto damp feet to exfoliate and moisturize simultaneously.
Ingredient Measurements Summary Table
| Recipe | Shea Butter | Carrier Oil/Coconut Oil | Beeswax | Vitamin E Oil | Aloe Vera Gel | Sugar | Essential Oils |
|---|---|---|---|---|---|---|---|
| Body Butter | 1 cup | ½ cup (carrier oil) | — | 1 tbsp | — | — | 10-15 drops (lavender) |
| Lip Balm | 2 tbsp | 1 tbsp (coconut oil) | 2 tbsp | — | — | — | 5-8 drops (peppermint) |
| Hand Cream | ½ cup | ¼ cup (sweet almond) | — | 1 tsp | ¼ cup | — | 10 drops (lavender) |
| Foot Scrub | ½ cup | ¼ cup (coconut oil) | — | — | — | ½ cup | 10 drops (eucalyptus) |
Storage and Shelf Life Tips
Proper storage and handling of shea butter recipes ensure maximum potency and longevity of the natural ingredients. Here are essential tips to help us preserve the fresh quality and effectiveness of our homemade shea butter products:
Ideal Storage Conditions
- Store shea butter in airtight containers such as glass jars or tin tins to protect it from air exposure and contamination.
- Keep the containers in a cool, dark place, away from direct sunlight or heat sources. A cupboard or drawer works best.
- Avoid humidity which can encourage mold growth or spoilage.
- Refrigeration is optional but can extend shelf life especially in warmer climates. However, allow the product to return to room temperature before use to maintain creamy texture.
Shelf Life Expectations
When stored correctly, homemade shea butter formulations typically last:
| Product Type | Average Shelf Life | Notes |
|---|---|---|
| Pure Shea Butter | 12 to 24 months | Unrefined and raw is more stable |
| Shea Butter Blends | 6 to 12 months | Depends on added ingredients |
| Lip Balm | 6 to 9 months | Includes beeswax and oils |
| Body Butter | 6 to 12 months | Contains carrier oils and extracts |
Signs of Spoilage to Watch For
- Off or rancid odor differing from natural nutty scent
- Change in texture such as excessive graininess or separation
- Presence of mold or discoloration
- Irritation upon skin contact; discontinue use immediately
Best Practices for Longevity
- Always use clean hands or a spatula to scoop product, avoiding contamination.
- Label containers with preparation date to track freshness.
- Incorporate natural antioxidants like vitamin E oil in recipes to slow oxidation.
- Prepare smaller batches suited to frequent use to minimize waste.
By following these guidelines we ensure our better shea butter recipes remain fresh, effective, and safe for skin and hair care routines over time. Proper storage maximizes the benefits of the nourishing vitamins and fatty acids, helping us enjoy radiant, hydrated skin and healthy hair every day.
Tips for Customizing Your Shea Butter Recipes
Customizing shea butter recipes allows us to tailor each product to our unique skin and hair needs. Here are essential tips to help us enhance the benefits and personalize our formulations effectively.
1. Choose the Right Carrier Oils for Your Skin or Hair Type
Different carrier oils drastically change the texture and absorption rate of our shea butter blends. Selecting the oil that suits our skin or hair type maximizes nourishment and prevents irritation.
| Skin/Hair Type | Recommended Carrier Oils | Key Benefits |
|---|---|---|
| Dry | Jojoba oil, avocado oil | Deep hydration, rich in fatty acids |
| Oily | Grapeseed oil, hemp seed oil | Lightweight, non-comedogenic |
| Sensitive | Sweet almond oil, chamomile-infused oil | Soothing, anti-inflammatory |
| Damaged Hair | Argan oil, castor oil | Strengthens and promotes growth |
2. Adjust Essential Oils for Desired Scent and Therapeutic Effects
Adding essential oils boosts both fragrance and skin/hair benefits. Start with 5-10 drops per 1/2 cup shea butter, adjusting to preference. Consider these combinations:
- Lavender + Chamomile: Calms irritated skin
- Peppermint + Eucalyptus: Refreshes and invigorates scalp
- Rosemary + Tea Tree: Supports hair growth and helps dandruff
“Use essential oils cautiously; patch test before full application to avoid allergic reactions.”
3. Modify Butter Consistency by Varying Beeswax and Oil Ratios
Thicker products work well for lotions or balms, while lighter blends suit creams and mousses.
| Ingredient | Effect on Texture |
|---|---|
| Increase beeswax | Firmer, more solid texture, longer-lasting |
| Increase carrier oils | Softer, more spreadable, quicker absorption |
| Balance shea butter | Creamy feel, helps emollient properties |
4. Incorporate Active Add-Ins for Targeted Benefits
Boost the functionality of our recipes by adding targeted natural ingredients:
- Vitamin E oil: Extends shelf life, enhances skin repair
- Aloe vera gel: Adds cooling hydration for sensitive skin
- Sugar or salt: Create exfoliating scrubs with shea butter base
- Herbal infusions: Infuse your oils with calendula or green tea for extra antioxidants
5. Experiment with Vegan Alternatives for Beeswax
For vegan-friendly options, substitute beeswax with:
- Candelilla wax: Harder texture, high melting point
- Carnauba wax: Adds shine and firmness
These provide similar stability and texture without animal products.
6. Fine-Tune Temperature and Mixing Technique
Maintaining the proper melting temperature (below 120°F) preserves shea butter’s nutrients and ensures smooth blending.
- Melt ingredients slowly using a double boiler
- Stir continuously with a silicone spatula to avoid graininess
- Allow mixtures to cool at room temperature before storing
“Patience in the mixing process yields the most luxurious shea butter recipes.”
Summary Table for Customization Considerations
| Customization Aspect | Options & Tips |
|---|---|
| Carrier Oils | Match to skin/hair type for optimal absorption |
| Essential Oils | Use 5-10 drops per 1/2 cup; test for allergies |
| Consistency | Adjust beeswax (firmer) and oils (softer) proportions |
| Active Add-Ins | Vitamin E, aloe vera, scrubs, herbal infusions |
| Vegan Alternatives | Use candelilla or carnauba wax instead of beeswax |
| Temperature & Mixing | Melt below 120°F; stir continuously |
By following these tips, our shea butter recipes become truly customizable, allowing us to address specific concerns while preserving the natural benefits of this amazing ingredient.
Conclusion
Crafting our own shea butter recipes opens up a world of natural skincare and haircare possibilities. With the right ingredients, tools, and techniques, we can tailor each product to meet our unique needs while preserving the nourishing qualities of raw shea butter.
Embracing these homemade formulations not only supports healthier skin and hair but also empowers us to choose clean and effective ingredients. By experimenting and customizing, we ensure every creation delivers the best care possible, making our beauty routines both enjoyable and beneficial.
Frequently Asked Questions
What are the main benefits of using shea butter on skin and hair?
Shea butter moisturizes, heals, and nourishes skin and hair. It contains vitamins and fatty acids that improve hydration, texture, and overall health, making skin softer and hair stronger.
Why should I use unrefined shea butter for DIY recipes?
Unrefined shea butter retains its natural nutrients and healing properties. It’s more effective for moisturizing and nourishing compared to refined versions that may lose some benefits during processing.
What essential ingredients are needed for making shea butter skincare products?
Key ingredients include raw shea butter, carrier oils (like coconut or jojoba), natural beeswax, and vitamin E oil. Optional additions are essential oils, herbal infusions, and aloe vera for extra benefits.
What tools are necessary to make shea butter recipes at home?
Useful tools include a digital kitchen scale, measuring spoons, heat-resistant bowls, silicone spatulas, a double boiler or microwave-safe container, and storage jars. Labels and gloves help keep the process clean and organized.
How do I melt shea butter properly without losing its nutrients?
Melt shea butter using a double boiler or microwave on low heat. Gently soften it to preserve vitamins and fatty acids, avoiding overheating for best texture and effectiveness.
Can you suggest simple shea butter DIY recipes?
Yes, popular recipes include body butter, lip balm, hand cream, and foot scrub. These combine raw shea butter with oils and natural ingredients tailored for moisturizing and soothing skin and hair.
How should homemade shea butter products be stored?
Store in airtight glass or tin containers, kept in a cool, dark place. Refrigeration is optional for longer shelf life. Proper storage helps maintain freshness and effectiveness.
What is the typical shelf life of shea butter products?
Pure shea butter can last 12 to 24 months, while blended products typically last 6 to 12 months. Watch for spoilage signs like off smells or texture changes to ensure safety.
How can I customize shea butter recipes for my skin type?
Select carrier oils suited to your skin/hair type, adjust essential oils for scent and benefits, and modify beeswax ratios to change consistency. You can also add active ingredients or vegan alternatives as needed.
What signs indicate that my shea butter product has gone bad?
Spoiled products may develop a sour or rancid smell, discoloration, or unusual texture like clumping. Discard any product showing these signs to prevent skin irritation or reduced effectiveness.