
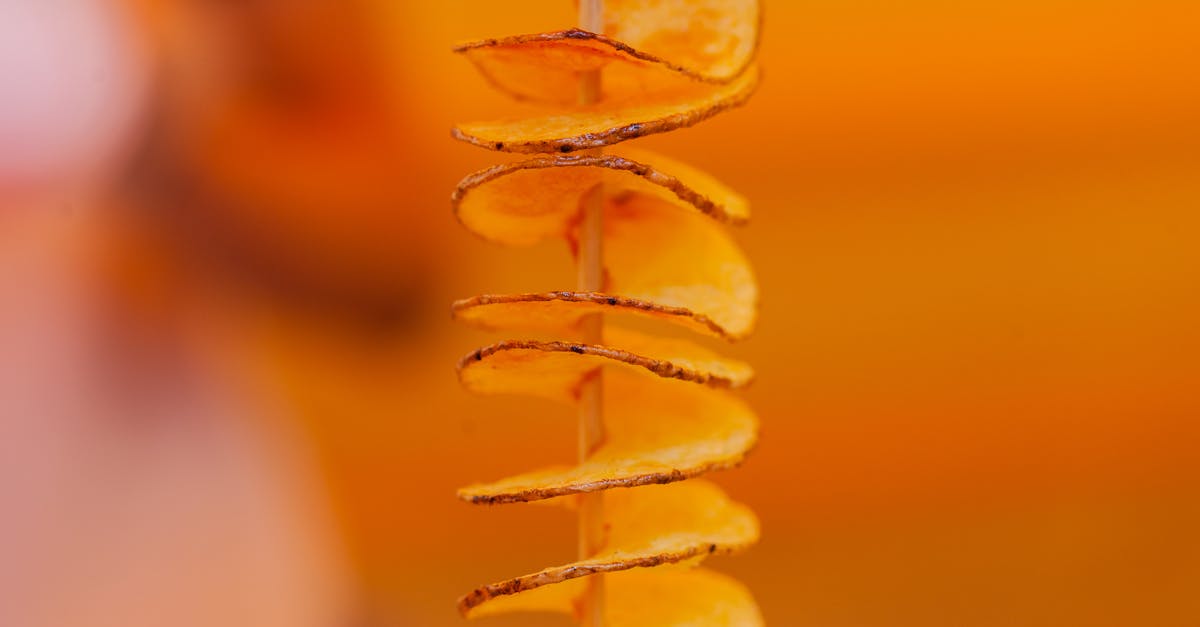
Venison snack sticks are a delicious way to enjoy lean game meat anytime. Packed with rich flavor and a satisfying chew they make the perfect protein-packed snack for outdoor adventures or just a quick bite.
We’ve perfected the best venison snack stick recipe using simple ingredients and traditional curing methods to bring out the natural taste of the meat. Whether you’re an experienced hunter or just love trying new snacks this recipe delivers great results every time.
Making your own venison snack sticks lets you control the seasoning and quality while enjoying a tasty treat that’s both nutritious and convenient. Let’s dive into crafting these flavorful sticks that will quickly become a favorite in your snack rotation.
Ingredients
To create the best venison snack sticks, we carefully select ingredients that enhance the natural flavor of the meat while ensuring perfect texture and shelf stability. Below, we break down everything needed to craft these delicious, savory treats.
Meat and Seasonings
The foundation of our venison snack stick recipe is the quality and balance of the meat and seasonings. Choosing the right cuts and spices brings out that signature rich and smoky taste.
- 3 pounds of venison — trimmed of fat and finely ground
- 1 pound of pork fat — adds moisture and helps bind the sticks
- 1 tablespoon kosher salt — for flavor and preservation
- 2 teaspoons curing salt (Prague Powder #1) — essential to prevent spoilage and achieve the right color
- 1 tablespoon black pepper — fresh ground for bold spiciness
- 1 tablespoon smoked paprika — adds smoky depth without smoking equipment
- 1 teaspoon crushed red pepper flakes — for a subtle kick
- 1 teaspoon garlic powder — enriches savory notes
- 1 teaspoon onion powder — balances flavors
- 1 tablespoon brown sugar — aids fermentation and adds mild sweetness
- ½ cup cold water — helps in mixing, keeps meat cold
| Ingredient | Amount | Purpose |
|---|---|---|
| Venison | 3 lbs | Main protein, lean meat |
| Pork fat | 1 lb | Moisture, fat content |
| Kosher salt | 1 tbsp | Seasoning, preservation |
| Curing salt (Prague #1) | 2 tsp | Safety, color development |
| Black pepper | 1 tbsp | Spice, flavor enhancement |
| Smoked paprika | 1 tbsp | Smoky flavor, color |
| Crushed red pepper | 1 tsp | Heat, complexity |
| Garlic powder | 1 tsp | Aromatic seasoning |
| Onion powder | 1 tsp | Flavor balance |
| Brown sugar | 1 tbsp | Fermentation, mild sweetness |
| Cold water | ½ cup | Moisture, temperature control |
Casing and Other Essentials
To shape our venison snack sticks and preserve their texture, we need appropriate casings and supporting tools:
- Natural hog casings (about 18-22mm diameter) — soak in warm water for 30 minutes then rinse
- Sausage stuffer or jerky gun — to fill casings smoothly and evenly
- Butcher’s twine — for tying ends and portioning sticks
- Meat thermometer — to ensure proper curing temperature
- Smoker or oven with a drying rack — for drying and cooking the snack sticks
These essentials guarantee the sticks maintain their form and develop that classic firm yet tender texture we look for in the best venison snack sticks.
Equipment Needed
To craft the best venison snack sticks, having the right equipment is essential for a smooth process and outstanding results. Below is a detailed list of the tools we use, along with their functions, to help us achieve perfect texture and flavor every time.
| Equipment | Purpose |
|---|---|
| Meat Grinder | To finely grind venison and pork fat ensuring uniform texture |
| Sausage Stuffer | For stuffing the seasoned meat mixture into casings |
| Natural Hog Casings | Traditional casing that holds the snack sticks firmly without compromising flavor or texture |
| Mixing Bowls | To combine meat, fat, and spices evenly |
| Sharp Knives | For trimming meat and fat to correct sizes |
| Meat Thermometer | To monitor internal temperature during curing or drying |
| Scale | For precise measurement of ingredients and portions |
| Hooks or Drying Racks | To hang snack sticks during the curing/drying process |
| Plastic Wrap and Freezer Bags | For storing prepared snack sticks before curing |
Why Each Tool Matters
- Using a meat grinder ensures we get a consistent grind that blends venison and pork fat perfectly without over-processing the meat.
- The sausage stuffer guarantees easy, uniform filling of the casings, which is critical for snack sticks that hold together well.
- We always prefer natural hog casings because they allow the sticks to breathe during curing enhancing flavor and texture.
- Precise measurement with a scale helps us maintain the delicate balance of seasoning and fat for optimal preservation and taste.
Helpful Tip
“Maintaining clean and sanitized equipment is crucial to avoid contamination and ensure the best flavor and safety of our venison snack sticks.”
Having these tools ready and understanding their purpose streamlines our process and guarantees the best homemade venison snack sticks with rich flavor and perfect texture every time.
Prep Work
Proper prep work is crucial for crafting the best venison snack sticks. It sets the foundation for flavor, texture, and safety. Let’s get started with prepping the meat and casings to ensure the perfect result.
Preparing the Meat
We begin by trimming and grinding the meat carefully. Use 3 pounds of venison and 1 pound of pork fat, as the fat adds moisture and richness to the snack sticks.
- Trim all visible sinew, silver skin, and connective tissue from the venison to avoid toughness in the final product.
- Cut the meat and fat into 1-inch cubes for easier grinding.
- Chill the meat cubes in the freezer for about 30 minutes. This helps the grinder work smoothly and maintains the right fat texture.
- Pass the chilled meat and fat through a meat grinder using a medium grind plate to achieve a consistent texture.
- Mix the ground meat thoroughly by hand or with a stand mixer. Evenly distribute the spices and curing ingredients as outlined to preserve quality and flavor.
Soaking the Casings
Natural hog casings need proper soaking and cleaning before use to ensure they are flexible, clean, and ready for stuffing.
| Step | Details | Time |
|---|---|---|
| Rinse | Flush each casing under cold running water inside and out | 2 minutes each |
| Soak in warm water | Use water between 70°F – 80°F to soften casings | 30 minutes |
| Final inspection | Check for holes and tears; remove any stubborn salt | 1-2 minutes |
- Keep the casings submerged in water during soaking to maintain their moisture.
- Rinse repeatedly until the water runs clear and casings feel pliable.
- Avoid soaking casings in hot water as it can weaken them leading to breaks during stuffing.
By thoroughly Preparing the Meat and Soaking the Casings, we create the perfect canvas for our venison snack sticks to develop rich flavor, firm texture, and ideal bite.
Making the Venison Snack Sticks
Now that we have everything prepared, it’s time to bring our Best Venison Snack Stick Recipe to life. Each step—from grinding to stuffing—plays a vital role in creating snack sticks with unmatched flavor and texture.
Grinding the Meat
We start by grinding the venison and pork fat together to achieve the perfect balance of lean and fat for a tender, flavorful snack stick. Here’s how:
- Ensure the venison and pork fat are thoroughly chilled; cold meat grinds better and stays safer during the process.
- Use a meat grinder fitted with a coarse grind plate (typically 3/8-inch) for the first pass.
- Grind the venison and pork fat together evenly to incorporate the fat throughout the meat.
- For a finer, smoother texture, grind the mixture a second time using a fine grind plate (about 1/8-inch).
By grinding twice, we create a consistent texture essential for firm yet tender snack sticks that hold together during drying or smoking.
| Step | Grinding Plate Size | Purpose |
|---|---|---|
| First grind | 3/8 inch (coarse) | Break down meat & mix fat |
| Second grind (optional) | 1/8 inch (fine) | Create smooth, even texture |
Mixing the Seasonings
In this step, we infuse the ground meat with the seasoning blend that defines our venison snack sticks’ bold taste:
- Place the ground meat mixture in a large bowl or mixer.
- Add the seasoning mix evenly: salt, black pepper, garlic powder, onion powder, curing salt (Prague Powder #1), crushed red pepper flakes, mustard seed, and a touch of maple syrup for subtle sweetness.
- Mix vigorously but gently using clean hands or a paddle attachment to distribute seasonings evenly without warming up the meat.
- Optionally add cold water or ice to help evenly spread the cure and maintain moisture.
“The key to excellent flavor and safety lies in thorough mixing while keeping the meat cold at all times.”
Stuffing the Casings
Stuffing transforms our seasoned meat into snack stick shapes ready for drying or smoking:
- Rinse the natural hog casings thoroughly in cold water; run water through the inside to remove excess salt.
- Slide the casings onto the tip of the sausage stuffer or funnel, ensuring no air pockets.
- Fill the casings slowly and evenly with the meat mixture, applying consistent pressure to avoid air bubbles and breaks.
- Twist the filled casings into sticks approximately 6 inches long to create individual portions.
- Prick any air bubbles carefully with a needle to prevent bursting during curing.
Proper stuffing ensures our venison snack sticks maintain their firm texture and develop authentic flavor during the curing process.
Cooking Instructions
To achieve the perfect venison snack sticks we must follow precise cooking steps that develop rich flavor and ideal texture. Below we cover both the recommended smoking process and alternative cooking methods for versatile results.
Smoking the Snack Sticks
Smoking is the traditional method that imparts a smoky aroma and helps preserve the venison snack sticks. Follow these steps carefully:
- Preheat the smoker to a steady temperature of 175°F to 200°F (79°C to 93°C).
- Use a mild hardwood like hickory, maple, or applewood for a balanced smoky flavor. Avoid overpowering woods like mesquite.
- Hang or lay the snack sticks on racks, ensuring they are spaced apart to allow smoke circulation and even cooking.
- Maintain smoker temperature consistently between 175°F and 200°F to gently cook without drying out the sticks.
- Smoke the snack sticks for 4 to 6 hours, or until the internal temperature reaches 155°F (68°C). Use a meat thermometer to check.
- Once done, remove the sticks and allow them to cool at room temperature for at least 30 minutes before refrigerating or storing.
| Step | Temperature Range | Time | Internal Temp Target |
|---|---|---|---|
| Preheat Smoker | 175°F – 200°F (79°C – 93°C) | — | — |
| Smoking Duration | — | 4 to 6 hours | — |
| Internal Doneness | — | — | 155°F (68°C) |
Pro Tips:
- Keep the smoker lid closed to maintain steady heat and smoke levels.
- Soak wood chips in water for 30 minutes before adding to prevent quick burning.
- Use a digital thermometer probe that stays in the meat for constant temperature tracking.
Alternative Cooking Methods
When smoking is not an option, other methods enable us to cook venison snack sticks with great results:
-
Oven Cooking:
- Preheat oven to 200°F (93°C).
- Place snack sticks on a wire rack over a baking sheet lined with foil to catch drips.
- Bake for 4 to 6 hours or until internal temperature reaches 155°F (68°C).
- For smoke flavor, add a small pan with soaked wood chips inside the oven or use smoked paprika in the seasoning mix.
-
Dehydrator Method:
- Set the dehydrator temperature to 160°F (71°C).
- Arrange snack sticks without touching.
- Dehydrate for 6 to 8 hours, checking for firm, dry texture.
- This method yields a chewier stick without the smoky aroma.
- Vacuum seal the snack sticks and cook sous vide at 155°F (68°C) for 4 hours.
- Finish by quickly searing over medium-high heat for a minute to add browning and texture.
Applying these cooking methods with attention to temperature and time ensures our best venison snack stick recipe delivers rich taste with firm bite every time.
Storing and Serving
Proper storing and serving techniques are essential to preserve the bold flavor and firm texture of our best venison snack sticks. Let’s explore how to keep these savory snacks fresh and enjoy them at their fullest.
Cooling and Packaging
After cooking or smoking, it is crucial to allow the venison snack sticks to cool completely at room temperature for 1 to 2 hours. Cooling prevents moisture buildup, which can affect texture and shelf life.
To ensure optimal freshness, follow these packaging guidelines:
| Step | Details |
|---|---|
| Wrap | Use airtight vacuum-sealed bags or food-grade plastic wrap to minimize air exposure. |
| Refrigerate | Store in the coldest part of the refrigerator, ideally at 34°F to 40°F (1°C to 4°C). |
| Freeze (optional) | For extended storage, freeze snack sticks at 0°F (-18°C). They can last up to 3 months. |
| Thawing | Thaw in the refrigerator overnight; avoid room temperature thawing to maintain safety. |
“Proper packaging and cooling lock in the savory flavors and firm bite we worked hard to create.”
Serving Suggestions
Our venison snack sticks shine as a versatile and convenient snack. Here are a few ways to enjoy them:
- Outdoor fuel: Perfect handheld protein for hiking, hunting, or camping trips.
- Charcuterie boards: Slice thinly and pair with sharp cheeses like aged cheddar or smoked gouda, olives, and crusty bread.
- Snack boxes: Add alongside nuts, dried fruit, and veggies for a balanced on-the-go snack.
- Sandwich enhancer: Chop and sprinkle on sandwiches or salads for bursts of smoky, gamey flavor.
- Dips and spreads: Serve sliced stick pieces with creamy mustards, spicy aioli, or tangy chutneys.
“Each bite delivers a robust, smoky savoriness that complements a range of flavors perfectly.”
By following these storing tips and serving ideas, we ensure that our best venison snack sticks remain a flavorful, ready option whenever hunger strikes.
Tips for the Best Venison Snack Sticks
To master the art of crafting the best venison snack sticks, we focus on precision, temperature control, and seasoning balance. Below are essential tips to elevate your homemade snack sticks to perfection.
Maintain Cold Temperatures Throughout the Process
Keeping the meat mixture cold is critical. We recommend chilling the venison and pork fat in the freezer for 20 to 30 minutes before grinding. Cold meat ensures:
- Smoother grinding
- Better fat distribution
- Reduced risk of bacterial growth
During mixing and stuffing, keep the mixture in a bowl set over ice or refrigerate between steps. This preserves the texture and enhances flavor development.
Use High-Quality Meat and Fat Ratio
Balancing lean venison with pork fat is key for moist and rich snack sticks. Our ideal ratio is:
| Ingredient | Weight | Purpose |
|---|---|---|
| Venison | 3 lbs | Lean meat flavor |
| Pork Fat | 1 lb | Moisture, fat content |
This 75/25 lean-to-fat ratio ensures juiciness without excess greasiness.
Season with Intention
Each spice plays an important role in flavor and preservation. Avoid overpowering the venison’s natural taste. Incorporate spices evenly by thoroughly mixing but avoid over-mixing which can affect texture. Remember:
“Balanced seasoning is the soul of a memorable venison snack stick.”
Prepare Casings Properly
Soak natural hog casings in warm water for at least 30 minutes. Rinse thoroughly inside and out to remove salt and debris. Properly prepared casings prevent bursting during stuffing and smoking.
Avoid Air Bubbles When Stuffing
Air pockets cause uneven curing and unpleasant texture in snack sticks. To eliminate air:
- Stuff slowly and firmly
- Use a pin to prick any visible bubbles before twisting
- Twist links evenly at 4 to 6-inch intervals
Monitor Smoking Temperatures Closely
Consistent temperature is essential for safe curing and ideal texture. Maintain smoker temperature between 165°F to 175°F (74°C to 79°C) for 4 to 6 hours. Use a reliable digital thermometer to track internal temperature of snack sticks aiming for 155°F (68°C).
Alternative Cooking Tips
If you don’t have a smoker, alternatives include:
| Method | Temperature | Time | Notes |
|---|---|---|---|
| Oven | 200°F (93°C) | 4 to 6 hours | Use a wire rack and pan to catch drippings |
| Dehydrator | 145°F (63°C) | 6 to 8 hours | Flip periodically, monitor for dryness |
| Sous Vide | 155°F (68°C) | 3 hours | Vacuum seal snack sticks before cooking |
Each yields satisfying results when closely monitored.
Cool and Store Properly
After cooking, cool the snack sticks at room temperature for 1 to 2 hours before packaging. For freshness:
- Vacuum-seal or wrap tightly in plastic wrap
- Refrigerate between 34°F to 40°F (1°C to 4°C) for up to 2 weeks
- Freeze for longer storage up to 6 months
Following these expert tips ensures our venison snack sticks will be a crowd favorite—flavorful, tender, and perfectly preserved every time.
Conclusion
Crafting the perfect venison snack sticks is a rewarding process that brings out the best flavors in quality meat. With the right ingredients, tools, and techniques, we can create a delicious snack that’s both nutritious and versatile.
By paying close attention to each step—from grinding and seasoning to cooking and storing—we ensure every bite is packed with rich, savory goodness. These snack sticks are not just great for outdoor adventures but also a flavorful addition to any snack lineup.
Let’s embrace the art of homemade venison snack sticks and enjoy a tasty treat that’s truly our own.
Frequently Asked Questions
What are venison snack sticks?
Venison snack sticks are small, cured sausages made primarily from venison meat mixed with pork fat and spices. They are flavorful, nutritious, and portable, making them ideal for outdoor activities or quick snacking.
Why make venison snack sticks at home?
Making your own venison snack sticks allows you to control the quality, seasoning, and ingredients. It ensures freshness and lets you customize flavors while avoiding preservatives found in store-bought options.
What ingredients are needed for making venison snack sticks?
Key ingredients include 3 pounds of venison, 1 pound of pork fat, natural hog casings, and a mix of spices for flavor and preservation. The balance of meat to fat and seasoning is crucial.
What equipment do I need to make venison snack sticks?
Essential tools include a meat grinder, sausage stuffer, and natural hog casings. Clean and sanitize all equipment to ensure safety and the best taste.
How do I prepare the meat and casings?
Trim and chill the venison and pork fat before grinding. Soak and rinse natural hog casings thoroughly to make them soft and ready for stuffing.
What is the best grinding method for venison snack sticks?
First, coarse grind the chilled meat and fat, then follow with a fine grind for a uniform and smooth texture in the final product.
How do I prevent air bubbles while stuffing?
Fill the casings evenly and slowly, occasionally pricking or gently squeezing to release trapped air, ensuring consistent texture and proper curing.
What is the traditional cooking method for venison snack sticks?
Smoking is traditional, using mild hardwoods at a consistent temperature for 4 to 6 hours until sticks reach an internal temperature of 155°F (68°C).
Are there alternative cooking methods?
Yes, you can use an oven, dehydrator, or sous vide to cook venison snack sticks, using controlled temperatures to achieve the same safe and flavorful results.
How should I store venison snack sticks?
After cooling at room temperature for 1 to 2 hours, store them in airtight vacuum-sealed bags or food-grade wrap. Refrigerate at 34°F to 40°F (1°C to 4°C) or freeze for longer storage.
What are some serving suggestions for venison snack sticks?
They make great outdoor snacks, additions to charcuterie boards, elements of snack boxes, sandwich toppings, or pair well with dips and spreads.
What expert tips will improve my venison snack sticks?
Keep meat and tools cold, balance meat and fat well, season thoughtfully, prepare casings properly, avoid air bubbles, monitor smoking temperature, and cool sticks before storing.