
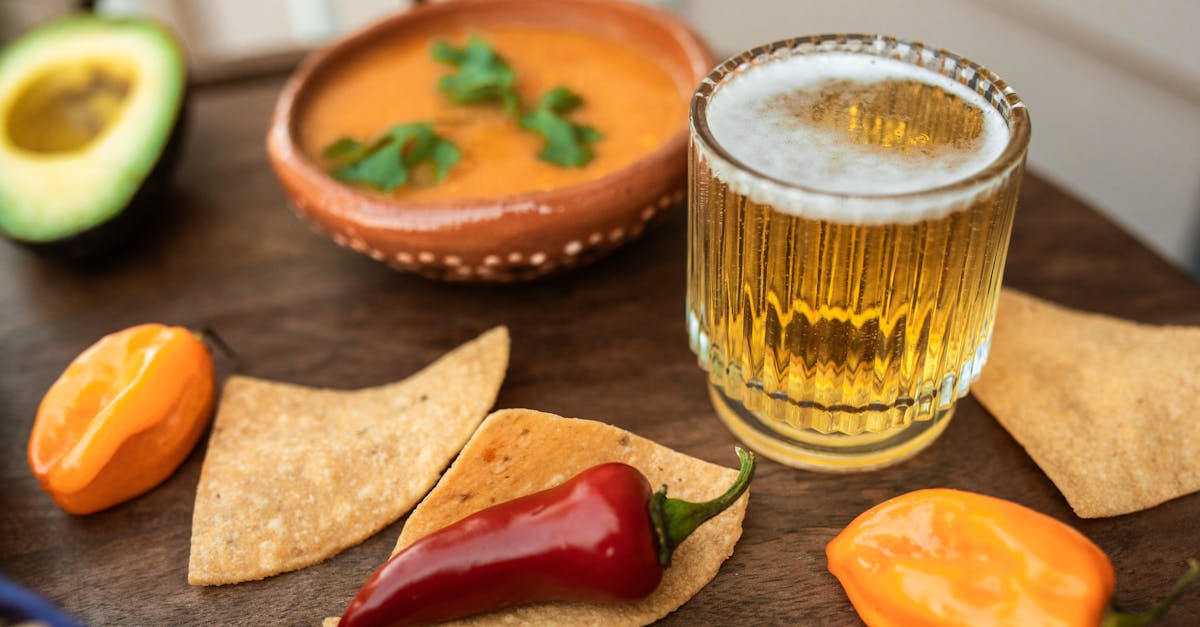
There’s something undeniably satisfying about crafting a rich, velvety porter right in our own kitchen. This classic beer style, known for its deep, dark color and robust malt flavors, has roots dating back to 18th-century England, where it became a favorite among hardworking porters—hence the name. It’s a timeless brew that balances boldness with a smooth finish.
What makes brewing a porter so exciting is the chance to experiment with flavors. From hints of chocolate and coffee to subtle caramel undertones, we can customize it to suit our taste. Whether we’re seasoned brewers or just starting, this recipe is approachable and rewarding. Let’s dive into the world of homebrewing and create a beer that’s as satisfying to make as it is to sip.
Beer Porter Recipe
Brewing a beer porter at home combines tradition and creativity. This recipe guides us step-by-step to craft a porter with a balance of rich malt flavors and subtle aromatic complexity. Let’s dive in!
Ingredients
Here’s what we need to brew 5 gallons of classic beer porter:
- 7 lb pale malt (crushed)
- 1 lb chocolate malt (adds roasted flavor)
- 0.75 lb caramel malt (60L)
- 0.25 lb black patent malt (darkens color)
- 1 lb flaked barley (enhances body and head retention)
- 1 oz Fuggle hops (bittering, 60-minute boil)
- 0.5 oz East Kent Goldings hops (aromatic, 15-minute boil)
- 1 packet ale yeast (English-style strain, for fermentation)
- 5 gallons water (filter for optimal taste)
- 4 oz priming sugar (for carbonation)
Equipment Needed
We recommend having these tools prepped and sanitized:
- 5-gallon fermenter with an airlock
- Large brew kettle
- Grain bag or mash tun
- Thermometer
- Hydrometer
- Bottling bucket and siphon
- Bottles and caps
Step-by-Step Instructions
1. Heat the water and mash the grains
- Heat 3.5 gallons of water to 165°F (74°C) in the brew kettle.
- Place all the grains inside a grain bag and steep them in the water for 60 minutes at 152°F (67°C), maintaining a steady temperature.
- After the mash, remove the grain bag and let it drain back into the kettle.
2. Boil the wort
- Bring the liquid (wort) to a boil.
- Once boiling, add 1 oz Fuggle hops and start a 60-minute timer.
- At the last 15 minutes of the boil, add 0.5 oz East Kent Goldings hops for a delicate aroma.
- Cool the wort quickly using an immersion chiller to around 70°F (21°C).
3. Prepare for fermentation
- Transfer the cooled wort into the sanitized fermenter.
- Top up with water to reach 5 gallons, if necessary.
- Use a hydrometer to take a gravity reading and record it.
- Pitch (add) the yeast into the fermenter and secure the airlock.
4. Primary fermentation
- Place the fermenter in a dark area at 65–70°F (18–21°C).
- Allow the beer porter to ferment for 10–14 days.
- Check the gravity after fermentation to ensure it matches the expected range.
5. Secondary fermentation (optional)
- If preferred, transfer the beer to a secondary fermenter for additional clarity. Leave for another 1–2 weeks.
6. Bottling and carbonation
- Dissolve the 4 oz priming sugar in 2 cups boiling water and mix it into the bottling bucket.
- Siphon the beer into the bottling bucket, avoiding sediment at the bottom of the fermenter.
- Bottle the beer and cap securely.
7. Conditioning
- Store the bottles at room temperature (65°F–70°F) for 2–3 weeks.
- Chill and enjoy the smooth, malty goodness of our homemade beer porter!
Quick Brewing Data Reference:
| Step | Duration | Temperature |
|---|---|---|
| Mashing Grains | 60 minutes | 152°F (67°C) |
| Boiling Wort | 60 minutes | Boil temperature |
| Primary Fermentation | 10–14 days | 65–70°F (18–21°C) |
| Conditioning Bottles | 2–3 weeks | 65–70°F (18–21°C) |
Ingredients
To craft a classic beer porter, we’ll need a carefully chosen mix of malts, hops, yeast, and water. Each ingredient plays a crucial role in developing the deep malty flavors and rich texture that makes porters so distinctive. Here’s what we require:
Malt Ingredients
- 8 lbs Pale Malt (2-Row): The backbone of our porter, providing essential fermentable sugars.
- 1 lb Chocolate Malt: Adds a deep, roasted flavor reminiscent of cocoa.
- 0.75 lb Black Patent Malt: Contributes a bold, dark color and sharp roasted notes.
- 0.5 lb Crystal Malt (60L): Introduces caramel sweetness and enhances mouthfeel.
Hops
- 1.5 oz Fuggle Hops (boil – 60 minutes): A mild, earthy aroma hop perfect for balancing malty sweetness.
- 0.5 oz East Kent Goldings Hops (boil – 15 minutes): Adds subtle floral and herbal notes.
Yeast
- 1 packet English Ale Yeast: Such as Safale S-04 or Wyeast 1098, for optimal fermentation and rich, malty flavors.
Water
- 5 gallons of filtered water: Ideally free from chlorine and other impurities to ensure a crisp finish.
Additional Ingredients (Optional)
- 0.5 lb Lactose (if brewing a milk porter): Adds a creamy sweetness.
- Coffee or cacao nibs (if adding flavor variations): Steep during secondary fermentation for a custom twist.
Quick Reference Table:
| Ingredient Type | Quantity | Purpose |
|---|---|---|
| Pale Malt | 8 lbs | Provides fermentable sugars. |
| Chocolate Malt | 1 lb | Offers deep roasted flavor. |
| Black Patent Malt | 0.75 lb | Adds dark color and bold roast. |
| Crystal Malt | 0.5 lb | Caramel sweetness and mouthfeel. |
| Fuggle Hops | 1.5 oz (60 min) | Balances malt flavor. |
| E.K. Goldings Hops | 0.5 oz (15 min) | Floral and herbal aroma. |
| English Ale Yeast | 1 packet | Ferments sugars, enhances flavor. |
| Filtered Water | 5 gallons | Base of our beer. |
Tools And Equipment
To brew a classic beer porter successfully, we need to ensure we have the right tools and equipment. The brewing process can get technical, but having the appropriate tools simplifies each step, ensures accuracy, and maintains the quality of our brew. Below is a detailed breakdown of the essential equipment and their primary purposes:
Essential Brewing Tools
- Brew Kettle
- This is where the magic begins. We need a large stainless-steel pot (at least 5 gallons) to boil the wort. Stainless steel is preferred for its durability and even heat distribution.
- Mash Tun
- A mash tun is used for steeping and mashing our grains. If we do all-grain brewing, this insulated container maintains a consistent temperature for starch conversion.
- Fermentation Vessel with Airlock
- This is a must-have for fermentation. A glass or food-grade plastic fermenter allows yeast to transform wort into beer while the airlock regulates gas without contamination.
- Hydrometer and Testing Tube
- A hydrometer measures the specific gravity of our brew. This tells us the alcohol content and fermentation progress.
- Thermometer
- Consistent temperature control is crucial. A high-quality thermometer helps monitor mash, wort, and fermentation temperatures accurately.
- Spoon or Paddle
- A long-handled metal or plastic spoon helps us stir the mash and wort without scratching our equipment.
- Sanitizing Solution
- Cleanliness cannot be overstated. A sanitizing solution, such as Star San, ensures our tools and vessels remain contamination-free.
- Boiling Bag (Optional)
- For steeping specialty grains, a nylon or muslin boiling bag is handy. It makes removal easy after steeping.
Table of Tools With Functions
| Tool/Equipment | Function |
|---|---|
| Brew Kettle | Boiling wort and creating the beer base. |
| Mash Tun | Mashing and temperature-controlled steeping. |
| Fermentation Vessel | Containing the beer during fermentation. |
| Airlock | Venting gas while protecting the beer. |
| Hydrometer and Tube | Measuring alcohol content and brewing accuracy. |
| Thermometer | Monitoring mash and fermentation temperatures. |
| Spoon or Paddle | Stirring mash and wort during the process. |
| Sanitizing Solution | Ensuring all equipment is sterilized and clean. |
| Boiling Bag (Optional) | Filtering specialty grains easily after steeping. |
Additional Accessories
- Bottle Capper and Caps
When bottling our porter, we need a manual or bench bottle capper to seal bottles securely. Caps keep our beer fresh and carbonated.
- Siphon or Auto-Siphon
For transferring liquids, an auto-siphon ensures we move our beer from the fermenter to bottles without disturbing the sediment.
- Carboy Brush or Fermenter Scrubber
Cleaning after brewing can be tedious. A carboy brush or specialized fermenter scrubber removes residue efficiently.
- Bottles (12 oz or 16 oz)
Collect enough glass bottles before bottling day. Brown bottles protect our porter from light exposure.
Directions
Brewing our own classic beer porter is a rewarding and enjoyable process. Let’s follow these step-by-step instructions to create a smooth and flavorful porter that’s sure to impress.
Preparing The Equipment
Before we begin, it’s essential to prepare our brewing equipment thoroughly. Proper preparation ensures our beer remains uncontaminated during the process.
- Sanitize all tools, including the brew kettle, mash tun, fermentation vessel, and any stirring utensils, using a food-safe sanitizer.
- Rinse the sanitized equipment with filtered water to ensure no residue interferes with the brewing process.
- Double-check that items like the hydrometer, airlock, and thermometer are clean and ready to use during the steps.
A clean setup is the first step to brewing a porter with consistent and pure flavors.
Preparing The Malt And Grain
The base flavors and colors of our porter come from the selection and preparation of malts and grains. Follow these steps:
- Measure out the exact quantities of malt, such as Pale Malt (8 lbs), Chocolate Malt (1 lb), Black Patent Malt (0.5 lbs), and Crystal Malt (0.5 lbs) for sweetness.
- Crush the grains gently using a grain mill until coarse. Avoid reducing the grains to a powder.
- Place the crushed grains into a muslin bag or directly into the mash tun for simpler handling.
Proper preparation of the malt will enhance the smooth, roasted characteristics of our porter.
Mashing Process
The mashing step is where we extract sugars and flavors from our grains.
- Heat 3 gallons of filtered water in the mash tun to about 150-155°F.
- Slowly add the crushed malt into the mash tun while stirring to prevent clumping.
- Let the grains steep for 60 minutes at a consistent temperature between 150°F and 155°F. Use a thermometer to monitor closely.
- After mashing, sparge (rinse) the grains by pouring an additional 2 gallons of warm water (around 170°F) over them to extract remaining sugars.
This step creates a rich, flavorful liquid called wort that we use in the next stages.
Boiling The Wort
The boiling process sterilizes the wort and prepares it for fermentation.
- Transfer the wort to the brew kettle, and bring it to a rolling boil for 60 minutes.
- Keep an eye on the boil to avoid spills or scorching at the bottom of the kettle.
During this time, we’ll add hops to balance flavors, which brings us to the next step.
Adding Hops
Hops add complexity to our porter, balancing its malt-forward character with bitterness and aroma.
- At the beginning of the boil, add 1 oz of Fuggle hops for bitterness.
- With 15 minutes remaining, add 0.5 oz of East Kent Goldings hops to introduce subtle aromatic notes.
- Optional: Add any flavor infusions like cacao nibs or coffee beans during the last 5 minutes for a creative twist.
The combination of hops and optional ingredients gives the porter a layered profile.
Cooling And Fermentation
Cooling and fermenting the wort properly is critical for a consistent, high-quality brew.
- Once the boil is finished, use a wort chiller or ice bath to cool the temperature down to 70°F as quickly as possible. Rapid cooling reduces the risk of contamination.
- Transfer the chilled wort into a sanitized fermentation vessel.
- Pitch English Ale Yeast into the cooled wort and seal the vessel with an airlock.
Place the fermentation vessel in a location with a stable temperature between 65-70°F. Let it ferment for 7-14 days, during which the yeast converts sugars into alcohol and carbonation.
Bottling And Carbonation
Bottling completes the process, preparing the porter for conditioning and carbonation.
- Thoroughly clean and sanitize all bottles and bottling equipment.
- Dissolve 3/4 cup of priming sugar in 2 cups of boiling water, then cool it to room temperature. Add the sugar solution to the beer before bottling to create natural carbonation.
- Siphon the beer from the fermenter into bottles, taking care not to disturb the sediment. Fill to about 1 inch below the bottle’s top.
- Seal each bottle using a bottle capper.
Condition the bottles at room temperature for 2 weeks to develop carbonation and flavors.
| Time Breakdown | Process Description | Estimated Duration |
|---|---|---|
| Mashing | Extracting grain sugars | 60 minutes |
| Boiling | Sterilizing wort, adding hops | 60 minutes |
| Fermentation | Yeast activity | 7-14 days |
| Bottling/Conditioning | Natural carbonation | 2 weeks |
By sticking to these detailed steps, we’ve created a mouthwatering, rich porter ready to be savored.
Tips For Success
Crafting a perfectly balanced porter takes more than just following a recipe. To ensure your brew boasts a rich, malty character, delightful complexity, and professional-quality finish, we’ve compiled some expert tips. These guidelines hone techniques, prevent common problems, and help elevate your brewing experience.
Consistency is Key
- Measure precisely: Use a digital kitchen scale for grains and hops. Ensure all ingredients match the recipe’s specified weights and quantities. A small miscalculation can impact flavor balance.
- Maintain consistent temperatures during mashing, boiling, and fermentation. Use a reliable thermometer and regularly monitor.
- Stick to a detailed brew log. Jot down each step’s time, temperature, and observation to replicate successes or adjust future brews.
Nail the Mash
- Water-to-grain ratio is critical. Aim for 1.25–1.5 quarts of water per pound of grain.
- Keep the mashing temperature steady at around 152°F for optimal sugar conversion.
Perfect the Boil
- Use a rolling boil to ward off unwanted flavors. Boiling intensity affects the wort’s overall bitterness.
- Add hops at the right times as instructed—early additions contribute bitterness, and late additions enhance aroma.
Pay Attention to Fermentation
- Use fresh yeast and follow proper rehydration or starter-making techniques, as yeast vitality impacts beer quality.
- Maintain the fermentation temperature within the recommended range for English Ale Yeast: 64–72°F.
- Sanitize the fermentation vessel, airlock, and all utensils meticulously. Cleanliness is non-negotiable.
Enhance Flavors Creatively
- To add a twist, incorporate adjuncts like cacao nibs, vanilla beans, or coffee. Sterilize them and add during secondary fermentation for distinct highlights.
- If crafting a milk porter, measure lactose carefully: 8 ounces lactose per 5 gallons of porter is a good starting point.
Carbonation and Bottling
- Dissolve the priming sugar in boiling water for even distribution in the beer. Never add sugar directly.
- Allow the bottles to carbonate at a consistent room temperature of 65–75°F for approximately 2 weeks before chilling.
Troubleshooting Guide
Use the table below to address common brewing pitfalls:
| Issue | Cause | Solution |
|---|---|---|
| Flat beer | Insufficient priming sugar | Measure correctly: use 1 oz. sugar per gallon of beer |
| Cloudy beer | Improper wort chilling | Use a wort chiller to cool rapidly |
| Off-flavors | Fermentation at incorrect temperature | Control fermentation with a temperature-regulated chamber |
By following these tips, we can ensure that every batch of our porter is smooth, flavorful, and true to its classic roots.
Conclusion
Brewing a porter at home is more than just crafting a beer; it’s an opportunity to explore creativity and tradition. With the right ingredients, tools, and attention to detail, we can produce a rich, flavorful porter that reflects its classic heritage while adding our personal touch.
Whether we’re seasoned brewers or just starting out, the process offers a chance to experiment, learn, and enjoy the fruits of our labor. Let’s embrace the challenge, savor the experience, and raise a glass to the art of homebrewing. Cheers!
Frequently Asked Questions
What is a porter beer, and why is it unique?
Porter beer is a classic beer style that originated in 18th-century England. It is characterized by its dark color and robust malt flavors, with notes of chocolate, coffee, and caramel. What makes it unique is its versatility, as brewers can experiment with various flavor additions while retaining its smooth, malty base.
Can beginners brew a porter at home?
Yes, beginners can successfully brew a porter at home! With the right ingredients, equipment, and step-by-step instructions (like those provided in the article), brewing a porter can be an enjoyable and rewarding experience for novice brewers.
What ingredients do I need to brew a classic porter?
A classic porter requires Pale Malt, Chocolate Malt, Black Patent Malt, and Crystal Malt, along with English Ale Yeast, water, and hops like Fuggle or East Kent Goldings. Optional items include lactose (for a milk porter), coffee, or cacao nibs for added flavor variations.
What equipment is essential for brewing a porter?
Key brewing equipment includes a brew kettle, mash tun, fermentation vessel with an airlock, and a hydrometer. Additional tools, such as a bottle capper, siphon, and cleaning supplies, simplify the process and ensure high-quality results.
How long does it take to brew a porter at home?
Brewing a porter, from start to finish, takes approximately 4–6 weeks. This includes preparation, boiling, fermentation (1–2 weeks), conditioning, and bottling. Patience during fermentation and carbonation is critical for a smooth, flavorful result.
Can I customize the flavors in my porter?
Absolutely! Porters are highly customizable. You can add ingredients like lactose for creaminess, coffee for a bolder profile, or cacao nibs for chocolatey richness. Experimenting with flavors allows you to create a unique, personalized brew.
How do I ensure my porter turns out smooth and balanced?
Consistency is key to a smooth and balanced porter. Maintain accurate measurements, monitor temperatures during mashing and fermentation, and ensure equipment is clean. Following precise steps outlined in the recipe helps avoid common brewing mistakes.
Why is clean equipment important for homebrewing?
Clean equipment prevents contamination that can spoil your beer. Sanitized tools ensure a better-tasting final product and reduce the risk of introducing off-flavors or unwanted bacteria during the brewing process.
What should I do if my beer turns out flat or cloudy?
Flat beer may result from insufficient priming sugar or poor sealing during bottling. Cloudiness can occur if the beer is not properly filtered or has yeast residue. Review your process, troubleshoot, and adjust future brews as needed.
Is brewing a porter worth the effort?
Absolutely! Brewing a porter is not only a fun and creative experience but also allows you to enjoy a rich, flavorful beer you’ve crafted yourself. It’s a rewarding hobby that lets you experiment and share your creations with others.