
There’s something irresistible about the crispy, golden crust of a perfectly made beef cutlet. This Italian classic combines tender beef, seasoned breadcrumbs, and a hint of Parmesan for a dish that’s both comforting and elegant. It’s a recipe that brings a touch of Italy to our kitchens, filling the air with mouthwatering aromas.
Italian beef cutlets are all about simplicity and bold flavors. Whether served as a main dish with a fresh salad or tucked into a sandwich with a drizzle of marinara, they never fail to impress. This recipe is easy to follow and perfect for weeknight dinners or special occasions when we want to wow our guests.
Ingredients
To make the perfect Italian Beef Cutlet, we’ll need fresh and flavorful ingredients to achieve its signature crispy texture and bold taste. Below is the detailed list of ingredients:
For the Beef Cutlet:
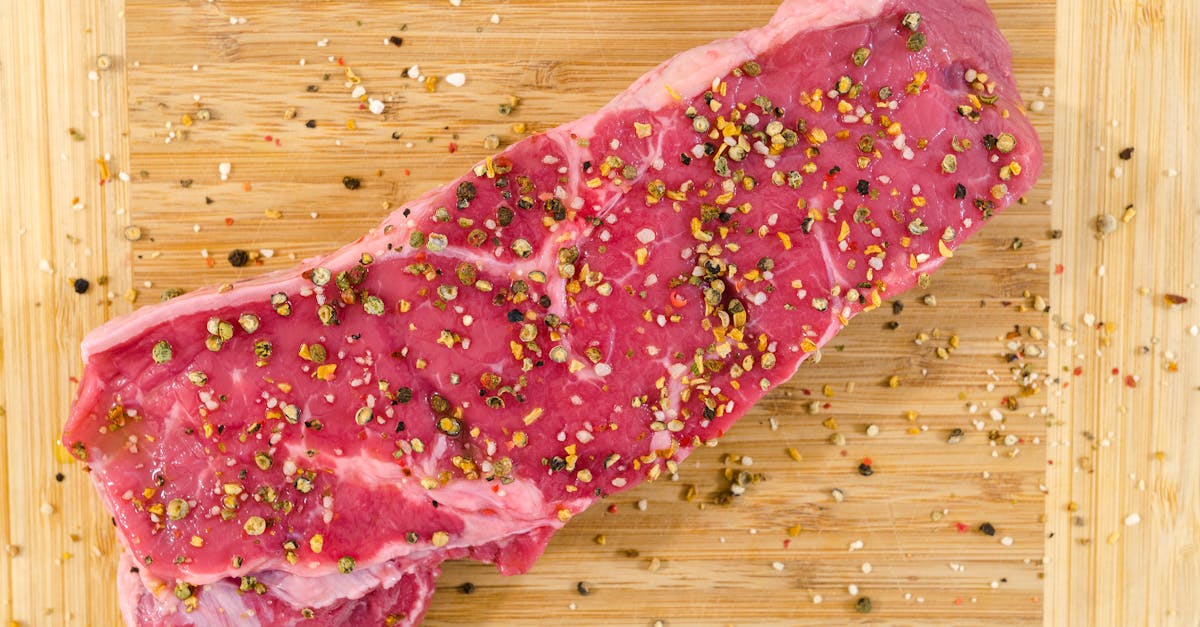
- 1 pound beef top round, sliced into ¼-inch thick cutlets
- ½ teaspoon salt, or to taste
- ⅓ teaspoon freshly ground black pepper
- ½ cup grated Parmesan cheese, fresh for best flavor
- 1 cup plain breadcrumbs, or Italian seasoned breadcrumbs for added flavor
For the Breading Station:
- ½ cup all-purpose flour, spread on a plate
- 2 large eggs, beaten in a shallow bowl
- 1 cup breadcrumbs, seasoned as preferred
For Frying:
- ½ cup olive oil, for frying (use extra virgin if available)
- 2 tablespoons butter, for added richness
Optional Garnishes:
- 1 tablespoon chopped fresh parsley, for a pop of color
- Lemon wedges, for serving
Additional Notes:
- The combination of breadcrumbs and Parmesan creates the ultimate golden crust. Feel free to tweak the seasoning in the breadcrumbs to match your preference.
- This recipe uses a classic three-step breading process: flour, egg, then breadcrumb coating for maximum crispiness.
Tools And Equipment
To prepare the perfect Italian beef cutlets, having the right tools and equipment on hand ensures ease and efficiency. Below is a list of essential items that we’ll use to create this flavorful and crispy dish.
Essential Tools
- Cutting Board: A sturdy cutting board to slice and prep the beef top round for uniform thickness.
- Sharp Knife: Use a sharp chef’s knife to slice the beef cleanly without tearing.
- Meat Mallet: For pounding the beef into thin cutlets, ensuring even cooking and tender texture.
- Shallow Bowls: We’ll need three shallow bowls or plates for the breading station to hold flour, eggs, and the seasoned breadcrumb mixture.
- Tongs: Essential for handling and flipping the cutlets without disturbing the crispy coating.
- Large Skillet: A wide, heavy-bottom skillet (preferably cast iron) for frying the cutlets evenly.
- Cooling Rack and Baking Sheet: Place fried cutlets on a cooling rack set over a baking sheet to keep them crispy by draining excess oil before serving.
- Measuring Cups and Spoons: For precise measurements of ingredients like breadcrumbs, Parmesan cheese, and seasonings.
- Silicone Brush (Optional): If you wish to add a light coating of olive oil to enhance crispness, a silicone brush works perfectly.
| Tool | Purpose |
|---|---|
| Cutting Board | To prep and slice beef |
| Sharp Knife | For clean beef slicing |
| Meat Mallet | Pound beef for uniform thickness |
| Shallow Bowls | Setup for breading steps |
| Tongs | Safe flipping and handling of cutlets |
| Large Skillet | Fry cutlets evenly |
| Cooling Rack | Drain oil, maintain crispiness |
| Measuring Cups | Accurate ingredient measurements |
| Silicone Brush | Optional: Apply olive oil for crisp finish |
Pro Tips for Using Equipment
- When pounding the beef, use even pressure with the meat mallet to avoid tearing the meat. Cover the meat with plastic wrap or parchment paper to minimize mess.
- For frying, a cast-iron skillet retains and distributes heat more evenly, giving the cutlets a beautifully golden crust.
- Use tongs to handle the cutlets gently; this keeps the coating intact and prevents burns from hot oil.
- After frying, let the cutlets rest briefly on a cooling rack so the bottom stays crunchy without becoming soggy.
These tools, combined with our carefully chosen ingredients, help ensure that every step of the preparation process runs smoothly and delivers the ideal crunchy, golden Italian beef cutlets.
Directions
Let’s dive into the step-by-step process of creating the perfect Italian beef cutlets. Follow these precise instructions to achieve a crispy, golden crust with tender, flavorful beef.
Prep
- Prepare the beef:
- Using a sharp knife, slice 1 pound of beef top round into evenly sized, thin cutlets approximately ¼ inch thick.
- Place the cutlets between two pieces of plastic wrap and pound them gently with a meat mallet until they are about ⅛ inch thick.
- Season generously:
- Sprinkle both sides of the beef with kosher salt and freshly ground black pepper. Set aside.
- Create breading station:
- Arrange three shallow bowls in assembly-line order:
- First bowl: Add ½ cup of all-purpose flour.
- Second bowl: Beat 2 large eggs with 2 tablespoons of water until smooth.
- Third bowl: Mix 1 cup of Italian seasoned breadcrumbs with ½ cup of grated Parmesan cheese.
Cook
- Heat the pan:
- Place a cast-iron skillet or large frying pan over medium heat. Add 3 tablespoons of olive oil and 2 tablespoons of unsalted butter. Heat until the butter is melted and the oil is shimmering.
- Bread the cutlets:
- Dredge each piece of beef lightly in the flour (shake off excess), then dip into the egg wash, and finally coat thoroughly in the breadcrumb mixture, pressing gently to adhere.
- Fry to golden perfection:
- Place 2-3 breaded cutlets into the skillet (do not overcrowd). Fry for about 2-3 minutes per side, or until crispy and golden brown. Use tongs to flip carefully and ensure even frying.
- Transfer cooked cutlets to a cooling rack lined with paper towels to drain. Repeat with remaining cutlets, adding more oil and butter as needed.
Assemble
- Finish with garnishes:
- For added flavor, sprinkle freshly chopped parsley over the cutlets. Serve with lemon wedges on the side to brighten the dish.
- Perfect pairings:
- Serve these crispy cutlets as a main dish alongside a fresh arugula salad or creamy polenta. Alternatively, make a hearty sandwich by layering the cutlets with marinara sauce and melted mozzarella on crisp Italian bread.
| Cooking Step | Time per Step | Key Tools | Notes / Tips |
|---|---|---|---|
| Pounding Beef | 5 minutes | Meat mallet | Cover beef with plastic wrap to prevent splattering. |
| Breading Cutlets | 10 minutes | Shallow bowls | Ensure even coating for the best crust. |
| Frying | 2-3 min/side | Cast-iron skillet | Use tongs for clean handling and even cooking. |
Make-Ahead Instructions
When it comes to preparing Italian beef cutlets in advance, proper planning ensures the same delicious, crispy texture and tender flavor when you’re ready to serve. Here’s how we make these cutlets ahead of time while preserving their quality:
1. Prepare the Beef Cutlets
- Slice the beef into thin cutlets and pound them to the desired thickness. Use a meat mallet to ensure even thickness for consistent cooking.
- Season the beef with salt and pepper, then let it rest for 10-15 minutes to absorb the seasoning.
2. Bread the Cutlets
- Set up the breading station with flour, egg wash, and the breadcrumb-Parmesan mixture.
- Bread each cutlet by coating it in the flour, dipping it into the egg wash, and finally pressing it firmly into the breadcrumb mixture. Make sure the coating adheres evenly.
- Place the breaded cutlets on a parchment-lined baking sheet in a single layer. Avoid stacking to maintain the coating.
3. Storing the Prepared Cutlets
If you’re not frying the cutlets immediately, follow these storage guidelines:
- Refrigeration: Cover the breaded cutlets with plastic wrap and refrigerate them for up to 24 hours. This helps the coating adhere better and improves crispiness during frying.
- Freezing: For longer storage, freeze the breaded cutlets. Arrange them on a baking sheet in a single layer and place them in the freezer until firm (about 1-2 hours). Then, transfer them to an airtight container or freezer-safe bag. The cutlets can be frozen for up to 3 months.
| Storage Method | Storage Duration |
|---|---|
| Refrigeration | Up to 24 hours |
| Freezing | Up to 3 months |
4. Cooking from Refrigerated or Frozen
- From Refrigerated: Heat the skillet with olive oil and butter over medium heat. Fry the cutlets directly from the refrigerator, following the original recipe instructions.
- From Frozen: For frozen cutlets, thaw them in the refrigerator overnight before frying. If short on time, you can fry directly from frozen, but ensure the heat is moderated to avoid uneven cooking.
5. Reheating Leftovers
If you’ve pre-fried the cutlets and want to reheat them, use the oven instead of the microwave to maintain their crisp texture.
- Preheat the oven to 375°F (190°C).
- Arrange the cutlets on a wire rack set over a baking sheet to allow air circulation.
- Heat them for 10-12 minutes or until warmed thoroughly. Avoid overcooking to prevent drying out.
By following these Make-Ahead Instructions, we can ensure our Italian beef cutlets are just as mouthwatering and golden as if they were freshly made.
Tips For The Best Italian Beef Cutlets
Creating perfect Italian beef cutlets requires attention to technique, ingredients, and timing. Follow these expert tips to achieve a tender, flavorful beef center encased in a golden, crispy crust every time. Let’s dive into the essentials.
1. Choose the Right Cut of Beef
- Use beef top round or sirloin, as they are lean and tender when pounded thin.
- Always remove excess fat or connective tissue for even cooking.
- Ask your butcher to slice the meat, or slice it yourself to maintain uniformity.
2. Master the Pounding Process
- Place the sliced beef between two layers of plastic wrap or parchment paper. This prevents sticking and mess.
- Pound the beef to about 1/4-inch thickness using a meat mallet for even cooking. Uneven thickness results in undercooked or overcooked areas.
Pro Tip: Avoid over-pounding, as this can tear the meat and affect texture.
3. Perfect the Bread Crumb Mixture
- Combine Italian breadcrumbs with freshly grated Parmesan cheese. This duo ensures a seasoned, crispy, and cheesy crust.
- Add seasoning like garlic powder, dried oregano, or fresh parsley to elevate flavors.
4. Follow the Three-Step Breading Method
- Set up your breading station with three shallow bowls:
- Flour seasoned with salt and pepper.
- Beaten eggs with a splash of milk for smooth coating.
- The breadcrumb-Parmesan mixture.
“Dip one cutlet at a time, first into flour, then egg, and finally the breadcrumb mixture, pressing firmly to adhere the coating fully.”
5. Control the Frying Temperature
- Use a mix of olive oil for flavor and butter for crispiness when frying.
- Heat the skillet to medium-high—oil should shimmer but not smoke.
- Fry each cutlet for 2-3 minutes per side or until golden and crispy.
| Frying Element | Details |
|---|---|
| Oil-to-butter ratio | 2:1 for balanced flavor and browning. |
| Ideal skillet temperature | Medium-high (~350°F). |
6. Drain on a Cooling Rack
- After frying, transfer the cutlets to a wire rack set over a baking sheet. This keeps them crispy by allowing excess oil to drip away.
Avoid placing cutlets directly onto paper towels, as it can make the crust soggy.
7. Garnish and Serve Thoughtfully
- Sprinkle freshly chopped parsley for color and flavor.
- Add a squeeze of lemon juice just before serving to brighten the dish.
8. Reheat Without Losing Crispiness
- To reheat, place cutlets on a baking sheet in a preheated 375°F oven for 10-12 minutes. Avoid microwaving, as it softens the crust.
By following these proven tips, we can ensure our Italian beef cutlets achieve restaurant-quality results, impressing family and guests alike. Remember to keep focus on fresh, high-quality ingredients and precise techniques for the best outcome.
Conclusion
Italian beef cutlets are a true celebration of flavor, texture, and versatility. With their golden crust, tender interior, and rich seasoning, they’re a dish that effortlessly elevates any meal. Whether you’re preparing them for a casual dinner or a special gathering, their simplicity and elegance make them a standout choice.
By following the steps and tips we’ve shared, you’ll master the art of creating these delightful cutlets. From selecting the right cut of beef to achieving that perfect crispiness, every detail plays a role in delivering a dish that’s as impressive as it is satisfying. Let’s bring a taste of Italy to our kitchens and enjoy every bite!
Frequently Asked Questions
What type of beef is best for Italian beef cutlets?
For the best Italian beef cutlets, use top round or sirloin. These cuts are tender, easy to pound thin, and cook evenly for a perfect result.
How do you achieve a crispy golden crust on beef cutlets?
The key to a crispy crust is using a three-step breading process: coat the beef in flour, dip it in egg wash, and coat it with a Parmesan-breadcrumb mixture. Frying in a combination of olive oil and butter also enhances crispiness.
Can I prepare Italian beef cutlets ahead of time?
Yes, you can prepare the cutlets in advance. After slicing, pounding, seasoning, and breading, refrigerate them for up to 24 hours or freeze for up to 3 months. Cook straight from the fridge or frozen for convenience.
How do you reheat Italian beef cutlets while maintaining crispiness?
Reheat cutlets in a preheated oven at 350°F (175°C) on a wire rack to preserve their crispy texture. Avoid microwaving as it makes them soggy.
Which tools are essential for making Italian beef cutlets?
You’ll need a cutting board, a meat mallet, a sharp knife, shallow bowls for breading, tongs, a large skillet, a cooling rack, and measuring tools for precise preparation.
What oil is best for frying Italian beef cutlets?
A mix of olive oil and butter works best. The oil provides a high smoke point for frying, while the butter adds flavor and aids in browning.
What garnishes pair well with Italian beef cutlets?
Fresh parsley and lemon wedges are classic choices. They add brightness and complement the rich, crispy cutlets beautifully.
Can the breadcrumb mixture be customized?
Yes, you can season the breadcrumbs with your favorite herbs and spices. Italian breadcrumbs with Parmesan are traditional, but you can adjust flavors to suit personal preference.
How thin should the beef be pounded for cutlets?
For ideal results, pound the beef to around ¼ inch thickness. This ensures even cooking and a tender texture.
What side dishes pair well with Italian beef cutlets?
Serve the cutlets with an arugula salad or roasted vegetables for a light meal. They also make a great filling for sandwiches with marinara sauce.