
Banana pudding is a classic Southern dessert that’s loved for its creamy texture and sweet banana flavor. But traditional recipes often rely on dairy, which can be a challenge for those with lactose intolerance or dairy allergies. That’s why we’re excited to share our dairy-free banana pudding recipe that doesn’t compromise on taste or creaminess.
Ingredients
To master our Banana Pudding Recipe Dairy Free, we carefully select ingredients that preserve the dessert’s classic creaminess without any dairy. Below are the essentials along with some tasty options to elevate the flavor and texture.
Dairy-Free Pudding Ingredients
We focus on plant-based alternatives and wholesome components to recreate that smooth, luscious pudding base.
| Ingredient | Quantity | Preparation Notes |
|---|---|---|
| Coconut milk (full fat) | 2 cups | Shake well before measuring |
| Ripe bananas | 3 medium | Sliced thinly |
| Cornstarch | 1/3 cup | For thickening pudding |
| Granulated sugar | 3/4 cup | Adjust to taste |
| Vanilla extract | 1 teaspoon | Pure vanilla recommended |
| Salt | 1/4 teaspoon | Enhances flavor |
| Turmeric (optional) | 1/8 teaspoon | For natural yellow color |
Toppings and Garnishes
Our toppings lend the classic crunch and fresh notes that complete this dairy-free banana pudding.
- Dairy-Free Vanilla Wafers – Crisp and light for layering
- Toasted Coconut Flakes – Adds a nutty, aromatic crunch
- Fresh Banana Slices – For garnish and extra fruitiness
- Chopped Pecans or Walnuts – Optional for a rich, crunchy bite
Optional Add-Ins
These add complexity and personalization to our banana pudding dairy free dessert.
- Dairy-Free Whipped Cream – Coconut or almond-based for a fluffy finish
- Maple Syrup or Agave Nectar – Substitute or complement sugar for a natural sweetener
- Chia Seeds – For added texture and omega-3 boost
- Dairy-Free Chocolate Chips – Introduce a subtle chocolate twist
By assembling these carefully selected ingredients, we ensure every spoonful of our dairy-free banana pudding delights with authentic Southern flavor and velvety texture.
Equipment Needed
To create our Banana Pudding Recipe Dairy Free successfully, having the right tools is essential. These pieces of equipment help us achieve the perfect creamy texture and enhance the natural flavors without dairy.
- Medium Saucepan: Use this to gently cook the pudding base. A heavy-bottomed pan prevents scorching and ensures even heat distribution.
- Whisk: A whisk is crucial for stirring the pudding mixture continuously. It helps us avoid lumps and creates a smooth consistency.
- Mixing Bowls: We will need at least two bowls — one for combining dry ingredients and another for mashing the bananas.
- Measuring Cups and Spoons: Precise measurements keep our recipe accurate and reliable.
- Spatula: A heat-resistant spatula is useful for scraping the sides of the saucepan and folding ingredients together.
- Immersion Blender or Potato Masher: For smoothly mashing bananas if we prefer no chunks in our pudding.
- Serving Dish or Individual Cups: Choose glass or ceramic bowls to display the pudding attractively.
- Refrigerator: To chill the pudding for a few hours ensuring it sets properly.
| Equipment | Purpose |
|---|---|
| Medium Saucepan | Cook pudding base evenly |
| Whisk | Prevent lumps and mix ingredients |
| Mixing Bowls | Combine and prepare ingredients |
| Measuring Tools | Ensure precision in recipe |
| Spatula | Scrape and fold ingredients |
| Immersion Blender / Potato Masher | Mash bananas to desired texture |
| Serving Dish / Cups | Present pudding aesthetically |
| Refrigerator | Chill and set the pudding |
With these tools at hand, we are fully prepared to craft our dairy-free banana pudding that is every bit as luscious and satisfying as the classic version.
Prep Work
Before we begin assembling our Banana Pudding Recipe Dairy Free, proper preparation ensures smooth cooking and perfect results. Let’s break down the essential steps.
Preparing the Dairy-Free Pudding
First, we combine the full-fat coconut milk, granulated sugar, and cornstarch in a medium saucepan. Using a whisk, we mix the ingredients thoroughly until the cornstarch dissolves completely to avoid lumps.
Next, we place the saucepan over medium heat, stirring constantly. The mixture will gradually thicken as it heats. Once it reaches a creamy, pudding-like consistency, we remove it from the heat and stir in the vanilla extract and an optional pinch of turmeric for a subtle golden hue.
Then, we transfer the pudding into a mixing bowl and cover it with plastic wrap, pressing the wrap directly onto the surface to prevent a skin from forming. We chill it in the refrigerator while preparing the bananas and other components.
Slicing the Bananas
Choosing ripe bananas with a bright yellow peel and slight brown speckles is key for natural sweetness and softness. We peel the bananas and slice them evenly about 1/4 inch thick. Uniform slices create consistent layers and improve the texture throughout the pudding.
We place the banana slices in a bowl and cover them lightly to prevent browning. If desired, a quick toss in lemon juice can help maintain their fresh appearance without altering the flavor.
Preparing Any Additional Components
For dairy-free vanilla wafers, we arrange them on a baking sheet if we want to slightly toast them for added crunch, heating at 350°F (175°C) for 5-7 minutes until lightly golden.
If using toasted coconut flakes or chopped nuts, we prepare these by measuring roughly 1/4 cup of each, toasting them in a dry skillet over medium heat for 3-4 minutes until fragrant and golden, stirring frequently to avoid burning.
For optional dairy-free whipped cream or other toppings, we make sure to have them chilled and ready for layering.
| Component | Quantity | Preparation Details | Cooking Details |
|---|---|---|---|
| Full-fat coconut milk | 2 cups | Combine with sugar and cornstarch | Heat until thickened |
| Granulated sugar | 3/4 cup | Mix with coconut milk and cornstarch | |
| Cornstarch | 1/4 cup | Dissolve completely in liquid | |
| Vanilla extract | 1 tsp | Stir in after pudding thickens | |
| Bananas | 3-4 ripe | Peel and slice 1/4 inch thick | Toss with lemon juice optional |
| Dairy-free vanilla wafers | 1 package (about 24 wafers) | Toast at 350°F for 5-7 minutes optional | |
| Toasted coconut flakes | 1/4 cup | Toast in skillet 3-4 minutes | |
| Chopped nuts | 1/4 cup | Toast in skillet 3-4 minutes |
With these prep steps completed, we are set to build our layers and enjoy an indulgent Banana Pudding Recipe Dairy Free that delights every sense.
Instructions
Follow these steps carefully to create a luscious Banana Pudding Recipe Dairy Free that boasts the classic taste without any dairy.
Making the Dairy-Free Pudding Base
- In a medium saucepan, whisk together 1 1/2 cups full-fat coconut milk, 1/2 cup granulated sugar, and 1/4 cup cornstarch until smooth with no lumps.
- Place the saucepan over medium heat. Stir constantly with a whisk to prevent clumps and sticking.
- Continue cooking for 5 to 7 minutes until the mixture thickens and begins to gently bubble.
- Remove from heat immediately; stir in 1 teaspoon vanilla extract and a pinch of turmeric (optional) to enhance color.
- Pour the pudding into a bowl. Cover the surface with plastic wrap to prevent a skin from forming.
- Allow it to cool at room temperature while prepping other components.
Layering the Banana Pudding
- Slice 3 ripe bananas into 1/4-inch thick rounds using a sharp knife.
- In your preferred serving dish or individual cups, begin by spreading a thin layer of the dairy-free pudding base.
- Add a layer of banana slices over the pudding.
- Sprinkle a layer of dairy-free vanilla wafers evenly over the bananas.
- Repeat these layers—pudding, bananas, and wafers—until you use all ingredients or fill your dish.
- Finish with a final thick layer of pudding on top.
Adding Toppings and Garnishes
Enhance your dairy-free banana pudding with these carefully selected toppings for added texture and visual appeal:
| Toppings | Amount | Notes |
|---|---|---|
| Toasted coconut flakes | 2 tablespoons | Adds subtle crunch and tropical flavor |
| Fresh banana slices | For garnish | Use for freshness and aesthetic |
| Chopped nuts (optional) | 2 tablespoons | Adds a nutty crunch |
| Dairy-free whipped cream (optional) | As desired | For creaminess and richness |
- Gently sprinkle toasted coconut flakes and chopped nuts over the pudding.
- Top with fresh banana slices.
- Optionally, pipe or spoon dairy-free whipped cream over the top for a decadent finish.
- Chill the entire pudding in the refrigerator for at least 2 hours to allow flavors to meld and pudding to set perfectly.
Chill and Set
Allowing the banana pudding to chill properly is essential for developing its signature creamy texture and melding all the flavors together. This step also ensures the pudding sets firmly without losing its dairy-free richness.
Refrigeration Time
We recommend refrigerating the assembled dairy-free banana pudding for a minimum of 2 hours. This time frame gives the pudding base a chance to thicken fully and the flavors of ripe bananas, coconut milk, vanilla, and other components to harmonize beautifully. If time allows, chilling overnight will yield an even more luscious and well-set texture.
| Refrigeration Duration | Purpose | Result |
|---|---|---|
| 2 hours | Initial setting | Creamy texture with good firmness |
| 4-6 hours | Optimal flavor melding | Smooth and richly flavored pudding |
| Overnight | Maximum setting and flavor depth | Firm pudding with enhanced taste |
Tips for Perfect Texture
To achieve the ideal dairy-free banana pudding texture, keep these tips in mind:
- Cool Before Refrigerating: Let the pudding base cool slightly before layering. Adding hot pudding can cause condensation and a watery texture.
- Proper Layering: Alternate layers of pudding, banana slices, and dairy-free vanilla wafers evenly. This helps maintain structure and balanced flavors.
- Seal Tightly: Cover the pudding dish tightly with plastic wrap or an airtight lid to prevent it from absorbing fridge odors and drying out.
- Avoid Overmixing: When folding any optional dairy-free whipped cream or toppings, use a gentle hand to retain lightness and not deflate the mixture.
- Serve Chilled: Serve pudding directly from the fridge for that rich creamy mouthfeel and fresh banana taste.
By confidently following these refrigeration and textural tips, our banana pudding recipe dairy free will transform into a velvety, indulgent dessert that appeals to everyone’s taste buds.
Serving Suggestions
To fully enjoy our dairy-free banana pudding, serving it with complementary textures and flavors elevates the experience beautifully. Here are some expertly crafted ideas to present and savor your pudding with style:
1. Classic Layered Parfait Style
Layer the chilled pudding with dairy-free vanilla wafers, fresh banana slices, and a sprinkle of toasted coconut flakes or chopped nuts in clear glasses. This visually appealing method allows every bite to include creamy, crunchy, and fruity notes.
2. Topped with Dairy-Free Whipped Cream
Add a generous dollop of dairy-free whipped cream atop each serving. The light, airy cream balances the pudding’s richness and enhances its indulgent mouthfeel.
3. Garnish with Chocolate
For a twist, sprinkle dairy-free chocolate chips or drizzle a bit of melted dairy-free chocolate on the top. This adds subtle bitterness to contrast the pudding’s natural sweetness perfectly.
4. Fresh Banana Fan
Fan thin slices of ripe banana over the pudding surface. This fresh garnish not only intensifies the banana flavor but creates an inviting and elegant look.
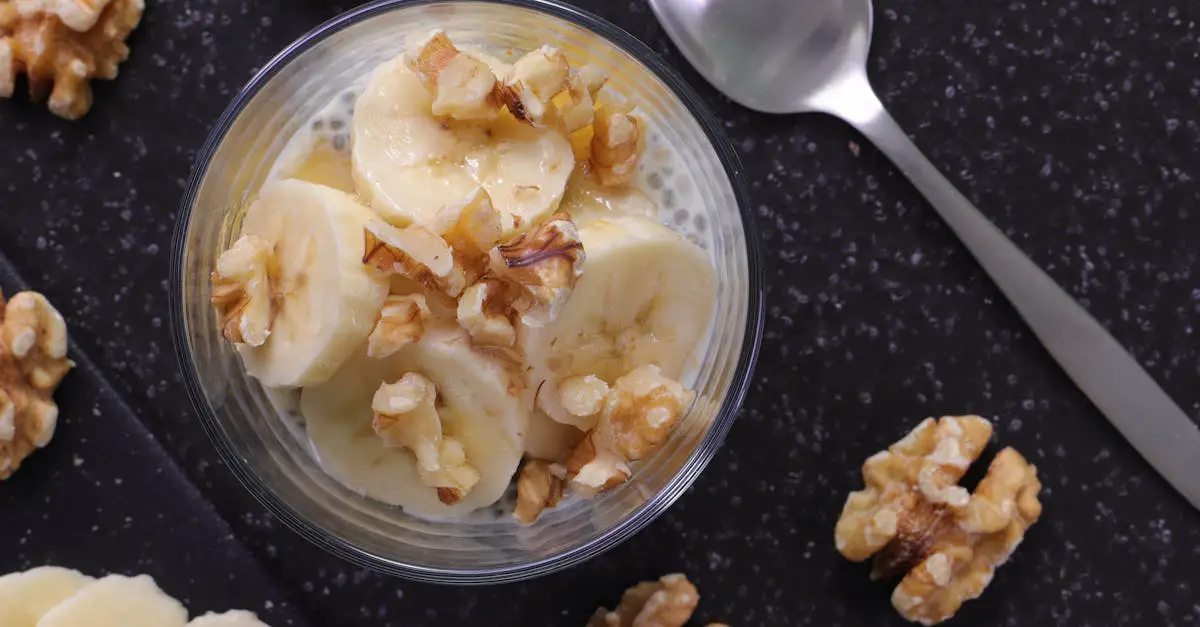
5. Nutty Crunch
Scatter toasted chopped pecans or walnuts just before serving. The crunch and earthy flavor provide a delightful contrast to the smooth pudding.
Serving Temperature and Plating Tips
| Tip | Details |
|---|---|
| Serve chilled | Keep pudding refrigerated until serving to maintain creaminess |
| Use clear glassware | Show off the pudding’s beautiful layers and colors |
| Portion size | Small dessert cups (4-6 oz) work best for individual servings |
| Add garnishes last minute | Preserve texture and freshness of toppings |
“Serving our dairy-free banana pudding with contrasting textures and fresh garnishes is key to delivering a memorable dessert experience.”
With these suggestions, we craft a beautiful balance of taste and presentation that highlights every element of this classic Southern favorite — now perfected without dairy.
Storage Instructions
Proper storage is essential to preserve the flavor, texture, and freshness of our dairy-free banana pudding. Follow these steps to ensure your dessert stays delicious and safe to enjoy.
Refrigerating the Banana Pudding
- Cover the pudding tightly with plastic wrap or use an airtight container to prevent it from absorbing other flavors or drying out.
- Store the pudding in the refrigerator at a consistent temperature of below 40°F (4°C).
- Refrigerate for a minimum of 2 hours to allow the pudding to set and for the flavors to develop fully.
- For the best texture and taste, we recommend chilling overnight, especially if you plan to serve it the next day.
Shelf Life and Serving Window
| Storage Method | Duration | Notes |
|---|---|---|
| Refrigerator | 3 to 4 days | Maintain airtight covering |
| Freezer | Not recommended | Texture may become grainy on thaw |
“Always serve the pudding chilled to enjoy its creamy consistency and rich banana flavor.”
Avoiding Common Storage Mistakes
- Do not leave the pudding at room temperature for extended periods to prevent spoilage.
- Avoid overmixing before storage, which can cause the pudding to lose its silky smooth texture.
- Add fresh toppings like banana slices or whipped cream just before serving to maintain their appearance and flavor.
By following these storage instructions carefully, we keep our banana pudding dairy free and delightfully fresh every time.
Conclusion
This dairy-free banana pudding recipe lets us enjoy a classic Southern dessert without compromising on flavor or texture. By using thoughtful substitutions and simple techniques, we create a creamy treat that everyone can savor. Whether for a family gathering or a cozy night in, this pudding is sure to impress.
With easy prep, flexible toppings, and clear storage tips, making this dessert becomes a stress-free experience. Let’s keep delighting our taste buds while accommodating dietary needs—proving that dairy-free can be just as indulgent and satisfying.
Frequently Asked Questions
What makes this banana pudding recipe dairy-free?
This recipe uses full-fat coconut milk instead of dairy milk or cream, ensuring a creamy texture without lactose or dairy allergens.
Can I use regular bananas or should they be ripe?
Ripe bananas are best as they provide natural sweetness and a smooth texture essential for the pudding’s flavor.
What are the key ingredients to replace dairy in this recipe?
Key dairy replacements include full-fat coconut milk, dairy-free vanilla wafers, and optional dairy-free whipped cream for toppings.
Is cornstarch necessary in the pudding?
Yes, cornstarch acts as a thickener, giving the pudding its classic creamy consistency without using dairy-based thickeners.
How long should the pudding chill before serving?
Refrigerate the pudding for at least 2 hours, but chilling overnight yields the best texture and flavor.
Can I freeze dairy-free banana pudding?
Freezing is not recommended because it can alter the pudding’s texture and cause separation.
What equipment do I need to make this pudding?
You’ll need a medium saucepan, whisk, mixing bowls, measuring cups and spoons, spatula, and a refrigerator.
How should I store leftover banana pudding?
Store leftovers in an airtight container in the refrigerator below 40°F (4°C) and consume within 3-4 days.
Are there any recommended toppings for this dessert?
Popular toppings include toasted coconut flakes, fresh banana slices, chopped nuts, dairy-free whipped cream, and dairy-free chocolate chips.
Can I add natural sweeteners instead of granulated sugar?
Yes, natural sweeteners like maple syrup or agave syrup can be used as alternatives to granulated sugar.