
There’s something truly special about homemade jams and jellies that store-bought versions just can’t match. With the Ball Jam and Jelly Maker Recipe Book, we can unlock a world of delicious possibilities right in our own kitchens. This recipe book is packed with tried-and-true recipes that make preserving fresh fruits easy and enjoyable.
Whether we’re beginners or seasoned canners, this guide offers clear instructions and creative flavor combinations that inspire us to experiment. From classic strawberry jam to unique blends, the Ball Recipe Book helps us capture the taste of each season and enjoy it year-round. Let’s dive into the art of making jams and jellies that bring warmth and sweetness to every meal.
Essential Tools and Equipment
To master homemade preserves with the Ball Jam And Jelly Maker Recipe Book, having the right tools is paramount. These instruments ensure safety, precision, and an enjoyable canning experience.
Overview of the Ball Jam And Jelly Maker
The Ball Jam And Jelly Maker is specifically designed to simplify the jelly-making process. It integrates features that allow us to measure sugar directly and cook fruit mixtures with precision.
- Built-in Measuring Cup: Eliminates the need for separate measuring tools.
- Non-stick Surfaces: Provide even heating and easy cleanup.
- Stainless Steel Construction: Ensures durability and excellent heat distribution.
- Heat-Resistant Handles: Ensure safe handling during preparation.
This tool streamlines the jam and jelly process and helps maintain consistent results, which is crucial to perfecting preserves as guided by the recipe book.
Additional Kitchen Tools Needed
In addition to the Ball Jam And Jelly Maker, we recommend gathering the following essential tools for a smooth canning experience.
| Tool | Purpose |
|---|---|
| Large Pot or Canner | For sterilizing jars and processing preserves. |
| Glass Canning Jars | To store jams and jellies safely and properly. |
| Jar Lifter | Safely lifts hot jars from boiling water. |
| Funnel | Helps fill jars neatly without spills. |
| Ladle | For scooping jam or jelly into jars. |
| Rubber Spatula | Scrapes the sides of the jam maker to prevent waste. |
| Clean Cloth or Paper Towels | Wipes jar rims for a clean seal. |
| Kitchen Timer | Keeps track of cooking and processing times perfectly. |
| Thermometer | Tests temperature for consistency and safety. |
Having these tools ready and accessible complements the Ball Jam And Jelly Maker and supports us in achieving jam and jelly perfection following our reliable recipe guide.
Ingredients
To create delicious homemade jams and jellies using the Ball Jam and Jelly Maker Recipe Book, it is essential to gather the right ingredients. Below we outline the common staples and specialty items that appear frequently in the recipes, ensuring we are fully prepared to start preserving.
Common Ingredients for Jams and Jellies
The foundation of any great jam or jelly is fresh, quality produce paired with a few key pantry essentials. Here are the typical ingredients you will see throughout the recipe book:
- Fresh fruit (berries, peaches, apples, grapes) – use ripe, unblemished fruit for optimal flavor and texture
- Sugar – granulated white sugar is most common to achieve that perfect balance of sweetness and preservation
- Pectin – this natural gelling agent helps jams and jellies set properly; available as powder or liquid form
- Lemon juice – adds acidity to preserve color, enhance flavor, and assist pectin in setting
- Water – occasionally needed to adjust consistency or dissolve pectin
We often measure these ingredients carefully to maintain the precise balance that ensures successful results every time. The table below breaks down typical quantities for a standard batch:
| Ingredient | Typical Amount per Batch | Purpose |
|---|---|---|
| Fresh fruit | 4 to 6 cups | Flavor base and texture |
| Sugar | 3 to 5 cups | Sweetness and preservation |
| Pectin | 1 to 3 tbsp (powder) | Gel formation |
| Lemon juice | 1 to 2 tbsp | Acidity and gel activation |
| Water | 1/4 to 1/2 cup | Dissolving pectin or thinning |
Specialty Ingredients Featured in the Recipe Book
The Ball Jam and Jelly Maker Recipe Book also showcases a variety of specialty ingredients that elevate our preserves beyond the basics. These components allow us to experiment with unique textures, flavors, and dietary preferences. Key specialty ingredients include:
- Natural fruit juices (apple, cranberry) – to enhance or replace water for intensified fruit flavor
- Honey or maple syrup – alternatives to sugar for different sweetness profiles and subtle complexity
- Spices and herbs (cinnamon, ginger, basil, lavender) – add aromatic depth and seasonal twists
- Low-sugar and no-sugar pectin – crafted for reduced-calorie or diabetic-friendly preserves
- Gelatin or agar-agar – occasionally used for specialized jellies needing firmer texture without traditional pectin
By incorporating these specialty ingredients, we can customize our jams and jellies to our taste preferences while maintaining the reliability of the Ball Jam and Jelly Maker system. This flexibility encourages creativity and keeps our jarring adventures exciting all year round.
Preparing Your Workspace
Creating delicious homemade preserves with the Ball Jam and Jelly Maker Recipe Book starts with a clean and organized workspace. Let’s prepare our kitchen for seamless jam and jelly making by focusing on sterilization, cleanliness, and efficient setup.
Cleaning and Sterilizing Jars
Ensuring our jars are perfectly clean and sterilized is crucial for safe preservation and extending shelf life. Here’s how we prepare the jars:
- Wash jars and lids thoroughly with hot, soapy water. Rinse well to remove any soap residue.
- Place jars in a large pot filled with water. Bring to a rolling boil and boil for 10 minutes to sterilize.
- Keep the jars hot in the boiling water until we’re ready to fill them.
- For lids with sealing compound, do not boil. Instead, place lids in hot (not boiling) water to soften the sealing gasket.
- Use a jar lifter to safely remove jars from water, and place them on a clean, dry towel.
“A sterile jar is a happy jar.” Keeping jars sanitized prevents contamination and guarantees the perfect set for our homemade jams and jellies.
| Step | Action | Time | Notes |
|---|---|---|---|
| Wash | Hot, soapy water | 5 minutes | Remove all visible residue |
| Sterilize jars | Boil in water | 10 minutes | Keep jars submerged during boiling |
| Prepare lids | Soak in hot water | 5 minutes | Avoid boiling to protect seals |
| Remove jars from water | Use jar lifter | Immediately | Place on clean towel |
Setting Up the Cooking Area
A well-organized cooking area increases efficiency and safety while using the Ball Jam and Jelly Maker. We recommend the following setup steps:
- Clear ample countertop space close to the stove for easy access to the Ball Jam and Jelly Maker.
- Arrange all essential tools nearby: ladle, rubber spatula, funnel, thermometer, timer, and clean cloths.
- Keep glass canning jars and lids within reach but safely separated to avoid breakage.
- Place a towel or heat-resistant mat under the cooking area to catch spills and provide stability.
- Ensure good lighting for precise measurements and monitoring the cooking process.
- Have a large pot of hot water ready for immediate sterilizing needs during the jam-making process.
“Preparation is the key ingredient.” Organizing our workspace helps us maintain focus and achieve consistent results with every batch.
| Item | Placement | Purpose |
|---|---|---|
| Ball Jam and Jelly Maker | Center near stove | Main cooking vessel |
| Tools (ladle, spatula) | Within arm’s reach | For stirring and filling |
| Jars and lids | Off to the side | Ready for filling |
| Towels/mats | Underneath workspace | Prevent spills, provide grip |
| Thermometer | Nearby | Monitor temperature precisely |
| Timer | Visible on countertop | Track cooking duration |
Basic Jam and Jelly Making Techniques
Mastering the Basic Jam and Jelly Making Techniques is essential for producing delicious homemade preserves with vibrant flavors and perfect textures. Let us walk through key steps to prepare fruit properly and execute precise cooking and thickening methods for consistently successful results.
Fruit Preparation
Proper fruit preparation sets the foundation for flavorful and well-textured jams and jellies. Here is how we ensure our fruit is ready for the pot:
- Select ripe fresh fruit: Use fruit at peak ripeness for optimal sweetness and natural pectin content.
- Wash fruit thoroughly: Rinse under cold water to remove dirt, pesticides, and residues.
- Remove stems, pits, and cores: Depending on the fruit type, stem removal and pitting prevent bitterness and tough bits.
- Chop or crush fruit: For jams, chop or lightly crush to release juices and create a textured preserve. For jellies, crush fruit to extract juice, but strain solids out later.
- Measure fruit accurately: Consistent fruit quantity is critical for matching pectin and sugar amounts.
| Fruit Preparation Step | Purpose |
|---|---|
| Select ripe fruit | Ensures natural sweetness and pectin |
| Wash fruit | Removes dirt and contaminants |
| Remove stems/pits/cores | Avoids bitterness and tough textures |
| Chop or crush | Releases juices for flavor and gel |
| Accurately measure | Maintains recipe balance |
Cooking and Thickening Methods
The cooking and thickening phase transforms prepared fruit into luscious jams and jellies with ideal consistency. Follow these proven techniques:
- Combine fruit, sugar, and pectin as directed by the recipe. Use the Ball Jam and Jelly Maker’s built-in measuring cup for precision.
- Bring the mixture to a rolling boil, one that cannot be stirred down. This activates the pectin and dissolves sugar fully.
- Boil at full rolling boil for the specified time—often 1-3 minutes—to reach the gel point and prevent runny preserves.
- Optionally, add lemon juice during cooking to balance flavor and enhance pectin effectiveness.
- Use a candy thermometer or rely on standard “wrinkle test” to confirm correct gel formation.
- Skim foam that forms on top to ensure clear jam or jelly.
- Immediately transfer hot preserves into sterilized jars and process in a boiling water bath per safe canning guidelines.
| Stage | Key Actions | Purpose |
|---|---|---|
| Mixing | Combine fruit, sugar, pectin | Accurate balance for gel setting |
| Boiling | Bring to rolling boil | Fully activate pectin, dissolve sugar |
| Timed boil | Maintain rolling boil 1-3 min | Achieve gel point, proper thickness |
| Acid addition | Add lemon juice if needed | Enhance pectin action, flavor balance |
| Quality check | Use thermometer or wrinkle test | Confirm gel formation |
| Foam removal | Skim off foam | Clear finished product |
| Jar filling | Fill jars hot, seal, process | Prevent spoilage, ensure shelf life |
By mastering Fruit Preparation and Cooking and Thickening Methods with careful attention and quality tools like the Ball Jam and Jelly Maker, we guarantee homemade preserves that burst with the freshest fruit flavors and have the perfect spreadable texture every time.
Recipes from the Ball Jam And Jelly Maker Recipe Book
The Ball Jam And Jelly Maker Recipe Book offers a variety of tried-and-true recipes that bring out the freshest flavors in every batch. We’ll explore some of our favorites to get started on delicious homemade preserves using the Ball Jam and Jelly Maker.
Classic Strawberry Jam
Our Classic Strawberry Jam recipe captures the bright, sweet taste of ripe strawberries with simple steps.
Ingredients:
- 4 cups fresh strawberries, hulled and crushed
- 3 cups granulated sugar
- 1 package (1.75 oz) powdered fruit pectin
- 2 tablespoons lemon juice
Instructions:
- Combine strawberries and lemon juice in the Ball Jam and Jelly Maker.
- Stir in fruit pectin thoroughly before adding sugar.
- Gradually add sugar, stirring constantly.
- Heat on medium-high until mixture reaches a rolling boil.
- Boil for 1 minute, stirring frequently.
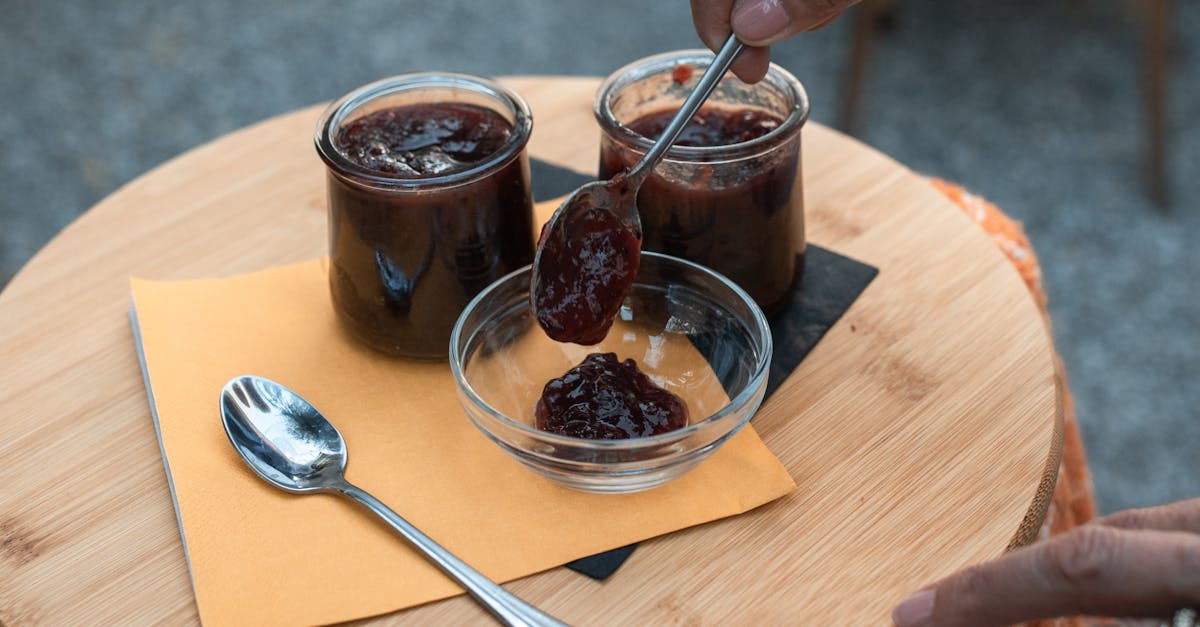
- Remove from heat, skim any foam, and pour into sterilized jars.
- Seal jars immediately to preserve freshness.
The jam sets into a luscious, thick texture that spreads effortlessly while delivering intense strawberry aroma.
Mixed Berry Jelly
This Mixed Berry Jelly blends the flavors of blueberries, raspberries, and blackberries to produce a beautifully clear and flavorful spread.
Ingredients:
| Ingredient | Quantity |
|---|---|
| Mixed berries (blue, raspberry, blackberry) | 5 cups |
| Water | 1 cup |
| Sugar | 4 cups |
| Liquid fruit pectin | 1 package (3 oz) |
| Lemon juice | 2 tablespoons |
Instructions:
- Combine berries and water in a large pot. Simmer 10 minutes to extract juice.
- Strain juice through a cheesecloth liner, pressing for maximum yield.
- Measure 4 cups of juice and return to the Ball Jam and Jelly Maker.
- Stir in lemon juice and pectin, bring to a boil over high heat.
- Quickly add sugar, stirring constantly until the mixture returns to a rolling boil.
- Boil for 1 minute, remove from heat, and pour jelly into hot sterilized jars.
- Seal immediately to lock in clear, bright flavors.
The result is a vibrant jewel-toned jelly with a perfectly smooth and firm set.
Peach Preserves
Our Peach Preserves recipe lets the natural sweetness and texture of ripe peaches shine in a syrupy, spreadable form.
Ingredients:
- 5 cups peeled and sliced fresh peaches
- 4 cups granulated sugar
- ¼ cup lemon juice
- 1 package (1.75 oz) powdered pectin
Instructions:
- Place sliced peaches and lemon juice in the Ball Jam and Jelly Maker.
- Stir in pectin thoroughly, ensuring an even mixture.
- Add sugar gradually while heating to medium-high.
- Bring to a rolling boil, stir frequently for 1-2 minutes.
- Remove foam with a spoon, ladle preserves into sterilized jars.
- Seal immediately to preserve peach flavor and texture.
Expect bright golden preserves with chunks of peaches suspended in sweet, clear syrup — perfect on toast or as a topping.
Unique and Seasonal Jam Recipes
The Ball Jam And Jelly Maker Recipe Book also inspires us to experiment with seasonal and unique jams. These recipes allow us to capture flavors beyond the classics, like:
- Spiced Apple Butter with cinnamon and cloves for cozy autumn mornings
- Raspberry-Lavender Jam combining floral notes with tangy berries
- Pear and Ginger Preserves offering a warm, spicy twist
- Fig and Vanilla Bean Jelly presenting a luxurious, sweet fragrance
We recommend following the same fundamental principles using your Ball Jam and Jelly Maker while customizing fruit combinations and spices. Here’s a simple format for adapting any fruit-based jam or jelly:
| Step | Action |
|---|---|
| Prepare Fruit | Wash, peel, and chop or crush as needed. |
| Add Pectin | Stir in exact measurement for gel formation. |
| Mix Sugar | Gradually add sugar, ensuring dissolution. |
| Boil | Bring to rolling boil and maintain for 1 min. |
| Jar & Seal | Pour into sterilized jars and seal immediately. |
These innovative recipes allow us to savor seasonal harvests year-round in jars filled with personalized flavors.
The Ball Jam And Jelly Maker Recipe Book truly transforms how we preserve fruit, providing a wide range of recipes that are simple to follow and deliver flavorful, homemade results every time.
Step-by-Step Instructions for Selected Recipes
To master the art of homemade preserves using the Ball Jam and Jelly Maker, we break down the process into three essential stages: Prep, Cooking, and Canning and Storing. Each stage is vital to achieving perfect texture and robust flavor in every jar.
Prep Stage
Our first step is to prepare everything thoroughly. This stage ensures that our workspace and ingredients are ready for flawless execution.
- Clean and sterilize all glass canning jars by boiling them in water for 10 minutes or running them through a dishwasher cycle.
- Wash fresh fruit under cold running water to remove dirt and debris.
- Remove stems, pits, and peelings from fruits as required by the recipe.
- Measure ingredients precisely: sugar, pectin, lemon juice, and any additional flavorings.
- Set up your cooking station with the Ball Jam and Jelly Maker, ladle, rubber spatula, funnel, jar lifter, and clean cloths within easy reach.
- Organize tools and ingredients on a well-lit countertop to streamline the process.
| Prep Task | Key Tips |
|---|---|
| Jar Sterilization | Boil 10 minutes or dishwasher |
| Fruit Cleaning & Prep | Use fresh ripe fruits |
| Ingredient Measurement | Use digital kitchen scale |
| Workspace Setup | Well-lit, tools at hand |
Cooking Stage
Next, we bring our jam or jelly to life by combining ingredients and cooking them to the right consistency with the Ball Jam and Jelly Maker.
- Combine fruit and lemon juice in the jam maker pot to maintain acidity and enhance flavor.
- Add pectin according to recipe instructions — usually sprinkled evenly to avoid clumps.
- Bring mixture to a full rolling boil over high heat, stirring continuously.
- Add sugar all at once and stir to dissolve.
- Return to a rolling boil and cook for exactly 1 minute, stirring constantly.
- Perform the gel test by dripping a small amount of jam onto a cold plate; it should wrinkle slightly when pushed with a finger.
- Remove from heat immediately to prevent overcooking and bitterness.
“Using the Ball Jam and Jelly Maker’s built-in measuring cup and non-stick surface simplifies this process and guarantees consistent results.“
Canning and Storing Stage
The final step locks in freshness and allows us to enjoy our preserves long after harvest.
- Ladle hot jam or jelly into sterilized jars, leaving a 1/4-inch headspace.
- Wipe jar rims clean with a damp cloth to ensure a proper seal.
- Place lids and rings on jars; screw rings finger-tight.
- Process jars in a boiling water bath for 5–10 minutes depending on altitude and recipe specifics.
- Remove jars with jar lifter and place on a towel to cool without disturbing.
- Check seals after cooling; lids should not flex when pressed.
- Label jars with date and flavor for easy identification.
- Store sealed jars in a cool, dark place and consume within one year for best quality.
| Canning Step | Details |
|---|---|
| Filling Jars | Leave 1/4-inch headspace |
| Sealing | Finger-tight lid rings |
| Boiling Water Bath Time | 5–10 minutes (altitude-dependent) |
| Cooling | Undisturbed on towel |
| Sealing Check | No lid flex on center press |
Following these detailed steps guarantees that each batch of jam or jelly we make using the Ball Jam and Jelly Maker Recipe Book is safe, flavorful, and perfectly textured.
Tips for Perfect Jams and Jellies
Mastering homemade jams and jellies requires attention to detail and a few essential tips that will help us achieve the ideal texture, flavor, and shelf life every time we use the Ball Jam and Jelly Maker Recipe Book. Let’s explore some key insights to ensure flawless preserves.
Troubleshooting Common Issues
Sometimes even with the best recipes and tools, jams or jellies may not turn out as expected. Here are solutions to frequent problems:
| Problem | Possible Cause | Solution |
|---|---|---|
| Jam too runny | Insufficient pectin or undercooked | Add more pectin and cook longer to reach gel point |
| Jam too stiff | Too much pectin or overcooked | Reduce pectin next batch and shorten cooking time |
| Jelly won’t set | Fruit not ripe or incorrect sugar ratio | Use ripe fruit and double-check sugar and pectin amounts |
| Jam crystallizing | Excess sugar or improper stirring | Stir constantly during cooking and use correct sugar |
| Cloudy jelly | Impurities or pulp in jelly | Strain juice carefully before cooking |
“Consistent temperature and careful timing are crucial to avoid many common jams and jellies issues.”
For testing gel formation, we rely on the wrinkle test or internal thermometer readings at around 220°F (104°C)—both guarantee the perfect set.
Storage and Shelf Life Recommendations
Proper storage is vital for preserving our homemade treasures. Here’s what we recommend:
- Use sterilized, airtight glass canning jars to ensure contamination-free preservation.
- Store finished jams and jellies in a cool, dark place like a pantry or cellar.
- Once opened, refrigerate jars promptly and consume within 3 to 4 weeks.
- Unopened, sealed jars typically last 12 to 18 months when stored correctly.
| Storage Condition | Expected Shelf Life | Notes |
|---|---|---|
| Unopened, cool & dark | 12 to 18 months | Maintain consistent cool temp |
| Opened, refrigerated | 3 to 4 weeks | Use clean spoon to avoid spoilage |
| Warm or direct sunlight | Reduced, may spoil faster | Avoid to preserve flavor & color |
By following these guidelines alongside the Ball Jam and Jelly Maker Recipe Book instructions, our jams and jellies will remain vibrant, flavorful, and safe for consumption throughout the year.
Make-Ahead and Gift Ideas
Mastering the art of homemade preserves offers the perfect opportunity to prepare jars in advance and create thoughtful gifts that celebrate fresh flavors and personal creativity. Let us explore effective strategies for preparing jams and jellies ahead of time and stylish packaging techniques for memorable presentations.
Preparing Jams and Jellies in Advance
Preparing jams and jellies ahead not only saves time during busy seasons but also intensifies flavors as preserves rest and mature.
- Choose the Right Time: Make your preserves at peak fruit season when ingredients are freshest and pectin levels are optimal.
- Cool Completely: After cooking and canning, allow jars to cool undisturbed for 12-24 hours at room temperature.
- Store Properly: Label each jar with the date and variety. Store in a cool, dark place away from direct sunlight.
- Allow Flavor Development: For best taste, allow unopened jars to mature for at least 2-4 weeks before opening. This resting period enhances flavor complexity and improves texture.
- Shelf Life Table for Homemade Jams and Jellies
| Storage Condition | Estimated Shelf Life | Notes |
|---|---|---|
| Pantry (unopened) | 12 to 18 months | Store away from heat and light |
| Refrigerator (opened) | 1 month | Ensure lids are tightly sealed |
| Freezer | 6 months | Use freezer-safe containers |
- Batch Preparation: Double or triple recipes using the Ball Jam and Jelly Maker to build a variety of flavors ready for gifting or personal enjoyment.
- Pre-portioning: Small jars work well for individual or sampler gifts and allow easy sharing.
Creative Packaging and Presentation Ideas
Packaging homemade jams and jellies beautifully elevates the gifting experience and showcases our craftsmanship.
- Decorative Lids and Ribbons: Use fabric squares, colorful paper, or burlap tied with twine or satin ribbon. Attach custom labels for a personal touch.
- Personalized Tags: Write flavor names and dates on chalkboard tags or printed labels. Include recipe cards or serving suggestions.
- Gift Baskets: Arrange jars with fresh fruit, artisan bread, or tea in rustic baskets. Wrap in cellophane with a bow for an elegant presentation.
- Reusable Containers: Present preserves in decorative jars or tins that recipients can reuse.
- Creative Labeling Ideas
| Label Type | Materials | Presentation Tip |
|---|---|---|
| Chalkboard Tags | Chalkboard paper, twine | Removable and customizable |
| Printed Stickers | Waterproof label paper | Professional look and durability |
| Handwritten Notes | Kraft paper, calligraphy | Adds a personal, heartfelt touch |
“A well-packaged jar of homemade jam is a gift that speaks volumes about care and creativity.” Whether gifting for holidays, housewarmings, or simple acts of kindness, thoughtful presentation makes all the difference in turning preserves into cherished keepsakes.
Conclusion
Making jams and jellies at home has never been more accessible or enjoyable thanks to the Ball Jam and Jelly Maker Recipe Book. With the right tools and techniques, we can turn fresh, seasonal fruit into delicious preserves that brighten any meal or gift.
By embracing this craft, we not only create flavorful spreads but also connect with a timeless tradition of homemade goodness. Let’s keep experimenting, savoring, and sharing the vibrant tastes of our own kitchen creations all year long.
Frequently Asked Questions
What makes homemade jams and jellies better than store-bought ones?
Homemade jams offer fresher flavors, customizable ingredients, and no preservatives. They retain the natural taste of seasonal fruits and allow for creative combinations not found in commercial products.
What is the Ball Jam and Jelly Maker Recipe Book?
It’s a collection of reliable, easy-to-follow recipes for making jams and jellies at home, suitable for beginners and experienced canners seeking diverse and flavorful preserves.
What are the essential tools for making jams and jellies?
Key tools include the Ball Jam and Jelly Maker, large pots, glass canning jars, jar lifters, funnels, ladles, rubber spatulas, clean cloths, timers, and thermometers for safety and precision.
What basic ingredients do I need for homemade jams and jellies?
Fresh fruit, sugar, pectin, lemon juice, and water are the basics. Specialty ingredients like honey, natural fruit juices, and spices can also enhance flavor and texture.
How do I prepare jars for canning jams?
Jars must be thoroughly cleaned and sterilized by boiling or using a dishwasher cycle to prevent contamination and extend the shelf life of your preserves.
What are the key steps in making jam or jelly?
Prepare and measure fruit properly, cook with sugar and pectin to a rolling boil, and test for gel formation using a thermometer or the wrinkle test for ideal texture.
How do I fix jams that are too runny or stiff?
Runny jam often needs more cooking or pectin, while stiff jam can be softened by reheating with a bit of water or fruit juice. Consistent temperature and timing help avoid these issues.
What is the shelf life of homemade jams and jellies?
Properly canned and sealed jars last about one year stored in a cool, dark place. Refrigerate after opening and use within a few weeks for best quality.
Can I make jams and jellies ahead of time?
Yes, making preserves ahead allows flavors to develop. Store them properly, label jars with dates, and keep in a cool environment to maintain freshness.
How can I gift homemade jams creatively?
Use decorative jars, personalized labels, fabric covers, and gift bags. Thoughtful presentation enhances the homemade feel and makes the gift special.