
Bacon wrapped backstrap is a game-changer for anyone who loves tender, flavorful meat with a crispy twist. This recipe combines the rich, juicy backstrap with smoky bacon that locks in moisture and adds an irresistible crunch. Whether you’re cooking venison, elk, or beef backstrap, this method elevates the natural flavors and makes every bite unforgettable.
We love how simple yet impressive this dish is to prepare. It’s perfect for weekend grilling, special occasions, or whenever you want to treat yourself to something deliciously satisfying. Plus, the bacon’s smoky goodness pairs beautifully with herbs and spices, making it a versatile recipe you can easily customize to your taste. Let’s dive into how to make this mouthwatering bacon wrapped backstrap that’s sure to become a favorite in your recipe collection.
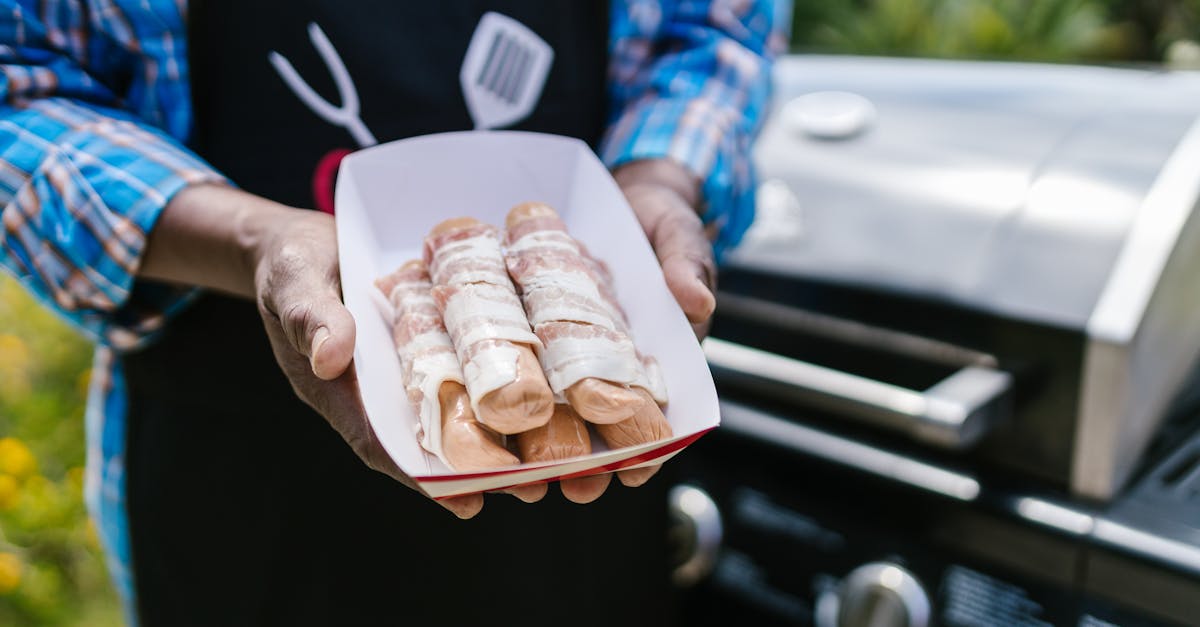
Ingredients
To craft the perfect Bacon Wrapped Backstrap, we gather high-quality ingredients that bring out robust flavors and tender textures. Each element plays a crucial role in achieving that delicious balance of smoky, juicy, and savory notes.
Bacon
For the rich, smoky crust that wraps our backstrap, choose:
- 12 slices of thick-cut bacon
Thick-cut ensures it crisps nicely without burning, locking in moisture around the meat. - Optional: Maple smoked bacon for an extra hint of sweetness and smokiness.
Backstrap (Venison or Beef)
The centerpiece of our dish is the backstrap, the tender loin that shines when paired with bacon.
| Ingredient | Quantity | Note |
|---|---|---|
| Backstrap Venison or Beef | 2 pounds (approximately 900g) | Trimmed of silver skin for tenderness. Cut into 1.5-inch thick medallions. |
Venison backstrap delivers a deep, gamey flavor while beef backstrap gives a milder, familiar taste. Both work wonderfully wrapped in bacon.
Seasonings and Marinade
To enhance the natural flavors and complement the bacon’s smokiness, our seasoning blend and marinade consist of:
- 2 tablespoons olive oil – to keep the meat moist and facilitate spice adhesion.
- 1 teaspoon garlic powder – for savory depth.
- 1 teaspoon smoked paprika – adds a subtle smoky warmth.
- 1 teaspoon freshly ground black pepper – sharp and aromatic.
- 1 teaspoon kosher salt – perfectly seasons without overpowering.
- 1 teaspoon fresh rosemary, finely chopped – herbaceous note that pairs well with both meat and bacon.
- Optional: ½ teaspoon cayenne pepper – for a spicy kick.
We mix these seasonings with olive oil to create a marinade that we apply liberally to every backstrap medallion before wrapping with bacon. This layer locks in flavor and tenderizes the meat.
By using these carefully selected ingredients, our bacon wrapped backstrap will deliver an unforgettable combination of tenderness, smokiness, and rich seasoning.
Equipment and Tools
To prepare our Bacon Wrapped Backstrap Recipe, having the right equipment ensures perfect cooking and presentation. Let’s review the essential and optional tools we will need for flawless results.
Required Kitchen Tools
We rely on these fundamental tools to prep and cook the bacon-wrapped backstrap efficiently:
- Sharp Chef’s Knife – For trimming the backstrap and slicing it into medallions with precision.
- Cutting Board – A sturdy surface where we can safely cut and season the meat.
- Mixing Bowl – To combine the marinade ingredients and coat the backstrap evenly.
- Tongs – For turning the bacon-wrapped medallions without piercing the meat, preserving juices.
- Toothpicks or Kitchen Twine – To secure the bacon around the backstrap during cooking.
- Cast Iron Skillet or Oven-Safe Pan – Ideal for searing the meat to a crispy bacon finish.
- Meat Thermometer – To monitor internal temperature, ensuring the backstrap is cooked perfectly.
| Tool | Purpose |
|---|---|
| Sharp Chef’s Knife | Trim and cut backstrap medallions |
| Cutting Board | Safe surface for prepping |
| Mixing Bowl | Mixing and marinating |
| Tongs | Turning medallions without piercing |
| Toothpicks/Kitchen Twine | Securing bacon in place |
| Cast Iron Skillet/Oven-Safe Pan | Searing and finishing in oven |
| Meat Thermometer | Monitoring precise cooking temperature |
Optional Equipment for Grilling or Smoking
If we want to take our bacon wrapped backstrap to the next level with smoky flavors and outdoor cooking, these optional tools come in handy:
- Charcoal or Gas Grill – Perfect for adding that authentic smoky char and crisping the bacon beautifully.
- Smoker – Infuses the backstrap with rich wood smoke, heightening the savory aroma.
- Grill Basket – Holds smaller bacon-wrapped medallions to prevent them from falling through grates.
- Aluminum Foil – Useful for wrapping and resting meat during grilling to retain juices.
- Heat Resistant Gloves – Protect our hands while handling hot grill equipment.
This equipment choice depends on our preferred cooking style but significantly enhances the flavor profile and texture of our signature dish.
Preparation
To create the perfect Bacon Wrapped Backstrap, careful preparation is key. We’ll guide you step-by-step to ensure every element locks in flavor and tenderness.
Preparing the Backstrap
First, trim the backstrap of any excess silver skin and fat. This allows for even cooking and enhances tenderness.
- Use a sharp chef’s knife to remove the thin silvery membrane.
- Cut the backstrap into 1.5 to 2-inch medallions, uniform for consistent cooking.
- Pat each medallion dry with paper towels to ensure the seasoning adheres well.
| Step | Action | Purpose |
|---|---|---|
| Trim silver skin | Remove membrane and excess fat | Tenderness, avoid chewy texture |
| Cut into medallions | 1.5 – 2 inches thick | Even cooking |
| Pat dry | Use paper towels | Better seasoning adhesion |
Seasoning the Meat
Our seasoning blend brings out the full depth of flavor in the backstrap before wrapping it in bacon.
Ingredients for seasoning blend:
- 2 tbsp olive oil
- 1 tsp garlic powder
- 1 tsp smoked paprika
- ½ tsp black pepper
- 1 tsp kosher salt
- 1 tsp fresh rosemary, finely chopped
- Optional: ¼ tsp cayenne pepper for heat
Steps:
- Combine all ingredients in a mixing bowl.
- Lightly brush or rub the seasoning mixture onto each medallion, coating all sides.
- Let the meat rest for 10-15 minutes at room temperature to absorb the flavors.
“Seasoning is the foundation of flavor—don’t rush this step.”
Wrapping the Backstrap with Bacon
Wrapping the medallions with bacon not only seals in moisture but adds a delicious smoky crunch.
- Preheat your bacon: For the crispiest wrap, partially cook bacon slices in a pan for 2-3 minutes until they start to render fat but remain pliable.
- Wrap each medallion with one slice of bacon. Overlap the ends just enough to cover the meat.
- Secure the bacon with toothpicks or kitchen twine, ensuring it stays tight during cooking.
- If needed, trim any excess bacon length for a neat wrap.
| Task | Detail | Tip |
|---|---|---|
| Partially cook bacon | 2-3 minutes in pan, keep pliable | Avoid fully cooking beforehand |
| Wrap medallions | One slice per medallion, overlap ends | Keep bacon snug around meat |
| Secure bacon | Toothpicks or kitchen twine | Prevents bacon from unraveling |
By following these preparation steps, our bacon wrapped backstrap will deliver a juicy, flavorful, and perfectly textured final dish every time.
Cooking Instructions
Follow these precise cooking methods to achieve the perfect Bacon Wrapped Backstrap with a crispy exterior and tender, juicy interior. Each technique highlights unique flavor characteristics so we can tailor our approach to our preferred cooking style.
Grilling Method
- Preheat the grill to medium-high heat (approximately 400°F).
- Arrange the bacon-wrapped backstrap medallions on the grill grates.
- Grill each side for 3 to 4 minutes, turning carefully with tongs to avoid tearing the bacon.
- Use a meat thermometer to check internal temperature, aiming for 130°F for medium-rare or 140°F for medium.
- Remove from grill and let rest covered loosely with foil for 5 minutes before serving.
“Grilling adds a smoky char that perfectly complements the smoky bacon flavor”.
Oven-Baking Method
- Preheat the oven to 400°F.
- Place the bacon-wrapped medallions on a wire rack set over a rimmed baking sheet to allow air circulation.
- Bake for 18 to 22 minutes, turning medallions halfway through the cooking time to ensure even rendering of fat and crispiness.
- Verify doneness with a meat thermometer at an internal temperature of 130°F to 140°F, depending on desired doneness.
- Remove from oven and rest for 5 minutes before serving to redistribute juices.
| Step | Oven Temperature | Cooking Time | Internal Temperature (°F) |
|---|---|---|---|
| Preheat oven | 400°F | – | – |
| Bake, turn halfway | 400°F | 18-22 min | – |
| Check doneness | – | – | 130°F – 140°F |
| Rest after cooking | – | 5 min | – |
Pan-Searing Method
- Heat a heavy skillet or cast iron pan over medium-high heat.
- Add a small amount of olive oil to lightly coat the pan.
- Place the bacon-wrapped backstrap medallions in the hot skillet.
- Sear each side for 3 to 4 minutes until bacon is crisp and backstrap achieves a caramelized crust.
- Lower heat to medium, cover skillet loosely with foil, and cook an additional 4-5 minutes to ensure the meat cooks through.
- Confirm internal temperature is 130°F to 140°F using a meat thermometer.
- Transfer the medallions to a plate and rest covered for 5 minutes.
“Pan-searing is ideal for developing rich golden crust and concentrated flavors from the bacon fat”.
All methods benefit significantly from resting the meat before slicing to lock in moisture and enhance tenderness. Use a sharp knife for clean medallion cuts and enjoy the irresistible combination of smoky bacon and succulent backstrap every time.
Cooking Tips
Mastering the bacon wrapped backstrap requires attention to detail in each step. These tips ensure we achieve perfectly cooked, flavorful, and juicy results every time.
How to Ensure Bacon is Crispy
Achieving the ideal crispy bacon is key to the signature texture contrast in this dish. Here’s how to get it right:
- Use thick-cut bacon — it crisps nicely while staying tender inside.
- Partially cook bacon before wrapping:
- Lay bacon strips on a baking sheet.
- Bake at 375°F for 5-7 minutes until just starting to brown but still pliable.
- Ensure bacon strips are wrapped tightly around the backstrap medallions.
- Use toothpicks or kitchen twine to secure the bacon, preventing it from unwinding during cooking.
- When pan-searing or grilling, cook over medium heat to allow fat to render slowly.
- Avoid overcrowding the pan or grill to promote even crisping.
“Partially cooking the bacon first is the secret to crispiness without overcooking the backstrap.”
Checking for Doneness
Cooking the backstrap to the perfect doneness ensures optimal tenderness and juiciness. We recommend aiming for medium-rare to medium for best flavor.
| Doneness Level | Internal Temperature | Meat Characteristics |
|---|---|---|
| Rare | 120°F – 125°F | Very soft, cool red center |
| Medium-Rare | 130°F – 135°F | Warm pink center, tender |
| Medium | 140°F – 145°F | Slightly firm, light pink center |
| Medium-Well | 150°F – 155°F | Firm, mostly brown center |
Use a meat thermometer inserted into the backstrap medallion’s thickest part after removing toothpicks. Avoid relying only on time as thickness may vary.
- For precise doneness, remove from heat at 5°F below target temperature because it will continue cooking while resting.
- Remember that the bacon wrapping may retain some heat, so careful monitoring prevents overcooking.
Resting the Meat
Resting is crucial for locking in the juices and ensuring tenderness after cooking.
- Transfer cooked medallions to a warm plate or cutting board.
- Tent loosely with foil to keep warm.
- Rest for 5 to 10 minutes without covering tightly to allow juices to redistribute.
- Avoid slicing immediately as juices will run out, causing dryness.
“Resting lets the savory bacon flavor meld with the tender backstrap juices, creating a melt-in-your-mouth experience.”
Following these tips will help us consistently serve a bacon wrapped backstrap that is crispy on the outside and perfectly cooked and juicy inside.
Serving Suggestions
To fully enjoy our Bacon Wrapped Backstrap recipe, pairing it with complementary sides and presenting it beautifully elevates the dining experience. Let’s explore perfect accompaniments and presentation tips that highlight this savory dish.
Side Dishes That Pair Well
The rich, smoky, and juicy flavors of the bacon wrapped backstrap call for sides that balance and enhance its profile. Here are our top recommended pairings:
- Garlic Mashed Potatoes: Creamy texture and subtle garlic notes complement the savory meat.
- Roasted Vegetables: Carrots, Brussels sprouts, and asparagus add earthy sweetness and crunch.
- Grilled Corn Salad: A fresh, tangy salad with lime, cilantro, and cherry tomatoes cuts through the richness.
- Wild Rice Pilaf: Nutty and aromatic, providing a delicious contrast in texture.
- Sautéed Mushrooms: Earthy mushrooms cooked with thyme bring out the meat’s depth.
| Side Dish | Flavor Profile | Texture | Why It Works with Bacon Wrapped Backstrap |
|---|---|---|---|
| Garlic Mashed Potatoes | Creamy, garlicky | Smooth, velvety | Enhances savory notes, balances smoky bacon |
| Roasted Vegetables | Sweet, earthy | Crispy, tender | Adds vibrant freshness and texture contrast |
| Grilled Corn Salad | Tangy, zesty | Crunchy, juicy | Cuts through richness with a bright, fresh finish |
| Wild Rice Pilaf | Nutty, aromatic | Firm, chewy | Provides hearty, textured complement |
| Sautéed Mushrooms | Earthy, herby | Soft, juicy | Deepens umami flavor profile |
Presentation Tips
Serving the Bacon Wrapped Backstrap to impress means showcasing its crispy bacon exterior and tender interior artfully. Consider these tips:
- Slice Medallions Thinly: Cleanly cut into ½-inch slices to display the juicy, pink center contrasted by golden bacon.
- Arrange in a Fan Shape: Layer slices slightly overlapping on a warm plate to create an inviting visual.
- Garnish with Fresh Herbs: Sprinkle finely chopped rosemary or parsley to echo the seasoning used and add fresh color.
- Serve with Drizzle of Pan Sauce: A light reduction of balsamic vinegar or red wine around the plate enhances richness and moisture.
- Use Rustic Wooden Boards: For casual settings, present the meat on a wooden carving board with toothpicks for easy grabbing.
“The way we serve our bacon wrapped backstrap reflects its careful preparation — vibrant, tender, and utterly irresistible.”
Incorporating these side dishes and presentation ideas ensures our Bacon Wrapped Backstrap Recipe delights the palate and pleases the eyes every time.
Make-Ahead and Storage
Preparing our bacon wrapped backstrap in advance and knowing how to store leftovers properly helps maintain its signature juiciness and crispy texture. Here’s how we can manage time efficiently without sacrificing flavor.
Preparing in Advance
We can assemble the bacon wrapped backstrap medallions up to 24 hours before cooking to deepen flavors and simplify last-minute preparation. Follow these steps:
- Trim and cut the backstrap into medallions as usual.
- Season the medallions with our custom blend of olive oil, garlic powder, smoked paprika, black pepper, kosher salt, fresh rosemary, and optional cayenne.
- Wrap each medallion with partially cooked thick-cut bacon, securing tightly with toothpicks or kitchen twine.
- Place the wrapped medallions on a baking sheet lined with parchment paper.
- Cover tightly with plastic wrap or transfer to an airtight container.
- Refrigerate immediately to allow flavors to marinate and bacon to crisp slightly before final cooking.
This step not only improves flavor infusion but also reduces prep time on the day of serving.
| Preparation Step | Time Frame | Notes |
|---|---|---|
| Trimming and seasoning | 10-15 minutes | Ensure medallions are uniform thickness |
| Wrapping with bacon | 5-10 minutes | Use pre-cooked bacon for crispiness |
| Refrigeration (marination) | Up to 24 hours | Keeps bacon and meat flavorful |
“Make-ahead preparation lets us enjoy a stress-free cooking experience while locking in that unforgettable taste.”
Storing Leftovers
Proper storage of any leftover bacon wrapped backstrap ensures we enjoy every bite without losing its quality. Here’s how to store and reheat:
- Cooling: Allow cooked medallions to cool to room temperature for no more than 30 minutes.
- Packaging: Place in an airtight container or wrap tightly in aluminum foil.
- Refrigeration: Store in the refrigerator for up to 3 days.
- Freezing: For longer storage, freeze wrapped medallions in a freezer-safe container or heavy-duty foil for up to 1 month.
For reheating, we recommend:
- Thaw frozen medallions overnight in the refrigerator.
- Warm in a 350°F oven on a wire rack over a baking sheet for 10-15 minutes to re-crisp bacon without drying out the meat.
- Alternatively, gently pan-sear leftovers on medium heat for a few minutes per side until heated through, preserving juiciness.
| Storage Method | Duration | Reheating Tips |
|---|---|---|
| Refrigeration | Up to 3 days | Oven at 350°F for 10-15 minutes or pan-sear |
| Freezing | Up to 1 month | Thaw overnight, then reheat as above |
Tip: Avoid microwaving leftovers as it can make the bacon soggy and the backstrap dry.
Conclusion
Mastering the bacon-wrapped backstrap opens up a world of rich flavors and satisfying textures that impress every time. With a few simple steps and quality ingredients, we can create a dish that’s perfect for any occasion, whether it’s a casual dinner or a special celebration.
By paying attention to preparation, seasoning, and cooking methods, we ensure each bite delivers that ideal balance of smoky, juicy, and crispy goodness. This recipe not only highlights the versatility of backstrap but also invites us to experiment with flavors and sides, making every meal memorable.
Let’s keep exploring and enjoying this delicious combination that brings out the best in both bacon and tender backstrap.
Frequently Asked Questions
What type of backstrap is best for bacon-wrapped backstrap?
Venison, elk, or beef backstrap all work well. Choose tender cuts, trimmed of excess silver skin and fat, to ensure a juicy and flavorful medallion.
How do you prepare bacon-wrapped backstrap for cooking?
Trim and cut the backstrap into medallions, pat dry, season with a marinade, partially precook thick-cut bacon, then wrap and secure the bacon tightly around each medallion before cooking.
What is the ideal internal temperature for cooking bacon-wrapped backstrap?
Cook to 130°F for medium-rare or 140°F for medium doneness. Use a meat thermometer to ensure precise cooking for juicy and tender results.
What cooking methods can I use for bacon-wrapped backstrap?
You can grill, oven-bake, or pan-sear the medallions. Each method works well with specific temperature and timing guidelines to achieve crispy bacon and tender meat.
How long should I rest bacon-wrapped backstrap after cooking?
Rest the cooked medallions for about 5-10 minutes. This allows juices to redistribute, locking in moisture and enhancing tenderness.
Can I prepare bacon-wrapped backstrap ahead of time?
Yes, you can assemble the wrapped medallions up to 24 hours before cooking. Refrigerate them to deepen flavors and simplify meal prep.
How should I store leftovers of bacon-wrapped backstrap?
Store leftovers in the refrigerator for up to three days or freeze for up to one month. Reheat gently to maintain crispiness and juiciness.
What sides pair well with bacon-wrapped backstrap?
Serve with garlic mashed potatoes, roasted vegetables, grilled corn salad, wild rice pilaf, or sautéed mushrooms for complementary flavors and textures.
Is it necessary to partially cook the bacon before wrapping?
Partially cooking thick-cut bacon helps ensure it crisps evenly without overcooking the meat, resulting in a perfect balance of textures.
What seasonings enhance the flavor of bacon-wrapped backstrap?
A blend of olive oil, garlic powder, smoked paprika, black pepper, kosher salt, fresh rosemary, and optional cayenne pepper makes the dish flavorful and aromatic.