
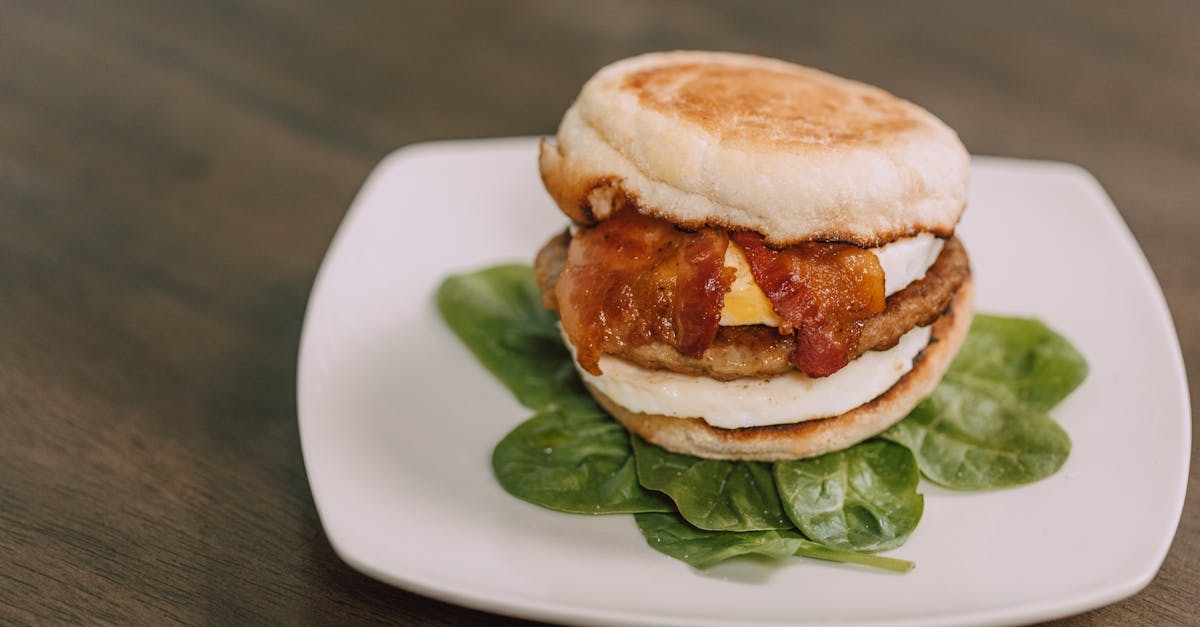
Bacon buns bring together the irresistible flavors of crispy bacon and soft, fluffy bread in one delicious bite. This recipe is perfect for breakfast, brunch, or a savory snack that satisfies any craving. We love how the smoky, salty bacon complements the tender dough, creating a comforting treat that’s surprisingly easy to make at home.
Ingredients
To make our delicious Bacon Bun, we need to gather fresh and flavorful ingredients that bring together the perfect balance of soft bread and crispy bacon. Here’s everything we’ll use for the dough, the savory bacon filling, and the shiny glaze.
For the Dough
- 3 ½ cups all-purpose flour (plus extra for dusting)
- 2 ¼ teaspoons active dry yeast (one packet)
- 1 cup warm milk (about 110°F, to activate the yeast)
- ¼ cup granulated sugar
- ¼ cup unsalted butter, melted
- 1 teaspoon salt
- 1 large egg
For the Bacon Filling
- 8 strips bacon, cooked until crispy and finely chopped
- ½ cup shredded cheddar cheese (adds rich flavor)
- 2 tablespoons cream cheese, softened
- 1 teaspoon black pepper (freshly ground for depth)
- 1 tablespoon chopped fresh chives (optional, for a mild onion flavor)
For the Glaze
- 1 large egg, beaten (for a shiny golden finish)
- 1 tablespoon milk (to dilute the egg for even brushing)
| Ingredient Type | Key Ingredients |
|---|---|
| Dough | Flour, active dry yeast, warm milk, sugar, butter, salt, egg |
| Bacon Filling | Bacon, cheddar cheese, cream cheese, black pepper, chives |
| Glaze | Egg, milk |
These carefully selected ingredients ensure our Bacon Bun delivers a perfect texture and irresistible taste from start to finish.
Equipment Needed
To create our Bacon Bun Recipe with precision and ease, having the right equipment is essential. This ensures the dough develops perfectly and the bacon filling cooks evenly, creating that irresistible savory bite we crave.
Essential Tools for Mixing and Kneading
- Mixing Bowls – Use medium and large sizes to combine wet ingredients and dry flour components separately.
- Measuring Cups and Spoons – For accurate measurement of flour, sugar, yeast, and liquids to maintain dough consistency.
- Stand Mixer with Dough Hook (Optional) – Speeds up kneading and ensures evenly mixed dough, but kneading by hand works fine too.
- Wooden Spoon or Silicone Spatula – For initial stirring before kneading.
Baking and Preparation Tools
- Baking Sheet or Tray – A flat surface to bake our buns evenly.
- Parchment Paper or Silicone Baking Mat – Prevents buns from sticking and promotes even browning.
- Rolling Pin – For gently rolling out the dough before adding the bacon filling.
- Pastry Brush – To apply the beaten egg glaze that will give our buns a shiny golden finish.
- Cooling Rack – Allows buns to cool uniformly without becoming soggy.
Additional Useful Items
- Sharp Knife or Dough Cutter – To portion dough and create neat buns.
- Skillet or Frying Pan – For pre-cooking bacon until crispy before adding it to our buns.
- Kitchen Timer – To keep track of rising and baking times precisely.
| Equipment | Purpose | Optional or Essential |
|---|---|---|
| Mixing Bowls | Combining ingredients | Essential |
| Measuring Cups and Spoons | Accurate ingredient measurement | Essential |
| Stand Mixer with Dough Hook | Efficient mixing and kneading | Optional |
| Wooden Spoon / Silicone Spatula | Initial stirring | Essential |
| Baking Sheet / Tray | Baking the buns evenly | Essential |
| Parchment Paper / Sil Mat | Non-stick baking surface | Essential |
| Rolling Pin | Rolling dough | Essential |
| Pastry Brush | Applying egg glaze | Essential |
| Cooling Rack | Cooling baked buns | Essential |
| Sharp Knife / Dough Cutter | Portioning dough | Essential |
| Skillet / Frying Pan | Cooking bacon | Essential |
| Kitchen Timer | Tracking time | Essential |
Instructions
Follow these precise steps to create the perfect Bacon Bun that bursts with flavor and texture. Let’s get started on making this irresistible treat.
Preparing the Dough
- In a large mixing bowl, combine 2 ¼ teaspoons of active dry yeast with 1 cup of warm milk (110°F). Stir gently and let the mixture sit for 5 minutes until it becomes foamy.
- Add 3 cups of all-purpose flour, 2 tablespoons of sugar, and 1 teaspoon of salt to the yeast mixture.
- Cut in 4 tablespoons of cold butter until the mixture resembles coarse crumbs.
- Crack in 1 large egg and mix until a shaggy dough forms.
- Knead the dough on a floured surface for 8 to 10 minutes until it becomes smooth and elastic.
- Place the dough in a greased bowl, cover with a clean kitchen towel, and let it rise in a warm place for 1 to 1 ½ hours or until doubled in size.
Preparing the Bacon Filling
- Cook 8 slices of bacon in a skillet over medium heat until crispy. Drain on paper towels.
- Crumble the bacon into medium-sized pieces.
- In a bowl, combine the crumbled bacon with ½ cup of shredded cheddar cheese, ¼ cup of cream cheese, and a pinch of black pepper.
- Optionally mix in 1 tablespoon of chopped fresh chives for a pop of color and freshness.
Assembling the Bacon Buns
- Punch down the risen dough and roll it into a 12-inch square on a lightly floured surface.
- Spread the bacon and cheese filling evenly over the dough, leaving a small border around the edges.
- Roll the dough tightly from one edge to the opposite edge to form a log.
- Cut the log into 12 equal pieces and place each piece cut-side up on a baking sheet lined with parchment paper.
- Cover the buns lightly and let them rise for another 30 minutes.
Baking the Buns
- Preheat the oven to 375°F (190°C).
- In a small bowl, whisk 1 egg with 1 tablespoon of milk to create the glaze.
- Brush the tops of the buns generously with the egg wash.
- Bake for 20 to 25 minutes, or until the buns are golden brown and cooked through.
- Transfer the buns to a cooling rack and cool slightly before serving.
| Step | Temperature/Time | Key Notes |
|---|---|---|
| Dough Rising | Warm place, 1 – 1 ½ hours | Doubles in size |
| Second Rise (buns) | Room temperature, 30 minutes | Covered with a towel |
| Baking | 375°F (190°C), 20 – 25 minutes | Golden brown with shiny glaze |
Make-Ahead Tips
Preparing Bacon Buns in advance can save us time while still delivering maximum flavor and freshness. Here are essential make-ahead tips to ensure our buns taste as delicious as if freshly baked:
Prepare and Refrigerate the Dough
- After kneading the dough until smooth and elastic, instead of allowing only one rise, we can cover the dough tightly with plastic wrap.
- Place the dough in the refrigerator for up to 24 hours. The slow, cold rise will develop deeper flavor and improve texture.
- Before using, remove from the fridge and let it rest at room temperature for 30 to 45 minutes to make it pliable for rolling and filling.
Cook and Store the Bacon Filling
- We can cook and crumble the bacon ahead of time and mix it with the cheeses and seasonings.
- Store the filling in an airtight container in the refrigerator for up to 3 days.
- Bring the filling to room temperature before assembling, or assemble directly with chilled filling for firmer texture.
Assemble and Freeze Before Second Rise
- For longer-term make-ahead plans, we can assemble the buns completely, placing them on a baking sheet lined with parchment paper.
- Freeze the unrisen buns in a single layer for 1 to 2 hours until firm. Then transfer them to a freezer-safe bag or container.
- When ready to bake, thaw buns overnight in the refrigerator, then allow them to rise at room temperature for 45 to 60 minutes before glazing and baking.
Summary Table for Make-Ahead Storage Times
| Item | Storage Method | Storage Duration | Notes |
|---|---|---|---|
| Dough (refrigerated) | Covered container | Up to 24 hours | Rest 30-45 minutes at room temp before use |
| Bacon filling | Airtight container | Up to 3 days | Bring to room temperature before assembly |
| Assembled buns (unrisen) | Frozen | 1-2 months | Thaw overnight in fridge, then rise before baking |
Following these steps lets us enjoy the convenience and flavor of freshly baked bacon buns anytime without sacrificing quality or taste.
Serving Suggestions
Our Bacon Bun Recipe offers a versatile base that pairs exceptionally well with a variety of accompaniments. To enhance the flavor experience and complement the smoky, crispy bacon within these soft, golden buns, consider the following serving ideas.
Perfect Pairings
- Breakfast Spread:
Serve these buns alongside scrambled eggs or an omelet. The creamy texture of eggs balances the savory richness of the bacon buns perfectly.
- Brunch Beverage Options:
Pair with fresh orange juice or a strong black coffee to cut through the saltiness and richness for a well-rounded meal.
- Soups and Salads:
Enjoy the buns with a light green salad tossed in a lemon vinaigrette or a bowl of tomato soup. The buns add a hearty, indulgent side element without overwhelming your meal.
- Sauces and Dips:
Offer a side of creamy ranch dressing, honey mustard, or a spicy aioli to dip your bacon buns for added flavor contrast.
Serving Temperature Tips
- Serve the buns warm to maximize the aroma of the crispy bacon and melted cheese inside.
- Reheat wrapped in foil at 300°F for 10-12 minutes if serving later; this method preserves softness and warmth without drying out.
Serving Size Recommendation
| Occasion | Suggested Number of Buns Per Person |
|---|---|
| Breakfast or Brunch | 2-3 buns |
| Snack or Appetizer | 1-2 buns |
Presentation Ideas
- Garnish with fresh herbs like finely chopped chives or parsley to add a pop of color and freshness.
- Arrange buns on a wooden cutting board with rustic linen napkins for a cozy homemade vibe.
- Stack buns in a basket lined with parchment paper for casual gatherings.
By following these serving suggestions, we ensure that each bite of our bacon buns delights the senses and elevates your meal occasion.
Storage and Reheating
Proper storage and reheating are essential to maintain the fresh taste and perfect texture of our Bacon Buns. Follow these guidelines to enjoy them anytime without losing their signature flavor and softness.
Storing Bacon Buns
- Room Temperature: Store fully baked bacon buns in an airtight container or a resealable plastic bag. Keep them at room temperature for up to 2 days to preserve their softness and avoid drying out.
- Refrigeration: To extend freshness, refrigerate the buns in an airtight container. This method keeps the buns safe for up to 5 days. However, refrigeration can slightly firm the bread, so proper reheating is important.
- Freezing: For long-term storage, freeze the buns after baking or even after assembling but before the final rise. Wrap each bun tightly in plastic wrap, then place them in a freezer-safe bag or container. Frozen buns keep well for up to 3 months.
| Storage Method | Container Type | Storage Duration | Notes |
|---|---|---|---|
| Room Temperature | Airtight container/bag | 2 days | Best for quick consumption |
| Refrigeration | Airtight container | 5 days | May need reheating for softness |
| Freezing | Wrapped + freezer bag | 3 months | Reheat directly from frozen |
Reheating Instructions
To bring back the gooey cheese and crisp bacon texture while softening the bread, follow these reheating tips:
- Oven Reheating:
- Preheat the oven to 350°F (175°C).
- Place buns on a baking sheet. For extra moisture, lightly brush the buns with water or cover loosely with foil.
- Heat for 10–15 minutes until warmed through and the crust is slightly crisp.
- Remove foil in the last 5 minutes to restore the shine on the glaze.
- Microwave Reheating:
- Wrap the bun in a damp paper towel.
- Microwave on medium power for 20–30 seconds.
- Check warmth and repeat in 10-second intervals if needed.
- Note: Microwaving may soften the crust but is faster for convenience.
- From Frozen:
- Thaw the bun at room temperature for 30–60 minutes.
- Reheat using the oven method for the best texture.
- Alternatively, microwave with the damp towel for 40–60 seconds.
“Reheating in the oven preserves the glorious contrast between the crispy bacon and tender dough,” making each bite taste freshly baked again.
By following these storage and reheating tips, we preserve the irresistible smoky aroma and melt-in-your-mouth texture that defines our Bacon Bun Recipe.
Conclusion
Bacon buns bring together the perfect balance of smoky, savory flavors and soft, comforting bread. Making them at home is straightforward and rewarding, whether for a cozy breakfast or a tasty snack. With the right ingredients, tools, and techniques, we can create a delicious treat that satisfies any craving.
By following the tips for storage and reheating, these buns stay fresh and flavorful for days. Serving them warm with complementary sides or dips elevates the experience even more. Let’s enjoy the irresistible taste and texture of homemade bacon buns anytime we want.
Frequently Asked Questions
What ingredients do I need to make bacon buns?
You need all-purpose flour, active dry yeast, warm milk, sugar, butter, salt, egg for the dough. For the filling, use crispy bacon, cheddar cheese, cream cheese, black pepper, and optional chives. A glaze made from beaten egg and milk is used for a shiny finish.
What equipment is essential for making bacon buns?
Basic equipment includes mixing bowls, measuring cups and spoons, a baking sheet, parchment paper or silicone baking mat, rolling pin, pastry brush, cooling rack, and a skillet for cooking bacon. A stand mixer and kitchen timer can be helpful but are optional.
How do I prepare the dough for bacon buns?
Combine yeast, warm milk, flour, sugar, salt, butter, and egg. Knead the mixture until smooth, then allow it to rise until doubled in size before assembling the buns.
Can I make the bacon buns ahead of time?
Yes, you can refrigerate the dough for up to 24 hours, store cooked bacon filling for 3 days, and freeze assembled buns for longer storage without sacrificing quality.
What is the best way to serve bacon buns?
Serve warm with scrambled eggs or omelets for breakfast, fresh orange juice or black coffee for brunch, or alongside light salads and tomato soup for lunch. Dips like ranch or spicy aioli also complement them well.
How should I store leftover bacon buns?
Store at room temperature for up to 2 days, refrigerate for up to 5 days, or freeze for up to 3 months in an airtight container or freezer bag.
What’s the best method to reheat bacon buns?
Reheat in a preheated oven at 350°F for 10–15 minutes or microwave for 20–30 seconds. This helps retain the crispy bacon and gooey cheese texture.
Can I customize the filling in bacon buns?
Yes, you can add ingredients like chives, different cheeses, or spices to suit your taste preferences while keeping the base flavorful and savory.
How long does it take to bake bacon buns?
Bake at 375°F for about 18-20 minutes or until the buns turn golden brown and the glaze is shiny.
Are bacon buns suitable for snacks or meals?
Bacon buns are versatile and can be enjoyed as breakfast, brunch, snacks, or even a light meal depending on how you serve them.