
Apricot syrup is a delightful way to capture the bright, sweet flavors of summer all year round. By canning this syrup, we can preserve the fresh taste of ripe apricots and enjoy it on pancakes, desserts, or even cocktails whenever we want. It’s a simple process that brings the bounty of the season right into our pantry.
Making apricot syrup at home lets us control the sweetness and quality, avoiding the additives found in store-bought versions. Plus, canning ensures a long shelf life so we can savor that rich apricot flavor well beyond harvest time. Whether you’re new to canning or looking to expand your homemade syrup collection, this recipe is a perfect place to start.
Ingredients
To make our Apricot Syrup Recipe perfect for canning and preserving, we carefully select fresh, ripe apricots and complementary ingredients that enhance flavor and ensure longevity. Below is a detailed list of what we’ll need, including preparation notes for each:
| Ingredient | Quantity | Preparation Details |
|---|---|---|
| Fresh Apricots | 4 cups (about 1.5 lbs) | Washed, pitted, and chopped |
| Granulated Sugar | 3 cups | Use pure white sugar for best results |
| Water | 2 cups | Filtered or spring water |
| Fresh Lemon Juice | 2 tablespoons | Helps balance sweetness and preserve |
| Pure Vanilla Extract (optional) | 1 teaspoon | Adds subtle warmth and depth |
Note: Selecting fully ripe apricots ensures a rich, natural sweetness and vibrant color in our syrup. Using filtered water prevents any off-flavors during canning.
Next, we’ll walk through transforming these ingredients into a luscious syrup ready to be canned for long-lasting enjoyment.
Equipment Needed for Canning
To successfully preserve our apricot syrup and ensure a safe, long-lasting result, we need to gather the right equipment. Using proper tools not only simplifies the canning process but also protects the quality and flavor of our syrup.
Essential Tools for Safe Canning
- Canning jars: Use sterilized glass jars designed for canning, preferably Mason jars with two-piece lids (lid and screw band). These ensure a proper seal.
- Lids and bands: Always use new flat lids for airtight seals. Reuse metal screw bands only if they are free from rust or bends.
- Large pot or canner: A water bath canner or a large deep pot with a rack is necessary for processing jars in boiling water.
- Jar lifter: This specialized tool allows us to safely transfer hot jars in and out of the boiling water without burning our hands or risking spills.
- Funnel: A wide-mouth funnel helps pour syrup neatly into jars, reducing mess and preventing burns from hot syrup.
- Ladle: A heatproof ladle is ideal for transferring the warm syrup into jars evenly.
- Bubble remover and headspace tool: This combined tool removes air bubbles trapped in the syrup and measures the correct headspace (usually 1/4 to 1/2 inch) to ensure proper sealing.
- Clean towels or cloths: These are essential to wipe the jar rims clean before sealing to avoid contaminants under the lids.
- Timer or clock: Accurate timing during the water bath process is critical to ensure food safety.
Summary of Equipment and Functions
| Equipment | Purpose |
|---|---|
| Canning jars | Store syrup and create airtight seal |
| Lids and bands | Ensure proper sealing |
| Water bath canner | Process jars in boiling water for safety |
| Jar lifter | Safely handle hot jars |
| Funnel | Pour syrup cleanly into jars |
| Ladle | Transfer syrup with control |
| Bubble remover/headspace tool | Remove air pockets, set jar headspace |
| Clean towels | Wipe jar rims for contaminant-free seal |
| Timer | Track processing time accurately |
By assembling this canning equipment kit, we set ourselves up for a smooth, efficient apricot syrup canning session. Next, we’ll walk through the exact canning steps to seal in summer’s flavors perfectly.
Preparation
We begin by preparing every ingredient and tool to ensure our Apricot Syrup Recipe Canning process is smooth and safe. Careful preparation sets the foundation for capturing the vibrant flavors of apricots in our syrup.
Selecting and Preparing Apricots
Choosing the right apricots is crucial to a successful syrup.
- Select ripe apricots with a bright orange hue and slight softness to the touch. Avoid bruised or underripe fruit to ensure maximum sweetness and vibrant color.
- Wash apricots thoroughly under cold running water to remove dirt and residues.
- Pit the apricots by cutting them in half and removing the stones carefully.
- Chop apricots into quarters to extract flavor efficiently during cooking.
| Step | Detail |
|---|---|
| Fruit selection | Ripe, bright orange, slightly soft apricots |
| Washing | Cold running water to clean |
| Pitting | Halve apricots and remove stones |
| Cutting | Quarter them for flavor extraction |
Sterilizing Jars and Lids
Sterilizing jars and lids is essential for safe canning apricot syrup to prevent contamination and extend shelf life. We follow these steps:
- Wash jars and lids in warm, soapy water, then rinse thoroughly.
- Place jars in a water bath canner filled with boiling water. Boil for at least 10 minutes to sterilize.
- Simultaneously heat lids in simmering (not boiling) water for 5 minutes to soften sealing compounds.
- Remove jars and lids with sterilized jar lifters and place them on a clean, dry towel. Avoid touching the inside to maintain sterility.
“Proper sterilization is the cornerstone of reliable canning, ensuring our apricot syrup stays fresh and flavorful for months.”
Here is a quick reference for sterilization durations:
| Item | Sterilization Method | Time Required |
|---|---|---|
| Jars | Boiling water bath | 10 minutes |
| Lids | Simmering water (below boil) | 5 minutes |
By carefully selecting and preparing our apricots and sterilizing our jars and lids, we lay the groundwork for a safe and delicious Apricot Syrup Recipe Canning experience.
Apricot Syrup Recipe
This apricot syrup recipe captures the vibrant sweetness of fresh apricots, perfect for canning and enjoying throughout the year. Let’s explore the detailed steps to create a rich, flavorful syrup that balances natural fruit sweetness with the right consistency.
Making Apricot Syrup
- Combine Ingredients:
In a large saucepan, add 4 cups of chopped ripe apricots (pitted and quartered), 2 cups granulated sugar, 2 cups filtered water, and 2 tablespoons fresh lemon juice. If desired, add 1 teaspoon pure vanilla extract for subtle depth.
- Heat and Simmer:
Place the saucepan over medium heat. Stir constantly until the sugar dissolves completely and the mixture reaches a gentle boil.
- Cook to Extract Flavor:
Reduce heat to low and simmer uncovered for 20 to 25 minutes. Stir occasionally to prevent sticking. The apricots will soften, releasing vibrant color and rich flavor into the syrup.
- Mash Apricots:
Using a potato masher or wooden spoon, gently mash the fruit to release juices and intensify the taste.
- Strain the Syrup:
Pour the mixture through a fine mesh sieve or cheesecloth into a heatproof bowl. Use the back of a spoon to press pulp and extract maximum liquid. Discard solids or reserve for baking.
- Reheat Strained Syrup:
Return syrup to saucepan and bring to a boil for 1-2 minutes to sterilize before canning.
Adjusting Sweetness and Consistency
Sweetness can be modified easily depending on taste preferences:
| Sugar Amount | Approximate Sweetness Level |
|---|---|
| 1.5 cups | Mildly sweet, fruit-forward |
| 2 cups (standard) | Balanced sweetness |
| 2.5 cups | Very sweet, syrupy richness |
Consistency adjustments require careful simmering:
| Simmering Time | Syrup Texture |
|---|---|
| 15 minutes | Thin syrup, pourable |
| 20-25 minutes (ideal) | Medium thickness, syrupy |
| 30+ minutes | Thick syrup, closer to jam |
“We recommend starting with 2 cups sugar and 20-25 minutes simmering to achieve a perfect balance of sweetness and syrupy texture that works well for canning.”
To thin the syrup after cooking, stir in small amounts of warm filtered water. To thicken, simmer longer but monitor closely to avoid burning.
By following these steps carefully, our apricot syrup will have a vibrant color, balanced sweetness, and smooth consistency perfect for canning to preserve the essence of summer.
Canning Process
Canning our apricot syrup properly is essential to preserve its vibrant flavor and ensure food safety. Let’s walk through the critical steps to achieve a beautifully canned product that lasts.
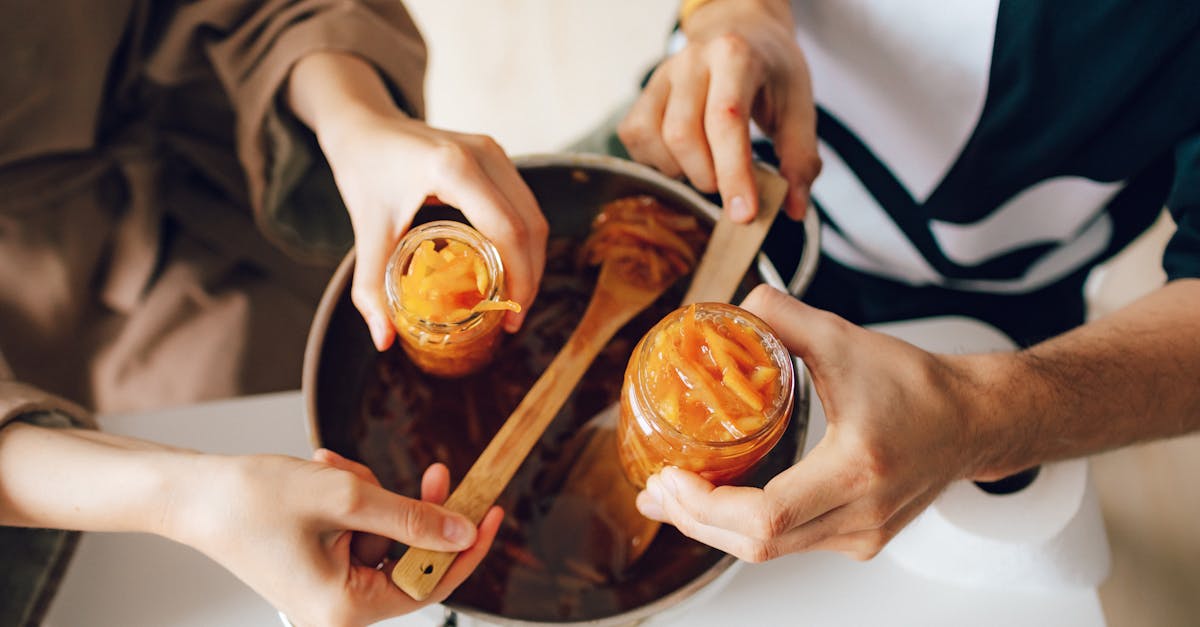
Filling Jars with Syrup
We start by using a sterilized funnel to fill each canning jar with the hot apricot syrup. Fill the jars carefully, leaving a 1/4 inch headspace at the top to allow for expansion during processing. Headspace is crucial to prevent overflow and ensure a proper vacuum seal. Avoid dripping syrup on the jar rims to achieve a clean seal.
| Step | Details |
|---|---|
| Jar Filling | Use hot syrup, funnel for ease |
| Headspace | Leave 1/4 inch at the top |
| Clean Jar Rims | Wipe with a clean, damp cloth |
Removing Air Bubbles
Trapped air bubbles inside jars can compromise shelf life and sealing. Immediately after filling, use a non-metallic bubble remover or a thin spatula to gently slide around the jar’s interior edge. This action releases bubbles that may cling to the jar sides or syrup surface.
“Removing air bubbles ensures we get airtight seals and prevents spoilage.”
After bubble removal, recheck the headspace and top off with hot syrup if necessary to maintain 1/4 inch clearance.
Sealing and Processing Jars
Next, we wipe the jar rims with a clean cloth dampened with boiling water to remove any syrup residue. This step is vital for ensuring the lids seal properly.
We then place the new canning lids on each jar, securing them with screw bands fingertip-tight. Avoid overtightening which can interfere with pressure release during processing.
Finally, we immerse the jars in a boiling water bath canner, ensuring the water covers them by at least two inches. Process the jars for 15 minutes at a rolling boil to kill bacteria and create a vacuum seal.
| Canning Step | Time (minutes) | Notes |
|---|---|---|
| Water Bath Process | 15 | Water covers jars by 2 inches minimum |
After processing, carefully remove jars using jar lifters and set them on a towel-lined surface. Leave undisturbed for 12-24 hours while seals form. Check for sealed lids by pressing the center—if it doesn’t flex up and down, the seal is sound. Store sealed jars in a cool, dark place to maintain quality.
By following each step meticulously, our apricot syrup will retain its sweet, tangy essence and enjoy a safe, extended shelf life.
Cooling and Storing
Once we have completed the water bath canning process for our apricot syrup, proper cooling and storing are essential to maintain quality and extend shelf life. Follow these steps carefully to ensure our syrup remains fresh and safe for months.
Cooling Steps
- Remove the jars carefully from the boiling water bath using the jar lifter. Place them upright on a clean towel or cooling rack.
- Leave sufficient space between jars to allow air circulation for even cooling.
- Let the jars cool undisturbed at room temperature for about 12 to 24 hours. Cooling the jars slowly prevents thermal shock and ensures a stable vacuum seal.
- During cooling we may hear satisfying “popping” sounds. These indicate the lids are sealing correctly.
- Avoid tightening or loosening lids while cooling as this can interfere with the seal.
Checking Seals
After cooling, it is critical to check the seal integrity of each jar before storing:
| Action | How to Check | Expected Result |
|---|---|---|
| Press the center of the lid | Should not flex or pop up | Confirms a vacuum seal |
| Tap the lid with a metal spoon | Clear ringing sound | Indicates a sealed jar |
| Inspect visually | Lid should be concave down | Sign of proper seal |
If any jars failed to seal properly, we should refrigerate and use those first.
Storing Guidelines
- Label each jar with the date of canning.
- Store jars in a cool, dark, dry place, ideally between 50°F and 70°F (10°C to 21°C).
- Avoid locations with direct sunlight or heat sources which may degrade color and flavor.
- Properly sealed jars can last up to 12 months without loss of quality.
- Once opened, refrigerate the syrup and consume within 2 to 3 weeks for optimal freshness.
Summary Table: Cooling and Storing Conditions
| Step | Details |
|---|---|
| Cooling Time | 12 to 24 hours at room temperature |
| Seal Check Methods | Press lid center, tap lid, visual lid check |
| Storage Temperature | 50°F to 70°F (10°C to 21°C) |
| Shelf Life (Sealed) | Up to 12 months |
| Shelf Life (Opened) | 2 to 3 weeks refrigerated |
Tips for Successful Apricot Syrup Canning
Canning apricot syrup involves precision and care to preserve its vibrant flavor and ensure safety. Let’s explore key tips to guarantee a successful canning experience.
Choose the Right Apricots
Always select fully ripe, bright orange apricots. Their natural sweetness and aroma give the syrup its signature taste. Avoid underripe or bruised fruit, which can affect flavor and spoilage.
Maintain Sterility Throughout
Sterilizing jars and lids is non-negotiable. Use boiling water for jars and simmer lids for the recommended times. Always handle jars and lids with clean hands or sanitized tools to ensure contamination-free preservation.
Mind the Headspace
When filling jars with hot syrup, leave a 1/4 inch headspace. This space allows expansion during boiling and forms a tight vacuum seal critical for long shelf life.
Remove Air Bubbles
Insert a non-metallic spatula or bubble remover tool along jar sides to expel trapped air pockets. Air bubbles can compromise the seal and shorten storage life.
Clean Jar Rims Thoroughly
Before placing lids, wipe rims with a clean, damp cloth to remove any syrup residue. This step prevents seal failure caused by sticky debris.
Time Your Water Bath Correctly
Process jars in a boiling water bath for exactly 15 minutes. Adjust processing time for altitude but do not reduce below this to ensure safety. Use a timer for accuracy.
Cool Jars Undisturbed
Allow jars to cool for 12 to 24 hours in a draft-free area. Avoid moving or tightening lids as this can interrupt the seal formation.
Verify Seal Integrity
Press the center of each lid — it should be firm and concave. A lid that clicks or moves indicates an improper seal; refrigerate and use that syrup first.
Label and Store Properly
Clearly label jars with the contents and date. Store in a cool, dark place to maintain flavor and color. Properly canned apricot syrup lasts up to 12 months.
| Step | Key Details | Purpose |
|---|---|---|
| Select Apricots | Fully ripe, bright orange | Best flavor and sweetness |
| Sterilize Jars & Lids | Boil jars 10 min, simmer lids 5 min | Prevent contamination and spoilage |
| Headspace | 1/4 inch | Safe vacuum seal formation |
| Remove Air Bubbles | Use bubble remover tool | Avoid air pockets that break seals |
| Clean Jar Rims | Wipe with damp cloth | Prevent seal failure due to residue |
| Water Bath Processing | 15 min boiling | Ensure safe preservation |
| Cooling | 12-24 hours undisturbed | Seal formation and quality |
| Seal Check | Press center of lid | Confirm airtight seal |
| Label & Storage | Cool, dark place, date-marked | Long-term quality and safety |
“Precision in every step safeguards the fresh apricot flavor and ensures your syrup can be enjoyed all year round.“
By following these important tips, we confidently safeguard our apricot syrup’s taste, texture, and shelf life every time we can.
Serving Suggestions
Our apricot syrup offers a versatile way to elevate many dishes with its bright, sweet-tart flavor. Here are some of the best ways to enjoy our homemade syrup to fully appreciate its luscious taste and aroma:
As a Beverage Enhancer
- Add 2 to 3 tablespoons of apricot syrup per glass of sparkling water or plain soda for a refreshing, naturally sweetened drink.
- Drizzle over iced tea or lemonade to transform these classics into vibrant summer refreshments.
- Mix into cocktails such as a Whiskey Sour or a sparkling Apricot Bellini to add a fruity depth.
Topping for Breakfast Favorites
- Pour warm apricot syrup over pancakes, waffles, or French toast for a delightful fruity glaze.
- Stir into oatmeal or yogurt bowls to sweeten naturally and add complexity.
- Drizzle over cream cheese or ricotta spread on toast for an elegant breakfast treat.
Dessert Companion
- Use as a sauce over vanilla or almond ice cream for a fresh fruity complement.
- Drizzle on pound cake, angel food cake, or shortcakes to boost moistness and sweetness.
- Brush over grilled pound cake or fruit skewers while warm for a caramelized finish.
Cooking and Baking Applications
- Incorporate into marinades or glazes for pork, chicken, or duck to introduce a subtle fruit sweetness.
- Add to salad dressings combined with balsamic vinegar and olive oil for unique flavor complexity.
- Stir into cheesecake or mousse recipes to impart apricot essence without chunks.
Storage and Serving Table
| Serving Use | Suggested Amount | Notes |
|---|---|---|
| Sparkling Beverage | 2-3 Tbsp per 8 oz glass | Adjust sweetness to taste |
| Pancakes/Waffles | 2-4 Tbsp per serving | Warm syrup enhances absorption |
| Ice Cream Topper | 1-2 Tbsp drizzled | Serve immediately for best texture |
| Glaze for Meats | 3-4 Tbsp in marinade or brushing | Cook gently to avoid burning |
| Salad Dressing | 1 Tbsp syrup + 2 Tbsp vinegar + oil | Whisk well for emulsification |
“Using apricot syrup as both a sweetener and flavor enhancer unlocks new dimensions in classic dishes and drinks, making every bite and sip memorable.”
Conclusion
Making and canning apricot syrup at home lets us savor the bright, fresh flavors of summer all year long. With careful preparation and attention to detail, we can create a delicious, preservative-free syrup that enhances everything from drinks to desserts.
By mastering this process, we not only enjoy a tasty treat but also gain confidence in safe home canning practices. Let’s keep experimenting with flavors and sharing the joy of homemade goodness with family and friends.
Frequently Asked Questions
What ingredients are needed to make apricot syrup at home?
To make apricot syrup, you need fresh ripe apricots, granulated sugar, water, fresh lemon juice, and optionally pure vanilla extract for added flavor.
Why should I can apricot syrup instead of buying commercial syrup?
Canning apricot syrup lets you control sweetness, avoid additives and preservatives, and ensures a long shelf life, capturing fresh apricot flavor safely.
What equipment is essential for canning apricot syrup?
You need sterilized canning jars with new lids, a water bath canner, jar lifters, funnels, ladles, bubble removers, clean towels, and timers.
How do I prepare apricots for making syrup?
Wash ripe apricots thoroughly, pit them, and chop into quarters to maximize flavor extraction during cooking.
How do I sterilize jars and lids properly before canning?
Boil jars for 10 minutes and simmer lids for 5 minutes to sterilize them and prevent contamination.
What is the basic process for making apricot syrup?
Combine apricots, sugar, water, and lemon juice in a saucepan, heat and simmer to extract flavor, mash apricots, then strain the syrup.
How do I adjust the syrup’s sweetness and consistency?
Adjust sugar amount and simmering time—more sugar and longer simmering create a thicker, sweeter syrup.
What are the key steps for safely canning apricot syrup?
Fill hot, sterilized jars with syrup leaving 1/4 inch headspace, remove air bubbles, clean rims, secure lids, then process in a boiling water bath for 15 minutes.
How do I know if the jars are properly sealed?
After cooling undisturbed for 12-24 hours, press the center of each lid—it should not flex up or down, indicating a proper vacuum seal.
How should I store canned apricot syrup?
Store sealed jars in a cool, dark place for up to 12 months. Once opened, refrigerate and use within 2 to 3 weeks.
What tips ensure successful apricot syrup canning?
Use fully ripe apricots, maintain sterility, leave proper headspace, remove air bubbles, and process jars timed precisely for safe sealing.
How can I use apricot syrup in meals and drinks?
Use it in sparkling water, cocktails, as a topping for pancakes or yogurt, on desserts, or in marinades and salad dressings for extra flavor.