
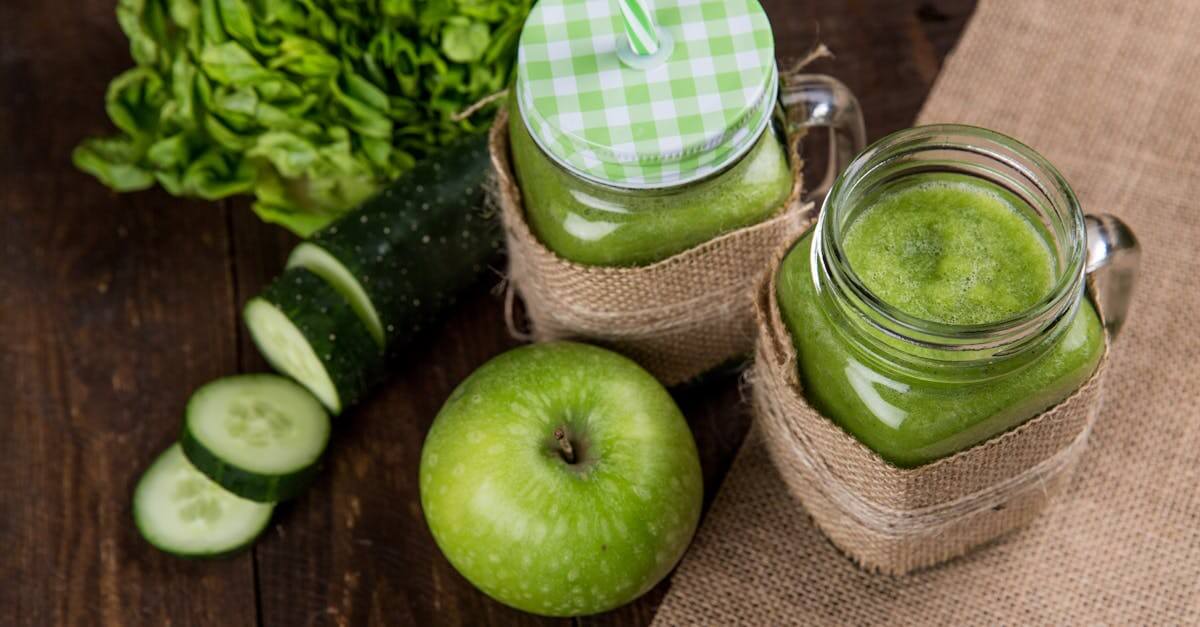
Apple chutney is a delicious way to capture the flavors of fall and enjoy them year-round. This tangy and sweet condiment pairs perfectly with roasted meats, cheese boards, and sandwiches. Canning apple chutney lets us preserve the harvest and have a homemade treat ready whenever we want.
Making apple chutney for canning is easier than you might think. With simple ingredients like apples, vinegar, spices, and a touch of sweetness, we can create a versatile condiment that brightens up any meal. Plus, the canning process ensures a safe and long-lasting preserve that keeps our kitchens stocked with seasonal goodness.
Ingredients
To create the perfect Apple Chutney for Canning, we need to gather fresh, high-quality ingredients that balance sweet, tart, and spicy flavors. Below is a detailed breakdown of what we will use in our recipe.
Fresh Apples
Fresh apples form the flavorful base of our chutney. We recommend using a mix of tart and sweet varieties for depth of flavor and balanced sweetness.
| Apple Variety | Quantity (cups, chopped) | Notes |
|---|---|---|
| Granny Smith | 3 | Tart and firm |
| Fuji or Gala | 2 | Sweet and aromatic |
We will peel, core, and chop the apples into uniform pieces to ensure even cooking and a consistent texture.
Spices and Seasonings
The spices elevate this chutney with warm and aromatic notes. Precise amounts help maintain the perfect spice balance without overpowering the fruit.
- 1 tablespoon mustard seeds: Adds a subtle pungent kick
- 1 teaspoon ground cinnamon: Provides warm sweetness
- 1/2 teaspoon ground cloves: Adds depth and aroma
- 1 teaspoon ground ginger: Boosts warmth and spice
- 1/2 teaspoon salt: Enhances overall flavor
- 1 finely chopped jalapeño (optional): Adds mild heat
Vinegar and Sugar
These ingredients are crucial for preservation and flavor balance. Apple cider vinegar is ideal for authentic tanginess and preserving qualities.
| Ingredient | Quantity | Role |
|---|---|---|
| Apple cider vinegar | 1 cup | Adds acidity for preservation and tanginess |
| Brown sugar | 1 1/2 cups | Sweetens and thickens the chutney |
The brown sugar caramelizes slightly during cooking, adding richness to the chutney.
Optional Add-ins
To customize our apple chutney, we can add optional ingredients that enhance texture and flavor complexity.
- 1/2 cup golden raisins: Adds sweetness and chewy texture
- 1/4 cup chopped red onion: Provides a mild savory contrast
- 1/2 cup chopped walnuts or pecans: Adds crunch and earthiness
These optional add-ins reinforce the chutney’s layers of taste and texture, making it more versatile for serving.
Equipment Needed
To make and preserve our Apple Chutney Recipe for Canning successfully, having the right equipment is essential. Below we list and describe the tools that streamline the process from cooking to safe storage.
Canning Jars and Lids
We use half-pint or pint-sized glass canning jars to hold the chutney. These jars must be heat-resistant and come with two-piece lids—flat metal lids with a sealing compound and screw bands for securing.
| Item | Description |
|---|---|
| Canning Jars | Half-pint or pint, heat-resistant glass |
| Lids | Two-piece lids: flat sealing lids + screw bands |
Always inspect jars for chips or cracks before use. We sterilize jars and lids with boiling water to ensure safe preservation.
Large Pot for Cooking Chutney
We prepare our chutney in a heavy-bottomed large pot with at least 6-quart capacity. This size allows us to stir frequently and cook evenly without spilling over.
- A thick base prevents scorching of apple pieces and spices.
- The large pot accommodates all ingredients, allowing the chutney to reduce evenly to a thick, flavorful consistency.
Water Bath Canner
For safe canning, a Water Bath Canner is indispensable. This is a large pot with a lid and a rack to hold jars off the bottom.
- It maintains a rolling boil that kills bacteria and seals jars properly.
- The rack prevents direct contact with the pot’s base for even heat circulation.
- We recommend a pot at least 8-10 quarts in size to process multiple jars simultaneously.
Quote: “A water bath canner is the heart of safe home canning. It ensures our apple chutney stays fresh and shelf-stable long after cooking.”
Other Essential Kitchen Tools
We also gather these handy tools to keep the canning process smooth and clean:
- Jar lifter: To safely remove hot jars from boiling water without burns.
- Funnel: A wide-mouth funnel fits jar openings to pour chutney without spills.
- Ladle: For precise scooping into jars.
- Clean towels or paper towels: To wipe jar rims before sealing.
- Wooden spoon or spatula: For stirring chutney and scraping pot sides.
- Timer: To monitor cooking and processing times accurately.
These tools complement our cookware and ensure both safety and ease as we prepare and preserve our delicious apple chutney.
Prep Work
Before we start cooking our apple chutney for canning, careful preparation sets the foundation for success. Let’s get everything ready efficiently to ensure a smooth process and the best flavor.
Washing and Peeling Apples
Thoroughly wash all apples under cool running water to remove any dirt or residues. We recommend using a mixture of tart Granny Smith and sweet Fuji or Gala apples for a balanced flavor profile.
- Use a vegetable brush to scrub the skin gently but thoroughly.
- Peel the apples with a sharp paring knife or a vegetable peeler to ensure uniformity in texture.
- Core the apples and cut them into evenly sized small chunks to help them cook evenly and absorb the spices well.
Preparing Spices and Ingredients
Accurate preparation of spices and other ingredients is crucial. Here’s our checklist:
| Ingredient | Preparation |
|---|---|
| Mustard seeds | Measure precisely (about 1 tbsp) |
| Ground cinnamon | Ready in small bowl (1 tsp) |
| Cloves | Whole or ground (1/2 tsp) |
| Fresh ginger | Peel and grate (1 tbsp) |
| Brown sugar | Measured (3/4 cup packed) |
| Apple cider vinegar | Measure (1 1/2 cups) |
| Red onion (optional) | Peel and finely chop (1 medium) |
| Golden raisins (optional) | Rinse and soak if needed (1/4 cup) |
We suggest placing all spices and additives in individual bowls for quick access during cooking. This organization helps maintain rhythm and precision during the chutney preparation.
Sterilizing Canning Jars
Sterilizing jars is a non-negotiable step to ensure safe preservation and avoid contamination. Follow these steps:
- Wash jars and lids with hot soapy water and rinse thoroughly.
- Place jars in a large pot or canner filled with water, making sure they are completely submerged.
- Bring water to a rolling boil, and keep boiling for 10 minutes to sterilize the jars.
- Keep jars hot until ready to fill by leaving them in the hot water or placing them in a warm oven at 225°F (107°C).
- Lids should be placed in hot simmering water (not boiling) for 5 minutes to soften the sealing compound.
“Sterile jars guarantee that our delicious apple chutney stays fresh long after the canning process.”
Having all jars and lids sterilized and warm will also prevent them from cracking when filled with hot chutney.
Cooking Instructions
Let’s dive into the step-by-step process to craft our Apple Chutney Recipe for Canning ensuring perfect texture, balance, and flavor with every batch.
Combining Ingredients
- In a large 6-quart pot, combine all prepped ingredients:
- Peeled, cored, and chopped apples
- Chopped red onion (if using)
- Golden raisins (optional for texture and sweetness)
- Brown sugar
- Apple cider vinegar
- Prepared spices: mustard seeds, cinnamon stick, ground cloves, grated ginger, and salt
- Stir the mixture thoroughly to blend the sugar and vinegar with the fruit and spices, distributing flavors evenly.
- Ensure the pot is large enough to prevent overflow during simmering, allowing space for bubbling and reducing.
Simmering the Chutney
- Place the pot over medium-high heat and bring the mixture to a gentle boil.
- Reduce heat to low and simmer uncovered for 45 to 60 minutes, stirring every 10 minutes to prevent sticking or burning.
- The chutney should thicken as the apples soften and the liquid reduces, creating a rich, chunky texture.
- Remove the cinnamon stick after 30 minutes of simmering to avoid overpowering the chutney’s flavor.
- Use this time to sterilize your canning jars or prepare your water bath canner for the next step.
Checking Consistency and Flavor
- Test the chutney’s thickness by placing a spoonful on a chilled plate; it should hold its shape without running immediately.
- Taste the chutney carefully and adjust seasoning if necessary:
- Add more brown sugar for sweetness
- Add a splash of apple cider vinegar for enhanced tang
- Sprinkle additional salt or spices if desired
| Parameter | Desired Outcome | Adjustment Tip |
|---|---|---|
| Consistency | Thick but spoonable, chunky texture | Simmer longer to reduce liquid |
| Sweetness | Balanced sweet-tart flavor with brown sugar | Add sugar gradually |
| Tanginess | Noticeable vinegar bite without overpowering | Add vinegar in small increments |
| Spice Level | Warm and aromatic but not too strong | Remove cinnamon stick early |
“The perfect chutney sings with balanced sweetness, tang, and spice stretched across a velvety, chunky texture.“
Once we confirm the chutney meets our expectations, it’s ready for the final canning preparations.
Canning Process
Canning apple chutney properly is essential for preserving its fresh flavors and ensuring safety. Let’s walk through each step to achieve a perfect sealed jar that will last.
Filling Jars with Hot Chutney
We start by ladling the hot apple chutney into sterilized canning jars. Use a clean funnel to avoid spills and maintain jar cleanliness. Leave a 1/2-inch headspace at the top of each jar to allow for expansion during processing. Removing air bubbles is crucial, so run a non-metallic spatula or chopstick around the inside edge of the jar to release trapped air.
| Step | Recommended Action |
|---|---|
| Jar Temperature | Warm (not cold) |
| Chutney Temperature | Hot (just off heat) |
| Headspace Depth | 1/2 inch (about 1.25 cm) |
| Air Bubble Removal | Use a non-metallic spatula |
Wipe the jar rims clean with a damp cloth before placing the lids to guarantee a proper seal.
Sealing the Jars
We place the two-piece lids, comprising a flat sealing disc and a screw band, on each jar. Tighten the screw bands just until fingertip tight — not too tight. This allows air to escape during processing and prevents lid damage. Using new lids is essential as reused lids may fail to seal.
“A proper seal is one of the most important steps in the canning process to ensure long-term preservation and food safety.”
Processing in a Water Bath Canner
Next, submerge the sealed jars in a boiling water bath canner. The water should cover jars by at least 1 to 2 inches. Process pint jars for 15 minutes and half-pints for 10 minutes at a full boil. Adjust times if you are above 1,000 feet elevation (see table below).
| Jar Size | Processing Time (minutes) | Adjusted Time Over 1,000 ft Elevation |
|---|---|---|
| Half-pint | 10 | Add 5 minutes |
| Pint | 15 | Add 5 minutes |
Keep the water at a steady boil during processing. Use the timer to ensure accuracy, as under-processing risks spoilage.
Cooling and Storing
Once processing time is complete, carefully remove jars with a jar lifter. Place them upright on a towel-lined surface. Leave at least 12 hours undisturbed to cool fully and seal naturally. You will hear the characteristic “pop” of sealed lids.
To test the seal after cooling, press the center of each lid. It should be concave and not flex when pressed. Remove screw bands to store jars. Label each jar with the date and contents.
Store your apple chutney jars in a cool, dark, dry place for optimal shelf life—up to one year. Refrigerate after opening.
Remember: Proper canning preserves the rich, tangy-spiced flavor of our apple chutney all year long, making it a pantry essential for savory meals and snacks.
Tips for Best Results
To achieve the perfect apple chutney recipe for canning, attention to detail is crucial. Below are our best tips to ensure your chutney turns out flavorful, safe, and beautiful every time.
Selecting the Right Apples
Choosing the right apples directly impacts the taste and texture of your chutney. We recommend using a balance of tart and sweet varieties to create depth and complexity in flavor.
| Apple Variety | Flavor Profile | Texture Contribution |
|---|---|---|
| Granny Smith | Tart, tangy | Holds shape well, crisp |
| Fuji | Sweet, juicy | Adds moisture, softens mix |
| Gala | Mildly sweet | Balances tartness, tender |
Tip: Use firm, fresh apples without bruises or soft spots. Quarter and peel the apples uniformly to ensure even cooking and a consistent chutney texture.
Adjusting Sweetness and Spice Levels
Balancing sweetness and spice is vital for a harmonious apple chutney. Here’s how to customize the flavor to your liking:
- Increase brown sugar slightly if you prefer a sweeter chutney.
- For tangier notes, add a splash more apple cider vinegar.
- Adjust spice quantities such as cinnamon, cloves, and mustard seeds gradually to avoid overpowering the apple’s natural flavor.
- Incorporate optional ingredients like golden raisins or dried cranberries for natural sweetness and texture.
“Taste as you go is our golden rule — simmer, then sample before final canning.”
Troubleshooting Common Issues
Even with perfect prep, challenges can arise. Here’s how to solve frequent problems for smooth canning success:
| Problem | Cause | Solution |
|---|---|---|
| Chutney too runny | Insufficient cooking or high liquid | Simmer longer uncovered to thicken |
| Chutney too dry or thick | Overcooked or too many solids | Add small amounts of apple cider vinegar |
| Jars not sealing properly | Lid not tightened correctly or air bubbles | Reheat chutney, refill jars, retighten lids removing air bubbles |
| Off flavors after storage | Improper canning process or spoiled fruit | Strictly sterilize jars and use fresh ingredients |
Remember: Proper sterilization and processing times are mandatory for safe preservation.
By following these targeted tips we ensure your homemade apple chutney for canning delights with rich flavors and long-lasting freshness.
Serving Suggestions
Our Apple Chutney Recipe for Canning shines not only as a preserved delight but as a versatile complement to countless dishes. Here’s how we love to serve it to maximize its rich flavors.
Pairing Apple Chutney with Meals
Apple chutney works beautifully to elevate both simple and sophisticated meals. Its sweet-tart-spicy profile pairs perfectly with:
- Roasted and grilled meats: Especially pork, chicken, and turkey. The chutney’s tang enhances savory flavors.
- Cheese boards: Adds a fruity, spiced contrast to creamy and sharp cheeses like brie, cheddar, and gouda.
- Sandwiches and burgers: Spread a generous spoonful on your sandwich or burger for a burst of warmth and zest.
- Curries and rice dishes: A sweet contrast to spicy Indian or Middle Eastern cuisines.
- Charcuterie platters: Balances cured meats and crunchy nuts effortlessly.
“The complex flavor of apple chutney transforms any dish from ordinary to extraordinary.”
| Food Type | Recommended Pairings | Serving Tip |
|---|---|---|
| Roasted Meats | Pork loin, chicken, turkey | Serve alongside or spoon over top |
| Cheese | Brie, aged cheddar, gouda | Use as a dip or spread |
| Sandwiches | Turkey, ham, grilled veggies | Add as a condiment before serving |
| Curries & Rice | Spiced lentils, basmati rice | Serve as a side for contrast |
| Charcuterie | Salami, prosciutto, mixed nuts | Arrange in small bowls on boards |
Recipe Ideas Using Apple Chutney
We recommend incorporating our apple chutney into these recipes to highlight its vibrant flavors:
- Glazed Pork Chops: Spoon warm chutney over pan-seared pork chops for a sweet-savory glaze.
- Cheddar and Apple Chutney Grilled Cheese: Layer sharp cheddar and chutney between slices of sourdough bread and grill until crisp.
- Spiced Yogurt Dip: Mix chutney with Greek yogurt and a pinch of cumin for a fresh dip perfect for veggies or flatbreads.
- Baked Brie with Chutney: Top a wheel of brie with chutney before baking until melted and gooey.
- Roast Vegetable Salad: Toss roasted root vegetables with a spoonful of chutney and fresh greens for a flavorful salad boost.
Pro tip: Keep some jars of apple chutney on hand to quickly transform simple recipes into memorable meals.
| Recipe Idea | Primary Use | Serving Suggestion |
|---|---|---|
| Glazed Pork Chops | Sauce/topping | Serve immediately hot |
| Cheddar & Apple Chutney Grilled Cheese | Spread/sandwich filling | Serve with crisp apple slices |
| Spiced Yogurt Dip | Dip | Pair with fresh veggies or pita |
| Baked Brie with Chutney | Cheese topping | Serve with crackers or baguette |
| Roast Vegetable Salad | Dressing/mix-in | Serve warm or room temperature |
Conclusion
Making and canning apple chutney is a rewarding way to capture the vibrant flavors of fall and enjoy them year-round. With the right ingredients and careful preparation, we can create a delicious condiment that enhances a wide range of dishes.
By mastering the canning process, we ensure our chutney stays fresh and safe to enjoy long after the cooking is done. Keeping a few jars stocked in the pantry means we’re always ready to add a burst of flavor to meals and snacks alike.
Frequently Asked Questions
What is apple chutney and why should I make it?
Apple chutney is a sweet, tart, and spiced condiment made from apples and spices. It adds flavor to meats, cheese, and snacks. Making it at home is easy and lets you enjoy a fresh, seasonal treat all year round.
Which apples are best for making apple chutney?
A mix of tart Granny Smith apples and sweet Fuji or Gala apples works best. This combination balances flavors and creates a rich, complex taste.
What spices are typically used in apple chutney?
Common spices include mustard seeds, cinnamon, cloves, and ginger. These spices add warmth and depth to the chutney’s flavor.
Do I need special equipment to make and can apple chutney?
Yes. You’ll need heat-resistant glass canning jars with two-piece lids, a large pot, and a water bath canner. Tools like a jar lifter, funnel, and timer help make the process safe and smooth.
How do I prepare apples for chutney?
Wash and peel the apples, then cut them into uniform pieces. This ensures even cooking and a consistent texture.
How long should I simmer apple chutney?
Simmer the chutney for 45 to 60 minutes, stirring often until it reaches a thick, chunky consistency and balanced flavor.
Can I add other ingredients to apple chutney for variety?
Yes, optional add-ins like golden raisins, red onion, and nuts can enhance texture and complexity.
How do I safely can apple chutney at home?
Fill sterilized jars with hot chutney, leave 1/2-inch headspace, remove air bubbles, seal with new lids, and process in a boiling water bath for the recommended time.
How do I know if my jars sealed properly?
After cooling, press the center of each lid. If it doesn’t pop back, the jar is sealed correctly and safe for storage.
How should I store canned apple chutney?
Store sealed jars in a cool, dark place. Properly canned chutney lasts up to a year and retains its fresh flavor.
What dishes pair well with apple chutney?
Apple chutney complements roasted meats, cheese boards, sandwiches, curries, and charcuterie. It also works well in grilled cheese and yogurt dips.
Can I adjust the sweetness or spice in my chutney recipe?
Yes, you can increase or decrease brown sugar and spices like ginger or mustard seeds to suit your taste.
What common problems should I watch for during canning?
Watch for unsealed jars, air bubbles, or under-processing, which can cause spoilage. Follow canning times and sterilize jars properly for the best safety.
Why is canning important for apple chutney?
Canning preserves freshness and flavor while making the chutney shelf-stable. It allows you to enjoy this seasonal condiment year-round.