
There’s something truly satisfying about preserving the flavors of the season, and our apple chutney canning recipe lets us do just that. This tangy and sweet condiment brings together crisp apples, warm spices, and a hint of vinegar to create a versatile treat that’s perfect for year-round enjoyment. Whether we’re pairing it with roasted meats or spreading it on sandwiches, apple chutney adds a delicious twist to any meal.
Canning our own apple chutney not only extends its shelf life but also allows us to customize the flavors to suit our taste. With simple ingredients and easy steps, this recipe is a great way to capture the essence of fall and enjoy it long after the harvest is over. Let’s dive in and make a batch that will brighten up our pantry and our plates.
Ingredients
To make our Apple Chutney Canning Recipe, we’ll need fresh ingredients that balance sweetness, tartness, and spice. Here’s what we use to capture the vibrant flavors of fall in every jar:
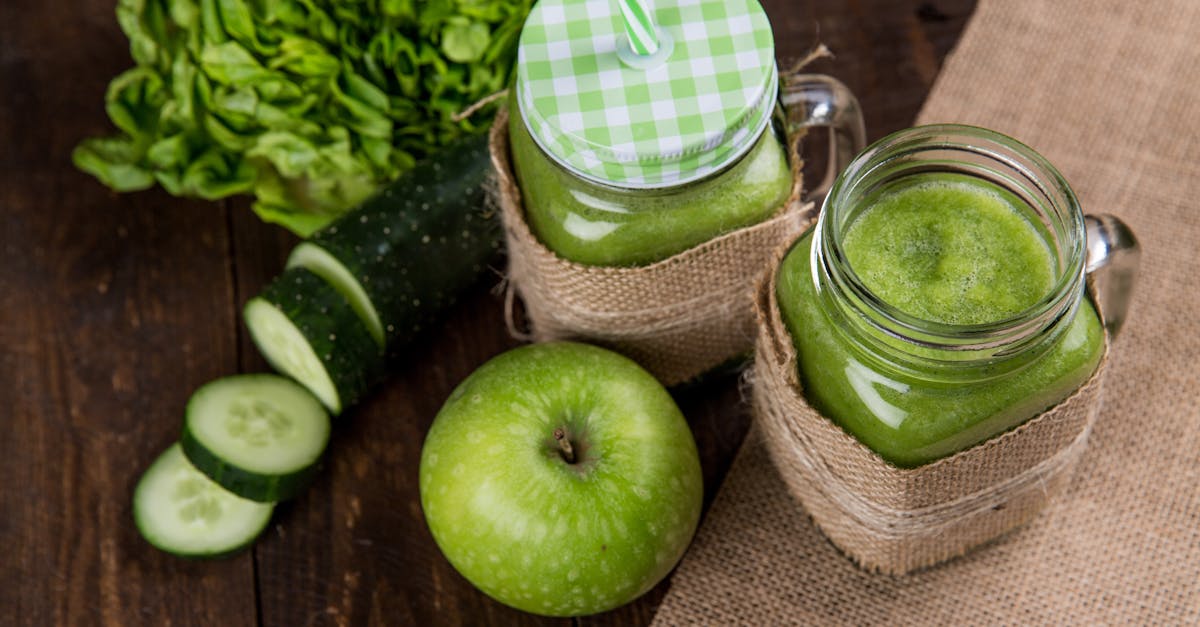
- 5 cups of peeled, cored, and chopped crisp apples (such as Granny Smith or Honeycrisp)
- 1 large onion, finely chopped
- 1 cup brown sugar, packed
- 1 cup apple cider vinegar (5% acidity for safe canning)
- 1/2 cup raisins
- 1 tablespoon grated fresh ginger
- 1 tablespoon mustard seeds
- 1 teaspoon ground cinnamon
- 1/2 teaspoon ground cloves
- 1/2 teaspoon ground allspice
- 1 teaspoon salt
- 1/4 teaspoon crushed red pepper flakes (optional for heat)
| Ingredient | Quantity | Preparation |
|---|---|---|
| Apples | 5 cups | Peeled, cored, chopped |
| Onion | 1 large | Finely chopped |
| Brown sugar | 1 cup | Packed |
| Apple cider vinegar | 1 cup | 5% acidity (for canning) |
| Raisins | 1/2 cup | Whole |
| Fresh ginger | 1 tablespoon | Grated |
| Mustard seeds | 1 tablespoon | Whole |
| Ground cinnamon | 1 teaspoon | – |
| Ground cloves | 1/2 teaspoon | – |
| Ground allspice | 1/2 teaspoon | – |
| Salt | 1 teaspoon | – |
| Crushed red pepper | 1/4 teaspoon (optional) | – |
Pro Tip: Using a mix of sweet and tart apples boosts the depth of flavor, creating the perfect balance for our apple chutney.
Equipment Needed
To ensure our apple chutney canning recipe turns out perfectly and safely preserved, having the right equipment is essential. Each tool plays a crucial role in cooking, filling, and sealing our chutney jars efficiently.
Canning Jars and Lids
We use quart or pint-sized canning jars made of thick glass designed to withstand heat changes. These jars keep the chutney fresh and safe for storage.
- Use new, unused lids to guarantee a strong vacuum seal.
- Rings can be reused if free of rust and dents but replace if uncertain.
| Equipment | Details |
|---|---|
| Jars | Mason jars, pint or quart size |
| Lids | New flat metal lids with sealing compound |
| Rings | Metal bands, reusable but check condition |
Large Cooking Pot
Our large heavy-bottomed pot needs to have enough capacity to hold all chutney ingredients without crowding. This allows for even heating and proper simmering of the mixture.
- At least a 6-quart capacity is recommended.
- A thick base prevents scorching the chutney during cooking.
Canning Funnel
A wide-mouth canning funnel makes transferring the chutney into jars clean and easy, preventing spills and burns.
- Funnel’s wide neck fits perfectly with canning jars.
- Enables filling jars evenly and smoothly.
Jar Lifter
Handling hot jars safely is critical. Our Jar Lifter grips jars firmly, letting us lower and remove jars from boiling water without risk.
- Essential for hot water bath canning.
- Non-slip gripping pads reduce dropping hazard.
Water Bath Canner or Large Stockpot
To preserve the apple chutney, a Water Bath Canner or Large Stockpot with a fitted rack is mandatory. It keeps jars submerged in boiling water for the recommended processing time.
- Choose a pot deep enough to cover jars by at least 1-2 inches of water.
- The rack lifts jars off the bottom preventing breakage from direct heat.
Having these tools ready helps us follow our apple chutney canning recipe confidently knowing the chutney will be preserved safely and deliciously.
Preparation
To achieve perfectly preserved apple chutney, preparation is key. We focus on preparing the apples with care and sterilizing jars meticulously to ensure safe, flavorful results.
Preparing the Apples
We begin by selecting 5 cups of chopped crisp apples, a blend of sweet and tart varieties to create depth in flavor. Wash the apples thoroughly to remove any residues. Peel and core them, then chop into evenly sized pieces about ½ inch thick to ensure uniform cooking.
| Step | Description |
|---|---|
| Wash | Rinse apples under cold water thoroughly |
| Peel and Core | Remove skin and core for best texture |
| Chop | Cut into ½ inch pieces for even cooking |
Keep the chopped apples in a bowl of cold water with a little lemon juice if not cooking immediately. This prevents browning and maintains their vibrant color for the chutney.
Sterilizing Jars and Lids
Sterilizing is critical for preserving the chutney safely. We use quart or pint-sized canning jars and new lids for a secure vacuum seal.
Steps for sterilization:
- Wash jars and lids in hot, soapy water. Rinse well.
- Submerge jars in a large pot of boiling water for 10 minutes.
- Keep jars hot until filling to prevent breakage.
- Simmer lids gently in hot water (do not boil) to soften sealing compound.
Pro tip: Use a clean towel to handle jars to keep them sterile and avoid contaminating the rims.
| Item | Sterilization Method | Time |
|---|---|---|
| Jars | Boil in water | 10 minutes |
| Lids | Simmer in hot water (not boiling) | 5 minutes |
Proper sterilization ensures our apple chutney remains fresh and safe for months, capturing the delightful essence of fall.
Making the Apple Chutney
Now that our ingredients are prepped and jars sterilized, it’s time to bring our apple chutney to life. This stage combines flavors and textures, transforming crisp apples and spices into a deliciously tangy and sweet condiment.
Cooking the Chutney
We begin by heating a large heavy-bottomed pot over medium heat. Add the finely chopped onion first and sauté until translucent, about 5 minutes. This step unlocks the onion’s natural sweetness, forming the flavor base for our chutney.
Next, we add the chopped apples, raisins, and freshly grated ginger to the pot. Stir gently to combine.
Now we pour in the apple cider vinegar and sprinkle in the brown sugar, mustard seeds, and the spice blend carefully measured from our ingredients list. Stir the mixture well to dissolve the sugar and distribute the spices evenly.
Bring the pot to a boil, then reduce the heat to a low simmer. Allow the chutney to cook uncovered, stirring occasionally to prevent sticking, for about 45 to 60 minutes. During this time, the chutney will thicken and deepen in color while the flavors meld beautifully.
We look for the chutney to reach the right balance of chunky texture and saucy consistency—the apples soften but retain some body, and the liquid reduces to a thick glaze that coats the fruit and spices.
Adjusting Seasonings and Consistency
Taste testing is crucial here. We carefully spoon a small amount of chutney and taste for balance. If the chutney tastes too tart, we add small increments of brown sugar to enhance sweetness without overpowering other flavors.
If the chutney is too thick, we stir in a splash of apple cider vinegar or water to loosen the texture.
To increase spice warmth, we add a pinch more mustard seeds or ginger. If the chutney feels flat, a pinch of salt can elevate the overall flavor profile.
Here’s a quick guide to typical seasoning adjustments:
| Flavor Adjustment | Ingredient Added | Amount |
|---|---|---|
| Increase Sweetness | Brown Sugar | 1 tsp increments |
| Soften Tartness | Apple Cider Vinegar or Water | 1 tbsp increments |
| Boost Spice Warmth | Mustard Seeds or Fresh Ginger | Pinch or 1/4 tsp |
| Enhance Overall Flavor | Salt | Pinch |
Adjust gradually, stirring thoroughly after each addition. We want our apple chutney perfectly balanced, showcasing that signature mix of tangy, sweet, and spiced notes that warm every bite.
Canning Process
Properly preserving our apple chutney requires careful attention during the Canning Process to ensure safety, longevity, and flavor integrity. Let’s walk through each critical step to guarantee a perfectly sealed batch ready for storage.
Filling the Jars
We begin by carefully filling the sterilized jars with the hot apple chutney mixture. Using a wide-mouth canning funnel, we pour the chutney into each jar, leaving a precise headspace of 1/2 inch at the top. This space allows for expansion during processing and prevents overflow.
| Action | Details |
|---|---|
| Jar Type | Quart or pint-sized canning jars |
| Headspace | 1/2 inch (approx. 1.3 cm) |
| Utensil Used | Wide-mouth canning funnel |
| Chutney Temperature | Hot, just off the stovetop |
Filling the jars too full or too low can jeopardize the sealing process. Therefore, accuracy here sets the stage for safe preservation.
Removing Air Bubbles
Trapped air inside the jars can disrupt sealing and promote spoilage, so we must remove air bubbles before sealing. After filling each jar:
- We take a non-metallic spatula or a thin plastic utensil.
- Slowly slide it around inside the jar to gently release air bubbles.
- Observe the chutney, ensuring no visible bubbles remain near the surface.
This step improves vacuum formation during processing and helps maintain the chutney’s vibrant texture and flavor.
Sealing the Jars
Once the jars are filled and bubbles removed, we proceed to seal them:
- Wipe the rim of each jar with a clean, damp cloth to remove any chutney residue.
- Place a sterilized lid flat on the jar rim.
- Screw the metal ring band down fingertip tight — firm but not over-tightened, which can prevent air escape during processing.
- Immediately place the filled jars into the water bath canner, ensuring they are fully submerged by at least 1-2 inches of water.
After processing, we carefully remove the jars and place them on a towel, undisturbed, for 12-24 hours. We listen for the satisfying “pop” sound, confirming the creation of a strong vacuum seal essential for preserving our apple chutney safely.
Pro Tip: Always check the seal after cooling by pressing the center of each lid. A sealed lid will not flex or pop back. If any lids have not sealed properly, refrigerate and consume those jars first.
Water Bath Canning
Water bath canning is the essential step to safely preserve our Apple Chutney for long-term storage. It ensures the chutney stays fresh and flavorful, locking in the tangy sweetness we crafted.
Processing Time
To prevent spoilage and secure a strong vacuum seal, process quart jars for 15 minutes and pint jars for 10 minutes in a boiling water bath. This timing starts when the water reaches a full rolling boil.
| Jar Size | Processing Time |
|---|---|
| Pint (8 oz) | 10 minutes |
| Quart (16 oz) | 15 minutes |
Keep jars completely submerged with at least 1-2 inches of water above the lids. During processing, maintain a steady boil and cover the pot with a lid to keep the temperature consistent.
Cooling and Storing
After processing, remove jars carefully using a jar lifter and place them upright on a towel or cooling rack. Avoid tilting or bumping jars, which can break seals.
Allow jars to cool undisturbed for 12 to 24 hours. You’ll hear satisfying “pings” as the lids seal with a vacuum locking in freshness.
Next, check each lid by pressing the center. A sealed lid should not flex up or down. If any jars fail to seal, refrigerate and consume those chutneys first.
Once sealed, label jars with the date and store them in a cool, dark place. Properly canned Apple Chutney keeps vibrant flavors for up to one year.
Tips for Successful Apple Chutney Canning
To master the art of apple chutney canning and ensure safe preservation with robust flavor, let’s focus on essential tips that guarantee excellent results every time.
1. Use the Right Apples
Choose a blend of sweet and tart apples such as Fuji, Granny Smith, and Gala. This balance enhances the chutney’s flavor complexity and texture. Avoid overly soft or mealy varieties.
2. Prepare Ingredients Consistently
Cut apples and onions into uniform pieces about ½ inch thick.
This ensures even cooking and consistent texture throughout the chutney.
3. Maintain Proper Headspace
When filling sterilized jars, leave a ½ inch headspace at the top.
This space allows for chutney expansion during processing and prevents jar breakage.
| Jar Size | Processing Time | Headspace Required |
|---|---|---|
| Pint (16 oz) | 10 minutes | ½ inch |
| Quart (32 oz) | 15 minutes | ½ inch |
4. Remove Air Bubbles Thoroughly
Use a non-metallic spatula or bubble remover tool to gently slide around the edge of the jar and release trapped air bubbles.
Trapped air can cause spoilage or prevent jars from sealing properly.
5. Wipe Jar Rims Clean
Before placing lids, wipe jar rims with a clean damp cloth or paper towel to remove any chutney residue.
This step is crucial to allow a tight vacuum seal.
6. Use Fresh Canning Lids
Always use new lids to ensure a strong vacuum seal and reduce contamination risks. Reusable metal rings should be inspected for rust or deformation.
7. Monitor Water Bath Temperature and Time
Start timing once water reaches a rolling boil.
Keep jars submerged under 1-2 inches of boiling water for the full recommended processing time.
8. Allow Jars to Cool Undisturbed
Place jars on a towel in a draft-free area. Cooling for 12 to 24 hours enables the lids to “ping” indicating a successful seal.
Do not press lids or tighten rings after processing.
9. Check Seals Before Storing
Press the center of each lid—if it does not flex or pop, the jar is sealed.
Unsealed jars should be refrigerated and consumed promptly.
Pro Tip: Label jars with the canning date using waterproof markers to track freshness.
10. Store in Optimal Conditions
Store sealed chutney jars in a cool, dark place where the temperature remains stable. Ideal storage is below 70°F and away from direct sunlight.
By following these critical tips for apple chutney canning, we ensure our homemade chutney stays flavorful, safe, and ready to enrich meals throughout the year.
Conclusion
Making and canning apple chutney is a rewarding way to capture the vibrant flavors of fall and enjoy them year-round. With the right ingredients, equipment, and careful attention to each step, we can create a delicious condiment that elevates any meal.
By following safe canning practices, we ensure our chutney stays fresh and flavorful for months, giving us a taste of the harvest season whenever we want. Let’s embrace this timeless tradition and savor the satisfaction of homemade apple chutney in every jar.
Frequently Asked Questions
What is apple chutney and why is it popular?
Apple chutney is a tangy and sweet condiment made from crisp apples, spices, and vinegar. It is popular for preserving seasonal flavors and enhancing various meals year-round with its balanced sweet and tart taste.
What ingredients are essential for making apple chutney?
Key ingredients include crisp apples, onion, brown sugar, apple cider vinegar, raisins, fresh ginger, mustard seeds, and warm spices. Using a mix of sweet and tart apples improves the flavor.
How do I prepare apples for chutney?
Wash, peel, core, and chop apples evenly. To prevent browning, keep chopped apples in cold water with lemon juice if not cooking immediately.
What equipment do I need for canning apple chutney?
You need quart or pint-sized canning jars, new lids, reusable rings, a heavy-bottomed pot, a wide-mouth funnel, a jar lifter, and a water bath canner or large stockpot.
How do I sterilize jars and lids?
Wash jars and lids thoroughly. Boil jars for 10 minutes. Simmer lids in hot water (not boiling). This ensures safe preservation and fresh chutney.
How long should the apple chutney cook?
Simmer the chutney for 45 to 60 minutes until thickened, stirring often and adjusting seasoning for perfect balance.
What is the correct way to fill jars for canning?
Fill sterilized jars with hot chutney, leaving a 1/2 inch headspace. Remove air bubbles, wipe rims clean, then seal with lids and metal rings before processing.
How long do I process the jars in a water bath canner?
Process pint jars for 10 minutes and quart jars for 15 minutes once water reaches a full rolling boil. Keep jars submerged with water covering lids by 1-2 inches and maintain a steady boil.
How do I know if the jars sealed properly?
After cooling for 12-24 hours, lids should make a “ping” sound and should not flex when pressed in the center. Unsealed jars should be refrigerated and used first.
How should I store canned apple chutney?
Store sealed jars in a cool, dark place. Properly canned chutney retains flavor and safety for up to one year. Label jars with the date for easy tracking.