
Anjappar Biryani is a flavorful South Indian dish that has won hearts across the globe. Originating from the famous Anjappar Chettinad restaurant, this biryani combines aromatic spices with tender meat and fragrant rice for a truly unforgettable meal. It’s a perfect blend of tradition and bold flavors that brings a taste of Chettinad cuisine right to our table.
What sets Anjappar Biryani apart is its unique spice mix and cooking technique that infuses every grain of rice with rich, robust taste. Whether you’re a biryani lover or looking to explore new flavors, this recipe offers an authentic experience that’s both satisfying and easy to recreate at home. Let’s dive into making this classic dish that’s sure to impress family and friends.
Ingredients
To recreate the authentic Anjappar Biryani, we need precise ingredients for each component. Below is the detailed list broken down to simplify the process while preserving the famous rich flavors of this dish.
For the Biryani Rice
We start with premium basmati rice and essential aromatics to achieve fluffy flavorful grains.
- 2 cups of basmati rice, soaked for 30 minutes
- 4 cups of water
- 2 bay leaves
- 4 green cardamom pods
- 4 cloves
- 1-inch cinnamon stick
- 1 teaspoon salt
- 1 tablespoon ghee or oil
For the Chicken Marinade
Marinating the chicken is vital for tender juicy bites infused with the signature Chettinad spices.
| Ingredient | Quantity | Preparation / Notes |
|---|---|---|
| Chicken (bone-in) | 1 kg | Cut into medium-sized pieces |
| Yogurt | 1 cup | Thick and fresh |
| Ginger-garlic paste | 2 tablespoons | Freshly ground |
| Red chili powder | 2 teaspoons | Adjust to spice preference |
| Turmeric powder | 1/2 teaspoon | For color and subtle aroma |
| Coriander powder | 1 tablespoon | Ground |
| Cumin powder | 1 teaspoon | Ground |
| Lemon juice | 2 tablespoons | Freshly squeezed |
| Salt | 1 1/2 teaspoons | To taste |
For the Biryani Masala
This special masala mix delivers the unmatched aroma and depth customary to Anjappar Biryani.
- 2 tablespoons oil
- 2 large onions, thinly sliced
- 2 tomatoes, chopped
- 4 green chilies, slit
- 1/4 cup fresh coriander leaves, chopped
- 1/4 cup fresh mint leaves, chopped
- 1 teaspoon garam masala powder
- 1 teaspoon fennel seeds
- 1 tablespoon black peppercorns
- 1 tablespoon poppy seeds
- 1 tablespoon dry coconut (copra), grated
- 1 tablespoon roasted cumin seeds
- 2 tablespoons water (for grinding)
Note: Grind fennel, peppercorns, poppy seeds, dry coconut, and cumin together into a smooth paste with water.
Garnishes and Additional Ingredients
Garnishing enhances both taste and presentation to match the restaurant standard.
- 1/4 cup fried onions (crispy, golden brown)
- 2 tablespoons ghee
- A pinch of saffron soaked in 2 tablespoons warm milk
- 1 tablespoon rose water (optional)
- Cashew nuts and raisins (fried in ghee for added richness)
This well-balanced combination ensures our Anjappar Biryani bursts with authentic taste from the very first bite.
Equipment Needed
To prepare an authentic Anjappar Biryani that captures the rich flavors and aromas, having the right equipment is essential. Here is the list of essential tools we will need to make the process smooth and ensure perfect results.
- Heavy-bottomed deep pan or a thick-walled pot (preferably a Dutch oven)
Ideal for slow-cooking and layering the biryani, this helps evenly distribute heat and prevents burning.
- Large saucepan
For boiling the basmati rice to the perfect al dente texture before layering with the marinated chicken.
- Mixing bowls
We’ll use these to marinate the chicken thoroughly with spices and yogurt.
- Frying pan or skillet
To lightly sauté whole spices and onions or temper additional ingredients if required.
- Measuring cups and spoons
Accuracy is key to balancing the unique Chettinad spices in the Anjappar Biryani.
- Fine mesh strainer
To drain soaked rice and rinse cooked components, ensuring clean grains and no excess moisture.
- Kitchen towel or airtight lid
For sealing the pot while the biryani simmers to trap and infuse flavors properly.
- Spatula or wooden spoon
To gently mix ingredients without breaking rice grains or tearing the marinated chicken.
- Herb chopper or kitchen scissors
To finely chop fresh coriander and mint leaves used for garnishing.
Essential Equipment Overview
| Equipment | Purpose | Features to Look For |
|---|---|---|
| Heavy-bottomed pot | Slow cooking and layering biryani | Thick base for even heat distribution |
| Large saucepan | Boiling rice | Wide and deep for easy stirring |
| Mixing bowls | Marinating chicken | Multiple sizes with stable base |
| Frying pan | Sautéing spices, onions | Non-stick or cast iron recommended |
| Measuring spoons/cups | Accurate spice and ingredient measurements | Standardized American measurement units |
| Fine mesh strainer | Draining and rinsing rice | Durable and rust-resistant |
| Kitchen towel/airtight lid | Sealing pot for steam infusion | Thick cotton towel or snug lid |
| Spatula or wooden spoon | Mixing ingredients gently | Heat-resistant and solid grip |
| Herb chopper/scissors | Chopping fresh herbs | Sharp and precise |
By preparing these tools ahead of time, we ensure every step in making the Anjappar Biryani flows effortlessly, preserving the integrity of the dish’s vibrant spices and tender chicken. Let’s gather our equipment and move confidently to the next phase of cooking this signature South Indian feast.
Prep Work
Preparing our ingredients and components carefully is essential to crafting an authentic Anjappar Biryani. Below, we break down the critical steps to get everything ready for a flavorful cooking experience.
Preparing the Chicken
- Cut 1.5 lbs of chicken into medium-sized pieces for even cooking.
- Marinate the chicken with:
- 1 cup yogurt (for tenderness)
- 2 tablespoons ginger-garlic paste
- 1 teaspoon turmeric powder
- 2 teaspoons red chili powder
- 1 tablespoon coriander powder
- 1 teaspoon garam masala
- Salt to taste
- Mix thoroughly to coat all pieces evenly.
- Set aside and let marinate for at least 1 hour, or preferably overnight in the refrigerator to deepen flavors.
Soaking and Cooking the Rice
- Measure 2 cups of premium basmati rice.
- Rinse the rice under cold running water until the water runs clear to remove excess starch.
- Soak the rice in fresh water for 30 minutes to achieve a perfect fluffy texture.
- Boil water in a large saucepan with:
- 4 cups water
- 1 bay leaf
- 4 cloves
- 2 green cardamoms
- 1 stick cinnamon
- Add soaked rice once water is boiling.
- Cook rice on medium heat until 70% done (about 6-7 minutes), then drain and keep aside.
Making the Biryani Masala
To capture the signature aroma of the Anjappar Biryani, prepare the special biryani masala by toasting and grinding the following whole spices:
| Spice | Quantity |
|---|---|
| Fennel seeds | 1 tablespoon |
| Black peppercorns | 1 teaspoon |
| Cumin seeds | 1 teaspoon |
| Cloves | 5 |
| Cardamom pods | 4 |
| Cinnamon stick | 1 inch piece |
| Nutmeg | 1/4 teaspoon grated |
- Dry roast the spices over medium heat until fragrant (2-3 minutes).
- Cool completely before grinding to a fine powder.
- Combine with 1 tablespoon coriander powder and 1 teaspoon chili powder for the final masala mix ready to infuse the biryani with warmth and depth.
Preparing Garnishes
- Slice 1 large onion thinly and fry until golden brown for a crisp, sweet topping.
- Chop fresh cilantro and mint leaves finely (2 tablespoons each).
- Toast cashews and raisins briefly in ghee for added texture and sweetness.
- Prepare 1/2 cup fried onions, fresh herbs, and nuts in separate bowls ready to layer and garnish the biryani before serving.
We ensure every element from marinated chicken to aromatic masala and fresh garnishes comes together seamlessly in the final dish.
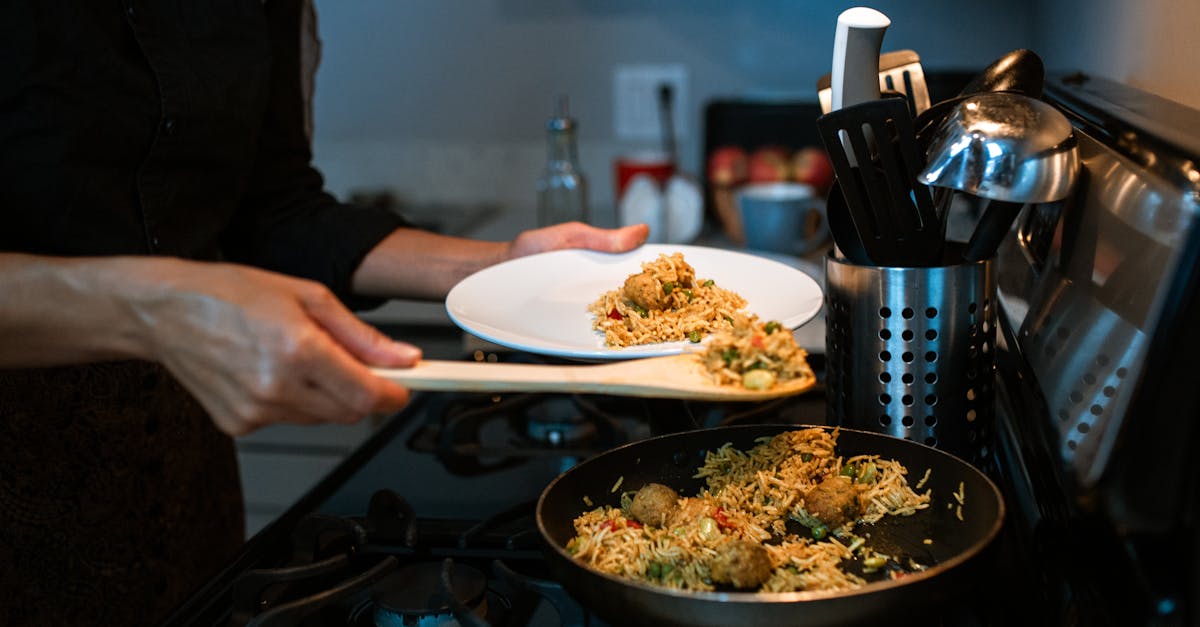
Cooking the Anjappar Biryani
To cook the Anjappar Biryani to perfection, we follow precise steps that develop rich flavors and ensure tender chicken embedded with aromatic spices. Let’s dive into the critical stages of marination, cooking, layering, and dum cooking that bring this signature South Indian dish alive.
Marinating the Chicken
Marination is the foundation for tender, flavorful chicken. Here is how we prepare it:
- Use 1 kg of chicken pieces, washed and drained.
- In a large bowl, combine:
- 1 cup yogurt (thick and fresh)
- 2 tablespoons Anjappar biryani masala
- 1 tablespoon ginger-garlic paste
- 1 teaspoon red chili powder
- 1/2 teaspoon turmeric powder
- 1 teaspoon coriander powder
- Salt to taste
- Juice of half a lemon
- Handful of chopped fresh coriander and mint leaves
We mix the chicken thoroughly with all the spices and yogurt. Cover and refrigerate for at least 1 hour, preferably overnight, to allow the flavors to penetrate deeply.
“Marinating the chicken properly sets the stage for the rich, luscious taste that defines our Anjappar Biryani.“
Cooking the Chicken
After marination, the chicken needs gentle yet thorough cooking to retain moisture and absorb the complex spice profile:
- Heat 3 tablespoons of oil in a heavy-bottomed pan.
- Add 1 large sliced onion and sauté until golden brown.
- Add the marinated chicken along with the marinade.
- Cook over medium heat for 15-20 minutes, stirring occasionally.
- Add 1/2 cup water if needed to prevent sticking.
- Once the chicken is almost cooked and the oil starts separating, turn off the heat.
| Step | Details |
|---|---|
| Pan type | Heavy-bottomed |
| Oil quantity | 3 tablespoons |
| Onion | 1 large sliced |
| Cooking time | 15-20 minutes |
| Additional water | 1/2 cup (optional) |
“Slow cooking the chicken ensures juicy, tender bites bursting with the signature Anjappar spice blend.“
Layering the Biryani
Layering is crucial for distributing flavors and creating the perfect biryani texture:
- Begin with a heavy-bottomed pot.
- Place half of the cooked rice in the pot as the bottom layer.
- Spread the cooked chicken evenly over this rice layer.
- Sprinkle fried onions, chopped coriander, and mint leaves generously.
- Optional: Add a few drops of saffron-infused milk for color and aroma.
- Cover the chicken with the remaining rice.
- Top with more fried onions, fresh herbs, and roasted cashew nuts.
We gently press the layers to compact them lightly without crushing the rice grains.
Dum Cooking (Steaming)
Dum cooking seals the flavors and gives biryani its signature aroma and tenderness:
- Seal the pot lid with dough or cover tightly with foil to trap steam.
- Place a heavy pan or tawa under the biryani pot for indirect heat.
- Cook on very low heat for 30-40 minutes.
- Avoid opening the lid during this time to retain the steam and pressure.
- Remove from heat and let it rest unopened for 10 minutes before serving.
| Dum Cooking Parameters | Description |
|---|---|
| Heat type | Low and indirect heat |
| Cooking duration | 30-40 minutes |
| Rest time | 10 minutes after cooking |
| Seal method | Dough or heavy foil |
Serving Suggestions
To enjoy the Anjappar Biryani at its best, pairing it with complementary sides and accompaniments elevates the meal dramatically. Here are our top recommended Serving Suggestions that perfectly balance and enhance the rich, spicy flavors of the biryani:
Traditional Side Dishes
- Cool Raita:
A refreshing cucumber or boondi raita made with thick yogurt calms the palate and balances the biryani’s heat. We recommend whisking yogurt with finely chopped cucumbers, a pinch of roasted cumin powder, salt, and freshly chopped coriander leaves.
- Spicy Mirchi Ka Salan:
This hot chili and peanut curry is a classic companion that adds a buttery, tangy kick. It’s cooked with green chilies, coconut, tamarind, and peanuts, intensifying the dish’s authentic South Indian flavor profile.
- Salad:
A simple salad of sliced onions, tomatoes, and lemon wedges brings freshness and crunch, making every biryani bite more exciting.
Beverage Pairings
Enjoy the biryani with cooling beverages that complement the spices without overwhelming the taste buds:
| Beverage | Description |
|---|---|
| Buttermilk (Chaas) | Lightly spiced, salted buttermilk refreshes your palate. |
| Masala Chai | A warm spiced tea for a comforting end to the meal. |
| Lemon Soda | Fizzy and citrusy soda cuts through the richness. |
Plating & Garnishing Tips
- Serve Anjappar Biryani in a rustic copper or heavy-bottomed bowl to retain heat and mirror the authentic experience.
- Garnish each serving with fried onions, fresh coriander, and mint leaves right before serving for aroma and color contrast.
- Sprinkle toasted nuts such as cashews and almonds to add a subtle crunch.
“Serving Anjappar Biryani with the right sides not only balances the flavors but also creates a wholesome and memorable dining experience for friends and family.“
Warm Tips for Serving
- Keep the biryani covered until ready to serve to preserve the warm steam and aroma.
- Offer lemon wedges on the side for guests who enjoy a zesty twist.
- Encourage mixing the biryani gently so every bite has a perfect mix of rice, chicken, and garnishes.
By following these Serving Suggestions, our Anjappar Biryani transforms into a complete, flavorful feast that delights all senses.
Make-Ahead Tips
To ensure our Anjappar Biryani delivers maximum flavor and convenience, we can prepare several components ahead of time. This streamlines the cooking process and intensifies the aromatic layers essential to this signature South Indian dish.
Marinate the Chicken in Advance
Marinating the chicken for at least 4 hours, preferably overnight, allows the spices and yogurt to deeply penetrate the meat. For the best texture and flavor, use an airtight container and refrigerate. This slow marination results in tender, juicy chicken imbued with the robust Chettinad spice blend.
Prepare the Biryani Masala Spice Mix Early
Grinding the whole spices fresh is ideal. However, we can create and store the special biryani masala powder up to one week in an airtight jar. This saves time on cooking day without compromising the fragrant depth.
Soak and Partially Cook the Rice
Rinse and soak the basmati rice for 30 minutes to achieve ideal fluffiness. For a true make-ahead advantage, we can parboil the rice to 70% doneness, drain, and refrigerate it for up to 24 hours. This method ensures gentle layering without overcooking during the final dum process.
| Step | Time Required | Storage Tips |
|---|---|---|
| Marinate Chicken | 4 hours to overnight | Airtight container, refrigerate |
| Prepare Biryani Masala Mix | 10 minutes | Airtight jar, store up to 7 days |
| Soak Rice | 30 minutes | Use immediately or parboil |
| Parboil Rice | 8–10 minutes | Drain and refrigerate 24 hours |
Make Garnishes Ahead
Fry the onions until golden and crisp, toast nuts, and chop fresh herbs in advance. Store these separately in airtight containers to maintain texture and aroma.
“Prepping key elements in advance not only cuts down on active cooking time but deepens the flavors making our Anjappar Biryani truly authentic and unforgettable.”
By organizing our workflow with these Make-Ahead Tips, we maximize flavor and efficiency, ensuring a seamless cooking experience when assembling and dum-cooking this iconic South Indian biryani.
Storing and Reheating
Proper storing and reheating of Anjappar Biryani is essential to preserve its rich flavors and tender texture. Let’s go through the steps to keep our biryani fresh and flavorful for the next meal.
Storing Anjappar Biryani
- Cool the biryani completely before storing to avoid moisture buildup that can cause sogginess or spoilage.
- Transfer the biryani to an airtight container to lock in aroma and prevent drying out.
- For short-term storage, refrigerate for up to 2 days.
- For long-term storage, freeze the biryani in a freezer-safe container, ideally in single-serving portions for convenient reheating. It keeps well for up to 1 month.
| Storage Method | Container Type | Duration | Storage Temperature |
|---|---|---|---|
| Refrigeration | Airtight container | Up to 2 days | 34°F to 40°F (1°C-4°C) |
| Freezing | Freezer-safe, sealed | Up to 1 month | 0°F (-18°C) or below |
Reheating Anjappar Biryani
To retain the authentic aroma and moisture balance during reheating, follow these methods:
Stovetop Reheating:
- Place biryani in a heavy-bottomed pan.
- Sprinkle a few tablespoons of water or stock to add moisture.
- Cover with a tight lid and cook on low heat for 8–10 minutes.
- Gently fluff with a fork before serving to revive the layers.
Microwave Reheating:
- Transfer biryani to a microwave-safe dish.
- Cover loosely with a microwave-safe lid or damp paper towel.
- Heat on medium power for 2–3 minutes.
- Pause halfway to stir and redistribute heat.
- Let stand for a minute before serving.
Oven Reheating:
- Preheat oven to 325°F (165°C).
- Spread biryani in an oven-safe dish.
- Sprinkle a little water or broth over the top.
- Cover with foil to lock moisture.
- Bake for 15–20 minutes or until heated through.
“Slow, gentle reheating is key to reviving the delicate flavors and textures of Anjappar Biryani without drying out the chicken or rice.”
Additional Tips for Best Results
- Avoid overheating to prevent the rice from becoming mushy.
- When freezing, cool the biryani quickly before sealing to maintain freshness.
- Reheat only the portion needed to avoid repeated temperature changes that compromise quality.
By mastering storing and reheating, we ensure every bite of our Anjappar Biryani delivers the same rich taste and fragrant experience as freshly cooked.
Conclusion
Anjappar Biryani is more than just a meal—it’s a celebration of rich flavors and traditional cooking techniques. By following the steps and tips we’ve shared, you can bring this iconic South Indian dish into your own kitchen with ease and confidence.
Whether you’re cooking for family or impressing guests, this biryani promises a memorable dining experience. With the right preparation and care, every bite will showcase the authentic taste that makes Anjappar Biryani truly special.
Frequently Asked Questions
What makes Anjappar Biryani unique?
Anjappar Biryani stands out due to its special Chettinad spice mix, marinated chicken, and slow-cooking (dum) technique, which together create rich, deep flavors and a tender texture.
What ingredients are essential for authentic Anjappar Biryani?
Key ingredients include premium basmati rice, chicken marinated with yogurt and spices, and a unique biryani masala made from toasted whole spices, along with garnishes like fried onions and fresh herbs.
How long should I marinate the chicken for best results?
Marinate the chicken for at least one hour, preferably overnight, to allow the spices and yogurt to tenderize the meat and enhance the flavor.
What equipment do I need to cook Anjappar Biryani at home?
You’ll need a heavy-bottomed pot for slow cooking, a large saucepan for boiling rice, mixing bowls, a frying pan, measuring cups, a fine mesh strainer, and a spatula.
What is the dum cooking method in Anjappar Biryani?
Dum cooking involves sealing the pot tightly and cooking on low heat, allowing steam to infuse the biryani with aroma and flavor while keeping the chicken tender.
Can I prepare Anjappar Biryani ingredients in advance?
Yes, you can marinate the chicken, prepare the biryani masala, soak and partially cook rice, and make garnishes ahead of time to save cooking time.
How should I store leftovers to maintain flavor?
Store Anjappar Biryani in airtight containers; refrigerate for up to 2 days or freeze for longer storage, ensuring flavors and texture remain intact.
What is the best way to reheat Anjappar Biryani?
Reheat gently on the stovetop, in the microwave, or oven, avoiding overheating; add a splash of water or cover to retain moisture and flavor.
Which side dishes complement Anjappar Biryani well?
Traditional sides include cool raita, spicy mirchi ka salan, and fresh salads, which balance the biryani’s rich and spicy flavors.
What drinks pair well with Anjappar Biryani?
Buttermilk, masala chai, and lemon soda are great beverage options that complement the spices and refresh the palate.