
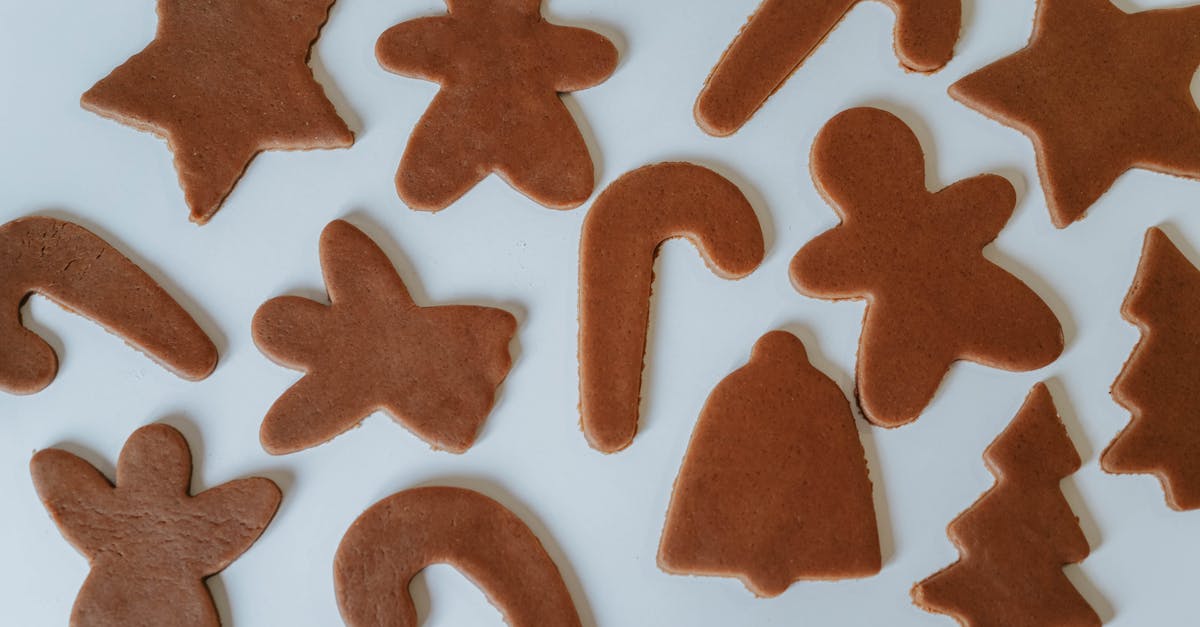
Angel Kiss Cookies are a delightful treat that’s as charming as their name suggests. These soft, melt-in-your-mouth cookies combine a delicate vanilla base with a sweet, fruity surprise at the center. Perfect for any occasion, they bring a touch of elegance and nostalgia to your cookie jar.
Ingredients
To create our delicious Angel Kiss Cookies, we carefully select ingredients that deliver the perfect balance of soft texture and sweet fruity center. Below are the essential components divided into Dry Ingredients, Wet Ingredients, and Optional Add-Ins for customization.
Dry Ingredients
We start with the following dry ingredients to build the cookie’s soft vanilla base:
- 2 ½ cups all-purpose flour, sifted
- 1 teaspoon baking powder
- ¼ teaspoon salt
- 1 cup powdered sugar (confectioners’ sugar)
Wet Ingredients
Next, we combine the wet ingredients for rich flavor and smooth dough consistency:
- 1 cup (2 sticks) unsalted butter, softened at room temperature
- 1 large egg
- 2 teaspoons pure vanilla extract
Optional Add-Ins
To add a personal touch or enhance our Angel Kiss Cookies, consider the following variations:
| Add-In | Amount | Purpose |
|---|---|---|
| Food coloring drops | 3-4 drops | Tint dough for festive colors |
| Almond extract | ½ teaspoon | Adds a nutty depth alongside vanilla flavor |
| Sprinkles | 2 tablespoons | For a vibrant, crunchy decoration on top |
We keep the core ingredients simple to highlight the soft vanilla flavor and fruity surprise, but these add-ins allow us to customize to our liking or the occasion’s theme.
Equipment Needed
To bake Angel Kiss Cookies perfectly, gathering the right equipment is essential. Below is a detailed list of tools that ensure precision and ease throughout the baking process.
- Mixing Bowls
Use medium and large bowls for combining dry and wet ingredients separately before mixing them together.
- Electric Mixer or Stand Mixer
A hand mixer or a stand mixer makes creaming butter and sugar effortless, helping achieve a smooth batter.
- Measuring Cups and Spoons
Accurate measurement of both dry and wet ingredients is critical for the perfect cookie texture. We recommend a set of standard measuring cups and spoons.
- Sifter or Fine Mesh Strainer
Sifting the dry ingredients like flour and powdered sugar ensures an even, lump-free mixture for a tender crumb.
- Rubber Spatula
Ideal for folding optional add-ins and scraping down the sides of the bowl to incorporate all ingredients evenly.
- Baking Sheets
Use rimmed baking sheets to prevent any dough from sliding off during baking.
- Parchment Paper or Silicone Baking Mats
These liners help prevent sticking and promote even baking—plus, they make cleanup easy.
- Small Cookie Scoop or Spoon
To portion dough evenly for uniform-sized cookies, use a small cookie scoop or spoon.
- Cooling Rack
Once cookies come out of the oven, transferring them to a cooling rack helps them cool evenly while maintaining their delicate texture.
| Equipment | Purpose |
|---|---|
| Mixing Bowls | Combine ingredients |
| Electric or Stand Mixer | Cream butter and sugar |
| Measuring Cups & Spoons | Measure ingredients precisely |
| Sifter or Fine Mesh Strainer | Sift dry ingredients |
| Rubber Spatula | Fold in add-ins and scrape bowl sides |
| Baking Sheets | Hold dough for baking |
| Parchment Paper / Silicone Mats | Prevent sticking and ensure even baking |
| Small Cookie Scoop/Spoon | Portion evenly |
| Cooling Rack | Cool cookies evenly |
Using this essential equipment helps us master the process of making these dreamy Angel Kiss Cookies—with consistent, delightful results every time.
Make-Ahead Instructions
To enjoy our Angel Kiss Cookies fresh and flavorful anytime, we recommend preparing the dough or cookies ahead of time following these simple steps.
Preparing and Storing the Dough
- After mixing all ingredients thoroughly and shaping the cookie dough, place it in an airtight container or wrap tightly in plastic wrap.
- Refrigerate the dough for up to 3 days to allow flavors to meld, and the dough to firm up for easier handling.
- For longer storage, freeze the dough between layers of wax paper in a resealable freezer bag for up to 3 months.
- When ready to bake, thaw dough overnight in the refrigerator. Allow it to sit at room temperature for 10-15 minutes before scooping and baking.
Baking from Frozen Dough
| Step | Instruction |
|---|---|
| Preheat oven | Set to 350°F (175°C) |
| Scoop dough | Use a small cookie scoop to portion dough |
| Adjust baking time | Add 1-2 minutes to the original baking time |
| Cool cookies | Let cool on a wire rack before serving |
Baking and Storing Baked Cookies Ahead
- Bake cookies completely following the recipe instructions.
- Allow cookies to cool completely on a cooling rack.
- Store baked cookies in an airtight container between layers of parchment paper.
- Keep cookies at room temperature for up to 5 days or freeze for up to 2 months.
- To refresh frozen cookies, thaw them at room temperature and warm in a 300°F (150°C) oven for 5 minutes to restore softness.
“Pro Tip: For the freshest taste, we recommend baking from chilled dough and enjoying the cookies within a couple of days.”
Using these make-ahead instructions keeps your Angel Kiss Cookies moist, flavorful, and ready for any occasion without sacrificing quality or taste.
Instructions
Follow these precise steps to craft the perfect Angel Kiss Cookies, capturing their delicate texture and iconic fruity center.
Prep Work
First, preheat your oven to 350°F (175°C). Line rimmed baking sheets with parchment paper or silicone baking mats for nonstick baking and easy cleanup.
Sift together the dry ingredients—all-purpose flour, baking powder, salt, and powdered sugar—to ensure a smooth, lump-free dough texture.
Gather and measure the wet ingredients: unsalted butter at room temperature, one large egg, and pure vanilla extract. Having everything at hand streamlines the mixing process.
Making the Dough
- Cream the unsalted butter and powdered sugar using an electric or stand mixer on medium speed until the mixture is light and fluffy, about 3 minutes.
- Add the egg and vanilla extract to the creamed butter mixture. Continue beating until fully combined, about 1 minute.
- Gradually incorporate the sifted dry ingredients. Mix on low speed to avoid flour clouds until just combined.
- If desired, gently fold in optional add-ins such as almond extract, food coloring, or sprinkles with a rubber spatula to customize your Angel Kiss Cookies.
Shaping the Cookies
Use a small cookie scoop or spoon to portion the dough into 1-inch balls. Roll each between your palms to achieve uniform size. Space the dough balls at least 2 inches apart on the prepared baking sheets to allow room for spreading.
For a classic look, ensure the surface of each dough ball is smooth and slightly rounded before baking.
Baking the Cookies
Bake in the preheated oven for 10 to 12 minutes until the edges are set but the centers remain soft. Avoid overbaking to keep the Angel Kiss Cookies tender and melt-in-your-mouth.
Remove the cookies from the oven and allow them to cool on the baking sheet for 5 minutes. Then transfer to a wire rack to cool completely.
| Step | Temperature | Time | Notes |
|---|---|---|---|
| Preheat Oven | 350°F (175°C) | – | Prepare baking sheets |
| Bake Cookies | 350°F (175°C) | 10-12 minutes | Watch for set edges |
| Cool on Sheet | Room temperature | 5 minutes | Ensure cookie firmness |
| Transfer to Rack | Room temperature | Until cooled | Prevent sogginess |
Adding the Kiss
While the cookies are cooling but still slightly warm, press a fruity gumdrop, candied cherry, or a small piece of your favorite fruit candy gently onto the center of each cookie.
The warm cookie surface will help the “kiss” adhere beautifully, creating the signature look and flavor contrast that defines the Angel Kiss Cookies.
Allow the cookies to cool completely to set the candy kiss firmly in place before serving or storing.
Cooling and Storage
After baking, cooling the Angel Kiss Cookies properly is essential to preserve their texture and enhance the flavor contrast between the soft cookie base and the fruity candy center.
- Cooling on Baking Sheets
Allow the cookies to rest on the baking sheet for 5 minutes. This lets them firm up slightly while the candy centers set, preventing breakage when transferring.
- Transfer to Cooling Rack
Use a spatula to gently move the cookies onto a wire cooling rack. This step promotes even air circulation, cooling the cookies thoroughly and avoiding sogginess.
Storing Angel Kiss Cookies
Proper storage ensures that our Angel Kiss Cookies maintain their delicate texture and freshness for days.
| Storage Method | Duration | Instructions |
|---|---|---|
| Airtight Container | Up to 5 days | Place cooled cookies in a single layer or separate layers with parchment paper. |
| Refrigeration | Up to 2 weeks | Store in an airtight container. Allow cookies to return to room temperature before serving. |
| Freezing (Baked Cookies) | Up to 3 months | Freeze cookies in a sealed container or freezer bag. Thaw overnight at room temperature. |
Tip: To maintain the candy’s shine and prevent stickiness, avoid stacking cookies directly on top of each other without parchment paper.
Refreshing Stored Cookies
If our Angel Kiss Cookies lose some softness during storage, quickly warm them in a 300°F (150°C) oven on a parchment-lined baking sheet for 3 to 5 minutes. This brief reheating restores their melt-in-your-mouth texture without compromising the candy center.
By following these Cooling and Storage guidelines, we keep our Angel Kiss Cookies fresh and ready to delight anytime.
Serving Suggestions
Enhance the experience of Angel Kiss Cookies with versatile serving ideas that highlight their soft, melt-in-your-mouth texture and the bright fruity center. Here are our favorite ways to present and enjoy these charming cookies:
Pairing with Beverages
- Serve Angel Kiss Cookies warm alongside a cup of hot tea or freshly brewed coffee to balance their sweetness with a soothing hot drink.
- For gatherings, offer a chilled glass of milk or sparkling lemonade to complement the buttery richness and add a refreshing contrast.
- Consider a buttery hot cocoa during colder months, which accentuates the cookies’ vanilla notes.
Presentation Tips
- Arrange cookies on a decorative platter lined with parchment paper to enhance visual appeal.
- Garnish the serving tray with fresh berries or edible flower petals that match the fruity candy centers for a coordinated look.
- Stack cookies in small towers tied with a soft ribbon to create a charming gift or party favor display.
Accompaniments and Flavor Boosters
To add layers of texture and flavor, serve Angel Kiss Cookies with:
| Accompaniment | Serving Suggestion |
|---|---|
| Whipped cream | Lightly sweetened, piped next to the cookies |
| Fresh fruit slices | Strawberries, kiwi, or oranges for refreshing zest |
| Fruit preserves | Small dollop of jam on the side |
| Ice cream | Vanilla or raspberry sorbet for contrast in texture |
Serving for Special Occasions
- For holidays or celebrations, decorate cookies post-baking with a light dusting of powdered sugar or edible glitter.
- Arrange cookies in a themed box or tin with tissue paper for an elegant edible gift.
- Use different colored fruity candies to match event themes, such as red and green for Christmas or pastel shades for Easter.
“The key to enjoying Angel Kiss Cookies lies in complementing their gentle sweetness with vibrant, fresh elements and warm or cold beverages.”
By incorporating these serving suggestions, we ensure every bite of our Angel Kiss Cookies becomes a delightful occasion.
Conclusion
Angel Kiss Cookies bring a perfect blend of simplicity and elegance to any baking experience. With just a few key ingredients and the right techniques, we can create a treat that’s as charming as it is delicious. Whether for everyday enjoyment or special occasions, these cookies offer endless opportunities to customize and share.
By following the tips for preparation, baking, and storage, we ensure every batch stays fresh and delightful. Pairing them with your favorite drinks and creative presentations only enhances the experience. Let’s keep these sweet little gems a staple in our kitchens and celebrations.
Frequently Asked Questions
What are Angel Kiss Cookies?
Angel Kiss Cookies are soft, melt-in-your-mouth vanilla cookies with a sweet, fruity candy center. They offer a nostalgic, elegant treat perfect for any occasion.
What ingredients are needed to make Angel Kiss Cookies?
Key ingredients include all-purpose flour, baking powder, salt, powdered sugar, unsalted butter, an egg, and pure vanilla extract. Optional add-ins like almond extract, food coloring, and sprinkles can be added for customization.
What tools do I need to bake these cookies?
Essential tools are mixing bowls, an electric mixer, measuring cups, a sifter, a rubber spatula, rimmed baking sheets, parchment paper, a cookie scoop, and a cooling rack.
Can I prepare the dough in advance?
Yes, dough can be refrigerated for up to 3 days or frozen for up to 3 months. Bake directly from frozen by adding a few extra minutes to the baking time.
How do I store baked Angel Kiss Cookies?
Store cookies in an airtight container at room temperature up to 5 days, refrigerate for up to 2 weeks, or freeze for up to 3 months to maintain freshness.
How can I refresh stored cookies?
Briefly reheat cookies in a preheated oven at 300°F (150°C) for 5 minutes to restore their soft, melt-in-your-mouth texture.
What are some serving suggestions for Angel Kiss Cookies?
Serve with hot tea, coffee, milk, or sparkling lemonade. Pair with whipped cream, fresh fruit, preserves, or ice cream for added flavor.
Can I decorate Angel Kiss Cookies for special occasions?
Yes, decorate with powdered sugar, edible glitter, or themed packaging to make them festive and gift-ready.