
Nut butter has become a beloved staple in kitchens across America, and for good reason. It’s creamy, versatile, and packed with nutrients that fuel our busy lives. Our American Dream Nut Butter Recipes bring a fresh twist to this classic favorite, blending rich flavors and wholesome ingredients that satisfy both taste buds and health goals.
Whether you’re looking for a quick snack or a delicious ingredient to elevate your meals, these recipes are designed to inspire. From creamy classics to bold, unexpected combinations, we’ll show you how to create nut butters that capture the spirit of innovation and comfort. Let’s dive into these easy-to-make, mouthwatering recipes that turn everyday nuts into something truly extraordinary.
Ingredients
To craft the perfect American Dream Nut Butter recipes, we focus on carefully chosen ingredients that balance flavor, texture, and nutrition. Below is a detailed breakdown of essential components and exciting options to customize your nut butter experience.
Basic Nut Butter Ingredients
Our foundation starts with these core ingredients that create the creamy richness and smooth consistency characteristic of nut butter:
- Raw or roasted nuts (almonds, peanuts, cashews, walnuts) – about 2 cups
- Neutral oil (optional, for creaminess) – 1 to 2 tablespoons (such as avocado oil or light olive oil)
- Salt – ¼ to ½ teaspoon, adjusts taste and enhances natural flavors
We recommend roasting the nuts slightly if you prefer a deeper, toasted flavor before blending.
Flavor Variations and Add-Ins
Inject creativity into your American Dream Nut Butter with these flavorful additions that transform traditional nut butter into unique delights:
| Add-In | Quantity | Flavor Role |
|---|---|---|
| Cocoa powder | 1 to 2 tablespoons | Adds rich chocolate notes |
| Vanilla extract | 1 teaspoon | Provides aromatic sweetness |
| Cinnamon | ½ teaspoon | Adds warm spice complexity |
| Sea salt flakes | a pinch | Enhances contrast and crunch |
| Chopped nuts/seeds | ¼ cup | Introduces texture and bite |
| Espresso powder | ½ teaspoon | Boosts depth with slight bitterness |
These add-ins create exciting variations while complementing the natural nut flavors.
Optional Sweeteners and Spices
To tailor nut butter for a sweeter or spicier profile, consider these additions for balanced flavor enhancement:
- Honey, maple syrup, or agave nectar – 1 to 2 tablespoons for natural sweetness
- Ground nutmeg or cardamom – ¼ teaspoon for warmth and exotic flavor
- Chili powder or cayenne pepper – a pinch to add subtle heat
- Molasses – 1 tablespoon for robust depth and sweetness
Each sweetener or spice can highlight different taste dimensions, making your American Dream Nut Butter uniquely yours.
Equipment Needed
To create the perfect American Dream Nut Butter, having the right equipment is essential. Proper tools ensure smooth texture, easy preparation, and proper storage for lasting freshness.
Nut Butter Grinder or Food Processor
The foundation of creamy nut butter is a powerful nut butter grinder or a high-quality food processor. We recommend using a device with at least 700 watts of power to achieve a silky consistency without overheating the nuts.
Look for these features:
- Sturdy stainless steel blades for even grinding
- Large capacity bowl (at least 10 cups) to accommodate enough nuts per batch
- Variable speed settings to control texture precision
- Easy-to-clean, dishwasher-safe parts
| Equipment Type | Minimum Power | Bowl Capacity | Key Advantages |
|---|---|---|---|
| Nut Butter Grinder | 700 watts or more | 10+ cups | Designed for nut grinding, smoother results |
| Food Processor | 700 watts or more | 10+ cups | Versatile, handles multiple kitchen tasks |
Storage Containers
Proper storage containers keep our nut butter fresh and tasty for weeks. Opt for:
- Glass jars with airtight lids to prevent oxidation and moisture
- BPA-free plastic containers if glass is not preferred
- Containers sized to the amount of nut butter made to minimize air exposure
Label each container with the date made so we can enjoy the freshest batches first.
Additional Tools
A few handy tools streamline the nut butter-making process:
- Silicone spatulas: Scrape every bit from the bowl and smooth the nut butter before storage
- Measuring cups and spoons: Ensure precise ingredient portions like oil, salt, and sweeteners
- Oven or toaster oven: Optional for roasting raw nuts evenly before grinding
- Mixing bowls: Combine add-ins such as cocoa powder or spices uniformly
Having these essential tools helps us craft delicious and consistent American Dream Nut Butter every time.
Instructions
Creating American Dream Nut Butter starts with precise steps to ensure the perfect blend of flavor, texture, and freshness. Let’s walk through each phase to craft nut butter that delights every palate.
Prep: Roasting and Cooling Nuts
Roasting is essential to unlock the rich flavor and enhance the natural oils in nuts. Follow these steps:
- Preheat the oven to 350°F (175°C).
- Spread raw or dry-roasted nuts evenly on a baking sheet in a single layer.
- Roast for 10 to 15 minutes, stirring halfway through to ensure even browning.
- Remove from the oven once the nuts emit a fragrant aroma and take on a light golden hue.
- Transfer nuts to a cool surface and allow them to rest for 20 to 30 minutes until completely cooled.
Cooling prevents excess heat from altering the nut butter’s texture during grinding.
Making the Nut Butter Base
Our nut butter base forms the creamy and smooth foundation. Use these clear steps to process:
- Place the cooled nuts into a high-powered food processor or nut butter grinder with a minimum of 700 watts.
- Pulse nuts for 30 seconds to break them down.
- Continue processing on low speed, stopping every 30 to 45 seconds to scrape the bowl sides with a silicone spatula.
- After about 5 to 7 minutes, the nuts will release their oils and transition from crumbly to creamy.
- Add ¼ teaspoon of salt to enhance flavor and process for an additional 30 seconds.
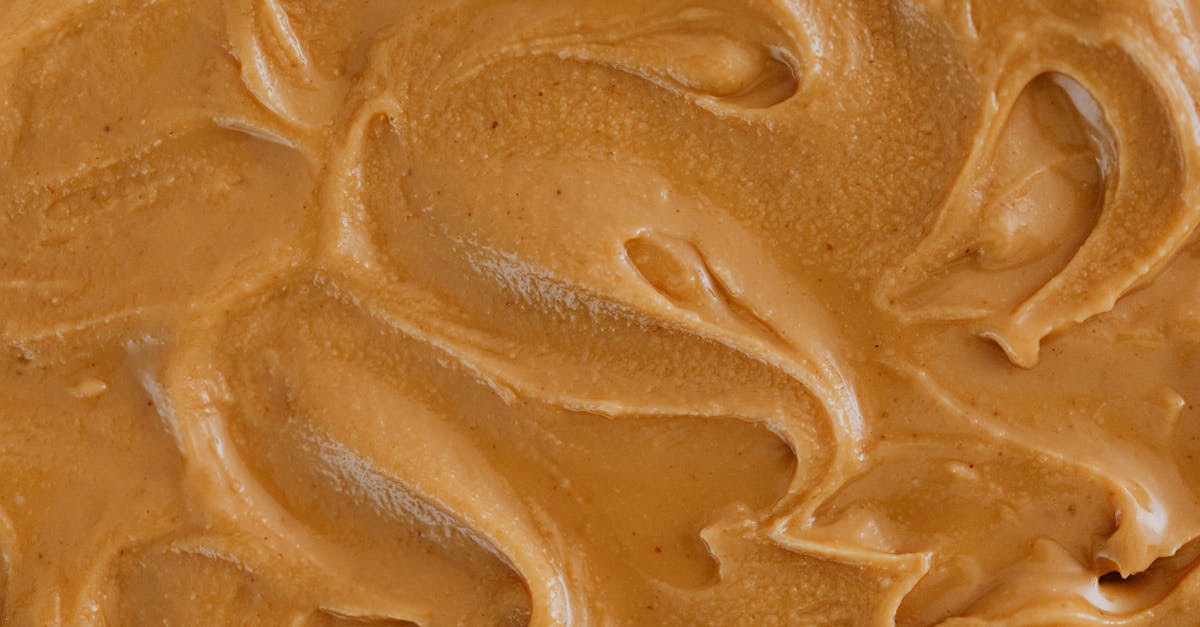
“The consistency should be thick yet spreadable as the oils naturally emerge.”
Adding Flavors and Sweeteners
Customize your nut butter with these popular American Dream additions to suit your taste preference:
| Flavor Enhancer | Suggested Amount | Notes |
|---|---|---|
| Cocoa powder | 1 to 2 tablespoons | Adds rich chocolate depth |
| Vanilla extract | 1 teaspoon | Brings aromatic sweetness |
| Honey or maple syrup | 1 to 2 tablespoons | Natural sweeteners for balance |
| Cinnamon or chili powder | ¼ to ½ teaspoon | For warmth or subtle heat |
- Add your chosen flavors and sweeteners after achieving a creamy nut base.
- Mix on low speed for another 1 to 2 minutes allowing even distribution.
- Taste and adjust the flavor, adding more as desired.
Adjusting Texture and Consistency
Perfect nut butter texture varies by preference. Modify thickness easily using these tips:
| Adjustment | Method | Approximate Amount |
|---|---|---|
| To thin | Add neutral oil (e.g., peanut or avocado oil) | 1 teaspoon at a time |
| To thicken | Chill in the refrigerator | 30 minutes or longer |
- If too thick, drizzle in oil gradually, blending well until reaching the ideal smoothness.
- If too thin, refrigerate the nut butter to firm up naturally before serving or storing.
- Use a spatula to stir after chilling for uniform consistency.
By following these detailed steps, we ensure our American Dream Nut Butter is irresistibly creamy, perfectly flavored, and ready to elevate any meal or snack.
Directions for Different Nut Butter Recipes
Here we explore step-by-step directions for making American Dream Nut Butter recipes. Each recipe highlights unique flavors and techniques to craft delicious, creamy nut butters perfect for any occasion.
Classic American Dream Peanut Butter
Ingredients:
- 3 cups roasted peanuts (unsalted)
- 1/2 tsp sea salt
- 1-2 tbsp neutral oil (optional for creaminess)
- 1 tbsp honey or maple syrup (optional for sweetness)
Steps:
- Roast the peanuts if not pre-roasted: Spread evenly on a baking sheet and roast at 350°F for 10 minutes until fragrant.
- Cool peanuts completely before processing.
- Add peanuts to a powerful food processor. Process for 3-5 minutes. Pause and scrape down sides every 30 seconds.
- Once peanuts start to crumbly soften, gradually add neutral oil if a smoother texture is desired.
- Add sea salt and optional sweetener. Blend until creamy and well combined.
- Transfer to an airtight jar and refrigerate. The peanut butter will thicken as it cools.
Creamy Almond Butter with Honey
Ingredients:
- 3 cups raw almonds
- 1/4 tsp sea salt
- 2 tbsp honey
- 1 tbsp neutral oil (optional)
Steps:
- Roast almonds on a baking sheet at 350°F for 12-15 minutes, stirring once.
- Cool completely before processing.
- Process almonds in a food processor for 4-6 minutes. Pause to scrape sides frequently.
- Add honey and sea salt during blending.
- Slowly pour in neutral oil for extra creaminess if needed.
- Once smooth and spreadable, transfer to a jar and store in the refrigerator.
Maple Pecan Nut Butter
Ingredients:
- 3 cups pecans (raw or roasted)
- 2 tbsp pure maple syrup
- 1/4 tsp cinnamon powder
- 1/4 tsp sea salt
- 1 tbsp neutral oil (optional)
Steps:
- If using raw pecans, roast at 350°F for 8-10 minutes.
- Let pecans cool before placing them in the food processor.
- Process pecans until they start to release their oils, blending for about 4 minutes.
- Add maple syrup, cinnamon, and sea salt.
- Gradually add neutral oil until the desired consistency is reached.
- Mix until creamy and smooth, then store in a sealed container in the refrigerator.
Mixed Nut Butter Blend
Ingredients:
- 1 cup roasted almonds
- 1 cup roasted cashews
- 1 cup roasted walnuts
- 1/2 tsp sea salt
- 1 tbsp honey or maple syrup (optional)
- 1-2 tbsp neutral oil (optional)
Steps:
- Combine all nuts and roast together at 350°F for 10 minutes if raw.
- Cool nuts completely before processing.
- Place nuts in a food processor. Blend for 4-6 minutes, scraping sides as needed.
- Add salt and sweetener during processing.
- Add neutral oil slowly if needed to adjust texture.
- Continue blending until creamy and well mixed. Transfer to airtight jars and refrigerate.
| Recipe | Roasting Time at 350°F | Main Sweetener | Salt Amount | Optional Oil |
|---|---|---|---|---|
| Classic American Dream | 10 minutes (if raw peanuts) | Honey or maple syrup | 1/2 tsp | 1-2 tbsp (neutral) |
| Creamy Almond Butter | 12-15 minutes | Honey | 1/4 tsp | 1 tbsp (neutral) |
| Maple Pecan Nut Butter | 8-10 minutes (if raw) | Pure maple syrup | 1/4 tsp | 1 tbsp (neutral) |
| Mixed Nut Butter Blend | 10 minutes (if raw nuts) | Honey or maple syrup | 1/2 tsp | 1-2 tbsp (neutral) |
“Smoothness and flavor unlock with patience and proper technique.” Always let nuts cool fully before blending to prevent overheating your machine and to preserve flavor integrity. Adjust sweetness and salt to taste, making your American Dream Nut Butter truly your own.
Storage and Shelf Life
Proper Storage and Shelf Life management of our American Dream Nut Butter recipes ensures they maintain their rich flavor, creamy texture, and nutritional quality. Understanding how to store nut butters correctly helps us enjoy them safely longer while preserving their signature taste.
Best Practices for Storing Nut Butter
To keep our American Dream Nut Butter fresh and delicious, follow these essential storage tips:
- Use airtight containers: Glass jars with tight-fitting lids or BPA-free plastic containers prevent air exposure, minimizing oxidation and spoilage.
- Keep it cool: Store nut butter in a cool, dark place such as a pantry for up to 1 month. For longer shelf life refrigerate immediately.
- Avoid moisture: Ensure no water or utensils introduce moisture into the jar, which can promote mold growth.
- Stir before storing: After each use, give the nut butter a good stir to redistribute natural oils and prevent separation.
- Label jars: Write the preparation or purchase date on containers to track freshness efficiently.
| Storage Location | Shelf Life | Notes |
|---|---|---|
| Pantry (cool dry) | Up to 1 month | Ideal for unopened jars |
| Refrigerator | 2 to 3 months | Recommended for homemade nut butter |
| Freezer | 6 months or longer | For extended preservation |
Freezing and Thawing Nut Butter
Freezing American Dream Nut Butter offers an excellent way to prolong shelf life while maintaining creamy consistency. Here’s how we handle it:
- Freeze in small portions: Use small airtight containers or freezer-safe bags to store manageable amounts, limiting waste.
- Leave space: Allow about 1-inch headspace in containers to accommodate expansion during freezing.
- Label clearly: Mark containers with the freezing date for easy rotation and identification.
- Thaw gradually: Move nut butter to the refrigerator overnight before use, allowing it to thaw slowly and avoid texture changes.
- Re-stir upon thawing: Once thawed, stir thoroughly to reincorporate separated oils and restore creaminess.
“Freezing nut butter is a fantastic way to enjoy our favorite homemade blends throughout the year without sacrificing quality.”
By applying these storage and preservation techniques, our American Dream Nut Butter recipes stay fresh, flavorful, and perfect for any snack or meal enhancement.
Serving Suggestions
American Dream Nut Butter shines not only as a standalone treat but also as a versatile ingredient that elevates everyday meals and snacks. Here are creative ways we enjoy these rich, flavorful nut butters in our kitchen.
Nut Butter on Toast and Sandwiches
We start with a classic favorite: spreading American Dream Nut Butter generously on warm toast. For a quick nutrient boost and indulgent flavor, pair it with:
- Sliced bananas or strawberries for natural sweetness
- A drizzle of honey or maple syrup for extra richness
- A sprinkle of chia seeds or crushed nuts for crunch and texture
When making sandwiches, the nut butter’s creamy texture melds perfectly with:
- Jelly or fruit preserves for a timeless peanut butter and jelly twist
- Sliced apples and a dash of cinnamon for a crisp, cozy bite
- Savory additions like crispy bacon or sharp cheddar for a bold flavor fusion
Incorporating Nut Butter into Smoothies and Baking
Nut Butter adds creaminess and a subtle nutty flavor that balances sweetness and boosts protein content.
In smoothies, we combine:
| Ingredient | Measurement | Notes |
|---|---|---|
| American Dream Nut Butter | 2 tablespoons | Choose creamy or crunchy depending on texture preference |
| Banana | 1 medium | Adds natural sweetness |
| Greek Yogurt | ½ cup | For creaminess and protein |
| Almond Milk | 1 cup | Helpful for desired consistency |
| Honey | 1 teaspoon | Optional for sweetness |
Blend until smooth for a nutrient-packed breakfast or snack.
In baking, nut butter enriches recipes such as cookies, brownies, and muffins. It contributes moisture and depth to flavors. Use it to replace part of the fat or add a luscious swirl:
- Swirl ¼ cup into brownie batter before baking
- Replace half the butter with nut butter in cookie recipes for a chewy texture
- Add 2 tablespoons to muffin batter for extra moisture and nutrition
Nut Butter as a Dip or Spread
For entertaining or snacks, American Dream Nut Butter becomes a flavorful dip or spread that complements various foods.
- Pair with crisp apple slices, celery sticks, or baby carrots for a healthy snack
- Mix with Greek yogurt and a pinch of cinnamon to create a creamy fruit dip
- Blend with a touch of honey and chili powder for a spicy-sweet twist perfect for pretzels or crackers
Let’s put our American Dream Nut Butter Recipes to work with these flavorful serving ideas that bring out the best in every jar.
Conclusion
Exploring American Dream Nut Butter recipes opens up a world of delicious and nutritious possibilities. With the right ingredients, equipment, and techniques, we can create creamy, flavorful nut butters tailored to our tastes. These recipes not only bring variety to our meals but also offer a wholesome boost to everyday snacks.
By embracing creativity and proper storage methods, we ensure our homemade nut butters stay fresh and enjoyable for longer. Let’s continue to experiment and savor the rich textures and unique flavors that make nut butter a staple in our kitchens.
Frequently Asked Questions
What are the key ingredients needed to make nut butter at home?
To make nut butter, you’ll need raw or roasted nuts, optional neutral oil, and salt for flavor. You can also add sweeteners like honey or maple syrup and flavorings such as cocoa powder or vanilla extract to customize the taste.
What equipment is essential for making smooth nut butter?
A high-powered food processor or nut butter grinder with at least 700 watts, sturdy stainless steel blades, and a large capacity bowl is best. Additional tools like silicone spatulas, measuring cups, and airtight storage containers help with preparation and freshness.
How do I roast nuts for nut butter?
Roast nuts in an oven at 350°F for 10-15 minutes, stirring occasionally. Let them cool completely before processing to enhance flavor and ensure a creamy texture in your nut butter.
Can I customize the flavor of my nut butter?
Yes, you can customize your nut butter by adding sweeteners like honey or maple syrup, spices such as chili powder or cinnamon, and flavor extracts like vanilla to achieve your desired taste.
How should I store homemade nut butter?
Store nut butter in airtight containers in a cool, dark place like the pantry or refrigerator. Refrigeration extends shelf life, and freezing can be used for longer storage, but always avoid moisture to prevent spoilage.
How long does homemade nut butter last?
In the pantry, homemade nut butter lasts about 1-2 weeks. Refrigerated, it can keep for up to a month. Frozen nut butter may last several months, but thaw carefully to maintain texture and flavor.
What are some creative ways to use nut butter?
Nut butter can be spread on toast, mixed into smoothies, used in baking, served as a dip for fruits or veggies, or paired with honey or yogurt for nutritious snacks.
Are nut butters nutritious?
Yes, nut butters are rich in healthy fats, protein, vitamins, and minerals, making them a nutritious addition to any meal or snack when consumed in moderation.