
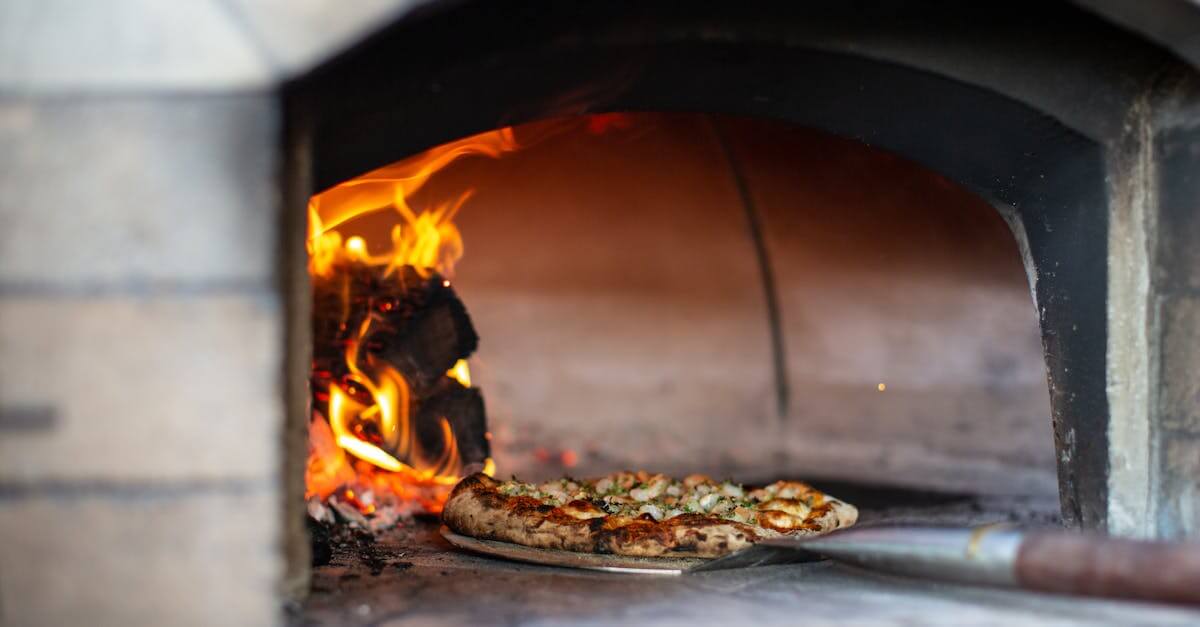
Few things compare to the irresistible aroma and crispy perfection of pizza baked in a wood-fired oven. This traditional cooking method dates back centuries and brings a unique smoky flavor and perfectly charred crust that’s hard to replicate with conventional ovens.
In our wood oven pizza recipes, we’ll explore how to harness that authentic taste right at home. Whether you’re a seasoned pizzaiolo or just getting started, these recipes will guide you to creating mouthwatering pizzas with fresh ingredients and simple techniques.
Ingredients
To craft the perfect wood oven pizza, using high-quality, fresh ingredients is essential. Below we break down the key components for dough, sauce, and toppings that bring out the distinct smoky flavor and irresistible crust characteristic of wood-fired pizza.
Dough Ingredients
Our wood oven pizza dough requires simple yet precise ingredients for that ideal chewy texture and blistered crust:
| Ingredient | Quantity | Preparation Notes |
|---|---|---|
| All-purpose flour | 4 cups (500 g) | Sifted for even mixing |
| Warm water | 1 ½ cups (360 ml) | Around 110°F to activate yeast |
| Active dry yeast | 2 ¼ teaspoons | One packet, dissolved in water |
| Salt | 1 ½ teaspoons | Enhances flavor |
| Olive oil | 2 tablespoons | Adds elasticity and richness |
| Sugar | 1 teaspoon | Feeds yeast for better rise |
“Proper dough preparation is the foundation of every great wood-fired pizza,” and these ingredients set us on the right path.
Sauce Ingredients
Our signature wood oven pizza sauce is fresh, vibrant, and balanced to complement the smoky crust:
- Crushed San Marzano tomatoes – 1 cup (fresh or canned)
- Extra virgin olive oil – 1 tablespoon
- Garlic cloves – 2, minced
- Dried oregano – 1 teaspoon
- Fresh basil leaves – 6 to 8, chopped finely
- Salt – ½ teaspoon
- Red pepper flakes – a pinch (optional for heat)
The tomato sauce should taste bright and aromatic to enhance the genuine wood-fired experience.
Toppings Ingredients
Choose fresh, quality toppings for authentic wood oven pizza flavor and texture. Here’s a typical selection we recommend:
- Fresh mozzarella – 8 ounces, sliced or torn
- Parmesan cheese – ¼ cup grated
- Italian sausage – 6 ounces, cooked and crumbled
- Bell peppers – 1 medium, sliced thin
- Red onion – ½ small, thinly sliced
- Black olives – ¼ cup, pitted and sliced
- Fresh spinach leaves – 1 cup, washed and dried
- Mushrooms – ½ cup, sliced
- Fresh basil leaves – for garnish after baking
- Extra virgin olive oil – for drizzling before serving
We encourage layering toppings thoughtfully to avoid overloading, ensuring the pizza cooks evenly in the wood oven’s intense heat.
Equipment Needed
To master wood oven pizza recipes at home, having the right equipment is essential. Our guide highlights the key tools that ensure safety, efficiency, and the perfect pizza bake every time.
Wood Oven Setup
A properly prepared wood-fired oven is the foundation of authentic wood oven pizza. We recommend the following for an optimal setup:
- Wood Selection: Use seasoned hardwoods like oak, maple, or hickory for a clean burn and steady heat.
- Temperature Control: Aim for 700°F to 900°F (370°C to 480°C) for quick cooking and charring.
- Fire Placement: Build the fire off to the side to create radiant heat while keeping the cooking surface evenly hot.
- Heat Distribution: Allow the oven to preheat for at least 1 hour ensuring thermal mass retention for consistent baking.
| Setup Element | Recommendation |
|---|---|
| Wood Type | Seasoned hardwood (oak, maple) |
| Optimal Temperature | 700°F to 900°F (370°C-480°C) |
| Preheat Time | Minimum 1 hour |
| Fire Location | Side of oven for even heat |
Pizza Peel and Stone
Handling and transferring pizzas requires precision. Investing in the right pizza peel and stone will keep our pizzas intact and beautifully cooked.
- Pizza Peel: Choose a large wooden or metal peel. Wood peels prevent dough sticking, metal peels slide under pizzas easily.
- Pizza Stone or Baking Steel: Place inside the wood oven to simulate the traditional pizza hearth. This focuses heat on the crust, giving the perfect crispy base with pockets of char.
We recommend a stone thickness of at least ¾ inch or a baking steel of ¼ inch for durability and heat retention.
| Tool | Material | Purpose |
|---|---|---|
| Pizza Peel | Wood/Metal | Transfer dough to oven, remove pizza |
| Pizza Stone | Cordierite/Clay | Even heat distribution |
| Baking Steel | Steel | Superior heat retention, crispy crust |
Other Useful Tools
To ensure smooth workflow from prep to serving, keep these handy:
- Infrared Thermometer: Quickly check oven surface temperatures for consistent cooking.
- Dough Scraper: Shape and portion dough precisely.
- Oven Gloves: Protect hands from intense heat when handling pizza or firewood.
- Long-Handled Brush: Sweep ash and embers from the stone between bakes.
- Timer: Monitor quick cooking times—wood oven pizzas cook in 90 seconds to 3 minutes.
Using these tools alongside your wood oven pizza recipes guarantees professional results in every pizza we create.
Preparing the Dough
Mastering the art of wood oven pizza starts with preparing the perfect dough. This foundational step ensures a chewy interior and a crispy, blistered crust that only a wood-fired oven can deliver.
Mixing the Dough
To create a dough that holds up to intense wood oven heat, we start by combining these ingredients precisely:
- 4 cups all-purpose flour
- 1 ½ cups warm water (about 110°F)
- 2 ¼ teaspoons active dry yeast (one packet)
- 1 teaspoon sugar
- 2 tablespoons extra virgin olive oil
- 2 teaspoons salt
Steps:
- In a small bowl, dissolve the yeast and sugar in warm water. Let it sit for 5 to 10 minutes until foamy bubbles appear.
- In a large mixing bowl, combine flour and salt.
- Make a well in the center and pour in the yeast mixture and olive oil.
- Gradually mix from the center outward until a shaggy dough forms.
- Turn the dough onto a lightly floured surface and knead for 8 to 10 minutes. The dough should become smooth, elastic, and slightly tacky but not sticky.
“The secret to a strong dough is persistence in kneading, which develops gluten for that ideal chewy texture.“
First Rise
Allowing the dough to properly rise develops flavor and structure.
- Lightly oil a large bowl with olive oil.
- Place the dough in the bowl and turn to coat it in oil.
- Cover the bowl tightly with plastic wrap or a damp cloth.
- Let the dough rise in a warm area, ideally around 75°F, for 1 to 1 ½ hours or until doubled in size.
| Step | Temperature | Duration | Result |
|---|---|---|---|
| First rise | ~75°F | 1 – 1 ½ hours | Doubled in size, airy |
Shaping the Dough
Proper shaping ensures the dough cooks evenly in the high heat of a wood oven.
- Punch down the dough gently to release excess gas.
- Transfer the dough to a floured surface.
- Divide the dough into equal portions (this recipe makes two 12-inch pizzas).
- Using your fingers, press and stretch each portion outward from the center, leaving a slightly thicker edge for the crust.
- Avoid using a rolling pin to preserve air bubbles—the hallmark of great wood oven pizza crust.
- Once shaped, place the dough on a floured pizza peel or parchment paper, ready for toppings and baking.
Preparing the Sauce
Crafting the perfect wood oven pizza sauce is essential to complement the smoky char of the crust and fresh toppings. We focus on vibrant flavors that balance acidity, sweetness, and herbaceous notes to elevate every slice.
Classic Tomato Sauce
Our foundation is a robust classic tomato sauce made from San Marzano crushed tomatoes, prized for their natural sweetness and low acidity. Here is how we make it:
- Ingredients:
- 28 oz crushed San Marzano tomatoes, preferably canned for consistency
- 2 tablespoons extra virgin olive oil
- 2 cloves garlic, finely minced
- 1 teaspoon dried oregano
- 6-8 fresh basil leaves, torn
- 1 teaspoon salt
- Optional: ¼ teaspoon red pepper flakes for subtle heat
- Steps:
- Heat olive oil in a saucepan over medium heat until shimmering.
- Add minced garlic and sauté for 30 seconds until fragrant but not browned.
- Pour in the crushed tomatoes and stir to combine.
- Add oregano, salt, and optional red pepper flakes.
- Lower heat and simmer gently for 15-20 minutes, stirring occasionally.
- Remove from heat and stir in torn fresh basil leaves.
- Let the sauce cool slightly before spreading evenly over the dough.
Pro tip: Avoid overcooking the sauce; a fresh, slightly chunky texture keeps the flavor bright and balances the wood oven’s intense heat.
| Ingredient | Quantity | Purpose |
|---|---|---|
| Crushed San Marzano tomatoes | 28 oz | Base with natural sweetness |
| Extra virgin olive oil | 2 tablespoons | Adds richness and depth |
| Garlic | 2 cloves (minced) | Aromatic foundation |
| Dried oregano | 1 teaspoon | Classic Italian herb flavor |
| Fresh basil leaves | 6-8 (torn) | Bright herbal notes |
| Salt | 1 teaspoon | Enhances overall taste |
| Red pepper flakes | ¼ teaspoon (optional) | Adds gentle heat |
Alternative Sauce Options
While the classic tomato sauce reigns supreme, experimenting with other delicious alternatives can offer exciting twists that complement wood oven pizzas:
- White Garlic Sauce: Combine olive oil, roasted garlic puree, cream, parmesan cheese, salt, and cracked black pepper. This sauce brings a creamy, savory layer, ideal for toppings like mushrooms or chicken.
- Pesto Sauce: Blend fresh basil, pine nuts, garlic, parmesan, and olive oil for a vibrant green sauce. Its fresh herbal notes and slight nuttiness make it perfect for vegetable or Margherita-style pizzas.
- Barbecue Sauce: Use a smoky, slightly sweet barbecue sauce base paired with smoked mozzarella, grilled chicken, and red onions. It taps into the wood oven’s inherent smokiness for a synergistic flavor profile.
- Buffalo Sauce: For a spicy kick, toss your toppings in a classic buffalo-style wing sauce. Balance the heat with creamy blue cheese or ranch drizzles after baking.
We encourage testing these sauces in small batches to find the perfect match for your wood-fired creations. Keeping sauce proportions manageable prevents sogging and respects the crust’s crisp texture.
Prepping Toppings
Mastering the art of wood oven pizza recipes means giving special attention to topping preparation. Properly prepared toppings ensure even cooking and enhance the smoky, charred flavor signature to wood-fired pizzas.
Cheese Selection and Preparation
Choosing the right cheese is critical for flavor and meltability in our wood oven pizzas. We opt for fresh, high-quality varieties like:
- Fresh Mozzarella: Cut into thin slices or small chunks to melt evenly without releasing excess moisture.
- Parmesan: Finely grated for a sharp, nutty accent sprinkled after baking.
- Fontina or Provolone: Thinly sliced for richer, gooey texture.
Pro tip: Drain any excess water from fresh mozzarella on paper towels for 15 minutes before use. This prevents soggy crusts in the intense heat of the wood oven.
| Cheese Type | Preparation | Role in Pizza |
|---|---|---|
| Fresh Mozzarella | Thin slices/chunks | Creamy melt, mild flavor |
| Parmesan | Finely grated | Adds sharpness post-bake |
| Fontina/Provolone | Thin slices | Rich, gooey texture |
Meat and Vegetable Toppings
We prepare meats and vegetables thoughtfully to withstand the rapid cooking temperature of a wood oven (700°F to 900°F) and meld harmoniously with other flavors.
- Italian Sausage: Brown and crumble before topping. This reduces extra grease and ensures thorough cooking.
- Bell Peppers and Red Onions: Slice thinly to cook quickly and maintain slight crunch.
- Mushrooms: Slice evenly and sauté lightly to reduce moisture, preserving crust crispness.
- Black Olives and Fresh Spinach: Use fresh spinach leaves whole and pit olives if necessary. Add these toppings sparingly to avoid overwhelming the pizza.
- Fresh Basil: Add after baking for vibrant aroma and color contrast.
We layer toppings carefully, placing heavier ingredients under cheese to secure them on the pizza and delicate items on top to preserve texture.
| Topping | Preparation | Purpose |
|---|---|---|
| Italian Sausage | Brown and crumble | Prevents greasiness, cooks thoroughly |
| Bell Peppers | Thinly sliced | Quick cooking, retains crunch |
| Red Onion | Thinly sliced | Balances sweetness and sharpness |
| Mushrooms | Light sauté | Moisture reduction to avoid soggy crust |
| Black Olives | Pitted | Adds salty tang |
| Fresh Spinach | Fresh leaves | Adds earthy freshness |
| Fresh Basil | Added post-bake | Maintains aroma and color |
“A well-prepped topping is half the secret to a spectacular wood-fired pizza.” Ensuring each topping is ready to handle the intense, fast heat will elevate the depth and texture of our homemade wood oven pizzas.
Cooking Instructions
Mastering the cooking process is essential to achieve the perfect wood oven pizza with a smoky char and bubbly, golden crust. Follow these clear and precise steps to get the best results every time.
Preheating the Wood Oven
Proper preheating ensures an even cooking temperature and a blistered crust unique to wood-fired pizzas.
- Start your fire using seasoned hardwoods like oak, maple, or hickory for consistent heat and aroma.
- Allow the oven to heat for at least 60 minutes to reach the optimal temperature range of 700°F to 900°F.
- Use an infrared thermometer to monitor the oven floor and dome temperatures. The floor should be about 700°F, and the dome closer to 900°F.
- Maintain the fire at the back or side of the oven to ensure even heat distribution across the cooking surface.
- Remove any large embers from the cooking area, leaving a layer of hot coals, to prevent burning the pizza crust.
| Step | Detail | Importance |
|---|---|---|
| Firewood Selection | Seasoned hardwood (oak, maple, hickory) | Flavor & steady heat |
| Preheat Duration | Minimum 60 minutes | Achieving ideal cooking temp |
| Temperature Range | 700°F (floor) to 900°F (dome) | Optimal cooking environment |
| Fire Placement | Side or back of oven | Heat distribution |
| Ember Positioning | Move embers away from cooking surface | Avoid burning crust |
Cooking the Pizza
Once the oven reaches the right temperature, timing and technique are critical.
- Slide the shaped dough onto a well-floured pizza peel, then transfer it quickly to the hot oven floor.
- Keep the pizza near the fire for a few seconds to start blistering the crust and then move it slightly away to cook evenly.
- Use a long-handled peel or pizza turner to rotate the pizza every 30 seconds to 1 minute. This ensures even cooking and prevents burning.
- Cook time ranges between 90 seconds to 3 minutes depending on your oven temperature.
- Top heat and radiant heat from the fire will melt cheese completely and crisp the bottom crust to a golden brown with charred spots.
- Avoid opening the oven door frequently as it causes heat loss and prolongs cooking time.
Checking for Doneness
Knowing when your wood-fired pizza is perfectly cooked requires attention to visual and tactile cues.
- The crust should be golden-brown with dark charred bubbles evenly distributed.
- The cheese must be fully melted, bubbly, and slightly browned.
- The bottom of the pizza should feel firm and crispy but not burnt.
- Use a pizza peel to lift and inspect the bottom for spots of char and firmness.
- If the crust is soft or doughy, return the pizza to the oven for an additional 15–30 seconds.
- For toppings, check that meats are fully cooked and vegetables are tender yet not soggy.
- Remove the pizza promptly to avoid overcooking, which can dry out the crust and toppings.
Serving Suggestions
To fully enjoy our wood oven pizza recipes we must serve them thoughtfully. Proper slicing and careful drink and side pairings enhance the smoky flavor and perfect char that define these pizzas.
Slicing and Serving
For the best presentation and ease of eating when serving wood-fired pizzas, slice using a sharp pizza wheel or a serrated knife. Aim for 8 equal slices for a standard 12-inch pizza to ensure balanced portions. Let the pizza rest for 1–2 minutes off the oven before slicing. This allows the cheese to set slightly and the crust to finish crisping.
Use a wooden paddle or pizza peel to transfer from the oven to a serving board. Arrange slices in a fan shape or circle on a rustic wooden board or pizza stone to keep the authentic wood oven feel. Garnish with fresh basil leaves or a sprinkle of grated Parmesan right before serving to add visual appeal and fresh aroma.
Pairing with Drinks and Sides
Pairing the smoky, charred flavors of wood oven pizza with complementary drinks and sides elevates the meal experience. Here are our top recommendations.
| Drink Type | Recommended Varieties | Flavor Profile & Pairing Notes |
|---|---|---|
| Red Wine | Sangiovese, Chianti, Barbera | Acidic and fruity, cut through rich cheese and meats |
| White Wine | Pinot Grigio, Vermentino | Crisp and light, balance herbaceous and veggie toppings |
| Craft Beer | Pale Ale, Amber Ale, Saison | Hoppy or malty flavors match char and wood smoke |
| Non-Alcoholic | Sparkling water with lemon, Herbal iced tea | Refresh and cleanse palate without overpowering taste |
For sides, keep it light to spotlight the pizza:
- Arugula salad with lemon vinaigrette for peppery freshness
- Grilled seasonal vegetables to complement smoky crust
- Garlic knots or focaccia with a side of marinara for dipping
Our wood oven pizza recipes shine brightest when paired simply and served with care. These serving suggestions invite us to savor the smoky crispness and fresh toppings in every bite.
Tips for Perfect Wood Oven Pizza
Mastering wood oven pizza requires attention to several key factors. By controlling temperature, handling dough correctly, and enhancing flavor with smoke, we can create pizzas that rival the best pizzerias.
Managing Oven Temperature
Achieving the optimal oven temperature is vital for that elusive wood-fired pizza crust—crispy outside, chewy inside, with the signature char. We recommend maintaining the oven temperature between 700°F and 900°F.
| Oven Temperature (°F) | Outcome | Notes |
|---|---|---|
| 600 – 700 | Longer cook time, less char | Good for thicker crust or delicate toppings |
| 700 – 900 | Ideal for traditional crust | Fast cooking ensures perfect blister |
| Above 900 | Risk of burning | Monitor closely, adjust wood or airflow |
To maintain this, we use seasoned hardwoods—like oak or maple—for steady burning. We position the fire to one side and adjust wood supply to balance heat distribution. Using an infrared thermometer helps us regularly check the stone and air temperature to avoid hot spots or undercooked pizzas.
“A well-maintained fire is the heart of every authentic wood oven pizza.”
Handling and Stretching Dough
The art of handling dough impacts both texture and cooking performance. We always handle dough gently to preserve air bubbles that create a light, airy crust.
- Flour your hands and working surface lightly to prevent sticking but avoid excess flour which can make dough tough.
- Use your fingers and knuckles to stretch evenly from the center outwards, rotating the dough continuously for uniform thickness.
- Avoid using a rolling pin to maintain gluten structure and bubbles critical for that chewy texture.
- For a larger pizza, gently stretch instead of pulling to keep the gas trapped inside dough pockets.
When placing the dough on a floured pizza peel, make sure it slides smoothly off into the oven without sticking. A quick shake test before transferring is helpful.
Pro Tip: Let the dough rest for 5 to 10 minutes if it resists stretching. This relaxes gluten making stretching easier.
Enhancing Flavor with Wood Smoke
The smoky aroma is what sets wood-fired pizza apart. To enhance this flavor:
- Use dry, well-seasoned hardwoods to produce clean smoke without bitterness.
- Keep some embers flickering to maintain consistent smoke rather than heavy flames, which can overpower the pizza.
- Avoid resinous woods like pine or cedar that produce unpleasant tastes.
- Open the oven door briefly while cooking to allow balanced smoke circulation—this infuses flavor without soot buildup.
We also recommend adding fresh herbs like rosemary or oregano near the fire for a subtle aromatic lift.
“Smoke is not just flavor—it’s character baked into every bite.”
By expertly managing these aspects, we ensure every pizza emerges with that irresistible wood oven pizza hallmark: crisp blistered crust, balanced smoky flavor, and perfectly cooked toppings.
Make-Ahead and Storage Instructions
Preparing ahead and storing properly are crucial for maintaining the freshness and flavor of our wood oven pizza recipes. Here’s how to handle dough and leftovers effectively to enjoy optimal taste anytime.
Dough Storage
Storing pizza dough correctly allows us to pause the process and bake later without sacrificing texture or rise. Follow these guidelines:
- Refrigeration:
After kneading, place the dough in a lightly oiled bowl and cover tightly with plastic wrap. Refrigerate for up to 72 hours. The dough will continue to ferment slowly, developing more depth in flavor.
- Freezing:
For longer storage, divide dough into individual portions, wrap securely in plastic wrap, then seal in a freezer bag. Freeze for up to 3 months. Thaw in the refrigerator overnight before shaping and baking.
- Bringing Dough to Room Temperature:
Before using dough that has been chilled or frozen, allow it to rest at room temperature for 1 to 2 hours. This helps relax gluten and improves stretchability for a perfect shape.
| Storage Method | Duration | Key Steps |
|---|---|---|
| Refrigeration | Up to 72 hours | Oil, cover tightly, ferment slowly |
| Freezing | Up to 3 months | Portion, wrap, freeze, thaw overnight in fridge |
“Proper dough storage ensures the same chewy interior and crispy crust integral to wood oven pizza’s signature bite.“
Leftover Pizza Storage
Preserving leftover wood oven pizza requires care to maintain its crispy crust and vibrant toppings.
- Cooling:
Allow the pizza to cool completely at room temperature before storing. This prevents condensation and soggy crust.
- Refrigeration:
Wrap individual slices tightly in aluminum foil or place them in an airtight container. Store in the refrigerator for up to 3 days.
- Reheating:
Reheat slices in a preheated oven at 375°F for 8-10 minutes on a baking sheet or pizza stone to restore crispness.
Avoid the microwave as it softens the crust and makes toppings rubbery.
| Storage Step | Instructions | Duration |
|---|---|---|
| Cooling | Let cool completely | 20-30 minutes |
| Refrigeration | Wrap or airtight container | Up to 3 days |
| Reheating | Oven at 375°F for 8-10 minutes | Until hot/crispy |
Conclusion
Mastering wood oven pizza recipes opens up a world of flavor and creativity right in our own kitchens. With the right ingredients, techniques, and equipment, we can achieve that signature smoky char and perfectly crisp crust every time.
Experimenting with dough, sauce, and toppings allows us to tailor each pizza to our tastes while embracing the unique qualities of wood-fired cooking.
By following these guidelines and tips, we’re well on our way to crafting authentic, delicious pizzas that impress family and friends alike. Let’s keep exploring and enjoying the art of wood oven pizza together!
Frequently Asked Questions
What makes wood-fired pizza different from traditional oven pizza?
Wood-fired pizza is cooked at very high temperatures (700°F–900°F) with seasoned hardwood, creating a unique smoky flavor and a perfectly charred, blistered crust that conventional ovens can’t replicate.
What are the key ingredients for making wood-fired pizza dough?
The dough requires all-purpose flour, warm water, active dry yeast, salt, olive oil, and sugar to achieve a chewy interior and crisp, blistered crust.
How is the classic wood-fired pizza sauce made?
It’s made from crushed San Marzano tomatoes, extra virgin olive oil, garlic, dried oregano, fresh basil, salt, and optional red pepper flakes for a fresh and slightly chunky texture.
What toppings are best for wood-fired pizza?
Fresh mozzarella, Parmesan, Italian sausage, bell peppers, red onion, black olives, spinach, mushrooms, and fresh basil are ideal. Layer toppings carefully for even cooking.
What equipment do I need to cook wood-fired pizza at home?
Essential tools include a pizza peel, pizza stone, an infrared thermometer, dough scraper, oven gloves, and a long-handled brush for proper fire management and safe handling.
How do I prepare the dough for wood-fired pizza?
Mix the ingredients, knead to develop gluten, let the dough rise until it doubles in size, then shape it gently to preserve air bubbles for an airy crust.
How should I preheat my wood-fired pizza oven?
Preheat the oven for at least 60 minutes using seasoned hardwood to reach optimal cooking temperatures ranging from 700°F to 900°F.
How do I know when the pizza is done?
The pizza is ready when the crust is golden and blistered, cheese is melted and bubbly, and the bottom feels firm with a smoky char.
Can I use alternative sauces besides tomato sauce?
Yes, you can experiment with white garlic sauce, pesto, barbecue sauce, or buffalo sauce while maintaining the dough’s texture and the pizza’s smoky flavor.
What are the best tips for storing dough and leftover pizza?
Store dough in the refrigerator or freezer for later use. Cool leftover pizza before refrigerating and reheat gently to maintain crust crispiness and topping freshness.