
We trust the power of elderberries because they’ve been a staple in homemade remedies for generations. Our rich syrup highlights their tart notes and keeps our pantry stocked for any season. People have used elderberry preparations for centuries to boost wellness and add flavor to teas or cocktails. We’ll show you how we can it at home.
Canning this syrup lets us preserve its fruity essence so we can enjoy it all year. We love the flexibility it brings because it’s perfect drizzled over pancakes or stirred into a soothing cup of tea. We’ll walk you through the steps so you can fill your shelves with jars of delicious elderberry goodness that stand ready whenever needed.
Ingredients
We rely on fresh elderberries or dried elderberries to achieve a rich taste in our Elderberry Syrup Recipe Canning. We ensure each item is prepped properly and ready for a smooth cooking process. Refer to the table below for precise measurements.
| Ingredient | Quantity | Preparation |
|---|---|---|
| Fresh elderberries | 6 cups | Rinsed and stems removed |
| Water | 4 cups | – |
| Raw honey | 2 cups | Add after syrup cools |
| Lemon juice | 2 tablespoons | Adjust for acidity |
| Cinnamon stick | 1 | Optional but adds a warm note |
| Cloves | 2 | Optional for subtle spice flavor |
If we use dried elderberries we measure about half the amount of fresh elderberries. We keep the water ratio the same for proper consistency. We use lemon juice to maintain acidity during canning.
We inspect our berries for any debris. Then we discard any shriveled or damaged pieces. We measure the rest carefully to ensure consistent results. We also sanitize our canning jars in advance. This step helps us preserve the final syrup with maximum freshness.
Equipment
We gather several key items to ensure our elderberry syrup canning process goes smoothly. We set them up neatly before we start so that everything is within reach. Here is what we use:
- Canning Jars and Lids
We choose jars with tight-fitting lids suitable for water bath canning. We inspect them for cracks or dents to ensure a proper seal.
- Water Bath Canner
We use a deep canner designed for boiling large batches. We ensure our rack fits inside so that jars stay elevated.
- Jar Lifter
We rely on a jar lifter to move hot jars in and out of boiling water. This helps us avoid burns or spills.
- Wide-Mouth Funnel
We place a wide-mouth funnel on each jar to reduce splatters while ladling the hot elderberry syrup.
- Kitchen Towels
We spread out clean towels to catch drips and set our jars on them after filling.
- Fine-Mesh Strainer or Cheesecloth
We strain the cooked berries to remove seeds and pulp. This method keeps our syrup smooth and clear.
- Measuring Cups and Spoons
We measure ingredients accurately to maintain flavor consistency.
- Ladle and Wooden Spoon
We stir our berries with a sturdy spoon. Then we ladle the finished syrup carefully to prevent overflow.
Preparation Steps
We gather our equipment and ingredients. We keep our canning process smooth by organizing everything in advance.
Rinse And Clean Elderberries
- We place our fresh or dried elderberries in a large colander.
- We remove any stems or debris by hand.
- We run cool water over the berries and gently agitate them.
- We inspect them for bruised or damaged pieces.
- We lightly pat them dry with a clean towel.
Measure And Combine Ingredients
| Ingredient | Quantity |
|---|---|
| Fresh elderberries | 1 pound (about 3 cups) |
| Water | 3 cups |
| Raw honey | 1 cup |
| Lemon juice | 2 tablespoons |
| Cinnamon stick (optional) | 1 |
| Cloves (optional) | 2 |
- We measure each ingredient using accurate kitchen scales and cups.
- We add the rinsed elderberries to a medium pot with the water.
- We include optional spices for added flavor.
- We simmer the mixture over medium heat, stirring occasionally.
- We reduce the heat until the berries are soft and the liquid has thickened.
Cooking Instructions
We carefully cook our elderberry syrup so it retains maximum flavor. We maintain steady heat and precise timing for the best canning results.
Simmer The Elderberries
- Place the pot with fresh or dried elderberries and water on medium heat
- Stir the berries gently to avoid scorching
- Allow them to bubble for about 20 minutes or until the berries burst
- Use a spoon to skim any foam from the surface
| Stage | Duration | Heat Level |
|---|---|---|
| Initial Simmer | 20 minutes | Medium |
Add Sweetener And Flavorings
- Lower the heat to a slow simmer
- Stir in raw honey or other sweetener while the mixture is warm
- Add optional spices like cinnamon or cloves for extra depth
- Let the syrup thicken for 5 to 10 minutes
- Remove from heat once the flavors have melded thoroughly
| Ingredient | Purpose |
|---|---|
| Honey | Adds sweetness and smoother taste |
| Cinnamon or Cloves | Provides warm and aromatic notes |
Canning Directions
We are now ready to preserve our elderberry syrup for future enjoyment. We organize our tools and prepare for a safe canning experience.
Sterilize The Jars
We place our empty jars into a large water bath canner and ensure they are fully submerged. We fill the canner with water so the jars are covered by 1 inch. We bring the water to a rolling boil for 10 minutes to eliminate any bacteria. We place lids and bands in a separate pot of hot water to soften and sanitize the seals.
| Step | Time |
|---|---|
| Boiling Jars | 10 minutes |
| Soaking Lids And Bands | 5 minutes |
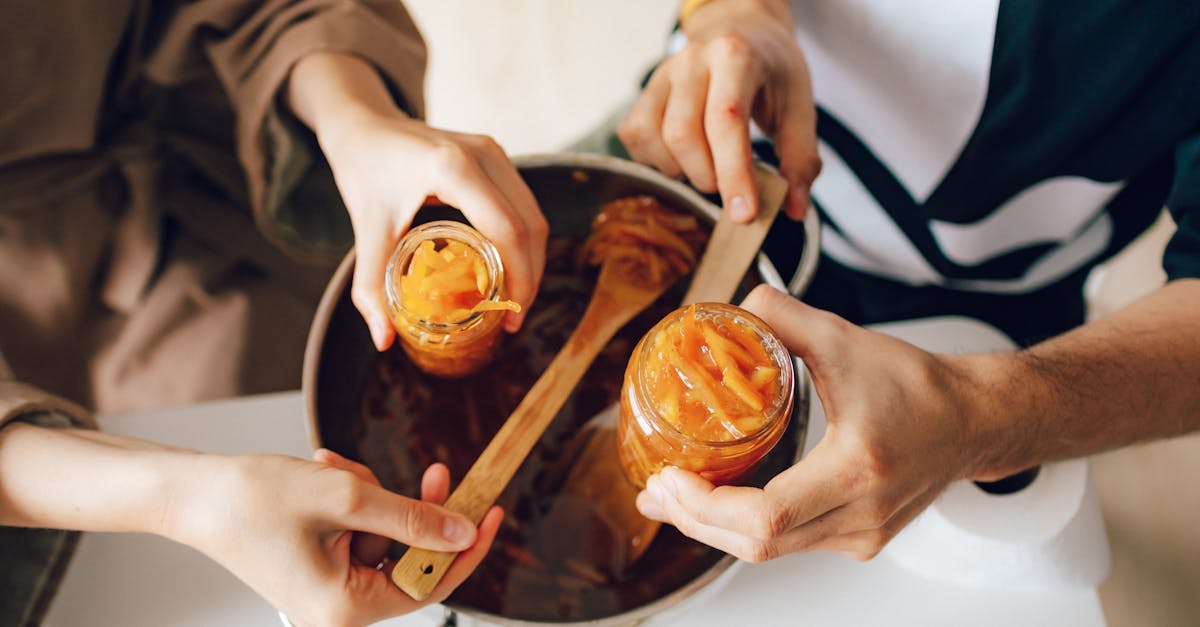
Fill And Seal
We lift one jar out of the canner using a jar lifter. We set a wide-mouth funnel on top and ladle in our hot elderberry syrup. We leave at least 1/4 inch of headspace. We wipe the rim with a clean cloth and secure the lid and band until fingertip tight. We process the filled jars in the water bath canner for 15 minutes. We allow the jars to rest in the hot water for 5 minutes before lifting them out. We set them on a towel to cool for 24 hours. We check the seals and store the sealed jars in a cool and dry place.
Storage Tips
We store our elderberry syrup in sealed jars in a cool, dark spot away from direct light to maintain freshness. We keep the area dry and free of temperature fluctuations to help preserve flavor. We label each jar with the processing date and inspect the seals monthly. We discard any jars that show bulging lids or mold.
We move opened jars to the refrigerator. We place them on a shelf where we can easily spot signs of spoilage and use them within a few months. We gently shake the jar before each use to mix any natural sediment.
Below is a helpful guide on recommended storage times:
| Storage Condition | Shelf Life |
|---|---|
| Sealed and Unopened | Up to 12 months |
| Opened and Refrigerated | Up to 3 months |
We keep our jars organized in a single layer to prevent accidental tipping. We also leave enough space between them so air can circulate. This simple system helps us track usage and ensures long-lasting quality.
Conclusion
We’ve discovered that canning elderberry syrup is a fulfilling endeavor that connects us with a timeless tradition and offers year-round enjoyment. Each jar captures the natural goodness we treasure waiting to enhance our everyday routines.
It’s a satisfying way to keep a ready supply on hand contributing to a sense of self-reliance and creativity in our kitchens. By following proper sealing and storage practices we’re confident this vibrant syrup will stay fresh and delicious. We hope you feel inspired to embrace the joys of canning and savor the unique flavor that elderberry syrup brings throughout the seasons.
Frequently Asked Questions
What are the benefits of elderberries?
Elderberries are popular for their antioxidants and vitamins, traditionally used to support immune health. They offer a tangy flavor and can be turned into syrup, jams, or even teas for versatile enjoyment.
How do I make elderberry syrup at home?
Combine fresh or dried elderberries with water, raw honey, and optional spices like cinnamon or cloves. Simmer on medium heat until berries burst, then add sweeteners. Strain the mixture to remove solids and enjoy.
What equipment is essential for canning elderberry syrup?
You’ll need canning jars with tight-fitting lids, a water bath canner, a jar lifter, and a wide-mouth funnel. Kitchen towels, a fine-mesh strainer, and measuring tools are also vital for a smooth canning process.
Why is sterilizing jars important?
Sterilizing jars by boiling them for at least 10 minutes helps eliminate bacteria. This simple step is critical for preventing spoilage, preserving flavor, and ensuring your elderberry syrup stays fresh and safe to use.
How long do I process jars in the water bath canner?
After filling your jars with hot syrup, process them in a boiling water bath for around 15 minutes. This time works to seal the jars properly and remove any lingering bacteria for long-lasting preservation.
How should I store canned elderberry syrup?
Keep sealed jars in a cool, dark spot away from direct sunlight. Label jars with the canning date and check seals regularly. Store opened jars in the fridge, use within a few months, and shake gently before pouring.
How long does sealed elderberry syrup last?
Properly sealed and stored jars can remain fresh for up to 12 months. Once opened, refrigerate and consume within three months. Discard any syrup showing bulging lids, mold, or off-smells to ensure safety.