
Keeping our canvas gear looking fresh and durable is easier than we thought with a simple canvas wax recipe. This natural wax blend restores water resistance and adds a protective layer that extends the life of our outdoor essentials. Whether it’s tents, backpacks, or jackets, a good wax treatment can make all the difference.
We love that making canvas wax at home lets us control the ingredients, ensuring a non-toxic, eco-friendly option. Plus, it’s cost-effective and customizable to suit different fabric needs. With just a few common ingredients and some easy steps, we can bring new life to worn canvas and keep it performing in any weather.
Ingredients
To create our Canvas Wax Recipe, we use simple natural ingredients that ensure a strong, eco-friendly water repellent finish while preserving the fabric’s breathability and durability. Each element plays a critical role in restoring your canvas gear’s protection and longevity.
Here’s a detailed list of the essential ingredients:
| Ingredient | Quantity | Purpose |
|---|---|---|
| Beeswax | 1 cup (grated) | Provides natural water resistance and hardness |
| Paraffin Wax | ½ cup (grated) | Adds flexibility to prevent cracking |
| Coconut Oil | ¼ cup | Softens wax to ease application and absorption |
| Turpentine or Citrus Solvent | 2 tablespoons | Thins wax mixture for a smoother finish |
Ingredient Details
- Beeswax: We use pure, natural beeswax for its strong sealing properties and eco-friendliness.
- Paraffin Wax: Combining paraffin with beeswax creates a balance of hardness and pliability, preventing brittleness.
- Coconut Oil: This natural oil improves wax spreadability and helps the canvas stay supple after waxing.
- Turpentine or Citrus Solvent: This thinner allows the wax to penetrate the fabric evenly while maintaining breathability.
“Using all-natural ingredients gives us peace of mind that we are protecting not only our canvas gear but also the environment.“
These components blend perfectly to create the ideal natural wax blend tailored for tough outdoor canvas maintenance. Next, we will guide you step-by-step through combining these ingredients for the perfect application consistency.
Tools and Equipment
To create our Canvas Wax Recipe effectively and safely, having the right tools and equipment is essential. These ensure precision, ease of handling hot ingredients, and seamless application of the wax blend.
Essential Tools for Wax Preparation
- Double Boiler or Heatproof Bowl and Saucepan
We use a double boiler to gently melt the beeswax, paraffin, and coconut oil without direct heat. If you don’t have one, place a heatproof bowl over a saucepan of simmering water to avoid burning the wax.
- Stirring Utensil
A wooden spoon or heat-resistant silicone spatula works best to blend ingredients evenly and scrape down the sides during melting.
- Digital Kitchen Scale
Accurate measurement of ingredients ensures our recipe performs consistently. Precision is key when mixing waxes and oils.
- Measuring Cups and Spoons
Use these for adding turpentine or citrus solvent in exact amounts to maintain the wax’s water resistance and application properties.
Tools for Wax Application
- Clean Cloth or Sponge
For smooth and even application, use a lint-free cloth or sponge. This helps us work the wax into the canvas fibers and avoid clumps.
- Heat Gun or Hair Dryer (Optional)
After applying wax, gently heating the surface with a heat gun or hair dryer helps the wax absorb into the canvas for superior water resistance.
- Gloves
Protect your hands while handling hot wax and solvents. Nitrile or rubber gloves prevent burns and chemical exposure.
Safety and Workspace Materials
- Protective Surface Cover
Lay down newspaper or a silicone mat to catch drips and keep your workspace clean.
- Well-Ventilated Area
Since we use turpentine or citrus solvent, ensure proper ventilation to avoid inhaling fumes.
Tools and Equipment Summary Table
| Tool / Equipment | Purpose | Notes |
|---|---|---|
| Double Boiler / Heatproof Bowl | Melt wax and oils evenly without burning | Maintain low to medium heat |
| Wooden Spoon / Silicone Spatula | Stir and blend wax ingredients smoothly | Heat resistant preferred |
| Digital Kitchen Scale | Accurate ingredient measurement | For recipe consistency |
| Measuring Cups and Spoons | Measure turpentine/citrus solvent precisely | Use clean dry utensils |
| Clean Cloth / Sponge | Apply wax evenly onto canvas | Lint-free for best results |
| Heat Gun / Hair Dryer (Optional) | Heat fabric for wax absorption | Use low heat setting |
| Gloves | Hand protection during wax handling | Nitrile or rubber recommended |
| Protective Surface Cover | Prevent mess on work surface | Silicone mats or newspaper |
| Well-Ventilated Area | Safe solvent use | Avoid enclosed spaces |
By assembling these tools before we start, we set up an efficient and safe workspace for making our canvas wax. This preparation guarantees a smooth process and optimal fabric protection results.
Prep Work
Before we begin crafting our Canvas Wax, thorough preparation is essential to ensure the best application and lasting protection for our canvas gear.
Preparing the Canvas
We start by giving the canvas a clean, dry surface. Remove any dirt, dust, or debris using a soft brush or damp cloth. Avoid harsh detergents that can strip the canvas fibers or reduce its natural breathability. Once clean, let the fabric air dry completely. Applying wax on a damp or dirty canvas reduces absorption and compromises the finish.
Tip: Test a small inconspicuous area first to gauge how the fabric reacts to the wax.
Measuring Ingredients
Accurate measurement of ingredients is key to achieving consistency in our Canvas Wax Recipe. Use a digital kitchen scale for precision. Below is the ideal ratio for a balanced wax blend that restores water resistance while maintaining flexibility:
| Ingredient | Amount (grams) | Purpose |
|---|---|---|
| Beeswax | 150 | Provides strong water resistance |
| Paraffin Wax | 100 | Adds hardness and durability |
| Coconut Oil | 50 | Enhances flexibility and spread |
| Turpentine or Citrus Solvent | 30 | Improves wax penetration and drying |
Weigh each ingredient separately before combining. Consistent measurements ensure smooth melting and uniform texture. Adjust quantities slightly based on your specific canvas type or desired finish.
Remember: Precision in measuring directly impacts the wax’s performance and longevity on your canvas gear.
Making the Canvas Wax Recipe
To create our effective canvas wax, we follow a precise melting and mixing process that ensures the right texture, flexibility, and water resistance. Let’s carefully blend the ingredients for the best protective finish.
Melting the Wax
Start by preparing a double boiler system. Fill the bottom pot with water and bring it to a gentle simmer. Place the measured beeswax and paraffin wax in the top heatproof bowl to melt slowly.
- Stir occasionally with a heat-resistant utensil to ensure even melting.
- Keep the heat low to prevent scorching or burning the wax.
- Watch for a fully liquid, smooth consistency without bubbles.
Important: Never melt wax directly over open flames to avoid fire hazards.
| Ingredient | Amount | Melting Point (°F) |
|---|---|---|
| Beeswax | 50 grams | 144 |
| Paraffin Wax | 25 grams | 130 |
Mixing the Ingredients
Once the waxes have melted completely, reduce heat to low or temporarily remove from the heat source. Quickly add coconut oil and then slowly stir in the turpentine or citrus solvent.
- Use the following quantities for optimal results:
| Ingredient | Amount | Purpose |
|---|---|---|
| Coconut Oil | 30 grams | Adds flexibility and smoothness |
| Turpentine/Citrus Solvent | 15 grams | Enhances application and penetration |
- Stir the mixture continuously until it is fully blended and uniform.
- Pour the hot wax blend immediately into a clean container for storage.
- Allow it to cool at room temperature to solidify.
Adding Fragrance or Essential Oils (Optional)
If desired, enhance your canvas wax with natural fragrances or essential oils for a pleasant scent and added benefits.
- Add 10-15 drops of essential oil such as lavender, eucalyptus, or lemon.
- Stir thoroughly once the wax has cooled slightly but before it solidifies completely.
- Essential oils not only improve aroma but can provide additional mildew resistance or insect repellent properties.
“Adding essential oils is optional but can customize your wax with personal flair and functional upgrades.”
Our canvas wax recipe is now carefully crafted and ready for application to restore and protect your cherished canvas gear.
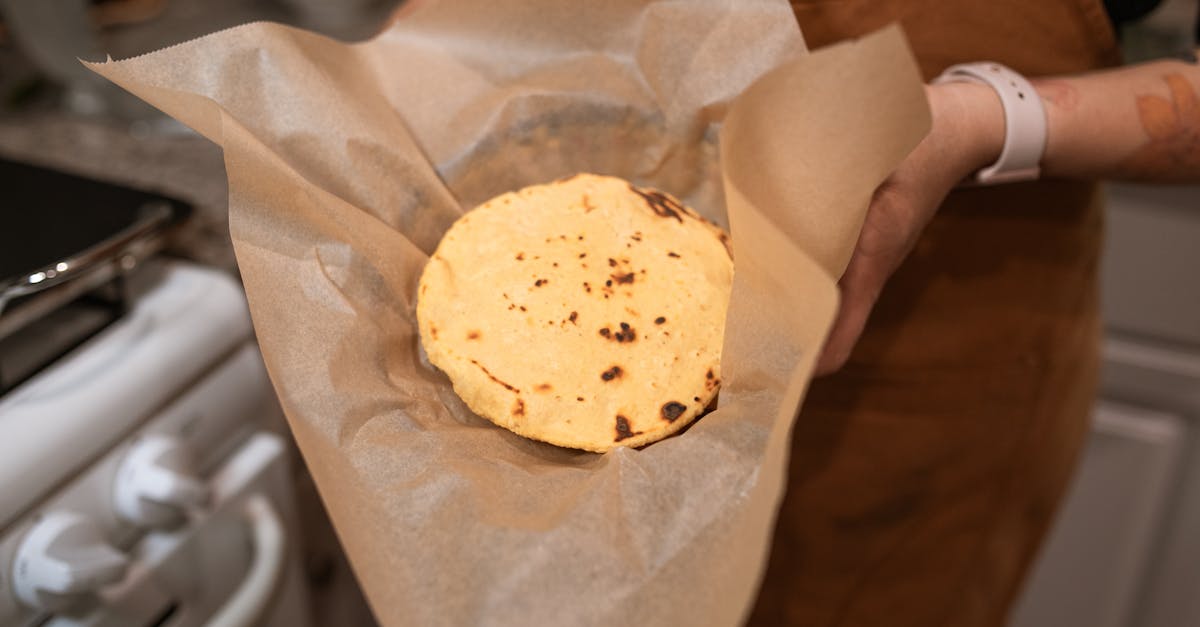
Applying the Wax to Canvas
Applying our homemade canvas wax properly is key to restoring water resistance and protecting your canvas gear. Let’s explore the best methods for even coverage and optimal absorption.
Application Techniques
To achieve a smooth wax layer on canvas, start with a clean, dry surface. Use a soft cloth, sponge, or a natural bristle brush to apply the wax in small sections. Warm the wax slightly for easier spreading but avoid overheating.
- Rub the wax firmly into the fabric using circular motions to ensure deep penetration.
- Overlap each stroke to avoid missed spots and thin patches.
- Apply a thin first layer and allow it to settle before adding additional coats for enhanced protection.
- For thicker areas or heavy-duty gear, repeating the application 2-3 times improves durability.
- Use a heat gun or hair dryer set on low to gently warm the waxed area. This helps open canvas fibers and promotes absorption without melting the fabric.
“Consistent pressure and patience are essential. Rushing can cause uneven patches or a sticky finish.”
| Step | Action | Details |
|---|---|---|
| 1 | Prepare canvas | Clean, dry, no dirt or debris |
| 2 | Warm wax slightly | To improve spreadability |
| 3 | Apply wax in small sections | Use circular rubbing motions |
| 4 | Overlap to cover all areas | Prevent thin spots |
| 5 | Optional heat application | Use a heat gun/hair dryer on low heat |
| 6 | Repeat coats | 2-3 layers for heavy-duty protection |
Drying and Curing Time
After applying wax, drying and curing are critical to lasting results.
- Allow the wax to cool and harden at room temperature for about 12-24 hours.
- Ensure the canvas is kept flat or hung in a dry, well-ventilated area.
- Avoid direct sunlight to prevent premature melting or discoloration.
- For best results, the waxed canvas should cure for up to 48 hours before heavy use or exposure to moisture.
“Proper curing transforms the wax into a tough, flexible barrier that enhances water resistance while maintaining canvas breathability.”
| Phase | Timeframe | Notes |
|---|---|---|
| Initial hardening | 12–24 hours | Room temperature, avoid humidity |
| Full curing | Up to 48 hours | Ensures durability and water resistance |
| Post-curing use | After 48 hours | Canvas ready for outdoor conditions |
Following these application and curing guidelines guarantees our canvas wax recipe performs at its best, extending the life and functionality of your outdoor gear.
Tips for Best Results
Achieving optimal performance with our canvas wax recipe depends on several key practices before, during, and after application. Below are our top tips for ensuring durable, water-resistant, and beautifully finished canvas gear.
Prepare the Canvas Thoroughly
- Always start with a clean, dry surface. Use a soft brush or damp cloth to remove dirt and dust.
- Avoid harsh detergents which can strip natural fibers. Instead, opt for mild soap if washing is necessary.
- Allow the canvas to dry completely, as applying wax on moisture can cause poor adhesion and uneven coverage.
Test Patch Application
- Before full application, test the wax on a small, inconspicuous area to observe fabric reaction and color change.
- This ensures no unexpected damage or discoloration and helps assess wax absorption.
Apply Wax Evenly and in Thin Layers
- Use a soft cloth, sponge, or brush to apply thin coats in small sections.
- Work with circular overlapping motions to ensure full fabric coverage without streaks or missed spots.
- Warming the wax slightly before application makes spreading easier and improves penetration.
Multiple Coats for Heavy-Duty Protection
- For maximum water resistance, apply 2-3 thin coats rather than a single thick one.
- Allow each layer to cool and absorb before applying the next.
Enhance Absorption with Heat
- Use a heat gun or hair dryer on a low setting to gently warm the waxed area after application.
- This practice helps the wax sink deeper into the fibers creating a robust, flexible barrier.
Proper Drying and Curing Time
- Let the wax cool and dry for at least 12-24 hours at room temperature.
- Avoid using or exposing the canvas to moisture until after a full curing period of up to 48 hours for best results.
- Full curing transforms the wax into a tough breathable shield that repels water effectively while preserving fabric flexibility.
Storage and Maintenance Tips
- Store waxed canvas gear in a dry, cool place to maintain wax integrity.
- Reapply wax every 6-12 months depending on usage intensity and weather exposure to sustain water resistance.
| Tip Category | Key Recommendation | Reason/Outcome |
|---|---|---|
| Canvas Preparation | Clean and dry thoroughly | Ensures optimal wax adhesion and coverage |
| Application | Thin coats in overlapping circular motions | Prevents streaks and uneven protection |
| Number of Coats | Apply 2-3 thin layers | Builds durable, water-resistant finish |
| Heat Use | Warm wax gently after application | Improves absorption and flexibility |
| Drying & Curing | Wait 12-24 hours drying, 48 hours curing | Transforms wax into hard breathable layer |
| Maintenance | Reapply every 6-12 months | Maintains long-term water resistance |
“Consistency in preparation, application, and curing ensures your homemade canvas wax delivers superior protection and longevity for your outdoor canvases.“
Following these tips thoroughly will enable us to maximize the benefits of our natural canvas wax recipe and keep our gear looking and performing at its best.
Storage Instructions
Proper storage of our homemade canvas wax ensures it maintains its effectiveness and longevity. Follow these steps to keep the wax in optimal condition:
- Store in a cool, dry place: Heat and humidity can soften or degrade the wax blend. Choose a location away from direct sunlight and sources of heat such as radiators or stoves.
- Use an airtight container: Transfer the cooled wax into a sealed jar or metal tin. This prevents contamination and limits exposure to air which could harden or dry the wax prematurely.
- Label your container with the date it was made, so you can track freshness and usage.
- Avoid freezing temperatures as extreme cold may cause the wax to crack or separate, affecting its consistency.
Ideal Storage Conditions Table
| Condition | Recommended Range | Notes |
|---|---|---|
| Temperature | 50°F to 70°F (10°C to 21°C) | Maintains wax pliability and longevity |
| Humidity | Below 60% | Reduces risk of moisture absorption |
| Container Type | Airtight glass or metal jar | Prevents contamination and air exposure |
“Storing our canvas wax correctly not only preserves its water-resistance and flexibility but also enhances ease of application for future use.”
Additional Tips for Storage
- If the wax solidifies too hard, warm it slightly by placing the container in warm water before application. Avoid microwave heating to prevent uneven melting.
- Keep the wax out of reach of children and pets to ensure safety.
- Inspect the wax periodically for any signs of separation or discoloration which could indicate spoilage or contamination.
By following these Storage Instructions, we guarantee our canvas wax remains ready to restore and protect our outdoor gear whenever needed.
Conclusion
Making our own canvas wax gives us full control over the ingredients and ensures our gear stays protected naturally and effectively. With the right preparation and application, this homemade wax restores water resistance while keeping canvas breathable and durable.
By following the steps carefully and maintaining consistent care, we can extend the life of our outdoor essentials without relying on harsh chemicals or expensive products. Storing the wax properly means it’s always ready when we need it, making this recipe a reliable addition to our outdoor maintenance routine.
Frequently Asked Questions
What is the purpose of homemade canvas wax?
Homemade canvas wax restores water resistance and adds a protective layer to canvas gear, like tents and backpacks, helping extend their life and maintain appearance.
What are the main ingredients in canvas wax?
The main ingredients include beeswax, paraffin wax, coconut oil, and turpentine or citrus solvent, each contributing to water resistance, flexibility, and application ease.
Why make canvas wax at home instead of buying it?
Making canvas wax at home allows control over non-toxic, eco-friendly ingredients, customization for fabric needs, and cost savings.
What tools do I need to make canvas wax?
You need a double boiler or heatproof bowl, stirring utensil, digital kitchen scale, clean cloth or sponge, and optionally a heat gun or hair dryer.
How do I prepare canvas before applying wax?
Clean the canvas thoroughly, ensuring it’s dry and free of dirt. Avoid harsh detergents and test a small area first to check fabric reaction.
How do I apply homemade canvas wax effectively?
Apply wax in thin, even coats using a soft cloth or brush with circular motions and overlapping strokes. Warm the wax slightly for easier spreading.
How long does the wax take to dry and cure?
Wax requires 12-24 hours of cooling at room temperature and up to 48 hours for full curing before exposure to moisture.
How often should I reapply the wax to my canvas gear?
Reapply every 6-12 months to maintain optimal water resistance and protection.
How should I store homemade canvas wax?
Store in a cool, dry place in an airtight container, label it with the date, and keep temperature and humidity stable to preserve quality.
Can I customize the scent or properties of the wax?
Yes, you can add essential oils during mixing to add fragrance or boost protective qualities naturally.