
Dried venison is a delicious way to preserve and enjoy the rich flavors of wild game. To get that perfect balance of tenderness and taste, a well-crafted brine is essential. Our dried venison brine recipe enhances the meat’s natural flavors while keeping it juicy and flavorful throughout the drying process.
Brining venison not only helps with moisture retention but also adds depth with a mix of savory and aromatic ingredients. Whether you’re a seasoned hunter or just love experimenting with game meats, this brine recipe will elevate your dried venison to the next level. Let’s dive into the simple steps that make all the difference in creating mouthwatering dried venison every time.
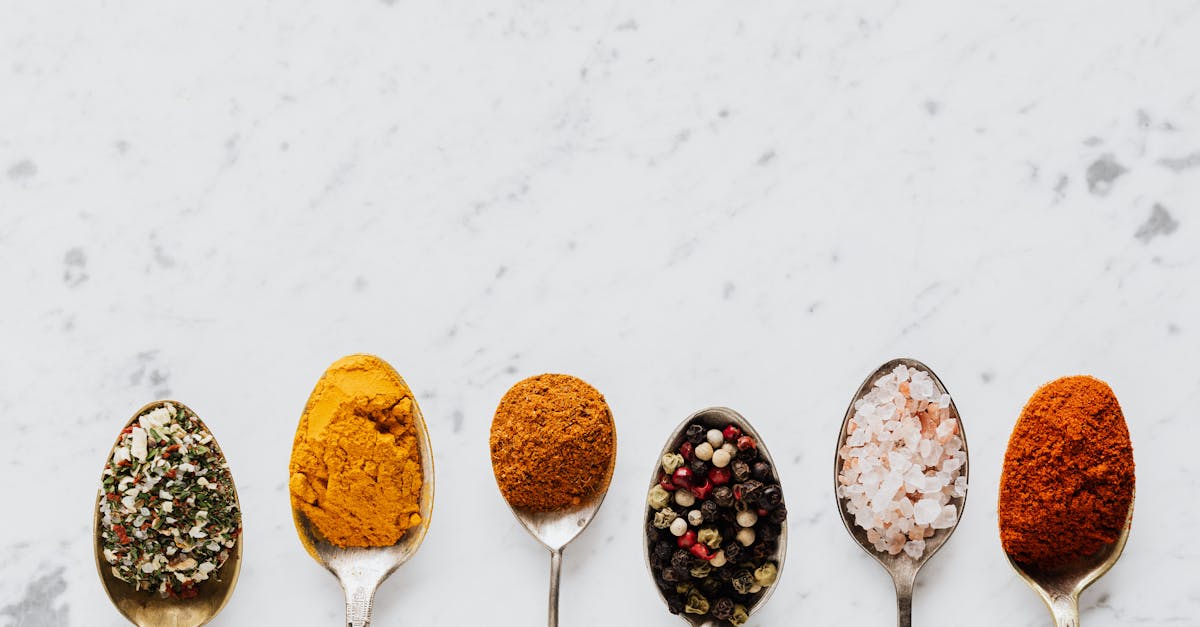
Ingredients
To create the perfect dried venison brine, we carefully select each ingredient to balance flavor, moisture retention, and preservation. Below, we break down the essentials for a successful brine.
Meat Selection
Choosing the right cut of venison is crucial for an outstanding dried meat product. We recommend using:
- Lean cuts like venison backstrap or top round for uniform drying.
- Fresh venison with minimal fat as excess fat can become rancid during drying.
- Venison harvested recently to ensure tender texture and maximum flavor absorption.
Brine Components
Our brine mixture blends key ingredients to enhance moisture and flavor while preserving the meat. Here is the detailed list with precise measurements for about 2 pounds of venison:
| Ingredient | Amount | Purpose |
|---|---|---|
| Water | 4 cups | Brine base |
| Kosher salt | 1/4 cup | Preservation and seasoning |
| Brown sugar | 2 tablespoons | Balances salt, adds sweetness |
| Black peppercorns | 1 tablespoon | Adds mild heat and aroma |
| Garlic cloves | 3, crushed | Infuses savory depth |
| Bay leaves | 2 | Aromatic complexity |
Optional Flavor Enhancers
To customize and deepen the flavor profile, we often include these optional ingredients:
- Juniper berries (1 teaspoon) for a piney, slightly fruity note.
- Red pepper flakes (1/2 teaspoon) if a hint of spice is desired.
- Fresh rosemary sprigs (2) for an earthy herbal undertone.
- Liquid smoke (1 teaspoon) to add a smoky aroma without smoking.
By carefully combining these ingredients, our dried venison brine delivers a savory, aromatic foundation that preserves and elevates your game meat.
Equipment Needed
To create the perfect dried venison brine, having the right equipment ensures a smooth process and consistent results. Below is a detailed list of the essential tools we recommend for preparing and brining your venison.
Essential Tools for Brining
- Large Non-Reactive Container
Use a food-grade plastic, glass, or stainless steel container to mix and hold the brine. Non-reactive material prevents metallic flavors and ensures safe brining. The container should be large enough to fully submerge the venison slices or cuts.
- Measuring Cups and Spoons
Accurate measurements are critical for balancing salt and sugar in your brine. Use dry and liquid measuring tools to precisely follow the recipe.
- Saucepan
A medium-sized saucepan or pot is needed to heat the water and dissolve salt, sugar, and spices. Heating helps extract flavor compounds more efficiently.
- Stirring Spoon
A wooden or silicone spoon will help mix the brine ingredients thoroughly and dissolve solids evenly.
Additional Helpful Equipment
| Equipment | Purpose |
|---|---|
| Kitchen Scale | For precise weighing of salt or sugar |
| Zip-Top Plastic Bags | Alternative for brining smaller pieces |
| Meat Thermometer | To check internal meat temps if cooking |
| Cooling Rack | To air-dry the venison after brining |
| Paper Towels | For patting meat dry before drying process |
Container Preparation and Safety Tips
“Always sanitize your container and utensils before use to avoid contamination.”
We recommend thoroughly cleaning and sanitizing all equipment before starting. Use hot soapy water and rinse well or run through a dishwasher if possible.
Having the proper equipment lets us focus on the brine’s flavor without worrying about container size, ingredient measurements, or brine contact. It streamlines the steps from mixing to soaking, making sure our dried venison brine penetrates perfectly.
Preparing the Venison
To achieve the best results with our Dried Venison Brine Recipe, preparing the venison properly is crucial. This ensures the brine penetrates evenly and the final product boasts superior flavor and texture.
Trimming and Cleaning
Start by thoroughly trimming the venison to remove all visible fat, silver skin, and connective tissue. These parts can affect the drying process by causing uneven texture and unwanted spoilage. Use a sharp boning knife and work carefully to preserve the lean meat.
Next, clean the meat under cold running water to remove any residual blood and surface impurities. Pat the meat dry with paper towels before proceeding. This step is vital to prevent bacterial growth during brining and drying, ensuring our dried venison remains safe and flavorful.
Cutting for Uniformity
For optimal brining and even drying, slice the venison into strips of uniform thickness. Aim for strips approximately 1/4 to 1/2 inch thick and about 6 to 8 inches long. Uniform cuts make it easier for the brine to saturate each piece equally.
| Parameter | Recommended Size |
|---|---|
| Thickness | 1/4 to 1/2 inch |
| Length | 6 to 8 inches |
| Width (optional) | 1 to 2 inches |
Consistent thickness also reduces drying time and prevents some pieces from becoming overly dry or under-cured. Arrange the strips on a clean surface as you cut to keep the workspace organized and sanitary.
Pro Tip: When cutting the venison, slice against the grain to enhance tenderness in the final dried meat. This technique improves chewability and overall enjoyment of our dried venison.
Making the Dried Venison Brine
Crafting the perfect dried venison brine is essential for unlocking deep flavors and preserving the meat’s juiciness. Let’s dive into the step-by-step process to combine and adjust the brine ingredients for optimum results.
Combining Brine Ingredients
To create a flavorful and balanced brine, we begin by carefully measuring and combining the essential ingredients. This blend ensures proper seasoning, moisture retention, and infusion of aromatic notes.
Ingredients for the Basic Brine:
- 4 cups cold water
- 1/4 cup kosher salt
- 2 tablespoons brown sugar
- 1 tablespoon whole black peppercorns
- 3 garlic cloves, crushed
- 2 bay leaves
Optional Flavor Enhancers:
- 1 tablespoon juniper berries
- 1 teaspoon red pepper flakes
- 1 sprig fresh rosemary
- 1/2 teaspoon liquid smoke
Steps to Combine:
- In a medium saucepan, pour 2 cups of water and add kosher salt and brown sugar.
- Heat over medium flame, stirring frequently until salt and sugar fully dissolve — this creates a balanced sweet-salty base.
- Remove from heat immediately after dissolving and add black peppercorns, crushed garlic, bay leaves, and any optional flavor enhancers.
- Pour the remaining 2 cups of cold water into the mixture to cool the brine.
- Allow the brine to reach room temperature before using to avoid partially cooking the venison during immersion.
Mixing and Adjusting Flavor
Once the initial brine is prepared, fine-tuning its flavor is crucial. We recommend tasting the brine after it cools to ensure the seasoning is balanced and vibrant enough to enhance the venison.
| Flavor Aspect | What to Check | Adjustment Tip |
|---|---|---|
| Saltiness | Should be pronounced but not overpowering | Add small increments of kosher salt until desired strength. |
| Sweetness | Should complement salt without cloying | Add brown sugar gradually to avoid oversweetening. |
| Peppery Heat | Should offer subtle warmth | Boost black peppercorns or red pepper flakes if needed. |
| Herbal Aromatics | Should be fragrant, not bitter | Add fresh rosemary or remove bay leaves early if too strong. |
Pro Tip:
“If the brine tastes too strong,” dilute with additional cold water in 1/2 cup increments until balanced. Conversely, simmer for a few extra minutes to concentrate flavors if too mild.
Once satisfied with the flavor profile, transfer the brine to a large non-reactive container. Submerge the prepared venison strips fully, ensuring even brining.
By mastering these mixing techniques, our dried venison brine becomes a robust foundation for tender aromatic game meat with remarkable depth.
Brining Process
The Brining Process is crucial for infusing dried venison with maximum flavor and maintaining its tender texture during drying. Let’s walk through the essential steps to ensure our venison absorbs every drop of the savory brine.
Applying the Dry Brine
To apply the dry brine effectively, we begin by thoroughly coating each venison strip. Use our balanced dry brine mixture, ensuring an even distribution over the surface of the meat. Here’s how to proceed:
- Lay the venison strips on a clean, non-reactive surface or tray.
- Sprinkle the dry brine generously, covering both sides.
- Gently rub the mixture into the meat with your fingers to promote deeper adsorption.
- Arrange the coated strips in a single layer inside a non-reactive container or zip-top bag, avoiding overlap to ensure every piece is brined evenly.
- Seal the container to prevent air exposure and potential contamination.
This direct contact with the dry brine draws moisture out while allowing salt and aromatics to penetrate, resulting in a tender, flavorful dried venison.
Resting Time and Temperature
Proper Resting Time and Temperature are essential for the brine to do its magic:
| Factor | Recommendation |
|---|---|
| Resting Duration | 12 to 24 hours |
| Temperature | Refrigerate between 34°F and 40°F |
| Container | Non-reactive, sealed container or bag |
“A minimum of 12 hours allows the salt and spices to fully infuse the venison strips. For deeper flavor penetration, 24 hours is ideal.”
Keep the venison in the refrigerator during this time to inhibit bacterial growth and maintain the meat’s freshness. Every few hours, flip or gently shake the container to redistribute the brine and ensure uniform seasoning.
By carefully controlling time and temperature, we guarantee our dried venison achieves the perfect balance of savory, juicy, and tender characteristics.
Cooking Directions
Following the brining process, precise cooking directions are essential to transform our dried venison into a flavorful and tender delicacy. Below we outline how to prepare the venison after brining and the optimal cooking methods to achieve the best results.
Prepping the Venison After Brining
Once the venison strips have soaked for the recommended 12 to 24 hours in our savory dried venison brine, we must prepare them properly for drying and cooking. Follow these precise steps for consistent, delicious outcomes:
- Remove the venison strips from the brine and gently shake off any excess liquid.
- Lay the strips separately on a cooling rack or paper towels to allow surface moisture to dry.
- Pat the strips lightly with a clean paper towel to remove extra brine without rinsing—the salt flavor should remain intact.
- Inspect each strip, trimming any excess fat or connective tissue that might not have been removed earlier. This helps prevent spoilage and off-flavors.
- Arrange strips on a drying rack or hanging apparatus, ensuring good air circulation between pieces for even drying.
- If air drying or dehydrating, maintain room temperature around 70°F (21°C) with low humidity.
- For oven drying, preheat to a low temperature around 160°F (71°C).
| Step | Description | Temperature / Time |
|---|---|---|
| Remove excess brine | Shake off liquid gently | N/A |
| Dry surface moisture | Pat dry with paper towels | N/A |
| Trim fat/connective tissue | Remove any remaining unwanted parts | N/A |
| Arrange for drying | Spread evenly with air circulation | Room temp ~70°F (21°C) |
| Oven drying (optional) | Place in oven on low heat | 160°F (71°C) for several hrs |
“Proper prep after brining is crucial to lock in moisture and flavors while ensuring safe, even drying.”
Cooking Methods and Tips
To bring out the best in our dried venison, selecting the right cooking methods and applying expert tips makes all the difference. Here are our preferred techniques and essential pointers:
1. Oven Drying:
- Lay venison strips on a wire rack placed on a baking sheet to allow air flow underneath.
- Maintain a steady temperature of 160°F (71°C) to slowly dry without cooking the meat.
- Check periodically; drying time generally ranges from 4 to 8 hours depending on thickness.
2. Dehydrator:
- Arrange strips avoiding overlap on dehydrator trays.
- Set the dehydrator temperature to 160°F (71°C).
- Dry for 4 to 8 hours or until the venison is dry but still pliable.
3. Air Drying:
- Hang venison strips in a well-ventilated, cool, dry area (ideally 70°F (21°C) with low humidity).
- This natural method can take several days; monitor for firmness and dryness.
Pro Tips for Cooking Dried Venison:
- Always slice against the grain prior to drying for tender results.
- Store dried venison in an airtight container to maintain flavor and texture.
- Dried venison pairs excellently with peppery seasonings or smoked flavors to complement its natural richness.
- Use a meat thermometer to confirm internal temperature if rehydrating or cooking dried strips further before eating.
| Cooking Method | Temperature | Time Range | Texture Outcome |
|---|---|---|---|
| Oven Drying | 160°F (71°C) | 4 to 8 hours | Dry, chewy, pliable |
| Dehydrator | 160°F (71°C) | 4 to 8 hours | Uniformly dried, tender |
| Air Drying | ~70°F (21°C), low humidity | Several days | Natural dryness, firm |
Storing and Serving Suggestions
Proper storing and serving of dried venison are essential to maintain its flavor, texture, and safety. Follow these carefully crafted steps to ensure we enjoy our dried venison at its best.
Storing Dried Venison
- Cool Completely Before Storing
Allow the dried venison strips to cool completely at room temperature. This prevents condensation that could cause spoilage.
- Use Airtight Containers
Store the dried venison in airtight containers such as glass jars, vacuum-sealed bags, or heavy-duty zip-top bags. Removing air minimizes moisture and prevents bacteria or mold growth.
- Optimal Storage Conditions
Keep the containers in a cool, dark, and dry place. Ideal temperature is between 50°F and 70°F (10°C to 21°C). Refrigeration can extend shelf life but may slightly change texture.
| Storage Method | Temperature Range | Approximate Shelf Life |
|---|---|---|
| Pantry (airtight) | 50°F – 70°F (10°C – 21°C) | 1 to 2 months |
| Refrigerator | 35°F – 40°F (2°C – 4°C) | 3 to 6 months |
| Freezer | 0°F (-18°C) | Up to 1 year |
- Label and Date
Clearly mark containers with the date of drying to monitor freshness and rotate stock correctly.
Serving Suggestions
- Slice Thinly Against the Grain
For optimal tenderness, slice the dried venison thin and against the grain. This reduces chewiness and makes the meat more enjoyable.
- Pair with Complementary Flavors
Our dried venison pairs wonderfully with robust flavors such as:
- Sharp cheeses like aged cheddar or gouda
- Whole grain mustards or horseradish sauces
- Crunchy crackers or toasted bread
These enhance the savory, slightly smoky flavor profile we developed through brining and drying.
- Use as a Protein Boost
Incorporate thin slices into:
- Salads for a chewy, flavorful protein addition
- Charcuterie boards alongside nuts, fruits, and pickles
- Trail mixes for easy, on-the-go energy snacks
-
Rehydrate for Cooking
To incorporate dried venison into stews or soups, soak strips in warm water or broth for 30 minutes until tender. This unlocks rich, gamey flavors with added juiciness.
Quick Reference for Serving
| Serving Style | Preparation | Flavor Enhancement | Ideal Pairings |
|---|---|---|---|
| Snack | Thin sliced | Whole grain mustard | Nuts, dried fruits |
| Charcuterie | Arranged | Soft cheeses, pickles | Crackers, olives |
| Salad Protein | Thin sliced | Fresh herbs, vinaigrette | Mixed greens, nuts |
| Cooking Ingredient | Rehydrated | Broth soak, spices | Stews, soups, pasta dishes |
By carefully storing and thoughtfully serving our dried venison, we preserve the hard work put into brining and drying. This attention to detail allows us to fully enjoy the rich, savory qualities of our homemade game meat delicacy.
Conclusion
Mastering the dried venison brine opens up a world of flavorful possibilities for game meat lovers. With the right balance of ingredients and careful preparation, we can transform simple cuts into tender, savory treats that stand out.
Taking the time to brine properly not only enhances taste but also preserves the quality of the meat for longer enjoyment. Whether for snacks or recipes, dried venison made with this brine recipe will impress every time.
Frequently Asked Questions
What is the purpose of brining venison before drying?
Brining venison enhances its natural flavors, helps retain moisture, and adds depth with savory and aromatic ingredients. It ensures the meat stays juicy and tender during the drying process.
Which cut of venison is best for drying?
Lean cuts like backstrap or top round are ideal. They are fresh, minimally fatty, and absorb the brine well, resulting in better flavor and texture.
What ingredients are essential in a dried venison brine?
Key ingredients include water, kosher salt, brown sugar, black peppercorns, garlic cloves, and bay leaves. Optional flavor enhancers like juniper berries, red pepper flakes, rosemary, and liquid smoke can also be added.
How thick should venison strips be for brining and drying?
Strips should be about 1/4 to 1/2 inch thick and 6 to 8 inches long to ensure even brining, reduce drying time, and improve chewiness.
How long should venison be brined before drying?
Brine the venison strips for 12 to 24 hours in a refrigerated, non-reactive container to allow flavors to penetrate deeply.
What equipment is needed for brining venison?
You’ll need a large non-reactive container, measuring cups and spoons, a saucepan, a stirring spoon, and optionally a kitchen scale, zip-top bags, meat thermometer, cooling rack, and paper towels.
How should dried venison be stored?
Store dried venison in airtight containers like glass jars or vacuum-sealed bags in a cool, dark place to maintain flavor and texture.
What are good serving suggestions for dried venison?
Serve thinly sliced against the grain. Pair it with sharp cheeses, whole grain mustard, add it to charcuterie boards, salads, trail mixes, or rehydrate for stews and soups.
Why is it important to slice venison against the grain?
Slicing against the grain helps make the dried meat more tender and easier to chew by breaking up muscle fibers.
What drying methods can be used for venison?
Venison can be dried using an oven, food dehydrator, or air drying. Each method requires specific temperatures and times for optimal texture.