
Raisin Challah is a delightful twist on the traditional braided bread that’s perfect for sweetening up any meal. This recipe combines the rich, soft texture of classic challah with the natural sweetness of plump raisins, making it an irresistible treat for breakfast, brunch, or holiday gatherings.
We love how the golden crust and tender crumb come together with just the right balance of sweetness and spice. Whether you’re new to baking challah or looking to add a flavorful variation to your repertoire, this raisin challah recipe is simple to follow and sure to impress.
Baking this bread brings a warm, comforting aroma to your kitchen and a taste that’s both nostalgic and fresh. Let’s dive into making this delicious raisin challah that will quickly become a favorite in our homes.
Ingredients
To create the perfect Raisin Challah, we rely on a well-balanced mix of ingredients that bring out its rich texture and sweet flavor. Below, you’ll find our precise list to guide you in preparing this delightful bread.
Dough Ingredients
Our dough is the foundation of this Raisin Challah Recipe, blending classic challah components to produce a soft, golden loaf.
- 4 cups all-purpose flour, plus extra for kneading
- 1/3 cup granulated sugar
- 2 1/4 teaspoons active dry yeast (one packet)
- 1 teaspoon salt
- 1 cup warm water (110°F / 43°C)
- 2 large eggs
- 1/4 cup vegetable oil
- 1 teaspoon vanilla extract
Additional Ingredients for Raisins
To infuse the bread with natural sweetness and an enjoyable texture contrast, we add:
| Ingredient | Quantity | Preparation |
|---|---|---|
| Golden raisins | 1 cup | Rinsed and patted dry |
| Warm water | 1/4 cup | For soaking raisins |
| Honey | 1 tablespoon | Optional for glaze |
Soaking the raisins in warm water before adding them to the dough helps keep them plump and juicy, creating delightful bursts of sweetness in every bite. The optional honey glaze enhances the golden crust with a subtle shine and added flavor.
Equipment Needed
To bake the perfect Raisin Challah, having the right equipment is essential. Each tool plays a crucial role in ensuring our dough develops the ideal texture and the loaf bakes evenly with that signature golden crust.
- Large Mixing Bowl: We need a spacious bowl to combine ingredients and allow the dough to rise comfortably. A bowl with a smooth surface helps in kneading and easy cleanup.
- Measuring Cups and Spoons: Precise measurements of flour, sugar, yeast, and liquids guarantee consistent results. Using accurate measuring tools prevents issues with dough consistency.
- Whisk or Fork: Useful for beating eggs and mixing wet ingredients thoroughly before incorporating them into the dry mixture.
- Wooden Spoon or Dough Hook: For stirring the dough during initial mixing. A dough hook attachment is ideal if using a stand mixer.
- Stand Mixer (Optional): While kneading by hand works well, a stand mixer with a dough hook attachment speeds up the process and ensures consistent kneading.
- Clean Kitchen Towel or Plastic Wrap: To cover the dough during rising, maintaining warmth and preventing drying out.
- Bread Baking Sheet or Pan: We bake our challah on a parchment-lined baking sheet or a shallow pan to achieve an even crust.
- Parchment Paper: Prevents sticking and promotes easy cleanup.
- Pastry Brush: To apply the optional honey glaze evenly over the loaf, enhancing shine and flavor.
- Cooling Rack: Vital for letting the challah cool completely, avoiding sogginess by allowing air to circulate freely around the loaf.
| Equipment | Purpose |
|---|---|
| Large Mixing Bowl | Mixing and proofing dough |
| Measuring Cups and Spoons | Accurate measurement of ingredients |
| Whisk or Fork | Beating eggs and mixing wet ingredients |
| Wooden Spoon / Dough Hook | Initial mixing and kneading |
| Stand Mixer (Optional) | Efficient kneading with dough hook |
| Kitchen Towel / Plastic Wrap | Covering dough during rising |
| Bread Baking Sheet or Pan | Baking challah evenly |
| Parchment Paper | Prevent baking sheet sticking |
| Pastry Brush | Applying honey glaze |
| Cooling Rack | Cooling bread properly |
We strongly recommend using a stand mixer if available to simplify kneading, especially for those new to bread baking. However, kneading by hand helps us develop a tactile sense of dough readiness. Using a pastry brush during glazing ensures the honey glaze covers the loaf uniformly, contributing to a beautifully glossy crust.
With these tools ready, we streamline our process and focus on creating the softest Raisin Challah with a tender crumb and rich golden color.
Prep Work
Before we dive into mixing and kneading, Preparing the Yeast and Soaking the Raisins are critical steps that set the foundation for our Raisin Challah. These early preparations ensure a perfectly risen, flavorful bread every time.
Preparing the Yeast
We start by activating the active dry yeast, which is essential for the dough’s rise and the light, airy texture of our Raisin Challah. Follow these steps for optimal yeast performance:
- Measure 2 ¼ teaspoons (one package) of active dry yeast.
- Combine the yeast with 1 cup of warm water. The ideal temperature is between 105°F and 115°F to wake the yeast without killing it.
- Add 1 tablespoon of sugar to the mixture to feed the yeast for a vigorous rise.
- Whisk gently until the yeast dissolves.
- Let the mixture stand for 5-10 minutes. It should become foamy and bubbly, indicating that the yeast is active and ready to work.
Tip: If the yeast does not foam within 10 minutes, the yeast may be dead, and it’s best to start with fresh yeast to avoid a dense challah.
| Yeast Activation Parameters | Details |
|---|---|
| Yeast Amount | 2 ¼ teaspoons |
| Water Temperature | 105°F – 115°F |
| Sugar Added | 1 tablespoon |
| Activation Time | 5-10 minutes |
| Indicator | Foam and bubbles |
Soaking the Raisins
To ensure our golden raisins are plump, juicy, and sweet, soaking is a must. This step infuses moisture and heightens their natural sweetness, creating delightful bursts of flavor in every bite.
- Place 1 ½ cups of golden raisins in a small bowl.
- Pour ½ cup of warm water over the raisins.
- Let them soak for at least 15 minutes or up to 30 minutes for even plumper raisins.
- Drain the raisins thoroughly using a fine mesh strainer to avoid excess moisture in the dough.
- Optional: For extra flavor, soak raisins in warm tea or add a splash of vanilla extract to the soaking liquid.
Reminder: Properly drained raisins prevent soggy spots and help distribute sweetness evenly throughout the dough.
These preparatory steps launch us toward making a rich, golden crust and a perfectly tender crumb in our Raisin Challah.
Making the Dough
Creating the perfect dough is the foundation of our Raisin Challah. This step involves carefully combining ingredients and developing gluten through kneading to achieve a soft, elastic texture that will hold the raisins beautifully.
Mixing Ingredients
We begin by combining the dry ingredients in a large mixing bowl. These include:
- 4 cups all-purpose flour (plus extra for dusting)
- 1/4 cup granulated sugar
- 2 1/4 teaspoons active dry yeast (one packet)
- 1 teaspoon salt
Next, in a separate bowl, we whisk together the wet ingredients:
- 1 cup warm water (about 110°F)
- 2 large eggs
- 1/4 cup vegetable oil
- 1 teaspoon vanilla extract
Once the yeast has been activated and the raisins soaked, we add the wet mixture to the dry ingredients. We gently fold them together using a wooden spoon or dough hook in a stand mixer until the dough begins to form. At this stage, we gently fold in the plump, soaked golden raisins to ensure even distribution without tearing the dough.
| Ingredient | Quantity | Notes |
|---|---|---|
| All-purpose flour | 4 cups | Plus extra for kneading |
| Granulated sugar | 1/4 cup | |
| Active dry yeast | 2 1/4 teaspoons | One packet; activated |
| Salt | 1 teaspoon | |
| Warm water | 1 cup | Around 110°F |
| Eggs | 2 large | Room temperature |
| Vegetable oil | 1/4 cup | Neutral-flavored |
| Vanilla extract | 1 teaspoon | Enhances sweetness |
| Golden raisins | 3/4 cup | Soaked and drained |
Kneading the Dough
Kneading is where we develop the dough’s structure. We turn the dough out onto a lightly floured surface and begin kneading by hand or use a stand mixer fitted with a dough hook.
- Press and fold the dough with the heels of our hands.
- Rotate the dough slightly and repeat for about 8-10 minutes.
- During kneading, the dough should be smooth, elastic, and slightly tacky but not sticky.
- If the dough feels dry, we add small amounts of flour, one tablespoon at a time.
- Conversely, if it is too sticky, we sprinkle a bit more flour.
Kneading by hand connects us to the dough’s transformation from a rough mixture to a soft, stretchy masterpiece ready to rise. Using a stand mixer, we knead on medium speed for 5-7 minutes, stopping to check the dough’s texture.
Once kneaded, we shape the dough into a ball and place it in a lightly oiled bowl, turning to coat all sides in oil to prevent drying. We cover the bowl with a clean kitchen towel or plastic wrap, allowing the dough to rise in a warm spot until doubled in size, approximately 1-2 hours.
First Rise
After kneading the dough until it is smooth, elastic, and slightly tacky, we transfer it to a large, lightly oiled bowl. The oil prevents the dough from sticking and facilitates easy handling after the rise.
We then cover the bowl tightly with a clean kitchen towel or plastic wrap to maintain humidity around the dough, which is essential for optimal yeast activity. Placing the dough in a warm, draft-free spot encourages a vigorous rise.
Ideal Conditions for the First Rise
| Factor | Recommendation |
|---|---|
| Temperature | 75°F to 80°F (24°C to 27°C) |
| Duration | 1 to 2 hours |
| Dough size goal | Double in volume |
“The dough should approximately double in size,” a clear sign that the yeast has fermented sugars, producing the gas needed to create the light texture characteristic of our Raisin Challah.
Step-by-Step Process:
- Shape the Dough — Once kneaded, form the dough into a tight ball.
- Prepare the Bowl — Lightly grease a large bowl with vegetable oil.
- Place the Dough in the Bowl — Roll the dough ball around to ensure all sides are coated with oil.
- Cover Securely — Use a clean kitchen towel or plastic wrap to cover the bowl firmly.
- Find a Warm Spot — Place the bowl in a draft-free area near a warm appliance or inside an oven with just the light on (do not turn it on).
- Wait Patiently — Allow the dough to rise undisturbed for 1 to 2 hours until it doubles in size.
We want the dough to feel puffy and soft. If we gently press a finger into it, the indentation should slowly spring back. This tactile cue confirms the yeast has done its magic.
By carefully monitoring the First Rise, we set the foundation for the tender crumb and slight sweetness that make our Raisin Challah exceptional.
Shaping the Challah
Shaping our Raisin Challah dough is a crucial step that combines flour, yeast, and sweet golden raisins into a beautiful and tasty centerpiece. This process prepares the dough for its final rise and baking, ensuring an even crumb and an inviting braided appearance.
Incorporating Raisins
Before we start shaping, it’s essential to evenly distribute the soaked golden raisins throughout the dough without crushing them. After the first rise:
- Turn the dough gently onto a lightly floured surface.
- Fold the dough over itself a few times to incorporate the raisins evenly.
- Avoid pressing or rolling too hard to keep the raisins plump and intact.
This careful folding guarantees every slice of our Raisin Challah bursts with sweet, juicy raisins, enhancing its tender crumb.
Braiding the Dough
The hallmark of traditional challah is its elegant braid. Here’s how we braid our raisin-studded dough perfectly:
| Step | Action | Detail |
|---|---|---|
| 1 | Divide the dough | Separate the dough into three equal pieces on a floured surface. |
| 2 | Roll into ropes | Roll each piece into a smooth rope about 14 inches long, keeping raisins evenly distributed. |
| 3 | Pinch ends | Pinch the three ropes together at one end to secure the braid. |
| 4 | Cross right strand over middle | Bring the right rope over the middle rope. |
| 5 | Cross left strand over new middle | Bring the left rope over the new middle rope. |
| 6 | Repeat until fully braided | Continue this pattern until the braid is complete, leaving the ends free. |
| 7 | Pinch and tuck ends | Pinch the ends together and tuck them underneath the loaf neatly. |
This braiding technique creates a classic Raisin Challah shape with an intricate golden crust and tender, flavorful interior — a feast for both the eyes and palate.
Once braided, we place the challah on a parchment-lined baking sheet for the second rise, preparing our dough for baking into the perfect balance of sweet and soft tradition.
Second Rise
After braiding our Raisin Challah, it’s essential to allow the dough to undergo the Second Rise. This step ensures a soft airy crumb and a beautifully risen loaf with a delicate texture. Here’s how we proceed:
- Place Braided Dough on Baking Sheet
Transfer the braided challah gently onto a parchment-lined baking sheet. This prevents sticking and helps achieve an even golden crust.
- Cover Loosely
We cover the challah loosely with a clean, damp kitchen towel or lightly greased plastic wrap. This protects the dough from drying out while allowing it to rise optimally.
- Ideal Environment for Rising
To get the best rise we place the dough in a warm draft-free spot with a temperature between 75°F to 80°F (24°C to 27°C). Consistent warmth activates the yeast for a tender crumb and slight sweetness.
- Duration of the Rise
The second rise typically lasts 45 to 60 minutes, or until the dough has puffed noticeably and nearly doubled in size. The loaf should look soft and slightly swollen but not overinflated.
| Step | Details |
|---|---|
| Temperature | 75°F to 80°F (24°C to 27°C) |
| Duration | 45 to 60 minutes |
| Coverage | Damp kitchen towel or plastic wrap |
- Visual and Tactile Cues
We gently press a finger into the risen dough. If the indentation springs back slowly but not completely, it indicates perfect proofing. This balance guarantees excellent oven spring without collapsing.
- Final Preparations Before Baking
Once the second rise is complete, our raisin-studded challah is ready for the final touches before baking. This stage is key to locking in moisture and bringing out the natural sweetness of the soaked golden raisins.
“The second rise transforms our carefully braided dough into a light pillow of flavor, setting the foundation for the radiant golden crust and tender crumb that define our Raisin Challah.“
By attentively managing this stage, we ensure every bite offers a soft, springy texture with delightful bursts of juicy raisins inside.
Baking Instructions
Baking our Raisin Challah requires precise temperature control and timing to develop its signature golden crust and soft, tender crumb. Let’s dive into the essential steps for perfect baking results.
Oven Temperature and Baking Time
To achieve the ideal golden crust and soft interior, preheat your oven to 350°F (175°C). This temperature allows even heat distribution, baking the dough through without burning the crust or drying out the loaf.
- Place the braided dough on a parchment-lined baking sheet.
- Bake uncovered in the preheated oven for 30 to 35 minutes.
- Check the internal temperature with a kitchen thermometer; it should read 190°F (88°C) when done.
- The challah should sound hollow when tapped on the bottom, confirming it is fully baked.
| Oven Temperature | Baking Time | Internal Temperature |
|---|---|---|
| 350°F (175°C) | 30-35 minutes | 190°F (88°C) |
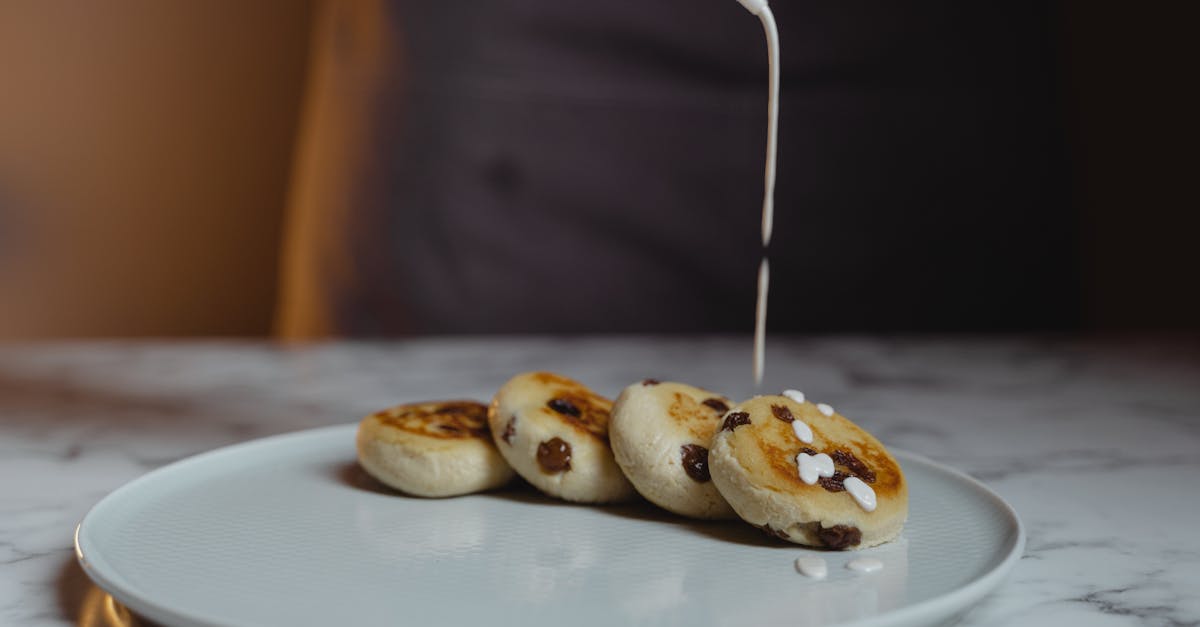
After removing the challah from the oven, immediately brush the loaf with the warm honey glaze (if using) to enhance the shine and deepen the flavor.
Tips for Even Baking
Ensuring an evenly baked Raisin Challah involves attention to detail throughout the baking process:
- Rotate the pan halfway through baking to promote uniform browning.
- Use a middle oven rack position for balanced heat exposure.
- Avoid opening the oven door frequently during the first 20 minutes to maintain steady heat.
- If the crust browns too quickly, tent loose foil over the loaf to prevent burning while the interior finishes baking.
- Let the challah cool completely on a wire rack to avoid sogginess and to set the crumb structure.
“Consistent temperature and patience produce a challah with a tender crumb, a beautiful golden crust, and delightful bursts of plump raisins in every bite.”
Following these baking instructions carefully will ensure our Raisin Challah emerges from the oven with the perfect texture and flavor balance every time.
Cooling and Serving
Once our Raisin Challah emerges from the oven, the cooling process is crucial to preserve its delicate crumb structure and sweet, moist texture. Here is how we handle cooling and serving for the best results:
Cooling the Challah
- Transfer immediately: Using a spatula, gently lift the challah from the baking sheet onto a wire cooling rack.
- Allow air circulation: Placing the challah on a rack prevents the bottom crust from becoming soggy by letting air circulate freely.
- Cool completely: Let the challah cool for at least 1 to 2 hours at room temperature. Cooling fully allows the interior crumb to set, making slicing easier and cleaner.
- Avoid covering: Refrain from covering the challah while it cools to prevent condensation, which can soften the crust undesirably.
Serving Suggestions
- Slice with care: Use a serrated bread knife to get clean slices that showcase the tender crumb dotted with plump raisins.
- Pairing: Our Raisin Challah shines when paired with butter, cream cheese, or a drizzle of honey for breakfast or brunch.
- Storage note: To maintain freshness, store the challah wrapped in a clean kitchen towel or airtight container once fully cooled. Consume within 3 days for optimal flavor and texture.
Quick Reference Table for Cooling & Serving
| Step | Details | Time | Notes |
|---|---|---|---|
| Transfer to rack | Move bread off baking sheet | Immediately after bake | Use a spatula to avoid crust damage |
| Cooling | Place on wire rack for air circulation | 1 – 2 hours | Do not cover during cooling |
| Slicing | Use serrated knife for even slices | Before serving | Reveals tender crumb and raisins evenly |
| Serving | Butter, cream cheese, honey recommended | At serving time | Enhances flavor of sweet raisin challah |
| Storage | Wrap in towel or airtight container | After cooling | Best within 3 days to maintain freshness |
“Cooling our Raisin Challah correctly is the final step to unlocking its full flavor and texture.” Perfectly cooled bread slices beautifully and retains that soft crumb that we love.
By following these cooling and serving steps thoughtfully, we ensure every bite of our Raisin Challah is full of warmth, sweetness, and tradition.
Storage Tips
To keep our Raisin Challah fresh and delicious for as long as possible, proper storage is essential. Follow these steps to preserve the bread’s soft crumb and sweet bursts of raisins.
Room Temperature Storage
- Once the challah is completely cooled, wrap it tightly in a clean kitchen towel or place it in an airtight container to prevent it from drying out.
- Store at room temperature in a cool, dry place away from direct sunlight and heat sources.
- Consume within 3 days for the best taste and texture.
| Storage Method | Container Type | Duration | Ideal Conditions |
|---|---|---|---|
| Room Temperature | Kitchen towel / Airtight container | Up to 3 days | Cool, dry, away from sunlight |
Refrigeration
- Although refrigeration can extend shelf life, it may cause the crumb to dry out faster.
- If you prefer refrigeration, wrap the challah tightly in plastic wrap or foil and place it in an airtight container.
- Consume within 5 days but allow the challah to come to room temperature before serving for optimal softness.
| Storage Method | Container Type | Duration | Notes |
|---|---|---|---|
| Refrigeration | Plastic wrap / Airtight container | Up to 5 days | May dry crumb; reheat gently |
Freezing for Longer Storage
- For longer storage, slice the challah and place parchment paper between slices to prevent sticking.
- Seal the slices in a resealable freezer bag or airtight container.
- Freeze for up to 3 months.
- To thaw, remove desired slices and leave at room temperature for 1 to 2 hours or toast directly from frozen.
| Storage Method | Container Type | Duration | Recommended Thawing |
|---|---|---|---|
| Freezing | Freezer bag / Airtight container | Up to 3 months | Room temperature 1-2 hours or toast |
Key Storage Tips Summary
- Always cool challah completely before storing to avoid condensation.
- Use airtight containers or tight wraps to maintain moisture and prevent staleness.
- Avoid refrigerating unless necessary due to moisture loss risk.
- For best texture and flavor, enjoy fresh or properly thawed slices.
By following these storage tips, we ensure our Raisin Challah maintains its signature soft crumb, golden crust, and delightful sweetness every time we enjoy it.
Conclusion
Baking Raisin Challah is a rewarding experience that fills our kitchen with warmth and sweet aromas. With its tender crumb and golden crust, this bread brings a special touch to any meal or celebration.
By following the steps carefully and paying attention to the rising and baking process, we ensure a loaf that’s soft, flavorful, and beautifully braided. Whether enjoyed fresh or stored for later, Raisin Challah is sure to become a beloved staple in our home.
Let’s keep sharing this delicious tradition and savor every bite together.
Frequently Asked Questions
What makes Raisin Challah different from traditional challah bread?
Raisin Challah includes golden raisins soaked for added sweetness and moisture, blending the classic braided bread’s rich texture with a delightful fruity flavor.
What ingredients are needed to make Raisin Challah?
Key ingredients include all-purpose flour, sugar, active dry yeast, salt, warm water, eggs, vegetable oil, vanilla extract, and golden raisins. Optional honey glaze adds shine and sweetness.
How do I properly activate yeast for the dough?
Dissolve yeast in warm water (around 105°F–110°F) with sugar. Let it sit for 5–10 minutes until bubbly and foamy, indicating it is active and ready to use.
Why do I need to soak the golden raisins before baking?
Soaking plumps up the raisins, enhancing their sweetness and moisture, which helps them blend well into the dough and remain juicy after baking.
Can I knead the dough by hand instead of using a mixer?
Yes, kneading by hand is perfectly fine. It may take longer but helps develop gluten for a smooth, elastic dough with great texture.
How long should the dough rise during the first proof?
First rise takes about 1–2 hours in a warm (75°F to 80°F), draft-free spot until the dough doubles in size and feels soft and puffy.
How do I shape and braid the Raisin Challah?
After folding the raisins into the dough, divide it into strands and braid them evenly. This gives the traditional challah shape and a lovely texture.
What is the purpose of the second rise?
The second rise allows the braided dough to puff up further, creating a soft, airy crumb and ensuring a tender interior after baking.
At what temperature and for how long should I bake the Raisin Challah?
Bake at 350°F (175°C) for 30 to 35 minutes. The loaf is done when it reaches an internal temperature of 190°F (88°C) and has a golden crust.
How should I cool and serve Raisin Challah?
Cool on a wire rack for 1–2 hours uncovered to keep the crust crisp. Slice with a serrated knife and serve with butter, cream cheese, or honey.
What is the best way to store Raisin Challah?
Wrap cooled challah in a clean towel or airtight container, and consume within 3 days. For longer storage, slice and freeze with parchment paper between slices for up to 3 months.