
Turquoise glaze has long been a favorite among ceramic artists for its vibrant color and smooth finish. When fired to Cone 10, this glaze achieves a stunning depth and durability that makes each piece truly stand out. Whether you’re crafting pottery or functional ware, mastering a reliable turquoise glaze can elevate your work to the next level.
In this recipe, we’ll share a tried-and-true formula designed specifically for Cone 10 firing. It balances color, texture, and melting properties to deliver consistent results every time. Let’s dive into creating a beautiful turquoise glaze that will bring your ceramics to life with rich color and a glossy finish.
Ingredients for Turquoise Glaze Recipe Cone 10
To achieve the vibrant, durable turquoise glaze at Cone 10, we carefully balance the components that influence color, texture, and melting characteristics. Below is the precise list of ingredients with their specific measurements, ensuring our glaze develops that deep, smooth finish every time.
| Ingredient | Amount (grams) | Notes |
|---|---|---|
| Feldspar (Potash) | 400 | Flux source for melting |
| Silica | 200 | Provides glass structure |
| Whiting (Calcium Carbonate) | 150 | Affects durability and gloss |
| Flint (Silica) | 100 | Enhances silica content |
| Talc | 80 | Adds softness and matte texture |
| Copper Carbonate | 20 | Primary colorant for turquoise |
| Cobalt Oxide | 4 | Enhances blue tone depth |
| Gerstley Borate | 60 | Flux, aids smooth melting |
Key Notes on Ingredients:
- Feldspar acts as the primary flux to lower the melting point, helping the glaze mature properly at Cone 10.
- Silica creates the glassy matrix essential for the smooth, glossy surface.
- Copper Carbonate delivers the characteristic turquoise color, striking the perfect balance between green and blue hues.
- The tiny amount of Cobalt Oxide intensifies the blue, stabilizing the overall tone without overpowering the copper.
- Fluxes like Whiting and Gerstley Borate improve melting behavior and surface durability.
By measuring ingredients precisely and blending them thoroughly, we ensure our turquoise glaze develops the vibrant color and refined finish that Cone 10 firing demands.
Equipment Needed
To achieve the perfect Turquoise Glaze at Cone 10, having the right equipment is essential. Our tools and kiln setup directly influence the glazing process and the final appearance of the piece.
Kiln Requirements
For firing a turquoise glaze at Cone 10, a kiln capable of reaching high temperatures up to approximately 2381°F (1305°C) is mandatory. We recommend the following kiln characteristics to ensure consistent and reliable results:
| Kiln Feature | Specification | Notes |
|---|---|---|
| Maximum Temperature | 2381°F / 1305°C | Must reach and maintain Cone 10 temps |
| Temperature Controller | Digital programmable controller | Allows precise firing schedules |
| Atmosphere Control | Oxidation or reduction capability | Turquoise glazes respond differently; choose according to glaze chemistry |
| Kiln Size | Depends on project size | Ensure enough space without overcrowding |
| Ventilation | Proper ventilation system | Prevents glaze defects caused by fumes |
Using a kiln with these specifications helps us mature the glaze properly, preventing under- or over-firing that can ruin color vibrancy and surface texture.
Tools for Glazing
For the application and preparation of the turquoise glaze ingredients, precise tools help us maintain consistency and quality. Here is a list of the essential tools:
- Digital Scale: Accurately measure glaze ingredients to nearest 0.1 gram for repeatability.
- Mixing Containers: Non-reactive buckets or bowls for mixing glaze batches thoroughly.
- Electric Mixer or Stir Stick: To blend powders and liquids smoothly, avoiding lumps.
- Sieve (80-120 mesh): For sifting dry ingredients ensuring a fine, even texture.
- Brushes or Spray Gun: Depending on application technique—brush for detail, spray for even coverage.
- Glove and Mask: Protection when handling powders during mixing and application.
- Dipping Tongs: For safely dipping pieces into glaze baths without contamination.
By assembling this suite of equipment, we gain full control over the glaze preparation and application, directly impacting the final turquoise color depth and surface finish of our Cone 10 fired ceramics.
Preparing the Clay Surface
Before we apply the Turquoise Glaze Recipe Cone 10, it is essential to prepare the clay surface properly to ensure optimal glaze adherence and a flawless finish.
Step 1: Cleaning the Clay Surface
We start by thoroughly cleaning the clay piece to remove dust and debris. Use a soft brush or a damp sponge to wipe the surface gently. This removes any particles that could cause glaze defects such as pinholes or crawling.
Step 2: Drying the Clay Completely
The clay must be completely dry but not bone dry before glazing. If the clay contains excess moisture, it can cause glaze defects like bubbling or crawling during firing. We recommend drying the piece for at least 24 hours in a low-humidity environment.
Step 3: Smoothing the Surface
For the best glaze effect, the surface should be smooth and even. Use fine-grit sandpaper (around 220 grit) or a soft sponge to gently smooth rough areas. This step helps the glaze to adhere evenly and enhances the glossy, vibrant finish typical of a Turquoise Glaze at Cone 10.
Step 4: Wiping Away Dust After Sanding
After smoothing, wipe the piece again with a damp sponge to remove any residual dust. This prevents particles from embedding in the glaze, which could mar the final surface.
Step 5: Applying a Clay Slip (Optional)
If the clay body is porous or rough, we suggest applying a thin layer of clay slip to the surface before glazing. This step creates a barrier that promotes uniform glaze absorption and reduces glaze defects.
Summary Table: Clay Surface Preparation Steps
| Step | Description | Purpose |
|---|---|---|
| Clean the surface | Use soft brush or damp sponge | Remove dust and debris |
| Dry completely | At least 24 hours in low humidity environment | Prevent glaze defects from moisture |
| Smooth the surface | Fine-grit sandpaper or sponge | Ensure even glaze adherence |
| Wipe off dust | Damp sponge after sanding | Remove residual dust |
| Apply clay slip (optional) | Thin layer of slip for porous clay | Improve glaze absorption |
By meticulously preparing the clay surface, we lay the foundation that lets our Turquoise Cone 10 Glaze develop its signature rich color and glassy texture, ensuring a durable and beautiful finish on our ceramics.
Mixing the Turquoise Glaze
To create the perfect Turquoise Glaze at Cone 10, precise mixing is crucial. Following accurate measurements and thorough combining of ingredients ensures a vibrant and smooth finish every time.
Measuring Ingredients
Accurate measurement sets the foundation for a consistent glaze. We use a digital scale to weigh each ingredient to the exact gram listed in the recipe. Here’s a breakdown of the essential components with their precise amounts for a 1000g batch of the Turquoise Glaze:
| Ingredient | Weight (grams) | Role in Glaze |
|---|---|---|
| Feldspar | 300 | Provides flux to lower melting temperature |
| Silica | 250 | Adds durability and structure |
| Whiting | 150 | Enhances opacity and fluxing |
| Flint | 100 | Adds hardness and prevents crazing |
| Talc | 100 | Improves glaze fluidity and surface finish |
| Copper Carbonate | 40 | Imparts the signature turquoise color |
| Cobalt Oxide | 5 | Deepens the blue tones |
| Gerstley Borate | 55 | A flux that smooths the melt and enhances texture |
We recommend weighing each ingredient individually rather than estimating by volume to maintain consistency. Always calibrate your scale before starting.
Combining Ingredients
Once all ingredients are measured, we proceed to mix them thoroughly to achieve a homogeneous blend:
- Sift dry ingredients together into a large mixing container. This step breaks up any lumps and ensures even distribution.
- Use an electric mixer on low speed to blend the powders for at least 3 minutes. This uniformity is vital to avoid spotting or uneven coloring.
- Gradually add water while mixing until the glaze reaches a smooth, cream-like consistency — typically around 1500 ml per 1000g dry mix.
- Pass the suspended glaze slip through a 100 mesh sieve twice. This removes any remaining clumps or impurities.
- Let the mixture rest for 12 to 24 hours to allow full hydration of materials and stabilization of the slip.
- Stir well before glazing your pieces to reincorporate any settled particles.
“Mixing is not just blending ingredients — it’s mastering the chemistry behind the glaze to unlock the stunning turquoise finish we seek.”
With these precise measurements and meticulous combining steps, our Cone 10 Turquoise Glaze will be ready to apply, promising vibrant color and superb surface quality on every fired piece.
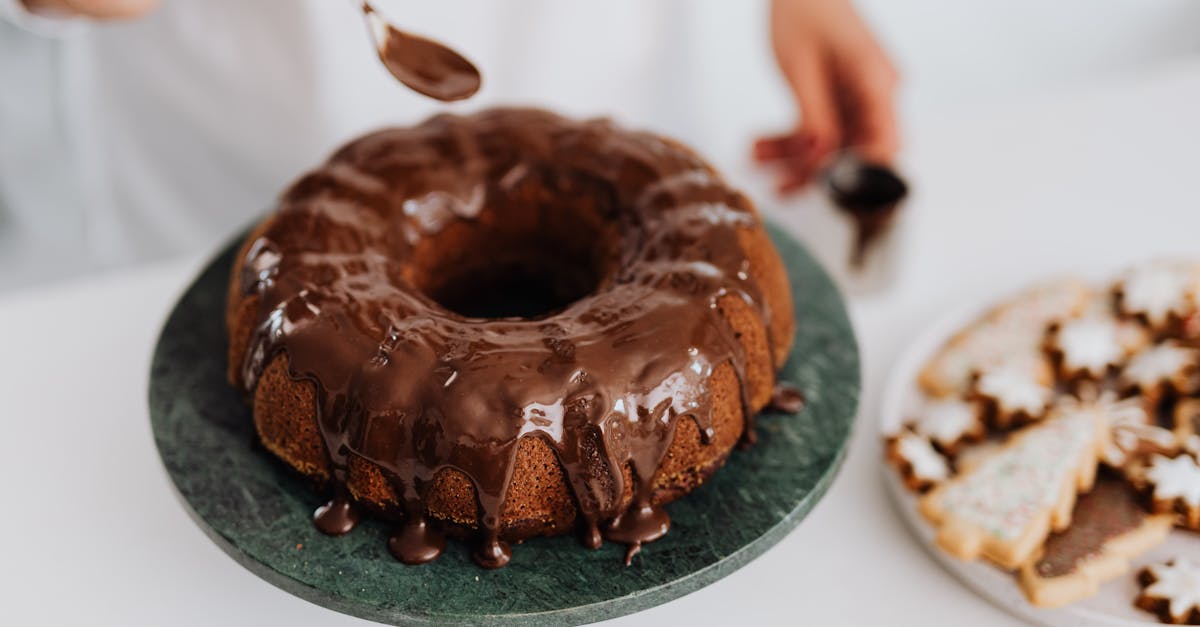
Applying the Turquoise Glaze
Applying the turquoise glaze evenly and expertly is crucial for achieving the vibrant color and smooth finish we aim for at Cone 10. Here we focus on proven techniques and tips that help us bring out the best in our ceramic pieces.
Techniques for Even Coverage
To ensure a flawless finish, follow these step-by-step techniques for applying the glaze:
- Use Clean Tools and Workspace: Always start with clean brushes, spray guns, or dipping tongs to avoid contamination.
- Consistent Viscosity: Check that the glaze slurry is at the right thickness—like heavy cream. Too thick, and it will clump; too thin, and it will run unevenly.
- Multiple Thin Layers: Apply the glaze in 2 to 3 thin, even coats rather than one thick layer. Each coat should dry slightly before applying the next.
- Brush Application: When brushing, use long, smooth strokes in the same direction to minimize brush marks.
- Spraying: Hold the spray gun about 8 to 12 inches from the surface. Overlap spray passes by 50% to avoid streaks.
- Dipping: Immerse the piece fully and withdraw steadily to prevent drips and pooling.
- Drying Time: Allow the glaze to dry completely between layers and before firing to prevent defects.
| Application Method | Key Tips | Drying Time Between Coats |
|---|---|---|
| Brushing | Long smooth strokes | 15-20 minutes |
| Spraying | Overlap passes by 50% | 10-15 minutes |
| Dipping | Steady, controlled withdrawal | 20-30 minutes |
“Precision in application unlocks the full beauty of the turquoise glaze at Cone 10, ensuring a uniform surface that highlights the glaze’s depth.”
Tips for Achieving Turquoise Color
To achieve the signature vibrant turquoise color, keep in mind these important points:
- Maintain Ingredient Ratios: Stick to the exact Copper Carbonate and Cobalt Oxide amounts in your recipe to hit the ideal hue.
- Adjust Thickness Thoughtfully: Too thin an application may yield a pale blue, while too thick can darken or distort the turquoise.
- Firing Atmosphere: Ensure your kiln atmosphere is well-controlled. Oxidation firing at Cone 10 is essential for the bright turquoise tone.
- Avoid Overfiring: Excessive heat beyond Cone 10 can dull the glaze or cause color shifts.
- Test Small Batches: Always fire smaller test tiles before full-scale glazing to verify color response with your specific clay body and kiln.
- Surface Preparation Matters: Porous or rough surfaces absorb glaze unevenly, so smooth preparation maximizes color clarity.
| Factor | Effect on Turquoise Color |
|---|---|
| Copper Carbonate Level | Controls the blue-green vibrancy |
| Coating Thickness | Influences lightness or darkness of the glaze |
| Kiln Atmosphere | Oxidation promotes bright turquoise versus reduction |
| Firing Temperature | Overfiring can mute or change glaze color |
| Clay Body Texture | Smooth improves color consistency |
Applying our turquoise glaze with these expert strategies ensures stunning, consistent results that make every piece a ceramic masterpiece.
Firing the Glazed Piece
Successfully firing the turquoise glaze at Cone 10 is crucial to achieving its vibrant color and glassy finish. We must follow a precise firing schedule and adhere to safety precautions to protect our work and ourselves.
Firing Schedule for Cone 10
To mature the turquoise glaze at Cone 10 (approximately 2381°F / 1305°C), we follow a controlled firing curve that maximizes the glaze’s depth and durability. This schedule ensures optimal melting, surface texture, and color development without defects such as crawling or blistering.
| Stage | Temperature Range (°F) | Ramp Rate (°F/hr) | Hold Time | Purpose |
|---|---|---|---|---|
| Drying | Room Temp to 400 | 100 | None | Remove residual moisture |
| Slow Ramp | 400 to 1500 | 150 | None | Gradual heating to minimize thermal shock |
| Mid Ramp | 1500 to 2100 | 225 | None | Prepare glaze components to start melting |
| Final Ramp | 2100 to 2381 | 100 | None | Precise approach to maturation temperature |
| Soak (Maturation) | 2381 | N/A | 10-15 min | Full glaze melt and color development |
| Cool Down | 2381 to 1000 | Controlled slow | N/A | Prevents glaze defects and cracking |
| Reach Room Temp | 1000 to Room Temp | Natural | N/A | Safe unloading temperature |
- We avoid rapid temperature changes especially during ramp-up and cooling to prevent stress on ceramic pieces.
- Monitoring the kiln with a digital programmable controller allows precise adherence to this firing profile.
- The 10-15 minute soak at Cone 10 ensures the glaze components fully mature, resulting in that signature turquoise vibrancy and smooth surface.
Safety Precautions
Firing ceramics at high temperatures like Cone 10 requires strict safety measures to protect both our studio environment and ourselves.
- Wear heat-resistant gloves and safety glasses when handling glazed pieces or opening the kiln.
- Always allow the kiln to cool to at least 1000°F before opening to minimize thermal shock risks and exposure to hot gases.
- Ensure proper ventilation in the kiln room to disperse fumes from glaze materials like copper carbonate and cobalt oxide.
- Avoid inhaling dust from raw glaze ingredients during mixing by wearing a dust mask or respirator.
- Keep a fire extinguisher nearby rated for electrical and chemical fires suitable for kiln environments.
- Conduct regular kiln maintenance checks for worn elements, damaged insulation, or faulty controllers to maintain safe operation.
- Follow manufacturer’s instructions strictly for the kiln and equipment used.
Following this firing schedule and safety checklist ensures our turquoise glaze pieces achieve the stunning finish we desire while maintaining a safe workspace for every firing session.
Troubleshooting Common Issues
When working with the Turquoise Glaze Recipe Cone 10, certain issues may arise that can impact the final color, texture, and durability. Below we address the most frequent problems and provide clear solutions to help us achieve consistent and vibrant results.
Glaze Crazing or Cracking
Crazing occurs when the glaze surface develops a fine network of cracks. This can compromise the piece’s durability and aesthetics.
- Cause: Mismatch between glaze and clay body thermal expansion.
- Solution Steps:
- Test the glaze on different clay bodies to find a better fit.
- Adjust the glaze recipe by increasing the feldspar or silica to reduce thermal expansion.
- Ensure proper cooling rates during firing; avoid rapid cooling.
- Consult glaze expansion charts and make small batch adjustments.
Dull or Matte Finish Instead of Glossy
A dull glaze surface indicates incomplete melting or improper firing conditions.
- Cause: Underfiring or glaze thickness too thin.
- Solution Steps:
- Confirm the kiln reached Cone 10 temperature (approx. 2381°F/1305°C).
- Apply slightly thicker coats during glazing; aim for even coverage.
- Increase firing soak time to promote full maturation.
- Check glaze consistency to ensure it is not overly thick or watery.
Pitting or Pinholes on Glaze Surface
Pits or pinholes create rough textures and interfere with the smooth finish typical of turquoise glaze.
- Cause: Air bubbles trapped in glaze or organic residues on ceramic surface.
- Solution Steps:
- Mix glaze thoroughly with an electric mixer to remove air bubbles.
- Sieve glaze before application to eliminate lumps.
- Clean ceramic piece meticulously before glazing; remove any dust or oils.
- Allow pieces to dry completely before firing to avoid steam formation.
Color Fading or Metallic Sheen Loss
The vibrant turquoise color or glossy sheen may fade or become muted after firing.
- Cause: Firing atmosphere issues or variations in oxide amounts.
- Solution Steps:
- Maintain kiln atmosphere control; ideally, fire in an oxidation environment.
- Check copper carbonate and cobalt oxide measurements; small variations impact color intensity.
- Conduct test firings to balance glaze components for consistent coloration.
- Avoid contamination during mixing and application.
Quick Reference Table for Troubleshooting
| Issue | Common Cause | Key Solutions |
|---|---|---|
| Crazing or Cracking | Thermal expansion mismatch | Adjust glaze recipe, test clay bodies |
| Dull or Matte Finish | Underfiring or thin glaze layer | Confirm Cone 10, apply thicker glaze coats |
| Pitting or Pinholes | Air bubbles, surface residues | Mix and sieve glaze, clean pieces thoroughly |
| Fading Color or Sheen | Firing atmosphere, oxide ratio imbalance | Control kiln atmosphere, measure oxides precisely |
“Achieving the perfect turquoise glaze requires patience and precise control. Using these troubleshooting tips, we can resolve common issues and consistently produce ceramic pieces with vibrant color, glossy finish, and durable surface.”
We encourage testing small sample pieces before full-scale production to refine glaze behavior specific to our studio setup and materials. This proactive approach ensures superior results with our Turquoise Glaze Recipe Cone 10 every time.
Conclusion
Mastering the turquoise glaze at Cone 10 opens up exciting possibilities for our ceramic work. With the right recipe, careful preparation, and precise firing, we can achieve that vibrant color and smooth finish that make our pieces stand out.
By paying attention to every detail—from ingredient measurements to kiln control—we ensure consistent, high-quality results. Troubleshooting common issues along the way helps us refine our process and grow as artists.
This glaze not only enhances the beauty of our ceramics but also adds durability, making each creation both functional and stunning. Let’s keep experimenting and perfecting this glaze to elevate our craft to new heights.
Frequently Asked Questions
What makes turquoise glaze popular among ceramic artists?
Turquoise glaze is favored for its vibrant color and smooth, glossy finish. When fired to Cone 10, it gains enhanced depth and durability, making ceramic pieces visually striking and long-lasting.
What key ingredients are used in a Cone 10 turquoise glaze?
The main ingredients include Feldspar, Silica, Whiting, Flint, Talc, Copper Carbonate, Cobalt Oxide, and Gerstley Borate. These elements balance melting, texture, and color to create the signature turquoise finish.
What equipment is necessary for creating turquoise glaze at Cone 10?
Essential equipment includes a kiln capable of reaching 2381°F (1305°C) with a digital temperature controller, plus tools like a digital scale, mixing containers, electric mixer, sieve, brushes or spray gun, gloves, and dipping tongs.
How should the clay surface be prepared before glazing?
Clean and dry the clay, smooth rough areas, remove dust, and optionally apply clay slip for porous surfaces. Proper preparation ensures better glaze adhesion and a flawless finish.
How do you mix the turquoise glaze ingredients properly?
Measure ingredients precisely by weight, sift them, mix thoroughly with an electric mixer, add water for consistency, and sieve the mixture to remove impurities. Accurate mixing is key for a vibrant finish.
What are the best techniques for applying turquoise glaze?
Use clean tools, maintain consistent glaze thickness, apply multiple thin layers, and allow drying between coats. Consistent application helps achieve the vibrant color and smooth surface desired.
What is the firing process for turquoise glaze at Cone 10?
Follow a controlled firing schedule with gradual temperature increases, hold times, and slow cooling to avoid defects. Use a programmable controller to maintain precise kiln conditions.
What safety precautions should be taken when firing at high temperatures?
Wear heat-resistant gloves and safety glasses, ensure proper ventilation, and perform regular kiln maintenance to keep your workspace safe during high-temperature firings.
How can common glaze issues like crazing or dull finishes be fixed?
Adjust glaze recipes, control firing temperature and atmosphere, and test small batches. Proper tweaking and consistent firing help eliminate these problems and improve glaze quality.
Why is testing small batches important when working with turquoise glaze?
Testing small batches helps identify how your specific clay and kiln setup affect the glaze, allowing fine-tuning for consistent, vibrant, and defect-free results in larger projects.