
Keeping our vinyl surfaces spotless can be a challenge, especially with dirt and grime building up over time. Whether it’s vinyl records, upholstery, or flooring, using the right cleaning solution is key to maintaining their shine and longevity. Commercial products can be pricey or filled with harsh chemicals, so making our own vinyl cleaning solution is a smart and cost-effective alternative.
This simple recipe uses everyday ingredients that are gentle yet effective, ensuring our vinyl stays clean without damage. With just a few steps, we can create a solution that’s safe for various vinyl items and easy to apply. Let’s dive into this easy DIY vinyl cleaning solution recipe that will keep our vinyl looking fresh and well cared for.
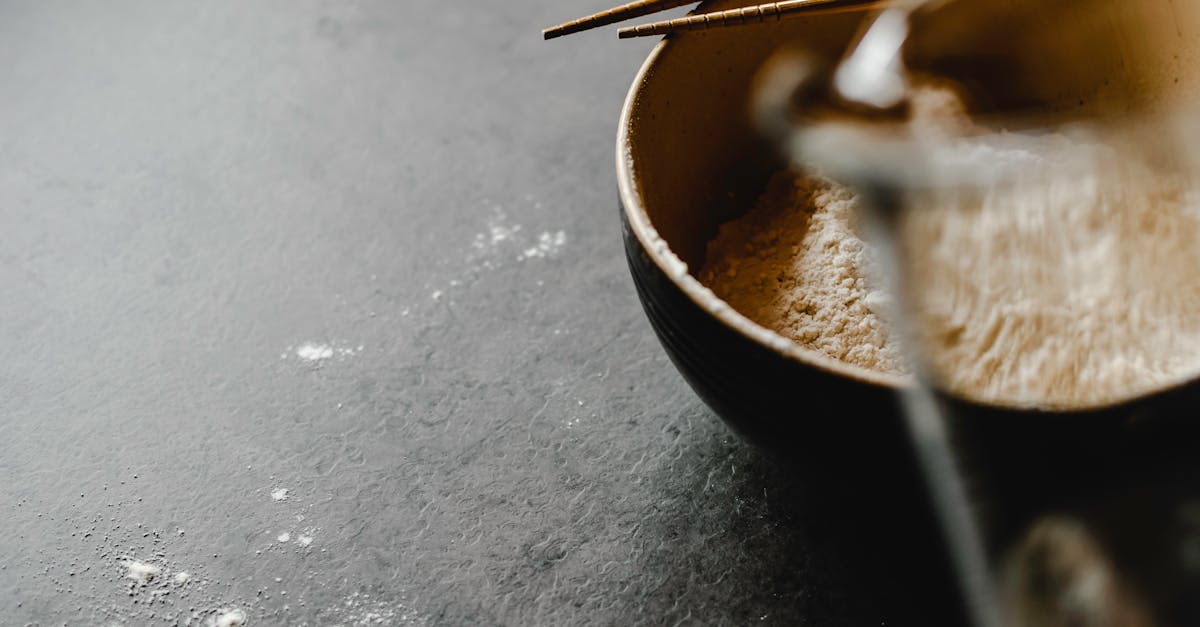
Ingredients
To create our effective Vinyl Cleaning Solution, we carefully select ingredients that are gentle yet powerful enough to remove dirt and grime without damaging the surface. Here is what we need:
- 1 cup distilled water — ensures purity, preventing mineral residue
- 1 tablespoon white vinegar — a natural disinfectant that cuts through grime
- 1 teaspoon isopropyl alcohol (70%) — enhances cleaning power and dries quickly
- 1/2 teaspoon mild liquid dish soap — breaks down oils and dirt without harsh chemicals
- Optional: 3-5 drops essential oil (like lemon or tea tree) — adds a refreshing scent and extra antimicrobial benefits
| Ingredient | Quantity | Purpose |
|---|---|---|
| Distilled water | 1 cup | Prevents mineral deposit |
| White vinegar | 1 tablespoon | Cuts through grime naturally |
| Isopropyl alcohol (70%) | 1 teaspoon | Boosts cleaning efficiency |
| Mild liquid dish soap | 1/2 teaspoon | Breaks down oils and dirt |
| Essential oil (optional) | 3-5 drops | Adds fragrance and antimicrobial properties |
Using these simple, everyday ingredients ensures our DIY Vinyl Cleaning Solution is safe for all types of vinyl—from records and upholstery to flooring—while maintaining its shine and durability.
Tools and Equipment
To effectively prepare and apply our DIY Vinyl Cleaning Solution we need the right Tools and Equipment. Using these ensures precision, safety, and best results when cleaning vinyl surfaces.
Essential Tools
- Measuring cups and spoons: Accurate measurement of ingredients is crucial. We recommend using standardized measuring cups for liquids and spoons for smaller quantities like vinegar and alcohol.
- Spray bottle (16 oz or larger): A clean, empty spray bottle allows us to easily apply the solution evenly across vinyl surfaces.
- Mixing container or bowl: Use a non-reactive container such as glass or plastic for mixing the ingredients.
- Soft microfiber cloths: These cloths are ideal for wiping down vinyl after application, preventing scratches and trapping dirt gently.
- Funnel: To transfer the solution from the mixing bowl to the spray bottle without spills.
Optional but Helpful Equipment
- Gloves: Protect your hands from prolonged exposure to cleaning agents.
- Labeling materials: A permanent marker or label can help us mark the spray bottle with contents and date, ensuring safe storage.
Summary Table of Tools and Their Uses
| Tool | Purpose | Recommended Material/Size |
|---|---|---|
| Measuring Cups & Spoons | Precise measurement of ingredients | Standard liquid & teaspoon sets |
| Spray Bottle | Even application of cleaning solution | Plastic or glass, 16 oz+ |
| Mixing Container | Combine ingredients safely | Glass or plastic bowl |
| Soft Microfiber Cloths | Gentle cleaning and drying | Lint-free microfiber |
| Funnel | Easy transfer without spilling | Plastic or stainless steel |
| Gloves (optional) | Hand protection | Nitrile or latex |
| Labeling Materials | Identification and storage safety | Permanent marker or sticker |
By gathering these Tools and Equipment beforehand, we set ourselves up for a smooth cleaning experience that will fight grime on our vinyl without damage. Next, we will move on to the step-by-step preparation of our safe and effective vinyl cleaning solution.
Preparation
To create our DIY vinyl cleaning solution, we will carefully combine ingredients with precision and follow safety measures to ensure effectiveness and protect our hands. Below are the detailed steps we take to prepare and handle the solution properly.
Preparing the Cleaning Solution
- Measure Ingredients Accurately
We start by measuring each ingredient precisely to achieve the perfect balance for cleaning effectiveness without damaging vinyl surfaces. Use the following quantities for a small batch:
| Ingredient | Quantity | Purpose |
|---|---|---|
| Distilled water | 1 cup (240 ml) | Prevents mineral residue buildup |
| White vinegar | 1 tablespoon (15 ml) | Natural disinfectant and stain remover |
| Isopropyl alcohol | 1 teaspoon (5 ml, 70%) | Boosts cleaning power and disinfects |
| Mild liquid dish soap | 1/2 teaspoon (2.5 ml) | Breaks down oils and dirt |
| Essential oil (optional) | 3-5 drops | Adds fragrance and antimicrobial effects |
- Mixing the Ingredients
- Pour distilled water into a non-reactive mixing container.
- Add white vinegar, then isopropyl alcohol, followed by the mild liquid dish soap.
- If desired, drop in the essential oil for a refreshing scent and added benefits.
- Stir gently but thoroughly until all components are fully combined without creating excess foam.
- Transfer to Spray Bottle
- Using a funnel, pour the solution carefully into a clean spray bottle to ensure even distribution during use.
- Label the bottle clearly with “DIY Vinyl Cleaning Solution” and date to avoid confusion and track freshness.
Safety Precautions
- Always wear gloves during preparation to protect your skin from irritation caused by vinegar and isopropyl alcohol.
- Work in a well-ventilated area to avoid inhaling fumes from vinegar or alcohol.
- Keep the solution out of reach of children and pets.
- Do not mix this solution with bleach or other harsh chemicals to prevent toxic reactions.
- Test the solution on a small hidden area of the vinyl surface before full application to ensure compatibility and avoid damage.
By adhering to these steps and precautions, we prepare a safe and effective vinyl cleaning solution that restores cleanliness and preserves the quality of our vinyl items.
Directions
Follow these step-by-step instructions to use our DIY Vinyl Cleaning Solution effectively. Proper application ensures a deep clean while preserving the shine and texture of all your vinyl surfaces.
Application Method
- Shake the spray bottle gently to mix the cleaning solution evenly.
- Lightly mist the vinyl surface from a distance of 8 to 10 inches to avoid over-saturation.
- Avoid soaking seams or edges to prevent moisture damage.
- For vinyl records, spray the solution onto a soft microfiber cloth instead of directly applying it to the surface.
Cleaning Process
- Using a soft microfiber cloth, gently wipe the vinyl surface in a circular motion.
- Apply moderate pressure to break down dirt and grime without scratching.
- For stubborn spots, dampen the cloth slightly with more solution and focus on those areas.
- Replace or rinse the cloth as needed to avoid redistributing dirt.
- Repeat the process if necessary but avoid excessive moisture which can harm vinyl over time.
| Step | Action | Purpose |
|---|---|---|
| Mist Surface | Spray solution lightly | Prevents overwetting |
| Wipe with Cloth | Circular motion cleaning | Removes dirt effectively |
| Spot Treatment | Target tough stains with damp cloth | Ensures thorough cleaning |
| Cloth Maintenance | Rinse or replace cloth as needed | Avoids spreading dirt |
Drying and Polishing
- Allow the cleaned vinyl surface to air dry for 5 to 10 minutes in a well-ventilated area.
- Once dry, buff the vinyl gently with a dry microfiber cloth to restore its natural shine.
- For added gloss, optionally apply a small amount of conditioner specifically made for vinyl upholstery or records, following manufacturer guidelines.
- Avoid direct sunlight or heat sources during drying to prevent warping or fading.
- Store the cleaning solution in a cool, dry place with the label visible for future use.
By carefully following these directions our vinyl cleaning solution will refresh your vinyl items without causing damage, leaving them spotless and vibrant.
Make-Ahead Instructions
To prepare our Vinyl Cleaning Solution ahead of time, we follow a few key steps that ensure the mixture stays fresh, effective, and ready to use whenever we need it. Proper storage and preparation extend the shelf life of the solution while maintaining its cleaning power and scent.
Steps to Make Ahead Our Vinyl Cleaning Solution
- Mix Everything Fresh But Store Properly
We combine the ingredients — distilled water, white vinegar, isopropyl alcohol, mild liquid dish soap, and optional essential oils — in a non-reactive container, then transfer the solution to a clean spray bottle.
- Label Clearly
Using a permanent marker or label sticker, we mark the bottle with the date of preparation and the contents. This helps us track freshness and avoid confusion.
- Store in a Cool, Dark Place
The solution retains its efficacy for up to 2 weeks when stored away from direct sunlight and heat. Sunlight can degrade the natural ingredients, especially the essential oils, weakening the solution.
- Shake Well Before Each Use
Since the ingredients may separate over time, shaking the bottle ensures the mixture is homogenous before spraying.
Shelf Life and Storage Details
| Aspect | Details |
|---|---|
| Shelf Life | Up to 2 weeks |
| Storage Location | Cool, dark cupboard |
| Container Type | Clean, opaque spray bottle |
| Labeling Info | Date prepared, contents |
| Pre-Use Action | Shake well |
Additional Tips for Make-Ahead Preparation
- Avoid Excessive Quantity: We recommend preparing no more than 2 cups (approximately 475 ml) at a time to maintain freshness.
- Test on Small Area Before Bulk Use: Even when made ahead, we test the solution on a small vinyl area to ensure no adverse effects.
- Use a Funnel: To avoid spills, when transferring solution to a spray bottle, we use a funnel for accuracy and cleanliness.
“Proper preparation and storage of our DIY Vinyl Cleaning Solution guarantees it remains safe for all vinyl surfaces and effective in removing dirt while preserving their natural shine.”
By following these make-ahead instructions, the next time we clean our vinyl records, flooring, or upholstery, our solution is ready and optimized for maximum cleaning power.
Storage Tips
Proper storage is crucial to maintaining the efficacy and longevity of our DIY Vinyl Cleaning Solution. To ensure it stays effective and ready for use, follow these detailed guidelines:
- Use a clean, airtight spray bottle made of plastic or glass to prevent contamination and evaporation.
- Label the bottle clearly with the date of preparation and contents to track freshness.
- Store the solution in a cool, dark place such as a cabinet or pantry away from direct sunlight and heat to prevent ingredient breakdown.
- Keep the container upright and sealed tightly to avoid leaks and exposure to air.
- For best results, use the solution within 2 weeks of preparation. After this period, the cleaning power may diminish, and the mixture could separate.
Storage Environment Recommendations
| Storage Condition | Recommendation | Reason |
|---|---|---|
| Temperature | 50°F to 75°F (10°C to 24°C) | Prevents degradation of ingredients |
| Light Exposure | Store in opaque or dark container | Protects from UV light that breaks down solution |
| Humidity | Low humidity area | Avoids contamination and solution dilution |
Tip: Always shake the bottle well before each use to quickly recombine any separated ingredients, ensuring consistent cleaning performance.
Additional Storage Advice
- Avoid preparing large batches to reduce waste and maintain solution freshness.
- If you notice any color change, unusual odor, or cloudiness, discard the solution immediately and prepare a fresh batch.
- Test solution on a small vinyl area after storage to confirm continued safety before full application.
By following these Storage Tips we keep our vinyl cleaning solution potent and safe, enabling us to maintain the pristine condition of our vinyl records, upholstery, and flooring with confidence.
Conclusion
Taking care of vinyl surfaces doesn’t have to be complicated or expensive. With a simple DIY cleaning solution made from everyday ingredients, we can effectively maintain the look and durability of our vinyl items. Proper preparation, application, and storage ensure that this solution stays safe and effective for repeated use.
By adopting this approach, we not only protect our vinyl investments but also avoid harsh chemicals found in many commercial products. It’s a practical, eco-friendly way to keep vinyl records, upholstery, and flooring looking their best for years to come.
Frequently Asked Questions
What ingredients are needed for the DIY vinyl cleaning solution?
You need 1 cup distilled water, 1 tablespoon white vinegar, 1 teaspoon 70% isopropyl alcohol, 1/2 teaspoon mild liquid dish soap, and optionally 3-5 drops of essential oil.
Why use distilled water in the cleaning solution?
Distilled water prevents mineral residue buildup, which can dull vinyl surfaces and reduce cleaning effectiveness.
Can I apply the solution directly to vinyl records?
No, spray the solution onto a soft cloth first, then gently wipe the record to avoid damage from direct moisture.
How should I store the homemade cleaning solution?
Store it in a clean, airtight spray bottle labeled with the date, in a cool, dark place away from sunlight and heat.
How long does the DIY cleaning solution last?
When stored properly, the solution remains effective for up to two weeks before needing to be discarded.
What tools do I need to prepare the cleaning solution?
Measuring cups/spoons, a non-reactive mixing container, a clean spray bottle, a funnel, and microfiber cloths are essential.
How do I safely use the cleaning solution on vinyl surfaces?
Shake well before use, mist from 8-10 inches without soaking seams, wipe gently in circular motions, and allow the surface to air dry.
Can I make a large batch of this cleaning solution?
It’s best to avoid large batches to prevent waste, as the solution loses effectiveness after about two weeks.
Are harsh chemicals necessary for cleaning vinyl effectively?
No, the DIY solution uses mild, natural ingredients that safely clean without damaging vinyl surfaces.
Should I test the solution before full application?
Yes, always test it on a small, hidden vinyl area to check for any adverse effects before widespread use.