
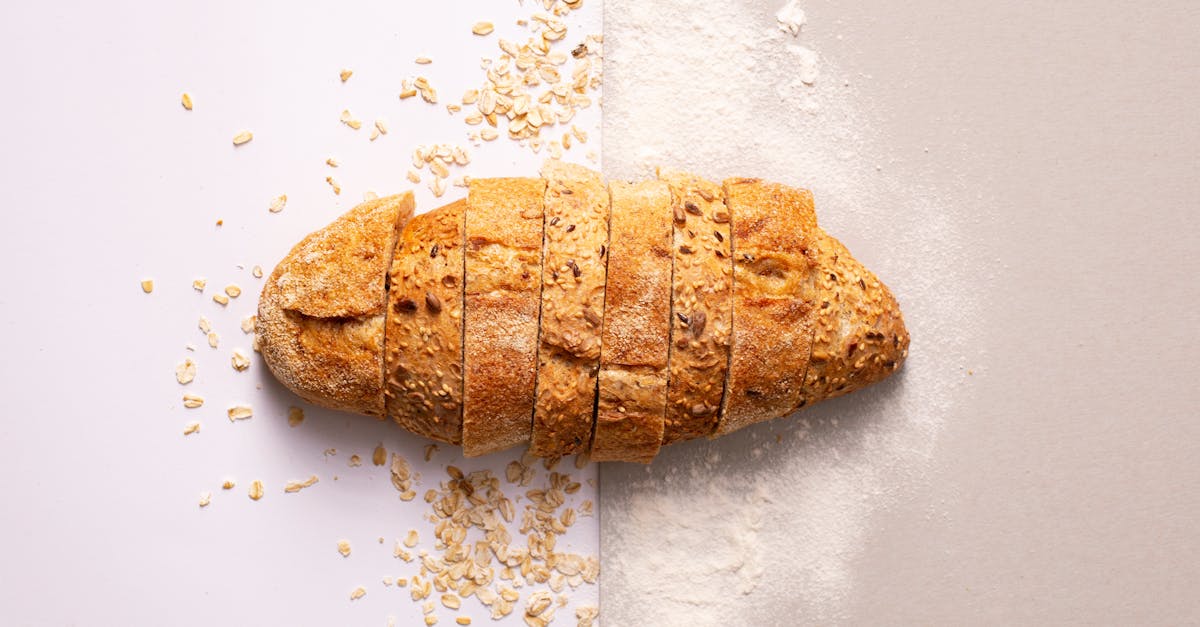
There’s something magical about the aroma of freshly baked bread, and Swiss bread takes it to another level. Known for its soft texture and golden crust, this bread has a rich history rooted in Swiss traditions. It’s a staple in households across Switzerland, often enjoyed with butter, cheese, or jam for breakfast or alongside hearty soups and stews.
Swiss Bread Recipe
Crafting authentic Swiss bread at home is a delightful experience. The soft crumb and perfectly golden crust make this loaf irresistible. Let’s walk through the detailed steps together to bake this traditional bread.
Ingredients
- 4 cups all-purpose flour (plus extra for dusting)
- 2 teaspoons salt
- 1 teaspoon sugar
- 2 ½ teaspoons active dry yeast (one packet)
- 1 ¼ cups warm water (110°F, to activate yeast)
- 3 tablespoons unsalted butter (melted and cooled)
- 1 large egg (for egg wash)
Step-by-Step Instructions
- Activate the Yeast
- Mix the warm water and sugar in a small bowl. Sprinkle the active dry yeast over the top. Let it sit for about 5–7 minutes until it becomes frothy. This step ensures that the yeast is alive and active.
- Combine Dry Ingredients
- In a large mixing bowl, whisk together the flour and salt. Create a well in the center of the dry mixture.
- Mix the Dough
- Pour the yeast mixture and melted butter into the center of the well. Stir gently using a wooden spoon until a shaggy dough forms.
- Knead the Dough
- Transfer the dough to a floured surface. Knead it using firm but gentle motions for about 10 minutes until smooth and elastic. If the dough is sticky, sprinkle a little more flour.
- First Rise
- Place the dough in a lightly oiled bowl, turning it to coat all sides. Cover it with a damp cloth and allow it to rise for 1 hour in a warm place or until it doubles in size.
- Shape the Loaf
- Punch down the risen dough and transfer it again to a floured surface. Shape it into a round or oval loaf, depending on your preference. Place the shaped loaf on a baking sheet lined with parchment paper.
- Second Rise
- Cover the shaped dough loosely and allow it to rise for another 30–40 minutes until it puffs up slightly. Meanwhile, preheat your oven to 400°F.
- Prepare Egg Wash
- Whisk the egg with 1 tablespoon of water to create a simple egg wash. Brush the surface of the loaf generously. This egg wash helps the bread achieve its signature golden crust.
- Score and Bake
- Using a sharp knife, carefully score the surface of the loaf with 2–3 shallow cuts. Bake in the preheated oven for 25–30 minutes or until the loaf is golden brown and sounds hollow when tapped on the bottom.
Baking Tips
| Key Element | Description |
|---|---|
| Warm water | Ensures yeast activation between 105–110°F. Avoid hotter water. |
| Egg wash | Creates a glossy and golden finish on the crust. |
| Kneading | Develops gluten structure for a soft, tender crumb. |
Once baked, let the bread cool completely on a wire rack before slicing. This ensures the crumb sets and yields beautiful slices.
Ingredients
To bake authentic Swiss bread, we need a handful of simple ingredients. Each one contributes to creating the iconic soft texture and golden crust. Below is the precise list of what we’ll use:
Dry Ingredients:
- 4 cups of all-purpose flour, sifted
- 1 ½ teaspoons of salt
- 2 teaspoons of granulated sugar
Wet Ingredients:
- 1 cup of lukewarm milk (around 100°F to activate the yeast)
- 2 ½ teaspoons of active dry yeast
- 3 tablespoons of unsalted butter, melted and slightly cooled
- 1 large egg, beaten (for the dough and optional egg wash)
Optional Topping:
- 1 tablespoon of sesame seeds or poppy seeds for garnish
Preparation Notes:
- Ensure the milk is lukewarm, not hot, to properly activate the yeast. A thermometer helps ensure accuracy.
- Use unsalted butter to control the flavor and salt level of the bread.
- For extra shine, reserve a small portion of the beaten egg to use as an egg wash before baking.
Tools And Equipment
To achieve the perfect Swiss bread, using the right tools and equipment is essential. Each item plays a critical role in ensuring the bread’s soft interior and golden crust. Here’s what we’ll need, along with their importance in the process:
Essential Tools
- Mixing bowls: At least two large bowls—one for preparing the dough and another for letting it rise. We recommend using a glass or stainless-steel bowl for easy cleaning and optimal dough handling.
- Kitchen scale: For precise measurements of flour and other ingredients. Consistency is key in bread-making, and a digital kitchen scale ensures perfect proportions.
- Measuring cups and spoons: Essential for accurately measuring ingredients like milk, sugar, and salt.
- Whisk or fork: To mix the dry ingredients evenly and beat the egg for the glaze.
- Dough scraper or bench scraper: Useful for handling and dividing the dough efficiently without sticking.
- Stand mixer with a dough hook attachment (optional): This can greatly simplify the kneading process and ensure an even texture for the dough.
- Pastry brush: For applying the egg wash, which gives the bread its glossy finish.
- Clean kitchen towel or plastic wrap: Needed to cover the dough during its rising phase to keep it moist.
- Sharp knife or lame: For scoring the dough before baking, which allows the bread to expand properly and creates a professional look.
- Baking tray or sheet pan: A sturdy surface to bake the bread evenly. Lining it with parchment paper helps prevent sticking.
- Cooling rack: Crucial for allowing proper airflow around the baked loaf to avoid a soggy bottom and ensure the crust stays crisp.
Tools Specification Table
| Tool | Purpose |
|---|---|
| Mixing bowls | Holding ingredients and dough during preparation |
| Kitchen scale | Precise measurement for consistent results |
| Measuring cups and spoons | Accurate portioning of liquids and dry ingredients |
| Dough scraper | Easy handling and division of sticky dough |
| Stand mixer (optional) | Simplifies kneading for a uniform texture |
| Pastry brush | Perfectly applies an egg wash for shine |
| Baking tray or sheet pan | Even baking of the bread |
| Cooling rack | Proper airflow to preserve crust texture |
| Sharp knife or lame | Scoring dough for a decorative finish |
By having these tools at our disposal, we set ourselves up for a seamless baking experience. From mixing to shaping and even presentation, every piece of equipment contributes to achieving flawless Swiss bread.
Directions
Let’s dive into the step-by-step Swiss bread recipe process. Follow these clear instructions for a soft, golden loaf with a tender crumb.
Prep The Dough
- In a small bowl, mix 1 cup of lukewarm milk (around 100°F) with 2 ½ teaspoons of active dry yeast and 2 teaspoons of granulated sugar. Let this sit for 5 minutes until it becomes frothy. This ensures the yeast is activated and ready.
- In a large mixing bowl, combine 4 cups of all-purpose flour and 1 ½ teaspoons of salt. Mix well to distribute the salt evenly.
- Add the yeast mixture, 3 tablespoons of softened unsalted butter, and most of the 1 large beaten egg to the dry ingredients. (Save some beaten egg for the egg wash later.)
- Using a wooden spoon or stand mixer with a dough hook, mix until the dough starts to come together. If it is too sticky, add a small amount of flour, 1 tablespoon at a time, until a cohesive dough forms.
Knead The Dough
- Transfer the dough to a lightly floured surface or use the stand mixer for kneading.
- Knead the dough for 8–10 minutes by hand or 5–6 minutes in the mixer until it becomes smooth, elastic, and slightly tacky but not sticky. The dough should spring back when gently pressed with a finger. This process helps develop gluten, giving Swiss bread its characteristic texture.
First Rise
- Place the kneaded dough into a clean, lightly oiled bowl. Turn the dough to coat it evenly with oil to prevent drying out.
- Cover the bowl with a damp cloth or plastic wrap and set it in a warm, draft-free area. Let the dough rise for 1–1 ½ hours or until it doubles in size. A general tip: an oven with the light on creates a great rising environment.
Shape The Bread
- Once the dough has risen, gently punch it down to release the trapped air, ensuring the bread retains a consistent crumb.
- Transfer it to a clean surface and divide the dough into the desired portion(s). For a traditional Swiss loaf, shape the dough into a braided loaf or a rounded boule.
- Pinch the seams tightly to seal and place the shaped dough onto a parchment-lined baking tray for even baking.
Second Rise
- Cover the shaped dough with a damp cloth and let it rise again for 30–40 minutes, or until slightly puffy. This second rise ensures an airy crumb and proper structure.
- Before baking, brush the dough lightly with the reserved beaten egg using a pastry brush for that glossy finish. Optionally, sprinkle with sesame seeds or poppy seeds for added texture and flavor.
| Step | Time Required | Purpose |
|---|---|---|
| Prep The Dough | 10–15 minutes | Combining ingredients and activating the yeast. |
| Knead The Dough | 8–10 minutes by hand | Develop gluten for structure and elasticity. |
| First Rise | 1–1 ½ hours | Allows the dough to double in size and create volume. |
| Shape The Bread | 10–15 minutes | Ensures proper shape and no trapped air for a uniform bake. |
| Second Rise | 30–40 minutes | Allows the dough to relax and final expansion before baking. |
Continue the process to bake your perfect Swiss bread, ensuring all the steps are followed meticulously.
Baking Instructions
Preheating the Oven
We start by preheating the oven to 375°F (190°C). This ensures our oven reaches the optimal baking temperature, creating the perfect environment for our Swiss bread to develop its golden crust and soft interior.
Preparing the Dough for Baking
After the second rise, which allows the dough to turn wonderfully airy and light, it’s time to shape and score. We transfer the dough onto a lightly floured surface and gently shape it into a neat loaf. Use a sharp knife or baker’s lame to score the top with diagonal cuts. Scoring not only adds a decorative element but also helps the bread expand evenly as it bakes.
Applying the Egg Wash
Next, we take the reserved beaten egg from earlier and, using a pastry brush, carefully coat the surface of the dough. This step is crucial for achieving that signature glossy finish. For an extra touch of flavor and texture, optional toppings like sesame seeds or poppy seeds can be sprinkled over the egg wash.
Baking the Bread
Place the prepared dough onto a lined baking tray—we recommend using parchment paper or a silicone mat to prevent sticking. Transfer the tray to the oven’s center rack to ensure even heat distribution. Bake for 25–30 minutes or until the bread turns a deep golden brown and emits a hollow sound when tapped on the bottom.
| Baking Temperature | Baking Time |
|---|---|
| 375°F (190°C) | 25–30 minutes |
Make-Ahead And Storage Instructions
When it comes to preparing Swiss bread ahead of time or storing leftovers, proper techniques ensure its flavor and texture remain intact. Follow these simple yet effective strategies for make-ahead preparation and storage:
Make-Ahead Tips for Swiss Bread
- Prepare the Dough in Advance: After kneading the dough and completing the first rise, shape it into a loaf. Cover it tightly with plastic wrap and refrigerate for up to 12 hours. When ready to bake, allow the dough to sit at room temperature for about 30–60 minutes until it reaches its second rise.
- Freeze the Dough: To freeze, complete the first rise, punch the dough down, and shape it into a loaf. Wrap tightly in plastic wrap followed by aluminum foil, then place in an airtight freezer bag. Store for up to 3 months. When ready, thaw in the refrigerator overnight and let it rise at room temperature before baking.
- Par-Baking Method: Par-bake the bread by baking it for 15 minutes at 375°F (190°C)—enough to set the structure without browning. Allow it to cool completely, then wrap tightly in plastic and foil before freezing. When needed, bake for another 10–15 minutes until golden brown.
Storage Instructions for Baked Swiss Bread
- Room Temperature Storage: Store cooled Swiss bread in a breathable bread bag or wrapped in a clean kitchen towel. Avoid sealing in plastic, as this traps moisture and softens the crust. When properly stored, the bread remains fresh for 2–3 days.
- Refrigeration Not Recommended: Storing bread in the refrigerator can lead to faster staling due to moisture loss, so it’s best to avoid this option.
- Freezing Baked Bread: To extend the lifespan of baked bread, slice it and store it in an airtight freezer-safe bag. Use parchment paper between slices to prevent sticking. Freeze for up to 3 months. Reheat slices directly from frozen in the oven or toaster.
Reheating Swiss Bread
To revive the soft crumb and ensure the crust remains crisp:
- Preheat your oven to 350°F (175°C).
- Wrap the bread lightly in aluminum foil to avoid drying out.
- Warm for 10–15 minutes or until the desired temperature is reached.
Quick Reference Table: Swiss Bread Storage Times
| Storage Method | Maximum Duration | Notes |
|---|---|---|
| Room Temperature | 2–3 days | Store in a breathable bag or towel. |
| Refrigerator | Not recommended | Leads to rapid staling. |
| Freezer (Baked Bread) | Up to 3 months | Slice and wrap for optimal freshness. |
| Freezer (Unbaked Dough) | Up to 3 months | Thaw and rise before baking. |
By adhering to these Make-Ahead And Storage Instructions, we can enjoy authentic Swiss bread that’s just as delicious days later as it is fresh out of the oven, preserving its tender crumb and crisp crust every time.
Tips For Perfect Swiss Bread
Achieving perfect Swiss bread at home requires attention to detail and a few tried-and-true techniques. Follow these tips to elevate your bread-making skills and create a loaf that boasts a tender crumb and beautifully golden crust.
1. Get the Yeast Right
- Use lukewarm milk: Ensure the milk temperature is between 100°F and 110°F. Too hot, and it can kill the yeast; too cool, and it’ll fail to activate.
- Check for froth: After mixing the yeast with milk and sugar, look for a foamy layer after 5–10 minutes. This signals active yeast ready to work its magic.
2. Accurate Measurements
Precision is critical for baking success. Always, always use a kitchen scale for measuring flour to avoid adding too much or too little, which can alter the dough’s consistency.
| Ingredient | Weight |
|---|---|
| All-purpose flour | 480 grams (4 cups) |
| Unsalted butter | 42 grams (3 tablespoons) |
| Granulated sugar | 8 grams (2 teaspoons) |
3. Master the Kneading Technique
Kneading develops gluten, which gives Swiss bread its structure and elasticity.
- By hand: Knead for 8–10 minutes, stretching the dough and then folding it back.
- With a stand mixer: Use the dough hook on medium speed for about 5–6 minutes. The dough should be soft, smooth, and slightly tacky but not sticky.
4. Perfect the Rise
Good rising is key to light and airy bread.
- First rise: Allow the dough to double in size by placing it in a slightly warm, draft-free spot for approximately 60–90 minutes. Cover it with a damp towel to retain moisture.
- Second rise: Shape the loaf and let it rise again for additional air and structure, about 30–40 minutes.
5. Scoring and Egg Wash
- Score the dough: Use a sharp knife to create diagonal slashes about 1/4-inch deep across the top. This prevents splitting during baking and ensures a uniform expansion.
- Egg wash tips: Brushing the dough with beaten egg (or milk for a softer finish) guarantees a shiny golden crust. Optionally, sprinkle sesame or poppy seeds for added flavor and texture.
6. Monitor Baking Conditions
- Oven placement: Bake your bread on the middle rack to ensure even heat distribution.
- Keep an eye on the color: Swiss bread should develop a deep golden brown crust. If it browns too quickly, tent it with foil halfway through the baking process.
7. Testing for Doneness
Once baked, tap the bread on the bottom. If it sounds hollow, your bread is ready. For an extra layer of confirmation:
- Check with an instant-read thermometer—the internal temperature should reach 190°F.
8. Cool Properly
After removing the bread from the oven, transfer it to a wire cooling rack for at least 30 minutes. Cooling allows the crumb to set and prevents gumminess when slicing.
By following these expert tips, we can ensure every loaf of Swiss bread we bake is not only delicious but also a true delight to the senses.
Conclusion
Swiss bread is more than just a recipe; it’s a celebration of tradition and craftsmanship. By dedicating time and care to each step, we can create a loaf that’s as comforting as it is delicious. Whether enjoyed fresh out of the oven or paired with our favorite dishes, this bread brings warmth and authenticity to any table. Let’s embrace the joy of baking and share the magic of Swiss bread with those we love.
Frequently Asked Questions
What makes Swiss bread unique?
Swiss bread is renowned for its soft texture, golden crust, and versatility. Its slightly sweet and buttery flavor, combined with traditional baking techniques, makes it a staple in Swiss households.
What are the key ingredients for Swiss bread?
The main ingredients include all-purpose flour, yeast, lukewarm milk, sugar, salt, butter, and a beaten egg. Optional toppings like sesame or poppy seeds add extra flavor and texture.
How do you ensure the yeast activates properly?
Use lukewarm milk (about 100°F/38°C) and mix it with sugar and yeast. Let it sit for 5–10 minutes until bubbles or foam form, indicating activation.
What tools are necessary to bake Swiss bread?
Essential tools include mixing bowls, a kitchen scale, measuring cups and spoons, a dough scraper, a pastry brush, a baking tray, a cooling rack, and a sharp knife for scoring.
How long does it take to make Swiss bread?
The process, including preparation, rising, and baking, takes approximately 2.5 to 3 hours, depending on the dough rising times.
What is the ideal oven temperature for baking Swiss bread?
Preheat the oven to 375°F (190°C) for optimal baking conditions, ensuring a golden crust and soft interior.
How do you achieve a glossy crust on Swiss bread?
Brush the dough with a beaten egg before baking. This egg wash contributes to the shiny, golden crust that Swiss bread is known for.
Can Swiss bread dough be made ahead?
Yes, you can prepare the dough and refrigerate or freeze it after the first rise. Thaw or bring to room temperature before shaping and baking.
How should Swiss bread be stored?
Store Swiss bread at room temperature in a breathable bag or towel to prevent staling. Avoid refrigeration as it can dry out the bread.
Can I freeze Swiss bread for later use?
Yes, you can freeze Swiss bread as a whole loaf or in slices. Wrap it in plastic or foil to preserve freshness, and reheat before serving.
What is the best way to reheat Swiss bread?
Wrap the bread in foil and place it in a 350°F (175°C) oven for 10–15 minutes. This restores its soft crumb and crusty texture.
How do I test if Swiss bread is fully baked?
Tap the bottom of the bread—if it sounds hollow, it’s done. The crust should be golden brown, and an internal temperature of 190°F (88°C) ensures doneness.
Why is scoring important in Swiss bread baking?
Scoring helps the dough expand evenly during baking, preventing cracks and ensuring a smoother texture and appearance in the finished loaf.
Are there any tips for beginners making Swiss bread?
Accurately measure ingredients, ensure proper kneading for gluten development, allow adequate rising time, and monitor baking closely for best results.
Can I use alternative flours for Swiss bread?
While all-purpose flour is traditional, bread flour can be used for a chewier texture. Avoid gluten-free flours unless using a specific recipe designed for them.