
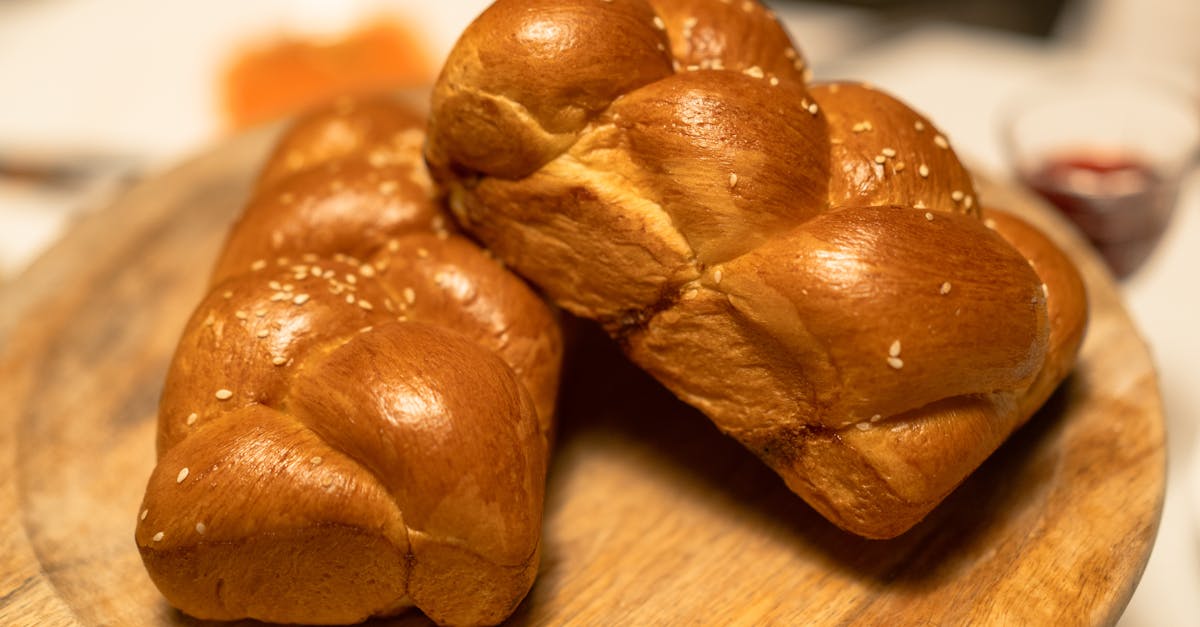
Rebbetzin Kanievsky Challah is more than just bread—it’s a cherished tradition that brings warmth and meaning to the Shabbat table. Known for its soft texture and slightly sweet flavor, this challah recipe has been passed down through generations, carrying with it a sense of community and faith.
We love how this recipe balances simplicity with rich, comforting flavors that everyone will enjoy. Whether you’re new to baking challah or looking to perfect your technique, the Rebbetzin Kanievsky Challah offers a delightful way to connect with heritage while creating something truly special. Let’s dive into this timeless recipe and bring a piece of tradition into our kitchens.
Ingredients
To recreate the authentic Rebbetzin Kanievsky Challah, we carefully combine ingredients that contribute to its signature soft texture and balanced sweetness. Below is a detailed list of all the essential components to make this cherished Shabbat bread.
Dry Ingredients
We start with the foundational dry elements that define the challah’s structure and flavor.
- 4 cups (480g) all-purpose flour – sifted for lightness
- 1/3 cup (65g) sugar – adds subtle sweetness
- 2 teaspoons instant yeast – for perfect rising
- 1 teaspoon salt – balances flavors
Wet Ingredients
The wet ingredients bring moisture and richness to the dough, creating that soft crumb we love.
- 1 cup (240ml) warm water – approximately 110°F to activate yeast
- 1/4 cup (60ml) vegetable oil – ensures tenderness
- 2 large eggs – room temperature for better emulsification
- 1 teaspoon vanilla extract – enhances aroma (optional yet recommended)
Optional Ingredients
These ingredients are not mandatory but add distinct flavor and texture enhancements.
- 1 tablespoon honey – for a deeper, natural sweetness
- 1 egg yolk + 1 tablespoon water – for egg wash glaze, giving a glossy finish
- Sesame or poppy seeds – for sprinkling on top before baking
| Ingredient Type | Ingredient | Quantity | Notes |
|---|---|---|---|
| Dry Ingredients | All-purpose flour | 4 cups (480g) | Sifted |
| Sugar | 1/3 cup (65g) | Adds subtle sweetness | |
| Instant yeast | 2 teaspoons | For dough rising | |
| Salt | 1 teaspoon | Balances sweetness | |
| Wet Ingredients | Warm water | 1 cup (240ml) | ~110°F, activates yeast |
| Vegetable oil | 1/4 cup (60ml) | Tenderizes crumb | |
| Eggs | 2 large | Room temperature | |
| Vanilla extract | 1 teaspoon | Optional for aroma | |
| Optional Ingredients | Honey | 1 tablespoon | Adds natural sweetness |
| Egg yolk + water (for wash) | 1 egg yolk + 1 tbsp | Creates glossy crust | |
| Sesame or poppy seeds | To sprinkle | Optional topping |
Equipment Needed
To bake the Rebbetzin Kanievsky Challah perfectly, having the right equipment ensures smooth preparation and optimal results. Below is a detailed list of essential tools we use to achieve the dough’s ideal texture and the final loaf’s characteristic shine and softness.
| Equipment | Purpose |
|---|---|
| Large mixing bowl | To combine dry and wet ingredients thoroughly |
| Measuring cups & spoons | For precise measurement of ingredients |
| Sifter | To aerate and sift flour for a light texture |
| Stand mixer with dough hook (optional) | To knead dough evenly and save time |
| Dough scraper | To handle and shape sticky dough easily |
| Clean kitchen towel or plastic wrap | To cover dough during rising to retain moisture |
| Baking sheet or challah pan | For shaping and baking the dough |
| Pastry brush | To apply egg wash for the signature glossy finish |
| Cooling rack | To cool baked challah evenly |
Why These Tools Matter
- Mixing bowl & measuring tools keep our ingredient ratios accurate, which is critical for the slightly sweet, soft crumb that defines this challah.
- Using a sifter aerates the flour, contributing to the bread’s delicate texture, a hallmark of the traditional recipe.
- A stand mixer with a dough hook is optional but helpful for consistent kneading, especially when working with sticky challah dough.
- The pastry brush helps us apply the egg wash smoothly, creating that iconic shiny crust that makes Rebbetzin Kanievsky Challah visually inviting.
- Covering dough with a towel or plastic wrap during rising maintains moisture, ensuring the dough doubles properly without drying.
Equipping ourselves with these tools prepares us thoroughly for each step, from mixing to baking, allowing us to embrace the heritage and craft of this beloved challah recipe.
Prep Work
Before we start mixing, it’s essential to prepare meticulously to ensure our Rebbetzin Kanievsky Challah turns out soft, flavorful, and perfectly braided. The foundation of success lies in precise measuring and well-prepared dough.
Measuring Ingredients
Accurate measuring is crucial for the classic texture and sweet aroma of the Rebbetzin Kanievsky Challah. We recommend using a kitchen scale for flour and liquids whenever possible, but if you use measuring cups and spoons, be sure to level off ingredients for consistency.
| Ingredient | Measurement | Notes |
|---|---|---|
| All-purpose flour | 6 cups (750 g) | Sifted for lightness |
| Sugar | 1/4 cup (50 g) | Granulated |
| Instant yeast | 2 1/4 tsp (7 g) | Active dry can substitute |
| Salt | 2 tsp (10 g) | Fine salt preferred |
| Warm water | 1 cup + 2 tbsp (270 ml) | Around 105°F (40°C) |
| Vegetable oil | 1/3 cup (80 ml) | Neutral flavor oil |
| Large eggs | 3 | Room temperature |
| Vanilla extract | 1 tsp (optional) | Adds subtle aromatic note |
| Honey | 2 tbsp (optional) | Enhances sweetness |
Pro Tip: Keep all your ingredients at room temperature for better yeast activation and dough elasticity.
Preparing the Dough
We begin by activating the yeast and combining wet and dry ingredients step-by-step to develop the rich, tender crumb distinctive to this challah.
- Activate the Yeast:
Pour warm water into a large mixing bowl. Sprinkle the yeast over the surface evenly. Let it sit for 5–7 minutes until foamy.
- Add Sugar and Wet Ingredients:
Stir in the sugar, vegetable oil, eggs, and vanilla extract (if using). Mix gently until blended.
- Combine Dry Ingredients:
In a separate bowl, whisk together sifted flour and salt. Slowly add this mixture to the wet ingredients in batches.
- Form the Dough:
Stir using a wooden spoon or dough hook on low-speed until the dough holds together. Then increase to medium speed kneading for 8–10 minutes until smooth and elastic.
- Adjust Consistency:
The dough should be slightly tacky but not sticky. If too sticky, add flour one tablespoon at a time. If too dry, add warm water a teaspoon at a time.
- First Rise:
Shape the dough into a ball. Place it in a lightly oiled bowl and cover with a damp towel or plastic wrap. Let it rise for 1 to 1.5 hours in a warm spot until doubled.
“The key to authentic Rebbetzin Kanievsky Challah lies in treating the dough gently yet firmly, allowing gluten to develop while preserving softness.”
With our dough perfectly prepped, we are ready to move to shaping and baking—the heart of this cherished tradition.
Dough Mixing and Kneading
Mastering the Dough Mixing and Kneading process is crucial to achieving the signature soft texture and balanced flavor of the Rebbetzin Kanievsky Challah. Precise mixing and gentle kneading develop the gluten network while maintaining the dough’s delicate structure.
Mixing Instructions
We begin by activating the yeast in warm water (ideally 100°F to 110°F) to ensure it blooms fully. This step creates a lively yeast mixture that will give our challah its lightness.
Next, in a large mixing bowl, we combine the sifted dry ingredients:
- All-purpose flour
- Sugar
- Instant yeast (added only after activation)
- Salt (added separately to avoid deactivating yeast)
We then create a well in the center and pour in the wet ingredients:
- Warm water with activated yeast
- Vegetable oil
- Large eggs
- Optional vanilla extract and honey for subtle sweetness
Using a wooden spoon or dough hook, we mix these components just until a shaggy dough forms. Overmixing at this stage can lead to a dense loaf, so we aim for harmony between all ingredients without exhausting the gluten formation.
| Step | Details | Important Notes |
|---|---|---|
| Yeast Activation | Warm water 100°F to 110°F | Watch for foamy yeast surface |
| Dry Ingredient Mix | Flour, sugar, salt separately | Salt should never touch yeast directly |
| Wet Ingredient Mix | Eggs, oil, water, honey, vanilla | Incorporate quickly with dry mix |
| Initial Mixing | Until shaggy dough forms | Avoid overmixing |
Kneading Techniques
Once the dough comes together, we transfer it to a clean, floured surface for kneading. Our goal is to develop elasticity without compromising softness.
We use the classic push-fold-turn method:
- Push the dough away with the heel of our hands, stretching the gluten strands.
- Fold the dough back over itself.
- Turn the dough slightly to knead evenly.
We repeat this process for about 8 to 10 minutes. The dough should become smooth, elastic, and slightly tacky but not sticky. If the dough feels too sticky, we sprinkle in small amounts of flour gradually. However, adding too much flour can toughen the challah.
To test readiness, we perform the “windowpane test” by stretching a small dough piece thinly. It should stretch into a translucent membrane without tearing immediately.
“Gentle yet consistent kneading is the key to our Rebbetzin Kanievsky Challah’s tender crumb and inviting texture.”
We then place the kneaded dough in a lightly oiled bowl, turning once to coat it with oil, and cover it with a damp towel or plastic wrap to rise. This resting period allows the gluten to relax and the dough to double in size, setting us up for perfect shaping and baking.
First Rise
The First Rise is a vital step in our Rebbetzin Kanievsky Challah Recipe, where the dough gains volume and flavor complexity. Proper rising ensures our challah develops its signature soft texture and slight sweetness.
Covering and Timing
After kneading, transfer the dough to a lightly oiled large mixing bowl to prevent sticking. We then cover it with a clean, damp kitchen towel or tightly with plastic wrap. This covering maintains moisture and creates a warm, draft-free environment essential for yeast activation.
We allow the dough to rise until it doubles in size, which typically takes:
| Temperature | Approximate Time for First Rise |
|---|---|
| 75°F (24°C) | 1.5 to 2 hours |
| 80–85°F (27–29°C) | 1 to 1.5 hours |
| Cooler Environment | Up to 3 hours or longer |
Pro Tip: Avoid rushing this step. A slow rise encourages deeper flavor development and a tender crumb.
Once doubled, gently press the dough with your fingertip. If the indentation remains without bouncing back quickly, the dough has sufficiently risen and is ready for the next stage.
Maintaining the correct rise time and environment ensures our challah dough is perfectly aerated and relaxed for easy shaping and optimal baking results.
Shaping the Challah
Shaping the dough correctly is essential to achieve the traditional beauty and texture of the Rebbetzin Kanievsky Challah. Our careful attention here ensures each loaf bakes evenly and presents an inviting golden crust.
Braiding Techniques
Braiding the dough is a hallmark of challah that not only creates an attractive loaf but also helps maintain an even crumb. We recommend mastering these classic braiding methods:
| Technique | Number of Strands | Description | Visual Result |
|---|---|---|---|
| Three-Strand Braid | 3 | Divide dough into 3 equal strands. Cross the right strand over the middle, then left over the middle, repeating until finished. | Traditional, simple braid |
| Four-Strand Braid | 4 | Lay 4 strands side by side. Pass the outer right strand under the one next to it, over the next, and under the last. Repeat on the left side. | Thicker braid with depth |
| Six-Strand Braid | 6 | Arrange 6 strands flat. Follow a specific over-under pattern moving strands from outer edges towards the center. | Intricate, visually stunning |
Pro Tip: Keep each strand evenly sized and tension consistent to prevent uneven rising or breaking during baking. Gently stretch the strands to about 12 inches for flexibility.
After braiding, gently tuck the ends underneath to create a neat finish. Avoid pulling too tight; allow room for expansion during the final rise.
Alternative Shapes
If you want to vary from the classic braid, the Rebbetzin Kanievsky Challah dough is versatile enough for other traditional or symbolic shapes that still honor its heritage:
- Round Challah: Roll the dough into one or two ropes and connect the ends in a circle. This shape is especially meaningful for Rosh Hashanah symbolizing continuity and eternity.
- Knot Challah: Form a single thick rope and tie it into an elegant knot. This is a simple shape that gives a rustic, homemade charm.
- Braided Ring: Create a 3 or 4-strand braid and connect the ends to form a ring, combining braid beauty and symbolic roundness.
- Asymmetric Challah: For a creative twist, loosely braid with uneven strand thickness, making an artisanal, freeform look.
Whichever shape we choose, maintaining gentle handling preserves the dough’s softness and lightness. After shaping, cover the challah with a clean cloth to prevent drying while it undergoes its final rise.
Second Rise
After shaping our Rebbetzin Kanievsky Challah, the Second Rise is crucial to ensure the dough develops its signature light texture and perfect volume. This step allows the gluten network to relax further and gives the yeast an opportunity to create air pockets that make the challah soft and fluffy.
Steps for the Second Rise
- Cover the Shaped Dough
Gently place a clean, damp kitchen towel or lightly greased plastic wrap over the shaped challah. This prevents the dough surface from drying out and forming a crust during rising.
- Optimal Temperature
Place the covered dough in a warm, draft-free area. The ideal temperature range is 75°F to 80°F (24°C to 27°C). This environment promotes consistent yeast activity and a steady rise.
- Rise Duration
Allow the dough to rise until it nearly doubles in size. This usually takes about 45 to 60 minutes, but ambient temperature and humidity can affect timing. A slower rise deepens flavor and improves texture.
- Readiness Test
To check if the dough is ready, gently press your finger into the surface. If the indentation springs back slowly and not completely, the dough has risen enough and is ready for the next step.
Key Points to Remember
| Factor | Details |
|---|---|
| Covering | Use a damp towel or plastic wrap |
| Temperature Range | 75°F to 80°F (24°C to 27°C) |
| Rise Time | 45 to 60 minutes |
| Ready Indicator | Slow spring back of finger indentation |
“The second rise is where our challah takes on that inviting volume and softness, making every bite a tender, flavorful experience.”
Pro Tips for the Second Rise
- Avoid over-proofing: If the dough rises beyond double, it may collapse, leading to a denser crumb.
- Maintain humidity: If your kitchen is dry, place a small bowl of hot water nearby to keep moisture in the air.
- Patience is key: Allowing the dough to rise undisturbed encourages an even crumb texture and richer flavor.
With the second rise expertly done, our Rebbetzin Kanievsky Challah is perfectly primed for the final touches—egg wash and baking—that will yield a golden, glossy crust and melt-in-your-mouth softness.
Baking Instructions
Baking Rebbetzin Kanievsky Challah requires precision and care to achieve the iconic soft texture and golden crust that define this beloved bread. Let’s walk through the essential oven settings and timing to perfect this traditional loaf.
Oven Temperature and Baking Time
Preheat the oven to 350°F (175°C), ensuring an even and consistent heat environment for the challah to bake thoroughly without drying out. Place the challah on the center rack to promote even air circulation.
| Step | Temperature | Time | Notes |
|---|---|---|---|
| Preheat Oven | 350°F (175°C) | – | Crucial to stabilize oven temperature |
| Bake Challah | 350°F (175°C) | 30-35 minutes | Bake until the crust is deep golden brown |
| Internal Temperature | 190°F (88°C) | – | Use instant-read thermometer to check doneness |
To ensure the perfect bake, start checking at 30 minutes. The challah should have a rich golden crust, and tapping the bottom of the loaf should produce a hollow sound. We recommend using an instant-read thermometer; when the internal temperature reaches 190°F (88°C), the challah is fully baked and ready to be removed from the oven.
Tips for Perfect Crust
The hallmark of Rebbetzin Kanievsky Challah is its glossy, golden crust that contrasts beautifully with its tender crumb. Follow these expert tips to achieve that signature finish:
- Egg Wash Application: Brush the dough gently and evenly with the prepared egg wash (one beaten egg with a tablespoon of water) before baking. This step creates the glossy, rich color and helps seeds stick perfectly.
- Avoid Over-brushing: Apply the egg wash only once after the second rise to prevent the crust from becoming tough or overly shiny.
- Seed Toppings: For a traditional touch, sprinkle sesame or poppy seeds immediately after brushing with egg wash. Press lightly to ensure they adhere throughout baking.
- Humidity in the Oven: Place a small, oven-safe dish of water on the lower rack during the first 10 minutes of baking. This adds steam, contributing to a softer crust.
- Cooling: Allow the challah to cool completely on a wire rack before slicing. This resting period lets the steam escape gradually, maintaining the crumb’s softness while stabilizing the crust.
“The magic of Rebbetzin Kanievsky Challah lies not just in the dough but in the baking technique — a perfect balance of temperature, timing, and moisture yields the iconic golden crust and tender interior.”
By following these baking instructions carefully, our Rebbetzin Kanievsky Challah will emerge from the oven with its distinctive soft texture and beautiful appearance, ready to elevate your Shabbat table.
Cooling and Serving
Once the Rebbetzin Kanievsky Challah has finished baking, allow it to cool completely on a wire rack. This step is essential to preserve the soft crumb and prevent sogginess.
Cooling Steps
- Carefully transfer the challah from the baking sheet using a spatula.
- Place it on a cooling rack to promote air circulation on all sides.
- Avoid covering the challah while it is hot to prevent moisture condensation that can soften the crust.
- Allow at least 1 to 2 hours for the loaf to cool fully before slicing.
“Patience during cooling guarantees the iconic soft texture and rich flavor we aim for in the Rebbetzin Kanievsky Challah.”
| Cooling Stage | Purpose | Duration |
|---|---|---|
| Initial cooling | Evaporate residual heat | 10-15 minutes |
| Full cooling | Set crumb structure and flavors | 1-2 hours |
Serving Suggestions
The Rebbetzin Kanievsky Challah shines as a centerpiece on the Shabbat table. Here are our favorite ways to serve it:
- Slice using a serrated knife for clean, even cuts.
- Serve plain to highlight the challah’s natural sweetness and tender crumb.
- Pair with honey, butter, or jam for a luscious breakfast or snack.
- Use it for traditional dishes like French toast or bread pudding to exploit its moist texture.
- Toast leftover slices lightly to refresh and add a slight crunch.
Tips for Serving
- Slice just before serving to maintain freshness.
- For a glossy crust and added aroma, brush slices lightly with melted butter before warming.
- Store leftover challah wrapped in a clean cloth or airtight container at room temperature for up to two days to preserve softness.
By following these Cooling and Serving practices, we ensure every bite of this challah delivers the comforting taste and tradition it represents.
Storage Tips
To maintain the freshness and soft texture of our Rebbetzin Kanievsky Challah, proper storage is essential. Follow these guidelines to extend its shelf life while preserving its signature flavor and crumb.
- Cool Completely Before Storing
Always allow the challah to cool fully on a wire rack—this prevents condensation from making the crust soggy.
- Short-term Storage (1-2 Days)
Wrap the challah tightly in plastic wrap or place it in a sealed plastic bag to keep out air and moisture. Store at room temperature away from direct sunlight and heat sources.
- Medium-term Storage (Up to 1 Week)
For longer freshness, place the wrapped challah in the refrigerator. Although refrigeration can slightly dry the bread, wrapping it securely minimizes this effect.
- Long-term Storage (Freezing)
Freezing is the best way to preserve Rebbetzin Kanievsky Challah for up to 3 months. Follow these steps:
- Slice the challah if preferred for easier thawing.
- Wrap each slice or whole loaf tightly in plastic wrap.
- Place the wrapped challah in an airtight freezer-safe bag or container.
- Label with the freezing date for reference.
- Thawing Instructions
To thaw, remove the challah from the freezer and leave it wrapped at room temperature for several hours or overnight. For a fresher taste, warm slices in a toaster or whole loaf in a preheated oven at 300°F (150°C) for 5-10 minutes.
Storage Summary Table
| Storage Type | Method | Duration | Key Tips |
|---|---|---|---|
| Room Temperature | Wrapped in plastic or sealed bag | 1-2 days | Keep away from heat and sunlight |
| Refrigerator | Wrapped securely | Up to 1 week | Minimize drying by wrapping tightly |
| Freezer | Wrapped + airtight bag/container | Up to 3 months | Slice before freezing for easy thawing |
Pro Tip: To refresh slightly stale challah, lightly sprinkle water and warm in the oven for a few minutes. This revives moisture and softens the crumb beautifully.
By following these Storage Tips we ensure that every slice of our Rebbetzin Kanievsky Challah remains as delightful as the first bite, enhancing our Shabbat experience whenever we enjoy it.
Conclusion
Baking Rebbetzin Kanievsky Challah is truly a rewarding experience that connects us to a rich tradition and brings warmth to our Shabbat table. With attention to detail and care at every step, we can create a loaf that’s soft, flavorful, and visually stunning.
Whether you’re a seasoned baker or just starting out, this recipe offers a perfect balance of simplicity and authenticity. Let’s embrace the process and enjoy the comforting results together, making each Shabbat even more special with this cherished challah.
Frequently Asked Questions
What makes Rebbetzin Kanievsky Challah special?
Rebbetzin Kanievsky Challah is cherished for its soft texture, slightly sweet flavor, and traditional significance. It enhances the Shabbat experience by fostering community, faith, and continuity through its rich yet simple recipe.
What ingredients are used in Rebbetzin Kanievsky Challah?
The challah uses all-purpose flour, sugar, instant yeast, salt, warm water, vegetable oil, eggs, and optional vanilla extract. Additional options include honey for sweetness, egg wash for shine, and sesame or poppy seeds for topping.
What equipment is needed to bake this challah?
Essential tools include a large mixing bowl, measuring cups and spoons, a sifter, dough hook (optional), dough scraper, kitchen towel or plastic wrap, baking sheet or challah pan, pastry brush, and cooling rack.
How important is measuring ingredients accurately?
Very important. Using a kitchen scale and precise measurements ensures the right texture and flavor balance, contributing to a soft, fluffy challah.
How do I know when the dough is ready after kneading?
Use the “windowpane test”: stretch a small dough piece thinly to see if it forms a translucent membrane without tearing. This indicates proper gluten development.
What is the first rise, and why is it important?
The first rise allows the dough to double in size, develop flavor, and build gluten structure. Covering the dough keeps it moist and warm, aiding yeast activation for optimal volume and taste.
How should I shape the challah dough?
Shape the dough using traditional braids (three, four, or six strands) or creative forms like round or knot challah. Evenly sized strands and gentle tension produce an attractive loaf with good crumb texture.
What is the purpose of the second rise?
The second rise further aerates the dough, enhancing its light texture and volume before baking. Proper humidity and timing prevent over-proofing and keep the dough soft.
At what temperature and how long should I bake the challah?
Bake at 350°F (175°C) for 30-35 minutes until the crust is deep golden brown. Applying an egg wash improves color and shine, while seed toppings add flavor and texture.
How should I cool and serve the challah?
Cool completely on a wire rack to keep the crumb soft and prevent sogginess. Slice with a serrated knife and serve plain or with honey, butter, or jam.
What are the best storage methods for leftover challah?
Cool fully, then wrap tightly for short-term storage at room temperature (1-2 days). Refrigerate for up to a week, freeze for up to 3 months. Thaw gently and refresh stale challah by warming briefly.