
There’s something magical about preserving the flavors of ripe, juicy plums in a homemade syrup. With their natural sweetness and vibrant color, plums transform into a luscious syrup that’s perfect for pancakes, waffles, or even drizzling over ice cream. Canning this syrup lets us enjoy the taste of summer all year long, and it makes a thoughtful homemade gift too.
Ingredients
To craft the perfect plum syrup for canning, we need a handful of simple ingredients. Each component plays a vital role in balancing flavors, achieving the desired consistency, and ensuring long-term storage. Here’s what we’ll need:
- 4 pounds fresh plums, washed, pitted, and quartered (choose ripe ones for maximum flavor).
- 2 cups granulated sugar (adjust to taste for sweetness).
- 1 cup water (for cooking the plums and creating the syrup base).
- 2 tablespoons fresh lemon juice (helps preserve the color and enhance flavor).
- Optional: 1 cinnamon stick or 1 teaspoon vanilla extract (for a warm, aromatic twist).
Pro Tip: Choose ripe, unblemished plums for the best texture and natural sweetness. Freestone varieties work well since the pits are easier to remove.
Essential Tools And Equipment
Crafting plum syrup for canning not only requires the right ingredients but also the correct tools to ensure precision, safety, and efficiency during the canning process. Here’s a curated list of the essential tools you’ll need and why they’re indispensable.
1. Basic Kitchen Tools
- Cutting Board: For slicing and pitting the fresh plums.
- Sharp Knife: Essential for cleanly cutting and removing the pits without bruising the fruit.
- Measuring Cups and Spoons: To measure exact quantities of sugar, water, and lemon juice for the recipe.
2. Cookware
- Large Heavy-Bottom Pot: Prevents scorching while simmering the syrup and ensures even heat distribution.
- Wooden Spoon or Silicone Spatula: For stirring the mixture without scratching pots.
3. Canning-Specific Tools
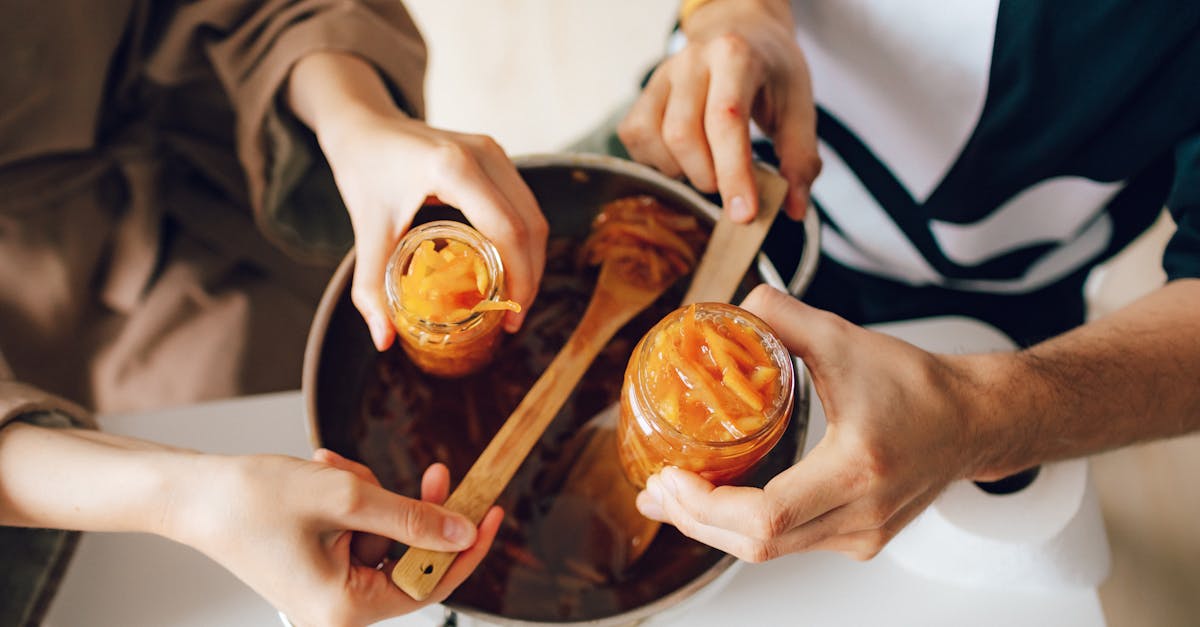
- Canning Jars with Lids and Bands: Use sterilized Mason jars with tight-sealing lids to store the syrup properly.
- Water Bath Canner or Large Stockpot with Rack: Required for processing and sealing the jars for long-term storage.
- Jar Lifter: Ensures safe handling of hot jars during the canning process.
- Funnel: A wide-mouth funnel helps pour the syrup into jars without spills.
| Tool | Purpose |
|---|---|
| Large Pot | Simmering syrup and preventing burning during cooking |
| Canning Jars | Airtight storage to preserve the plum syrup for months |
| Jar Lifter | Safe removal of jars from boiling water during canning |
| Wide-Mouth Funnel | Clean and spill-free jar filling |
4. Additional Tools for Success
- Kitchen Thermometer: Monitor temperatures for precise cooking and canning.
- Cheesecloth or Fine Mesh Strainer: If a smoother syrup texture is desired, this will help remove solids.
- Tongs: Convenient for handling utensils or jars submerged in hot water.
Each of these tools plays a vital role in preparing and preserving the distinct sweetness of your homemade plum syrup. Using high-quality equipment ensures that your syrup maintains freshness, flavor, and safety all year long.
Directions
Let’s dive into the step-by-step process to create a luscious plum syrup perfect for canning. Follow these detailed instructions to ensure a flavorful syrup that lasts through the seasons.
Prep The Plums
- Wash & Dry
Rinse the plums thoroughly under cold water to remove any dirt or debris. Pat them dry with a clean kitchen towel.
2. Pit & Cut
Use a sharp knife to slice the plums in half. Gently twist the halves to separate them. Remove and discard the pits. If desired, slice the plums into smaller chunks for faster cooking.
3. Optional Step
For a smoother syrup, you can remove the plum skins. To do this, blanch the plums in boiling water for 30 seconds, then transfer them to an ice bath. The skins should peel off easily.
Prepare The Syrup Mixture
- Combine Ingredients
In a large heavy-bottom pot, add:
- 4 pounds of prepped plums
- 2 cups of granulated sugar
- 1 cup of water
- 2 tablespoons of fresh lemon juice
Optionally, add a cinnamon stick or a splash of vanilla extract for enhanced flavor.
2. Cook The Mixture
Set the pot over medium heat and stir occasionally as the sugar dissolves. Bring the mixture to a gentle boil. Let it simmer for 20-25 minutes until the plums release their juices and soften entirely.
3. Strain For Smoothness
Place a cheesecloth or fine mesh strainer over another pot or bowl. Carefully pour the syrup mixture through the strainer to separate the liquid. Use the back of a spoon to press the plums, extracting as much syrup as possible. Discard the solids.
4. Adjust Consistency
Return the strained syrup to the pot. Simmer for another 5-10 minutes to thicken slightly, stirring occasionally.
Sterilize The Canning Jars
- Clean The Jars
Wash the canning jars, lids, and bands with hot soapy water. Rinse and set aside.
2. Sterilize The Jars
Place the jars in a water bath canner or a large pot filled with water. Bring the water to a boil and let the jars boil for 10 minutes to sterilize them. Keep jars hot until ready to use.
3. Prepare Lids & Bands
Heat the lids in a small pot of warm (not boiling) water to soften the seal. Ensure the bands are clean and dry.
Additional Notes
- Ensure your work area and utensils are clean to maintain food safety.
- Using sterilized jars is crucial to preserving your syrup effectively and avoiding spoilage.
| Step | Estimated Time |
|---|---|
| Prepping the plums | 10-15 minutes |
| Cooking the syrup mixture | 30-35 minutes |
| Sterilizing the jars | 10 minutes |
Instructions
Making plum syrup for canning is a rewarding process that offers a taste of summer all year round. Follow these detailed steps to cook, fill, and process the jars for perfectly preserved plum syrup.
Cook The Plum Syrup
- Place the prepared plums (washed, pitted, and optionally peeled) in a large heavy-bottom pot.
- Add 2 cups of granulated sugar, 1 cup of water, and 2 tablespoons of fresh lemon juice to the pot. For added flavor, include a cinnamon stick or a splash of vanilla extract if desired.
- Turn the heat to medium-high and bring the mixture to a gentle boil while stirring occasionally to dissolve the sugar completely.
- Lower the heat to medium and simmer for about 15-20 minutes, until the plums soften and release their juices.
- Gently mash the plums with a spoon or potato masher to extract more flavor and color.
- Once softened, pour the mixture through a fine mesh strainer or line it with cheesecloth for extra clarity. Strain into a clean bowl, pressing lightly to extract as much syrup as possible.
- Return the strained syrup to the pot, bring it to a boil again, and simmer for an additional 5-10 minutes to reach the desired thickness. Use a kitchen thermometer to check for syrup consistency around 219°F (optional).
- Remove from heat and skim off any foam from the surface.
Fill The Jars With Syrup
- Prepare your sterilized canning jars in advance by heating them in boiling water or running them through a hot dishwasher cycle.
- Use a wide-mouth funnel to carefully pour the hot syrup into the jars, leaving 1/4-inch headspace at the top. The air space is essential for proper sealing during the canning process.
- Wipe the jar rims with a damp, clean cloth to remove any syrup spills that could prevent the lids from sealing.
- Place the sterilized lids on top of the jars and secure them with canning rings, twisting until snug but not overly tight.
Seal And Process The Jars
- Heat water in your water bath canner, ensuring it covers the jars by at least 1 to 2 inches.
- Use a jar lifter to carefully lower the jars into the boiling water. Avoid tipping the jars and ensure they sit upright.
- Process the jars in the boiling water bath for 10 minutes (adjusting for altitude if necessary — consult altitude adjustment charts for precise times).
- Once processing is complete, turn off the heat and allow the jars to sit in the canner for a few minutes before removing them.
- Carefully lift the jars out using the jar lifter and place them on a cooling rack or towel-lined countertop. Leave undisturbed for at least 12-24 hours to ensure proper sealing.
- Check the seals by pressing on the lid centers. A properly sealed lid will not flex or pop. Any unsealed jars should be refrigerated and used promptly.
Tips For Successful Canning
When it comes to canning plum syrup, precision and cleanliness are paramount for both flavor and safety. Follow these tips to ensure a flawless canning experience and long-lasting preserved syrup.
1. Use High-Quality Ingredients
Always start with the freshest, ripest plums to achieve the best flavor and rich color in your syrup. Avoid bruised or overly soft fruit that could impact quality. The sweetness of the syrup is directly tied to the quality of the fruit used.
2. Sterilize All Equipment
Proper sterilization is non-negotiable. Sterilize jars, lids, and tools to eliminate bacteria. Place jars in boiling water or use a dishwasher’s sterilize setting. Remember, maintaining a sanitary work area is critical for safe canning.
3. Test Jar Seals
After processing jars in the water bath canner, ensure each lid is properly sealed. For the best results, press down on the lid. It should not flex or pop. If the jar did not seal, refrigerate the syrup immediately and use within three weeks.
4. Adjust for High Altitude
Altitude affects the boiling point of water. If you’re canning at an altitude above 1,000 feet, adjust the processing time as outlined in the table below:
| Altitude (Feet) | Additional Processing Time |
|---|---|
| 1,001–3,000 | Add 5 minutes |
| 3,001–6,000 | Add 10 minutes |
| 6,001–8,000 | Add 15 minutes |
| Above 8,000 | Add 20 minutes |
5. Maintain Proper Headspace
Always leave 1/4 inch headspace at the top of each jar. This ensures proper sealing and prevents syrup from spilling out during the boiling water bath. Using a wide-mouth funnel can make this step easier.
6. Monitor Cooking Temperature
Cooking syrup at the right temperature is key to achieving the desired texture. Use a kitchen thermometer to ensure the syrup reaches 220°F during cooking.
7. Label and Store Properly
After cooling, label each jar with the date of preparation. Store the jars in a cool, dark place to preserve the vibrant flavor and color of the plum syrup for up to 12 months.
Storage And Shelf Life
Proper Storage And Shelf Life management ensures that our homemade plum syrup remains flavorful and safe for consumption over an extended period. After successfully processing the jars, follow these steps and recommendations:
1. Cooling and Checking Jar Seals
- Allow the canned jars to cool for 12 to 24 hours undisturbed on a clean, dry towel. Avoid moving or tilting the jars during this time as it may disrupt the sealing process.
- Once cooled, inspect the seals by pressing the center of the lid. A properly sealed jar will remain firm, showing no movement or “pop.” If the lid flexes up and down, the jar did not seal correctly and must be refrigerated and consumed within a week.
2. Labeling Jars
- Clearly label each jar with a date of canning and the contents, such as “Plum Syrup.” For added organization, include notes about any unique flavors or spices like “Cinnamon Plum Syrup.”
- Use waterproof labels or write directly on the jar lid for durability during storage.
3. Storage Conditions
- Store sealed jars in a cool, dark, and dry place, such as a pantry, cupboard, or cellar, to maintain the syrup’s vibrant flavor and color. Ideal storage temperatures range between 50°F and 70°F.
- Keep jars away from direct light, heat, or moisture, as these conditions can deteriorate the quality of the syrup and potentially compromise the seal.
| Storage Factors | Optimal Conditions |
|---|---|
| Temperature | 50°F to 70°F |
| Light | Minimal, dark environment |
| Humidity | Low |
4. Shelf Life
- Properly sealed jars of plum syrup can be safely stored for up to 12 months. For the best flavor and quality, we recommend consuming the syrup within the first 6 to 9 months.
- Always check for signs of spoilage before use, such as an unsealed lid, off-smell, discoloration, or mold.
5. Handling Unsealed Jars
- For jars that fail to seal during the canning process, reprocess them using a new lid within 24 hours. Alternatively, refrigerate the syrup immediately and consume it within 1 to 2 weeks.
By following these storage practices, we preserve the rich taste, vibrant color, and freshness of our handcrafted plum syrup, ensuring enjoyment throughout the year without any compromise on quality.
Conclusion
Crafting and canning plum syrup is a rewarding way to capture the essence of ripe summer plums. With the right ingredients, tools, and careful preparation, we can enjoy this versatile syrup for months to come. Whether drizzled over breakfast favorites or given as a heartfelt gift, homemade plum syrup brings a touch of sweetness to any occasion. By following proper canning techniques and storage practices, we ensure every jar is as fresh and flavorful as the day it was made. Let’s savor the joy of preserving these vibrant flavors year-round.
Frequently Asked Questions
What are the essential ingredients for making plum syrup?
To make homemade plum syrup, you’ll need 4 pounds of ripe plums, 2 cups of granulated sugar, 1 cup of water, and 2 tablespoons of fresh lemon juice. Optional additions like cinnamon or vanilla can enhance the flavor.
What tools are required for making and canning plum syrup?
You’ll need a cutting board, sharp knife, measuring cups, a large pot, stirring utensils, and canning tools like sterilized jars, a water bath canner, jar lifter, and a wide-mouth funnel. Additional tools like a kitchen thermometer and cheesecloth can help achieve the perfect syrup texture.
How do I prepare plums for syrup making?
Start by washing the plums thoroughly, removing the pits, and optionally peeling them for a smoother syrup. Cut the plums into smaller pieces for easier cooking.
Why is sterilizing jars important for canning?
Sterilizing jars is essential to prevent bacteria, mold, or yeast growth, ensuring the safety and freshness of your preserved plum syrup.
How long does it take to cook the plum syrup mixture?
Cooking the plum syrup typically takes about 20-30 minutes, or until the plums soften, release their juices, and the mixture thickens slightly.
How do I ensure my canning jars seal properly?
Leave proper headspace in the jars, clean the rims before sealing, and process them in a boiling water bath. After cooling, check that the lids are firmly sealed by pressing the center.
How should canned plum syrup be stored?
Store sealed jars in a cool, dark, and dry place. Label them with the canning date to track freshness.
How long does homemade plum syrup last?
Properly sealed jars can last up to 12 months, but the best flavor is experienced within 6 to 9 months. Opened or unsealed jars should be refrigerated and consumed promptly.
Can I reuse jars and lids for canning?
You can reuse jars if they are in good condition, but always use new lids to ensure a proper seal during canning.
What should I do if a jar doesn’t seal during canning?
Unsealed jars can be reprocessed immediately or stored in the refrigerator for immediate use. Always inspect for damage or contamination before reprocessing.